Propolis Board Game Solo Playthrough | DaniCha
Games in This Video
1 game is featured in this video — it unlocks as you watch.
Transcript
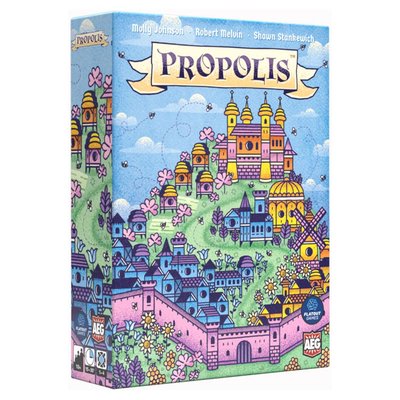
Hey everyone, Danielle here. I'm doing a solo playthrough of Propolis. Um, I backed this game on Kickstarter, so I'm very happy that I was able to finally play. So, this will be my second playthrough. Um, and I thought that this time I would also go through the setup because in the other video I did not go through setup and also I forgot to do a whole phase in the game where I check for majority. So, let's kind of do this together. And this way, maybe if you also have the game in your hands, you can set up the game as we speak. So, uh you're just going to grab a board and you're going to grab a color of of each of these um markers and you're going to place it on the one track of your board. So you just match those up and then put the rest away that you won't need.
But the board I am using is this uh teal looking color. So I will be grabbing all of those colored uh beeples or bee meuples. So, we will be grabbing 12
and then you'll be setting aside three from your personal supply. So, I'll be grabbing three and setting it aside. And the rest will be to the side of my board. And then I'll be grabbing this kind of purple color. There should be 12 as well. Let me just double check. 1 2 3 4 5 6 7 8 9 10 11 12. And this will be the AIS. So, I'm just going to put their stuff right here. And then the rest of these we won't need. All right. So, we'll put these away and then I will grab the cards. And again, you can set up with me if you like. All right. So, we've got all of those done. Let's take out the solo card. I am going to do the easiest mode, which means we'll be using all of them. So, we'll give that a little shuffle and put them aside as well.
Next, we'll grab the cards. So, we have a couple of um of things to point out if you're not familiar. So, let me just break them out first before I speak to them. Okay, so we have these starting resource cards. I'll go ahead and shuffle and then I will give myself one. All right. So, we'll go ahead and do this. And this says plus two starting resources. Um, so we're just going to do that. Um, so plus two, one, two. All right. So, that is our resource. And then we'll flip it around and we are going to shuffle and place five at the top of our player area.
Um, let me sing a card here. Set that aside. Um, just confirm here. So, yeah, we're going to take these Queen's Palace cards and put out five.
All right. And then the rest of these cards will not be used. After that, we're going to give these cards a shuffle. These are going to be the landscapes/ uh structure cards. So, give that a shuffle. And then what you're going to do here is you're going to deal out four rows of landscape cards um each in the space below the structure market based on the number of players. So, we're going to do eight cards total. So, that's going to be um a row of four cards and then another row of four cards just like that. And then for the structure market, we're going to do something similar and that will be five cards across though. And that will be this way. One, two, three, four, five. And I think we'll probably squeeze that over to the left.
Okay. And then we'll do a second row. And then we're just about ready. All right. So, we'll place this deck here. We will eventually need to replace cards in the landmark area and also the structure market. Um, and then aside from all of that, we are set. So each player flips their card and places um uh their starting structure into the hive or tableau adjacent to the player board. Oh, okay. So it's actually here. So our starting structure actually gives us this um a bonus uh resource when we play. So our resources are all here and we will get to always have this permanent plus one on this resource. So even though this is on track zero essentially this would this will give us one towards a cost that we might want to use towards a structure card. So a structure card has some costs on the bottom. So, it says you can spend a mele um three of these, two of these, or three of these to gain this card into your hive or tableau. And then this card will be worth four points at the end of the game. There are going to be cards like this that actually uh give you one point per something. So, one point per pair of I think lavender. This will cost two meles and five of those blue
resources. Um so, that will be interesting. And there's going to be some icons I may have to look up cuz I actually don't know what the the three icons mean. Um, this icon, I'm not familiar with that. I didn't see that in my first game. I'm not sure if it's going to show up. Oh, okay. Structure cards. So, for number two, immediately after constructing, gain any three non- wild resources. Oh, okay. That's pretty cool. That's a That's a card that I might want. Um, all right. I think we're going to get started. So, for the solo mode, um, we're just going to be flipping cards uh over so that we do either the top action or the bottom if we can't do the top action. That that should be pretty straightforward. And then, um, they don't actually score. They're just going to kind of get in our way.
All right, so let's start. We have a bunch of meeples to place. Um, I'm going to deploy worker peoples because that's I think a logical first action. Uh, choose one landscape card and place worker beles onto as many action spaces on that card as desired to gain the rewards. So, if I were to choose this one, I would get a lot of the yellow, which could be useful in getting this. So, I think I'll go ahead and do that. So, I'll go and place my beles standing up, which is important in this game that it stands up and gain two yellows. And then I'll place a Bull here to gain this orange. And that is my deploy worker people's action. Let's see what the solo mode does. All right.
So, this one says uh put the B uh or fortify basically with a B that is already out, but they don't have any. So, they're just going to go here and go into the second row. and they're going to place it on the leftmost card of the landscape market in the second row. So the solo mode is pretty clear in what what exactly you need to do. So when it shows a number, you deploy worker peoples onto the first open card in a matching row and you deploy the maximum number of worker people. So it's going to be this that they're going to get a ton of these. And for them, you also make sure that they're uh standing up as well. Okay. So, I think next because I am eyeing this card right here, the aster tower, I need to increase um these bottom two rows. Definitely increasing the bottom one. So, to do that, um I want to focus on getting cards that have both of these. And also something to keep in mind for each turn,
you check to see if any of the landscape card rows has no remaining completely empty landscape cards. So if all four cards in any row have at least one worker people, you have to check for majority and resolve if there is a majority. Otherwise, your turn ends and it passes to the next player. So, when you're checking for majority, that's kind of one of the most important parts of the game that I missed on the first play. Um, it says, "If there are no remaining completely empty landscape cards in any of the rows of landscape cards, count the number of worker peoples that each player has placed in the row. Each worker people counts as one towards the total. However, each fortified worker people counts two towards the total. The player with the highest wins the majority for this row.
If there is a winner, the winning im the winning player immediately takes back all of their worker beuples from the landscape cards in that row and adds them to their personal supply adjacent to their player board. So, that's helpful because you normally would have to waste a turn to return your meeples um if if you wanted to uh take them back for any reason. All right. And then you would just uh remove the first card from the left and replace. Um so yeah, I think that happens basically if any of the landscape rows have remaining completely empty landscape cards. Okay. So right now that is not the case because we have empty cards on the bottom row. So I think here we are going to focus on putting a mele here, deploying again to gain two of these.
They'll take their turn plus two. So they're going to get a card from their structure row row of uh row two, the left most card. So they're taking this one into their hand and then into their tableau and then we're flipping that over. Um, I always find that interesting because I feel like they're always just going to take the newest card that comes out, which I don't know if that's really the idea, but it says construct the left most structure card from the structure card. Mark it from the indicated row. Um,
and then it says the market uh when any structure card is constructed from a row, all of the cards in that row slide from left to right to fill the gap. which I don't know if that's if I'm misreading that because they're taking the leftmost card
and you are sliding from left to right to fill the gap and the new card from the top of the deck is added to the left most space. So I mean that's even when that's my turn too. So maybe that's why. Not sure. All right. So, we need to get uh Yeah. So, what I'm going to do next is fortify. So, I will tip over um this yellow and this orange. And then we should be able to get this on the next turn. All right. So, they're going to place their bees on the first card with this uh icon, which is the orange, which is going to be here. So, they're going to look left to right, top to bottom. They'll place their worker bees as well.
U no majority to check for right now. Um and then yes, I'm I'm going to grab this card. Spending five. Four for my resource, one for my starting uh structure. And then uh three here and one here. So now I've got my first structure card. Um, and this will now give me two permanent resources here, which is great. No points, but it gives me a good start in terms of resources. So, essentially, I have five of those resources. So, move that over and refill. So, talking about these Queen's Palace cards, these have um their own requirements, and this is related to the cards that you end up building in your hive or your tableau. And so I will need cards that give me at least three and at least two of these and spending three of our uh boples to obtain this card. That will give me the ability to um have this X go towards a lot of my scoring um uh scoring criteria at the end of the game. All right. So they'll take their turn and they're placing it on row two.
So, we'll place the leftmost, which is here and here. And for us, I think we're going to H think we could continue fortifying and go ahead and fortify here. One, two. You can only go up to two, so I'll do that. I mean, uh, fortify with up to two peoples. That gives me two of this resource. They're going to take their turn. They will fortify in row one. Doing that. And then uh let's see. I mean, I guess I could
No, nothing yet. I was going to see if I could do something here, but I definitely need more blue, which there's no blue out right now. This would be great to get. So maybe if I did deploy, I'll go ahead and deploy here. Yeah, I'll deploy here and here. And that icon here says I can swap resources I have. So I'll go down one here. Actually, do I even need to? I think I already have what I need. Yeah. No, I will go down here and go up one. Go down one here. Go up one. And then I think I will place another people as well to gain that yellow. Okay. So now we have a row that has uh every uh card have at least one people. So that means we have to check for majority.
So in this case, checking for majority. There's a couple of steps. We count the points. So, a worker people counts one, but a fortified worker people counts as two. So, the AI has 1 2 3 4 5 6. I have 1 2 3 4 5 6 7 8. So, I have majority. So, I get to get all of these back into my worker uh personal supply. And then um because oh wait, so if the player is not the active player, they immediately gain one one wild resource by moving the wild resource marker up one. But I am the active player, so um that's fine. So now that the player with the majority of workers meles have been removed from the row, remove the rightmost completely empty landscape card from the row. So that's this one. So this is going to be removed and discarded.
And then slide all landscape cards over so that the leftmost card in the slot in the row is emptied. So left most is emptied. And then take the landscape card from the top of the structure landscape card deck and place it onto this slot. Okay. So that was our uh first time doing that. So now it's their turn. They're going to place uh their meeples here on row one. And back to us. I'm going to grab this card. Spending two blues, a pink, and a purple. And now we'll get two of our beatles into our crystal supply. That's awesome. Okay. And it's worth two points at the end of the game.
Slide everything over. Refill. It's their turn. So, they're going to try to place it on a blue, but they don't have one. So, they're going to go in row one and fortify. All right. Um, next. Let me see if there's anything I can actually get. Does not look like it. Um
would be good to get some blues. I think what I am going to do is put two of my beles here. Decrease this to gain a blue and decrease this to gain a blue. And then also I'll place this here to gain a yellow. All right. So they're going to place their beles onto a card in row one. So they only have two. So they're just placing on two. And now we check for majority. And they clearly have majority of that. So they're going to return all of their Bles. The rightmost card is removed. Everything slides down.
And this card goes here. All right. Um, so I had a plan. I was trying to get something with um the yellow and the blue. I don't think I quite have it yet.
So, if I did three, then two, and one more for the blue, it's not going to really I I just need more resources so I can start trading more as well. So, it's just there's it's difficult cuz there's a lot of blue going on on this side and not enough blue going on on this side. So, let's try to uh fix that. We're going to go ahead and do this. gaining a people and then we're going to gain an orange. And now we check for majority. We have 1 2 3 4 5 1 2 3 4 5. So in case of a tie, um they do have language for that here.
The row is not resolved until future turn when a player for the fires worker beles and breaks the tie. Okay, so now it is their turn. They're going to gain a card from the first row back to us. And I think we are going to fortify for sure. But I I'm thinking maybe we can.
Um, no, we can't. So, yeah, we we should fortify. These are all yellows, right? Um, well, we have to fortify all actually. So, I'll go ahead and fortify one for a yellow and then one of these. And then I can swap. So decrease a yellow for purple. Actually for blue. Silly me. I need more blues, right? Okay. And so now we resolve the majorities. And I have 1 2 3 4 5 6 7. They only have 1 2 3 4 5 6. So I will grab all of my my Bles. Remove that card. It will shift everything over. And now we finally have a blue. And I see more blue coming. So we'll see how that works out. Okay.
All right. So, they're going to place their people on the second row. Of course, they're taking this one. And then I'm going to take this one. Spending a bowl. And then we have one, two, three. Two oranges are covered. And then we have three blues that we have to spend. All right. So, we have our second uh D. I don't know if you notice the types here. There's like a column for C, D, A. So far here, we'll shift these over and refill.
Okay. So, they're going to place it on the first purple one, and there is none. So, they're just going to take it from the first row. All right. So, right now, we have 1 2 3 four seven of these um orange. So, that's interesting. If I had eight, I could take this card. So maybe I can focus on doing that. So let's Yeah, let's do that. We're going to go here and grab an orange and then here to get a bull. And now we count for majority. They obviously have it. So they're going to go ahead and take their bles back.
discard the rightmost and put this down and then because it wasn't their turn they would get a wild resource but the solo does not require them to get any resources. Okay. Um so now it is their turn. They're going to place their peoples here matching that icon. All right. So, now that the blues have opened up, definitely going to try to get that. One, two. They're just about almost done getting through their deck. Once they go through their deck twice, that will force an endame unless one of us gets 10 cards. So, they're going to place their peoples on one of the cards with yellow. Fill it up.
And then we will grab this card. We have 1 2 3 four exactly eight to fulfill this and we have to spend the people. We'll have four points when we get this uh resolved at the end of the game. Okay, they place it on a blue and then You know, this is pretty good to have. So, I'm going to go ahead and actually put my beles here. I do have enough. So, I'll get four. And then at least I could trade them. Have to make sure I don't put them flat by accident.
Okay. And now we'll do the majority. I have majority for sure. So, we'll do that. They're going to place on the yellow resolving the majority at the top. They definitely have it. So, they'll grab all of theirs back.
And then I'm going to place my beles and gain two blues. They're going to take their last card and put them on the first orange card they can. All right. And then it's our turn. I am going to Yeah, I'll put these to four to five or six blues. And then now they've gone through the deck once. So now we have to shuffle and keep an eye on that.
They're placing it on one of the purple ones, which don't exist right now. Let's just grab one of these. Um, and then so I have four, five, and then four of those. And plenty of blues.
Yeah. So, I'll spend I'm going to get this one. I think five. I'll have one left and I'll spend two bibles to get this card and it'll give me three of any resource immediately. So, I will get three of these. Okay. see what they do. They're going to fortify in row two. Um, I'll grab this card. So, spend four minus one is three. One, two, three. And then two purples.
Now, I permanently have one of those blues. We'll build from the second row of the structure market. Uh I guess
trying to think if I should wait and get more blue. Yeah, I think I'll go ahead and put my beles here. gain a blue and then swap a yellow for a blue. They're going to place on an orange. And then I'm going to grab this one. This requires me to spend one of my beles. Three. Well, I have one here. So, spending two and then spending one of my lavenders. So now I have one of these automatically. They're going to place on the leftmost second. And now we count for majority cuz it's all full on the second row. So 1 2 3 4 5 6. I have six. And they have 1 2 3 4 5 six as well. So we have to wait till that tie um changes.
So, we have two meeples in our personal supply. I think I will go ahead and put this face down to fortify. Increase this by one. And we'll swap. I'll swap down for one. And then increase this purple by one. So, now the tie is no longer. I have 1 2 3 4 5 6 7 8 and they have six. So, I'll grab my be my Bles. The left most uh empty card will be removed. I mean, the rightmost is removed and then you're just shifting everything over. All right. So, they're placing on row two. They only have two bles left. No majority to look for right now.
Um I will place mine here. gain a bull and then gain an increase here. Check for majority. 1 2 3 4 5 6 1 2 3 4 5 6. So we're tied right now. All right. They don't have any peoples. So when that happens, I believe they had to remove and uh rest essentially. Let's double check that in the rules.
Um, I believe it did mention, yeah, because they can't do anything. They had to retreat all their me their meles.
Okay. All right. And then I'm going to think I'll take
I could just take this one. Then I also have another yellow which is good. 1 2 3 4 5 6 7 8 9. So if I get one more structure card, the game will end.
Oh, so if each player Oh, either player has 10. Yeah. So me or them. Okay. I'm going to place one, two, three, and then I think I'm going to fortify. Grab that.
Take one. I'm gonna do this and this. Actually, I'm not going to waste my B bills on that. I'm just going to do that and the majority will will be good. Um, actually, yeah, I will. I will going to decrease that. And then I'll spend another one. Decrease that. Now, we look at majority. 1 2 3 4 5 6 7 8 9 10 11. So, uh, yeah, I will grab all of my people's back.
I really like how smooth this solo mode is. Then they'll take their turn. And I really want more of the lavenders, but unfortunately there's none out. And I don't know if it's just worth it just to get cuz the thing is my only one of my only scoring is that I have this um one per every pair of lavender resources. So what I'm going to do is I'm going to kind of drag this out and get one, two, three, four, and then I'll just like use one of these icons later hopefully. All right, they're going to fortify row one.
And then yeah, I'm going to place two meeples here and here. And I will decrease this to gain one. Decrease the orange to gain one. We're going to place on the first one. And then we will look at the numbers here. 1 2 3 4 5 6 7 8 1 2 3 4 5 6 7. So they do have majority. They'll get theirs back
and then we can't quite get that. Can we do any queens? Let's see. So, we have two cards that do that. The ones ones with the highest score. Oh, no. I won't be able to do that. One of each. I don't have a purple one. H. So, I think I have this. So, I think I'll do this. I'll grab the structure card. One, two, three is spent from personal supply. I do have the two of these, one of these, and then one of these. Perfect. So, I will grab that. And that is my tenth. And they'll take one more turn, which I don't think it really matters. Um, but yeah, they're just going to be placing that. Okay, so now we score. I love how quick this game plays. Um, so says, "Score as you would." Okay, let's go to scoring. Each player scores points based on the structure cards in their tableau. Each structure card scores independently based on either a fixed number of points printed on the card or for set of resources or guild symbols.
Okay. So, I'm trying to see about the X symbols. They do explain how that comes in into play when you get the queen.
somewhere they explain it. I think on page 15. Okay, so page 15. Oh, I thought I was going to explain, but basically I do think this counts as anything any letter that we need. So that's cool because um as I score there's leathers involved here. So
going to just get a score sheet and then we'll just score from left to right. So just scoring points we have three and then one for every two lavender I have two so one point do uh one two so that's three plus four plus two and then we get two for every pair of ads 1 2 3 1 2 3 so that's going to be six so that's six coins just for um these so let's do at um 19.
So my score is 19 and then as far as unused uh resources uh you you divide the number by five. So I have three four five six 7. So that's just going to be uh one point. So essentially we have 20 points.
Now we look at the range score range um which there is none but I like to look at the achievements to take a look at the high score that they look for. And 15 is the lowest. So I'm at 20 which is basically row three. Last game I got only 14 points, so this is definitely an improvement. But there you have it. That was my solo playthrough Acropolis. I hope you enjoyed it. If I made any mistakes, definitely let me know. Um, but this is just just such a a lovely uh I I think it's a worker placement type game in my opinion and Tableau as well. Tableau building. Um, but yeah, let me know what games you've been playing solo. Love to hear about new games that maybe I haven't heard of that I could check out. And um yeah, as always, thank you so much for watching.
See you next time. Bye.