Sensuikan — First Patrol! | Episode 1 | December 1941 | WW2 Solo Japanese Submarine Game
Transcript
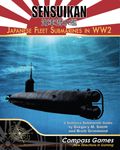
Hi everybody, I'm Silver Blitz and welcome to our first patrol with Sensuikan, the Japanese solitaire submarine simulation game from Compass Games. It's December 1941 and World War II is poised to erupt in the Pacific theater. It's time for our sub to go to sea for the first time. So, it is time for us to head to sea again. World War II is about ready to start with the attack on Pearl Harbor. Just a couple of quick things as we start out. This is our first mission, so we don't our first patrol, so we don't have any history yet here. We do have volunteers for our crew. Thanks to everybody who volunteered. Our XO is Rodentosan. Our engineer is Koji. Navigator is Tarkalac. Medic is David from Wisconsin. Our pilot is Gadget. We did need a gunner as well. Russ Seebs is our gunner. And we have a lead torpedo operator is Brian San. Now, a quick Japanese High Command was questioning me about the loyalty of some of these crew members given the rather dubious names for Japanese crew men, but I have assured them that their loyalty is to the sub and the mission and we will do our best to succeed on every task given to us. One other quick change. I was looking at the aircraft and pilot skills and I originally we had selected weapons expert and aircraft maintenance.
However, there's a high likelihood, a one in three chance basically, that a an aircraft won't be recovered after a mission. But, if you take the aerial navigation skill, it reduces that to a one in six chance. So, I I thought that's going to be more helpful for giving some longevity to our pilot and gunner on the plane. So, I've shifted out of the aircraft maintenance skill into the aerial navigation skill. So, one slight change there between between what we talked about in the first mission in the first episode and now. Now, as the war is starting out, we can see the map here and these red chits are actually very important. They signify special events happening at this particular moment in the history of the war. And there are four for December 1941. There are quite a few here. Now, if we get sent to one of these areas on patrol, we flip these over and we look and it will tell us what the special mission is. For example, mine laying.
That won't necessarily take up the entirety of our patrol, but it will be the first thing we do when we get there. Now, with that in mind, the reason I mentioned that is when we look at the 1941 patrol chart here, which is the first thing we're going to roll for is to determine where our submarine is getting sent. You'll notice that the middle chunk of it here is all Pearl Harbor. So, there's a very high likelihood we're going to get to sent to Pearl Harbor. And if we do get sent to Pearl Harbor, we look here, the first possibility is a submarine mission, which we don't have. The second possibility is a recon mission, which would involve our plane. So, let's see how this goes, but the very first thing we could do is if we arrive on to on on schedule to Pearl Harbor, we would be able to send our plane up on that recon mission. Let's see what happens. In 1941, the high command comes through.
Yes, we get a six, the high likelihood we are heading to Pearl Harbor. One quick thing about the Pearl Harbor mission, you'll notice that on the map here it has two extra transit boxes. This means that this particular mission is particularly far away and we have a long transit before we get on station. And how that is handled in game terms is we're going to move to this transit box. Then the There are two transit boxes, so you substitute them on either end of the mission.
So, this on station box will actually be a transit box, and then this one over here will be a transit box and a transit box. So, we will have three blocks, really, three searches or mission opportunities or events that can happen while we're on station, assuming we can make it because, well, as we all know in this game, bad things can happen before we get there. But, the I-15 sets out to sea. We're headed for Pearl Harbor. It is early December 1941 and the first thing we need to do then, now that we are at sea, is survive this transit box. The transit box basically has bad things happen to it on a two. Now, if it's a 12, you actually it's a random encounter, so we would ignore that, but we do not we want no part of aircraft here. We get an eight, we pass harmlessly through the first transit box.
Now, because this is so far away, this is also a transit box. Hopefully nothing big. A seven, we are right on the average die rolls. And now we arrive on station. We have made it to Pearl Harbor, so we flip this over and we look at the event list and as we mentioned earlier, we don't have a submarine, so we go to the second priority, which is recon seven. It is time to launch our aircraft. So, it is time for us to recon ahead of the tack attack on Pearl Harbor. We'll be using a couple of things to do this. This is the Pearl Harbor map and basically what's going to happen if we have a successful launch of our scout plane here. It's going to go through this transit zone, a recon zone, a target zone, which is actually recon for us. This is basically where we're going to be observing the ships in Pearl Harbor. And then a recon zone and then successfully back hopefully to successful recovery at the end of the mission. Additionally, we could be using this aircraft display mat. Now, there are five different types of airplanes in the the game here. We have an E14Y1, so this is our plane here. We're not carrying any bombs, it's a recon mission, we have no damage. Our pilot and gunners are fine right now and then these are our skills, weapons expert and aerial navigation, as well as a couple of charts that we may need as we conduct our mission. The first thing, however, that we need to do is to see if our aircraft gets up in the air successfully. So, this is not on a chart, it's just in the rulebook. On a roll of a two or 12, we have a mishap, otherwise the plane is up in in air. So, we've got it assembled. We're
saying banzai to our pilot Gadget and our gunner Ross Reeves. And we get a seven, which is about as perfect a launch as we could possibly have. So, we avoid this mishap chart and instead, we go over to the Pearl Harbor map and we are in transit to Pearl Harbor. So, our E14Y1 is in the air. It's airbound. We can see Hickam Field off to the right, off to the east here. And we're going to be rolling on this transit chart to see if we have an an encounter with an aircraft. We want no part of this. This is, you know, we're a scout plane. We're not a fighter. We get Oh, I thought we were going to get a three. We got a four, which means an uneventful transit zone. But, enemy pilots were eyeing some oddly glittering uh phenomenon in the sky and and thought about launching for us, but they didn't.
Now, we are to recon zone two. And this is where we're looking for things. This has nothing to do particularly with the success of the mission. The success of the mission is if our plane successfully gets through this mission and gets back to the submarine and we don't necessarily have to successfully recover it for the mission to be successful. But, here is our recon element. We could end up with aircraft here as well. We want no part of aircraft. Would be nice to spot a ship. Let's see Oh. Oh, we do. Yes. We almost had an aircraft again. We are dodging enemy fighters here so close. But, we do spot a ship. It's an unidentified ship off in the distance floating around Pearl Harbor or close to it perhaps, which is a successful scouting mission as well.
Now, we are at the target zone, which of course is Pearl Harbor in and of itself. And as we can see, we're going to see something. Now, this basically doesn't impact We don't engage with these ships. It's just there for narrative purposes as to what we see. Be nice to see some sort of ship. We get a five. We see a flotilla of destroyers, a half dozen destroyers cruising or at station in Pearl Harbor. It's been a very successful recon mission for us so far. We are up at the last zone now hoping to make it out back to the sub now. We get a an eight with a recon zone. Nothing spotted in this last zone and with that it is time for us to see if we can recover our pilot and gunner. So our aircraft is heading back to the I-15. Successful recon mission.
Now here we have uh the recovery chart and as we can see on a one or a two the pilot and crew are lost which is a very high likelihood. However, we have aerial navigation which gives us a plus one to this die roll. So hoping for successful recovery we need we need a two three four five or six. Yes, we get a two three four five or six. That is a successful recon mission for the E14Y1 and I-14's illustrious military career is off to a robust start. So we've got our E14Y1 back on board the I-15 and we have our pilot Gadget and Russ Seebs successfully recovered. An excellent start to our military career. Now the fun is not over yet as that was our first job on station. The nice thing too about those special missions is they count double credit. They count as two missions
for success for crew advancement. So that's an exceptionally nice way for us to start our career here. But now it is time to hunt. We have two on stations again because of the far distance this last on station is actually a transit box. So we'll have two chances now to search for enemy shipping which is more of our submarine role here. So we're looking on the Pearl Harbor chart. There is you know a modest likelihood we could hit a warship here or a capital ship on a three or a 10. Seven would be a ship plus an escort. Get a nine, nothing but empty ocean here. All the ships are still apparently at Pearl Harbor. So, with that being said, our patrol there does not accomplish anything. We go now to our next station here. So, we have this is our last search box in Pearl Harbor.
However, because we have this aircraft, the E14Y1, there's a special rule that we can use this for scouting. It's a little bit risky. We have to launch the aircraft and then recover the aircraft as well. But, that will get us an extra search event in this on station box. And because we haven't seen any ships yet, I would like to find some ships. We're actually going to do that. So, we're going to send the E14Y1 back up into the skies. And again, we have to have a successful launch and then subsequent recovery. So, this is going to be our first search opportunity now in this zone. I wonder I'm not sure about the sequencing of this. I suppose Now, I I don't think it doesn't mention anything about the sequencing of this. So, we're actually going to go back to here and pretend that we have our for our second search we're actually going to launch the scout plane as our second search for this area. Now, in order to do that we have to roll a avoid a two or a 12 on our die. We get a nine.
So, our scout plane is successfully in the air. We will have to recover it later, but this gives us another search opportunity in the Pearl Harbor zone. Let's see what we get.
Our scout plane our pilot here, Geddes, spots a warship on a 10. This is outstanding. The danger here ratchets up a little bit. Now, we get a warship encounter. For warship encounter, we're going to use this chart T3 here, which is for the US warships, and we'll use two 10-sided dice. The red side will be the first die. White side will be the second die. Now, there are some submarines that we could encounter which are deadly encounters we want to avoid here. So, this is somewhat risky. We do have some rather large targets. We'll some cruisers and carriers as well available in here. So, well, let's see what we get. Red die is first. We get a 67.
It is the destroyer Monaghan, 1,700 tons. All right. So, it is time to dance with the devil and we have shifted to our attack map. We've got the destroyer Monaghan here, which is a warship target. It's the only target around. Warships are always considered to be escorted. So, we have escorts here as well. Now, there are a number of hit boxes for this, but for the destroyer, we look down here on this damage to sink. But, because the more the Monaghan is 1,700 tons, we will need to hit it twice. Two damage well, two damage total in order to be able to sink the destroyer. Now, the first thing we do, this is a little bit risky, but we have a special advantage, I think, that we will probably play into on this one here. The first thing we need to do to roll is to see whether it's day or night. On a one, two, or three, it is day. On a four, five, or six, it is night.
Nighttime. Excellent. This is good because we can come in at night, which is going to give us a an advantage here. We are going to be nighttime and we are going to come in on the surface. Now, this is risky because destroyers are fast and they are very hard targets to hit. But, we're going to come in now at medium range. We have six torpedoes loaded in the tubes. They are all going at the Monaghan here. We're firing everything. No need no sense to save them. We've only got a little bit of minimal searching left on this patrol. Although this is only a small target, it would be a a moral victory to put this one to the bottom of the ocean. So, now we have to determine what are the odds on the hit and then we're going to have to see if can get away with detection, but
I have a plan for that. So, first up, we have to fire our torpedoes. Now, at medium range, as we can see in the chart, we needed two to seven to hit. However, however, a destroyer is extremely fast and mobile and nimble, so there is a plus two penalty to when firing at destroyers.
So, we needed two to five to hit. However, because it's night time and we're coming in on the surface, we get a minus one modifier. So, the total modifiers to this is a plus one. So, we need a two to six to hit, and we will do each torpedo in turn. Also, all Japanese torpedoes are duds on a die roll of one. So, we'll use a white die for the die roll of one, we'll use the red dice for the dice of our torpedoes. We need two to six to hit, let's fire first with the type We'll fire the type 95s first. Oh. Boom! First shot by torpedo operator Brian strikes the Monaghan. That's a great start for us. Let's fire two.
Oh! We are on fire. A four, a second hit slams into the Monaghan. It is also not a dud. This is guaranteed to sink it. We are really We're going to blow it who knows how far apart here. A five and a three. Oh my gosh, our torpedo room is en fuego. Next, we fire a fourth one, a nine and a five. That one misses. We fire our last T95. This is so much overkill. And we can Oh, another hit, another non-dud. Four torpedoes slam into the Monaghan. We are laying waste to this. The last one, which is the type six steam, that hits as well on a six. Five of our six shots hit. What shooting!
This is a great start for us. The next step is to see how much damage we do to this just for the sake of it. It only takes two hits to use, but we have down here this attack damage chart. We're going to roll a one-sided a six-sided die and add the damage here. Now, the Type 95s do the straight-up damage, but the Type 6s here have a minus a plus one added to them
to damage. So, we're going to roll on this chart. I'm going to roll the red dice for the Type 95s, the white die for the Type 96, and we will calculate the total damage here. We get two sixes, a one, a three, and a five. That adds up to a total of 10 damage, which sends literally five times the amount of damage we need to put on the Monaghan to absolutely shatter it, and we have sunk our first ship. The destroyer Monaghan plummets to the bottom of the ocean. A successful attack by the I-15. That was most most well done. Now, the next thing we have to do, however, is to escape detection. And this is where we can use our special ability, the Shibumi here, which allows us to succeed at one roll in a mission. So, we're going to use it now, right? We get escorts flying around us. We were up on the surface. We do not want to be detected. We want to get away here. Now, we still have a lot of on station time left, so we'll see how this all works out. But, we are going to expend our Shibumi to automatically succeed at the escape detection
roll, and that ends this encounter. We have got our first ship sunk, and we successfully slink away into the night. Not to be forgotten, however, is our scout plane, which spotted the Monaghan to to start this encounter. We have to recover it. On a two, three, four, five, or six, it is successful cuz we get a plus one. We get a five. They're back on board. Our scout plane is back, and we can continue our patrol. So, now we are back on station, and we can patrol once more. Let's see what we get for this one. We get a five, which is an R. Reroll if radar is present and working and we do not have radar. So, uh that is a failure. However, let's launch our scout craft one more time here. So, we need a two or 12 to We need to avoid a two or 12 to successfully woo. That was a a slightly uh dangerous launch there, but the aircraft is up and that means we get one more search here in this area. Let's see if something comes about of this. A seven.
Ship plus escort. Aha. Back into the maw, lads. We're back into the maw. So, let's go to what will be our last encounter on this patrol for sure. Well, I suppose we could have something in the transit on the way back, too. First up, we need to roll to see whether it's day or night. On a one to three, it's a day. Six. We are fortunate again. It is night time. That's excellent as we can come in on the surface here and have a better chance to hit if we need to. Now, we need to determine the ship size. We're going to roll a 1 D 6 since it's not a capital ship or a warship and on a one to four, it's a small ship. On a five to six, it is large. Unfortunately, it is a small ship. So, we're going to roll now on this small freighter chart. We're going to roll like we did with the uh two D 10s to get a number from one to 100. Red die will be first.
We get a 57. The Wallenbar, a 2,200 ton freighter. [snorts] Okay, so let's get that in place. So, I've added in the Wallenbar here. Now, it's 2,200 tons, so we only need to hit it with a damage of two on this one. So, let's uh ponder our attack here because we have six torpedoes and there's no sense bringing them home. These are the old ones that we don't really care about. So, we should get rid of them. So, given that we've got six torpedoes and one target, I think what we're going to do is we are actually going to come in submerged. We're not going to take advantage of the night surface attack. We're going to come in at long range, and we're going to fire all six torpedoes at the small freighter. We need two damage. One or two hits with these type six torpedoes, which do one less than the normal damage, should do the trick. So, I think the math works out pretty well here to stay at long range. And the reason I want to do that is that will give us minus one on our detection roll, which will give us a better chance of getting away. And by not going up to the surface,
we avoid the plus one die roll modifier penalty for a night surface attack when we go to detection. So, our goal here is to hit this from distance, blow it up, and then get away. So, let's let these torpedoes go. We need a two to six to hit. There are no modifiers on this roll. Like we did last time, the white die will be the dud roll. Fire one. An eight and a five. That one misses wide. Fire two. Six and a four. Bang! We've got our first hit. Excellent. So, one miss and one hit. One more hit would guarantee the destruction here of the Konobar. An eight and a three. Our third one misses. Fire four. A five and a six. There it is. Bang! So, our third one misses. Our fourth one hits.
Fire five. An eight and a six. That is a miss. Fire six. A four and a two. We alternate hits and misses here. Three hits on the Konobar. That is outstanding. Let's rack up the damage here. So, this torpedo has a plus one die roll modifier to it. I'll roll all three dice for this though, but they're going to do at least one damage. We get two ones and a five. The ones becomes two. That's a three plus a three is a six. The five becomes a six is a seven. Seven hits on the Connebar, She shatter [snorts] it in the night, and the Connebar goes to the bottom of the ocean. Outstanding. Our second hit, 2,200 tons of tonnage racked up for the I-15 here. And correction on this, the ship's name is the Wallingbar, or it was the Wallingbar. Now, the biggest role perhaps though, we don't have Shibumi to be able to use our elite skill and fortitude here to get away. We need to escape detection on a straight-up roll.
So, it is normally two to eight to escape detection. However, because we were at long range, we get a minus one die roll modifier. None of the other modifiers apply. We fired steam torpedoes, but it was at night, which doesn't hurt us. We weren't on the surface. Everything else is okay. Now, we could exceed test depth here. Let's think about that. Yes, actually we are going to exceed test depth here, which puts one hull damage hit onto us. But, that's okay, because it's going to give us an extra die roll modifier here. So, we now are at minus two on our die roll modifier. And the reason is this hull damage isn't enough to delay our refit, so we should be able to turn the submarine around in one month and be back at sea, assuming of course we get back to port okay. So, we need a two to eight minus two, so a two to 10 here.
Six minus two is four. We escape into the night. We have sunk the Wallingbar, not the Callingbar there. So, second ship sunk and we we we furtively move away from the Allied escorts. Outstanding. One last thing, let's not forget our scout plane. We needed two or better. Six. No problems, we recover our scout plane. Excellent work, our scout plane has been an extremely powerful asset. Not only did it lead us to do a successful recon mission over Pearl Harbor, it spotted the Wallingbar there, the freighter, and the Monaghan destroyer, which led us to get two extra attacks in,
racking up some kills here for the I-15. Let's head for home. As we mentioned, this on station one is actually a transit box for us now because we are so far away from home. Let's roll looking for something in the middle. We get a 10, which is no event, uneventful. Now we are getting closer to Tokyo and to uh Yokosuka uh base here. Last roll, we just need to get safely at home. We get another 10. We've made it. We're back home. Outstanding. Back at port, let's tally up the results here. First of all, let's check to see if we get any awards, and indeed we do. We get the Greater East Asia War Medal full for completing successfully our completing our first patrol, whether it's successful or not.
A very successful mission though on the whole. We had our successful recon mission over Pearl Harbor, which counts for double mission experience. So rather than this counting for one mission for us, one patrol it counts for two, which is good because if we have three successful patrols, we get to increase the experience of our crew crew members and to ratchet up our performance levels. So if we succeed in our next mission, we'll get an experience point that we can use to to improve our our attributes here. Now damage-wise, we sunk two ships, the Monaghan, which was a 1,700 ton destroyer, and then the Wallingbar, the 2,200 ton small freighter, which gives us two ships sunk and 3,900 tons. Now if the if our war career would end right now, we would be in the lost category. We have to cross to 10,000 tons to go into the draw category. This would be a defeat. So still small gains made, two smaller ships, but it was a I think a very successful patrol on the on the whole, especially thanks to our E-14 Y-1. Now looking at our refit time, I did make a mistake there. Because we exceeded test depth and took a point of hull damage on the I-15, we actually do add an extra month of refit. I thought up to three hull damage were free and didn't impact, but any hull damage up to three adds one month of refit time. And four to six would add two and beyond that would add three months and so on. So for every fraction of a even a hull damage, it adds a month. So we will
need to refit. Our patrols are two months long given the type B class of submarine that we have. So that was December and January. February and March we will refit and we will be back out in the ocean in April of 1942.