Shallow Sea solo play and review (review copy provided)
Games in This Video
1 game is featured in this video — it unlocks as you watch.
Transcript
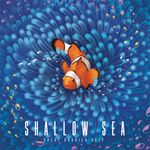
Hey everybody, this is Mike with the Onetop Co-op Shop. And today I'm doing a playthrough and review of the solo mode in Shallow Sea, the latest from Bad Comet Games. A disclaimer that I got a review copy of this one. And if you like the content on the OneStop Co-op shop, consider supporting us through Patreon. You get early access to our videos and exclusive videos every month you can't see anywhere else. You can also listen to our weekly podcast for reviews and design discussions, or join the conversation and say hi on our Discord. So, Shallow Sea is primarily a tile laying game. You're trying to build the best coral reef and earn the most victory points at the end. And it's a pretty straightforward game. you are drafting with the other players from a central supply of tiles and fish. But at least in our games, we haven't had that much hate drafting or really even paying attention to what the other people are drafting a lot of the time. So, in my experience, it's a pretty chill multiplayer game, which is nice because the solo game is basically beat your own score. I should say beat your own score with scenarios and challenges. And it doesn't really have a bot. Nobody's messing with you. You pretty much just have free reign to take whichever stuff you want to build the best coral reef you can. Now, in the base game, they have a bunch of ways to play solo. You can do achievements. That's what I'm doing right now. You can also just do basic difficulty ones where you can use any components. And they also have these modified game rolls where you have extra challenges. And then they sent me the first expansion which has some scenarios for solo. I haven't tried those yet though, but that adds even more ways to play. But the main way I'm playing again is the achievement scenarios. So they have 15 of these. And I beat the first two easy ones pretty easily. So I'm jumping all the way to number six, the first normal ranked one. Now watch all this get destroyed. So, it's going to tell me exactly what Sea Life tiles to use. You'll see that in a second.
Exactly which ecosystem cards to use to give endame scoring. It has an extra objective, which the first ones didn't. I have to complete four different sea life tiles within the outer spaces of my ocean. And I have a target score. I have to beat 165. And yeah, things just get harder from there. So, lots of ways to change up the way the game is played. But the core gameplay of the game is super simple. You've got two types of tiles. There are coral tiles which have a victory point value and a color here in the center. And then they have colors around some of their sides, two, three, or four of them. And they'll go into these little spots. And when you get every single side filled with fish, fish go on these little bubbles with the colors matching. Like here, the clown fish has to be on the orange spot. This purple fish has to be on the purple spot. Once all of those are fulfilled, then you flip the coral over and now it's actually earning you nine points at the end of the game. And then you also have to take one of the fish that helped to complete it and put it on here, which frees up more spaces, but means you can't use that fish anymore, but also some of the things will be looking for where your fish are. The other type of tiles are sea life tiles, which cannot be completed in and of themselves. They don't care about which fish are around them. Instead, for them, you're paying attention to coral tiles that are completed around them. Like this one wants to have three coral tiles in that configuration. And you can rotate tiles when you put them out. So like here, if I had that, I could have a coral tile here and a coral tile here. and they either want fish of the same type or fish of different types or coral of the same type or of different types. So for this one, it wants each of those coral tiles to have a different fish on it. If that happens, we get to flip it over. We have some nice sea life that have joined
our coral reef and we get this many victory points. But sea life tiles can give you partial scoring. So here, this little two with a star means that for each of these I complete, I'll get two points. So even if I only get two out of the three, it'll still be worth four. So it's a little bit more forgiving. So that's what you're trying to do in the game. get these coral tiles, these fish, and these sea life tiles out to score them. But how your actual turn works is super simple. You pick one tile and the matching fish. So I could take this sea life tile and this yellow guy or this coral tile and this purple guy. And then you place them in either order, the fish first or the tile first. And everything has to stay connected. So like if my first tile is here, I can't put my next tile over here. They have to be in one of the surrounding spaces. And similarly, fish have to be next to existing tiles. They can't just be off in the middle of the ocean. Now, I can modify those basic actions, taking a tile and a fish, placing them out by using these sea shells. For one sea shell, I can discard an entire row and redraw to give me different options. And also, for one sea shell, I can pick a fish that's not in the same column as the tile I take. So, I could take like this yellow guy and this coral instead of the one that's next to him. And you get seashells back whenever you complete any tile. Whenever a sea life or coral is flipped, you start with two, though.
Now, you also have these ecosystem cards. Again, in the solo scenario, they tell you which ones to use. So, in this scenario, I've got borders of diversity. I get two points for every sea life or coral tile in my outer locations. That is different from any other sea life or coral tile there. And remember, my objective already is to have four different completed sea life uh tiles out on these outskirts. So, that's going to get me eight extra points as well. And I want to do as much of that as I can, whereas usually like you're kind of working in the middle. So, this is going to change things up quite a bit. And I've also got the coral duo ecosystem. For every pair of red, yellow, purple, or green coral, every pair of the same color, I'm going to get three victory points at the end. Now, the only special rule for solo are lion fish. There's actually a boost. Anytime you need to spend seashells, you can instead draw a fish from the fish bag. There's a bag for each type of tile and then a bag for the fish. And you put it on this card.
The first two times you do that, it's free. Any fish you do it afterwards are worth minus two victory points each. But this gives you extra shells to spend. So, I could put a fish here instead of spending one shell. I could put two fish here instead of spending two shells. And I should mention there is one final use for shells. For two shells, at any point in your turn, you can take a fish that's not already on a coral tile and move it to anywhere else in your reef that is legal for it to be placed, which can be really nice once you've like used a fish to complete a tile over here, but now it's just sitting there kind of being useless, and you can move it somewhere else. And let's see any other details I should tell you. So, visual scoring. Oh, that's right. Uh, you do get two victory points for every different sea life that you get by the end of the game, which don't forget will also help me with borders of adversity if they're on the outside, will also help me with my objective. And then finally, you score for all the fish that aren't on coral. A number of points for each fish equal to the completed coral adjacent to it. So here, this yellow fish, what is that? A yellow tang. I don't know fish very well. They do explain like all the species in the book, but yeah, here they would earn two points for me because they're next to two completed coral. All right, with all that explained, it's actually a super fast game. So, uh, if all the rules make sense, let's jump in and play it, and then I'll have my review at the end. So, to start out the game, I get to pick one of the sea life tiles. So, I've got one that wants different fish. Uh, these ones that have arrows. Pay attention to any tiles in the two indicated directions or sometimes one indicated direction. And they don't have to be like in a row.
They can be mixed between the two directions. But here, this dude would want four different fish. So, just completing coral and putting different fish on it should be pretty easy. And actually, I've got two of these dudes that want different fish there, too. So, theoretically, I could put like this guy there and then get like, I don't know, one of these over here and complete like use the same fish to do both. Although, I guess that other one wouldn't be on the outskirts. That might not be as good. Oh, I could do like that and like that and do three. I like that combo a lot, which is making me lean towards taking this guy. This one wants four different coral. So, basically the exact same thing except coral instead of fish, although they are worth more victory points. Now, I can see that three of the five starting coral tiles are red. You can uh freely discard the entire row if there's four of a kind of fish or coral.
Saying coral is making me think of Carl from The Walking Dead. Coral. Anyway, that was a terrible Andrew Lincoln impression. But yeah, so maybe the the fish one will be easier because I have one of each color of fish. There's four colors of fish, four colors of coral. And then this one wants the same fish, which does not currently align as well. See, I'm going to take this dude, put him here with my little plan. Then I refill. After each of your turns, you refill. So, here we got this one's pretty easy. A seahorse that just wants the same fish. Uh, two in a line, which could go well with my little sea turtle. Is that a sea turtle? Uh, that is not a sea turtle at all. What is that guy? But yeah, that that could work pretty well. But yes, now we go into our first turn. So, I want to get uh three different fish going on over here. And you might notice that coral always includes the fish that matches its color. So, you'll always have clown fish with the red anemmones. Maybe they are. You'll always have some purple fish needed for the purple ones, green for the green, but then other colors kind of branch out from there. And it's great if you can use the same fish for uh multiple uses.
Speaking of that, I'm seeing like orange and green here, orange and green here. They're different corals, different fish. Maybe I can make that work. Let's try it out. Let's get this one first. And I want to be pointing towards where other stuff will go. So, let's put it Oh, that's right. They have to go like that. Um, let's put it like that. I want to see leave the outskirts uh free for sea life if possible. And I'll take the clown fish. Not going to use a shell yet. And I'll put him right there where we know he's needed. And oh, so I can choose. This is an option. I can choose at the beginning of my turn to discard all four of those without spending a shell because there are four reds. I don't know if I need to do that yet. Um, but I definitely might want to do it later. But here, let's do what I was thinking. So, we'll get that one. And now green is doing double duty. The second you complete a tile, you Well, not the second. Sorry. It's not actually immediate. By the end of your turn, because if you complete multiple things, you can decide the order. You have to flip it over and move a fish onto it.
So, I have completed this with a green there and a orange there. I'm going to go like that and move the orange over cuz clearly I still want to use the green to finish this one. And then I can put the green or the yellow when that one's completed on top to get closer to this guy being done and to set up for me to put this guy in as well. Oh, and can't forget to get a shell from completing a tile. Okay, we don't have the four of a kind for red anymore or orange, whatever it is. So, ideally, I want something here that's going to also need an orange there, right? I could keep it easy and do you can see the ones that are easier to complete are worth fewer victory points. Oh, and I didn't say the game ends once you've placed enough tiles to only have four empty ones left. So, you always fill all but four of your tiles. Yeah, getting that would be pretty easy. I could use a double orange here. Although, that would only give me an option of putting orange and green on it when I finish it, which means I would have to put the yellow on this one, but that's not necessarily a bad thing. That would still let me complete those sea life I'm going for.
So, sure, why not? Let's grab this guy and we'll do it like that and like that. So, we just need a yellow here and a green here. And we have a setup to complete all of them. Now, this is where moving a fish, by the way, could be useful. If I put a yellow here and move the yellow onto that, the green still be sitting here. I could spend two shells to send him over there to complete that coral. We got another red. They're really popular, although still not four. And okay, we got more yellows. We got a single green. So, we need have all the fish we need to finish the current stuff. Um, so what I need, I need a yellow and I need a green. I mean, I might as well. Yeah, let's do this the simple way. So, I'll go ahead and get this sea life and this yellow. Still not going to pay extra shells. So, I can do whatever order I want. Doesn't really matter here. I'll put that there. I'll put the yellow here. Complete. We need to put the yellow on this if we're going to have different fish like we planned.
So, boop. By the way, just to note, this does not count as an exterior space for my objectives for the borders of diversity. See, they can show you it's all the other spaces going around. Okay, that gets me a shell. I'm getting close to my max of five, so let's go and spend two of them to send Greeny over here. Flip this over. Getting us another shell. Putting green on it. Hey, we've got three different fish in the correct configuration. So, we also completed whatever that horrible thing is. We get another shell. We're cooking over here. It's going great. And this dude does still need in this direction cuz this direction is already finished. one more different fish, which importantly, there are only four types of fish in the game. So, we need to have a purple fish. That's what needs to happen here. That's going to be two of my four required sea life. So, I want to start planning what my next one is going to be for my objective. So, I got this guy, three of the same coral in a row. It's kind of tough. Two of the same fish in a row.
That's pretty easy potentially. I could just like put it here. Odog is here like on the exterior or even here and just get like another orange fish somewhere up there. That would already be done. Now, by the way, I could get another one of these and immediately score them. It would be worth seven victory points. It's probably worth doing, but it's not going to be on the outskirts. It's not going to be a different sea life type, so it's not going to score me much, but you know, a straight up immediately completed tile is pretty much never a bad thing. But for now, let's look at getting a purple boy going on. Uh, so there are no matches with the purple fish and something that actually needs purple to finish up this dude. I could spend one of my shells to take mismatched ones if I wanted. Oh, or wait, I this thing I was talking about. I can get that. Put it out there.
Whoops. Already done. Good job. And get the purple fish as part of the bargain. Uh, who do I want to do? I've got a clown fish sitting around. I can move them there. I've got a ton of shells. So maybe I get like the purple here. Planning to do another purple there. And the clown fish moved there. And then that would leave me a clown fish here that I could potentially put a new coral in here to use. Put him on top. Seahorse it up. I'm liking that. And all right, who do we have? Another Oh, no. There's different. That's three equal ones. Okay. I mean, these would both be pretty easy to do, right? If I can get this guy like here and this guy here. Bam. Bam. Bam. Get three of the same coral. Good to go. We would already have our objective completed. Oh, we we'll cross that bridge when we get to it. All right. So, what do I want? I wanted that. I don't want the green guy at all, though. Um I could use a shell to get that new. Yeah, let's do that. So, I'll spend a shell to be able to take this and a nonmatching fish. Put that there.
Let's spend two more shells. You got to spend to win um to move our friend over here, which immediately completes this and gets me a shell back. I'll put this purple one on top since this one's kind of more in the mix. Uh or maybe Yeah, there's a purple and orange or these purple and orange. Yeah. So, actually, I'll I'll leave him there and move this guy on top. Uh because of that, I now have four different fish for our friend here. Uh that's a that's a whale. Some kind of whale. Mike is so knowledgeable about sea creatures. All right. So, I got almost all my shells right back. That was awesome. Yeah. And scorewise, I think I'm doing well. Okay. And yeah, I want to get um something here. I mean, I could take that and just move the purple. Or for more points, I could get that. Uh maybe spend a shell to get the uh orange there. And then just wait until another purple shows up. I I like that option better. Nine points is a lot. So, we'll go there. And I spend a shell to be able to take a different fish. So, we'll go there. And we just need one purple to finish him up. And we'll see when that shows up. Okay.
Yeah. So, if we had four of a kind, like if we had four um yellow fish here, we could discard them all for free. I can of course also spend a shell to get rid of them, but it's okay. Um what do I want to do here? I liked my idea of the like multiple coral thing going on here. Uh which type of coral? So, there's only a nine of each fish color. I think that's right. Nine. Yeah, nine of each fish color in the bag in solo. So, I can see that there have already been a ton of clown fish, like almost half of them out. Whereas, I have a lot of yellow fish available, but not any yellow coral. I've not had a single yellow coral come out. I'm just trying to figure out which color would be easiest cuz I've done one green. I'm about to do my third red, which means clearly there ain't a lot of red to go around anymore.
Um, and I've done one purple. So, yes, yellow would be theoretically the easiest to do my plan with the seahorse and the the the octopus or squid or Oh my gosh, Mike learned something. Again, though, just to note, the the book has a lovely like index to avail yourself of knowledge. Look, that dude was a migaloo. Migaloo, a white humpac whale first discovered in 1991. Now, I know. And and let's see, what are they? Clown fish. A whiteedged liar tail. An orange spotted file fish. He's green and he's orange spotted. He's purple and he's whiteedged. Come on now. and the foxface rabbit fish. That's not a yellow tang then. That's not a yellow tang at all. I don't know what any of this stuff is. Anyway, where the heck was I? Uh, right. Plans. Um, I want to try to get yellow going. They're billion yellow fish here.
So, like that's theoretically possible. Although, there's two greens. I've only used one so far. And they all need yellow and green of which I have those in abundance. So, let's try to make that work for our three. Let me just get one more uh green tile and Oh, wait. Shoot. How was I planning to do it? Cuz if I do that and do three, there's nowhere for the the seahorse to go. What the heck was Oh, and the seahorse doesn't even No, no, that's right. That's right. It was this dude. That's what it was. Green. Green. Green. Okay. Forget seahorse. I I was confused. Okay. So, yeah, let's let's start out with the the the let's start out with this cheaper one. We can connect it there.
Can I get Ooh, I can Oh, yeah. There we go. There we go. That would be a perfect match next time. So, I'll put them there. Easy peasy. If a purple comes out, hey, if a purple comes out, I'm going to grab it is what I was about to say. And then purple came out because I still need the purple for that. Uh, it's another green. Hey, this is working out better than I thought. Although I can't put that tile there yet. So, let's grab the yellow first. Um Oh, shoot. But if I put the yellow down right away, I'm going to finish the tile and I won't have the yellow for the other tile. And h yeah, sorry. Just to explain what I'm saying. If I like like I wanted to pick this up and have a perfect match there, but if I put the yellow there, I immediately finish this and I'll have to steal one of those fish away. So, as dumb as it might be, I'm going to spend a shell. I'm going to still get this tile for my tile placement, but the shell is going to allow me to get the purple to finish this bad boy off. Why do I want to do that, by the way? What was I looking for? Oh, that's what that's what the seahorse was for. It's for the the clownfish combo over here.
I'm actually going to move this clownish on cuz this one's going to be getting me three points for three completed coral at the end of the game. Or I can always pay to move him. And this purple's getting three points as well. So, yeah, we complete that. Boop. Get that. And we do that. And we're ready for uh the seahorse to come in and score immediately. All right. I still need another green. That ain't it. So, if I can get the green on first, then I can get the yellow. And you can choose what order to do it in. So, I can like pull the green first and then pull the yellow onto that. And we'll complete them both nicely. Man, all we got is yellow and orange. Huh. Yellow and orange. Well, um I can get that green dude to finish that. I can get that green dude. I like put that like that. Maybe spend a shell to get or spend two shells to move the purple over there. I don't know. I don't know. It's using up my shells quite a bit, isn't it? But I'm going to get a free one back from the uh the seahorse.
All right. So, what if I What if I spend one to get this and this dude? I'm going to put it like that. Like that. I'm going to spend two more. God help me to get this purple. That's not scoring much for me at all yet. Boom. Uh, so then the green would let me flip that. Um, and then I can do the yellow to flip that. Okay. I mean, if a green fish decides to come. Hey, green fish, I am happy to see you. Although, are you on something I need? Not really. Now I'm getting all the green tiles. I don't need any more green tiles. So, I wanted to put that guy there. Now, we get me a yellow, which I don't want yet. I don't have any shells. I can put the seahorse there and get a yellow I don't want yet. I can put uh where was it? This dude here and get an orange. I don't want um I mean I don't I I could just like put a fish somewhere for the future and assume that I'll get around to them eventually. Oh, I totally forgot about the coral duo thing. But I mean four green, so that's already a bonus choice. Uh three red, so one more would be good. I want to get like another purple if I can. So I I should be thinking about that. Oh, and here's a nice purple red. Um, so if I get a clown fish like there, that'd be fine. So, let's let's take this one that I know I want and the clownfish. Let's put it there. And oh, I can't put this there yet. What am I thinking? Hold on. Cuz it wouldn't be adjacent to any tiles. Mike, you can't just cheat. Well, I really
want the green, right? That's going to like make my whole chain cascade be good. And then I can get the yellow that I've been wanting. So, do I want this dude? I need to have every color. So, green, purple, red. If I get a yellow here, he'd be done. Oh, no. No. That's where I want the uh the squid dude to go. So, never mind. I I'll get this and this. Whatever. So, first I'm going to put this down. Uh completing our friend here. I can do the purple or the um I was thinking I might get that, right? Which means I could kind of use both of them, but I feel like this gu is going to be less useful. Okay, so I'll do that. gets me a shell back. Yay for that. And then where do I want this to go? Oh, interesting. I could like put it there and just move. Oh, no. No. That's where I need the the dude to go for for my entire thing. Should I put it here for just like some random future purple I mean green fish to complete. Why not?
It might be fine. Who knows? All right. But now I should be able to do quite a few things that I actually want to do. Um, right. cuz I want to get this guy. And the yellow fish is now fine. So, I'm going to go there. Um, and I'm going to put the yellow fish here. So, first we're flipping you. Putting the green on it. One shell. Then we're flipping you. And putting I don't really care, do I? Yeah. I don't know. Put the yellow on it. Yeah, cuz that needs a green. So, I might move the green. Okay. Then that completes this guy. So, that gets me another shell. And I'm ready to put uh seahorse here and other thing here when I get a chance. And gosh, it's gonna give I'm really close to the end of the game. Like I said, it is not a long play at all. Keeps things snappy even at higher player counts. Okay, so what do I want to do with the fish? Well, let's see. If I get um this guy here, I can get a yellow for free. If I get this guy here, I can get a yellow for free. And I got like a green and purple kind of sitting around. Uh what needs all those yellows? I mean, I guess that coral. I don't have any clown fish. There's not very many left in the game in general.
And I could also just like put fish in places that'll score for me, but I'm probably going to complete a bit more coral, right? I mean, for my pairing up, I'd like another red. I'd like another purple. I guess I'd like another green. Do Do yellow exist, by the way. Where are the yellow coral? Okay. Yeah, I just I just went in the bag and drew out four of them. So, apparently they're in there. I'm just not shuffling well. All right. I don't know. Let's get this guy and the yellowish. Um, so he's immediately completed from the two uh the clown fish. I don't know what to do with this. I can I can redo all the coral and try to get more options. I just hate to push this down not knowing what I need yet. But I don't know. Hey, let's go there. It's next to two corals. Like worst case scenarios, worth some points that way. All right. All right. And then Well, let's Yeah, let's do this. I'm going to discard. So, whenever you spend a shell to get one of the rose, you take those things you put them to the side for a moment. You redraw and then you put them in the relevant bags.
You're not going to like get the same towels you just got rid of. All right, we got a purple, yellow, yellow. I knew you existed. And yellow again almost enough to get a free shuffle. Are any of them yellows that I like? Uh cuz I was thinking like yellow green would be great. Yellow. Green not facing the right direction. Okay. Oh, I need a green guy over there. I forgot about that. Um oh, I could just send him over anytime I want, couldn't I? which means that the green would necessarily need to stay a green over there. And here we've got yellow and angel fish. Okay. So, what if what if I get this and this, right? And put this there as planned. So, boom. I don't know what that is either. Okay. And then this dude. Well, I'm going to spend two of these to send this over here. Finish that. Get one of the two shells back. I'm still about to put the angel fish down. Uh, or not the clown fish. Clown fish. Uh, I don't know which of you I care about.
I mean, the purple's next to two things. The green's only next to one. The yellow. I can get that yellow and move the green over. None of the Oh, I guess that yellow wants a purple, but it doesn't want a clown fish. Yeah, I'm going to going to put the purple on top. And then if I put the clown fish here, I just need to get another yellow to complete that. That seems pretty smart. All right, just checking in. We've already got five different sea life things on the exterior, so I'm good for my objective. Um, and I've completed literally everything on the board. Now, I'm only putting down three more tiles. So, I want to I want to make those count if I can. I did get another one of these buddies. That would perfectly and immediately be finished because it's using the exact same thing. So, that's a free seven victory points. So, that's definitely one of my last three. Uh, our yellow friend here can be another one.
Oh, and this. Okay, let's do this. Sorry, I just saw that there's a yellow fish here. So, I'll go and put that down in preparation for that. But this again gets immediately completed and we get that. So, yeah, if that yellow one is one, I can just get one more. We'll see what will score for us. Oh gosh, I forgot about Sorry, I always forget about the lion fish in solo cuz when I'm playing multiplayer, it's not an option. I can't like use shells. Like that one time that I had no shells and I really wanted to get a different fish and tile. I could have easily done that without even a negative. The first two are free. Whoops. Okay, that's fine. Um, all right. So, I definitely want him, but I need to set up my final something. Is there any sea life I can finish? Um, three of the same fish. There's no way that's happening. Uh, one of each.
No, no, no, no. I don't think so. Yeah, I really never set up for like same fish stuff to happen. So, if that's the case, can I just get like a final uh coral completion? So, like if I grab this one, I would have a random purple or something else, and I could have most of these fish still sitting around. That one would be easy to do, right? So, let's go for that. So, I'll get this. Um, and so it's yellow, yellow, purple. So, I'll put the purple here. Um, that's done, which gets me a coral. And I need one of these yellows, but not the other one. So, I'll put that dude there cuz this one's worth three points to me. And that's the thing I can use the lion fish for and like any extra shells I have at the end for cuz they aren't worth any points. I can just move the fish to like the most advantageous positions possible. Okay, then I'll get these two as planned. Boop. Beep. Final tile completed. Oh, actually, before I do that, let's uh use some of these to move guys around. So, where can I move a fish that's going to be worth more? Actually, every fish I have is adjacent to three coral, which is the best I can do. Oh, no, no, there's going to be four coal here. Oh, but that guy, yes, maybe it doesn't really matter. Um, so I'm doing that. I can't hold another shell. And I'll put this guy in cuz he's in the worst spot. And then next to three, next to four. Next to three, next to three.
That's a three. And this guy's only next to two. So, let's spend two of these to send him. Oh, you. What are you doing over there? You're not worth much at all, are you? Uh, let's spend two more shells to bring him here. There we go. That's ideal. I think every fish that's left is in a great spot. I mean, I think I've maximized my score to the max possible. No lion fish. Sorry, lion fish. Let's calculate and see how we did. And I did have four plus sea life tiles within the 12 outer spaces. And I need a 165. That seems doable. All right. So, first you calculate for each of the ecosystem cards. So, for the coral duo, I've got two pairs of green. That's six. One pair of yellow. That's nine. Uh, no pairs of purple. One pair of orange. That's 12. That was pretty poor. That was not great. But this one should be awesome. Oh, although I forgot about the coral cuz it's coral and sea life. So, borders of diversity. I've got green coral. Uh, whatever that dude is.
So, that's two, three, four, five, six, seven types. Is that right? I mean, I've got eight things on the outside and all but one of them is different from the other. So, yeah. So, that's 14 points. Yeah, I feel like that wasn't enough either. Okay, then to keep it simple, you count each row and total up the points for flipped over things or partially completed sea life. So, five in the top a lot over here. That's 28 33 uh 16 23 30 and then what's this one? 21 from the 37s 31 and finally 22. Okay, now I get a bonus for every single different sea life I completed. So like for this one, but not the double for this one, but oh man, I doubled up two. And that's two points each. Yeah, I feel like I might have gone a little bit too coral heavy here. And I didn't really benefit from that as much as I should have. So 2 4 6 8 10. Is that really it?
Ouch, man. Okay, then my fish should be pretty good. So three adjacent completed coral, six uh 10 with four 13 16 19. All right, let's total it all up and see if I hit 165, my goal. All right, if I counted that right, 176. That was closer than I thought. The last time I beat the goal by like 50 points, but I was playing on an easy scenario, not a normal one. Yeah, not too bad. Uh, probably if I remember my lion fish, I could have done a little bit better. I didn't quite capitalize on everything I could have. But there you go. That is Shallow Seas solo mode. Although, once again, I'll say there are many ways to play it. And let's get into what I think of the game. So, first of all, it's been a big hit with my wife, a big hit with my 13-year-old. Uh, they both really enjoy it because, as you can see, it's pretty straightforward while still being a little thinky, and it really gives a nice feeling of combeness. Like, putting down a fish and then ending up using that fish in two or three different coral flips and then those coral flipping allowing you to complete your sea life forms. All that feels really good. like it's a nice satisfying rewarding play where clever placement, clever combos really makes you feel like you did some cool stuff, but the actual turns are very fast. You can see that the solo game is lightning fast, like 20 to 30 minutes. And multiplayer isn't that much worse because usually you can be picking which tile you want and which fish you want while other people are taking their turn. Now, of course, they might discard the entire row with a shell. Uh they might take the exact fish or whatever you are looking for. So sometimes you will have to rethink your turn, but in our plays at two and three
player, we have not played four. We found that things have tended to go pretty smoothly and the game doesn't last more than an hour maybe. And I think the game is very forgiving. I love the shells. They give you some nice choices. So even if uh the random draw does kind of mess you up. You don't have any of the color you want. You can spend a single shell and often get what you need. I mean, not 100% of the time, but if you put all five fish in the bag, the chance of not getting just one of the color that you want is pretty low. So, there is some RNG, but I have not found it punishes us too much. Although, the one thing I will note is that we have had games Oh, look. I had three yellows in a row. I mean, it was too late. I didn't have any more space. But yeah, the one thing I found is that sometimes you will get sea life forms coming out that perfectly matte stuff that's already there. But the thing is, you know, which sea life forms are going into the bag, so you kind of know which combos are possible. So, you can even set up for them before the sea life comes out uh once you get better at the game and kind of know the tiles better.
So, I think that's going to feel less random and more just part of the strategy as you play the game more. But I think beginners might get annoyed if they're not the one benefiting from the tiles coming out randomly and being the exact thing that somebody needs to, you know, just put a tile down without any extra thought and earn seven points immediately. As for the variation in game, the diversity of plays, I do think these ecosystem cards make you focus on different things. Like here, you really want to build on the outside. Other cards will make you really want to build on the inside. This makes you more coral focused. something else might make you more sea life focused. And there are a whole bunch of these cards and then there are more that came with the base game and then of course there's the expansion with even more options and more ways to score. Now that being said, you know, you're still kind of following similar strategies each game and you fill almost your entire board and in our games we've almost always flipped most of our tiles. I don't usually flip all my tiles except in solo where you have free reign over stuff. So, it's not really a mean game and you are going to have success every game. That might make it feel a bit more seamy playtoplay. But again, I think it also makes it more of a feel-good experience to get to the table. And I will note that the shallow sea expansion appears to, again, I haven't actually played it yet, but just looking through it, it appears to give you more limitations in solo because in the basic scenarios, you probably saw here that often you can kind of make things happen if you take a little time and are clever with where you place your stuff. So having more restrictions and having more requirements on what you do and what you don't do, I think it make the solo play even more exciting, but I don't think you really need that for the multiplayer play. It's it's a nice family weight little tile laying game.
Well, I say family, but you can see like you do have to be thinking like multiple turns ahead. You do have to be putting fish down to combo into different things. So I wouldn't play this with my nine-year-old necessarily, but uh good game for older kids and family members. But there we go. Shallow Sea. Definitely a recommend. I enjoy this one. I don't like it necessarily as much as Life of the Amazonia and Wondrous Creatures. I think those games are awesome, whereas this one is just pleasant and fun and nice. But still, Bad Comic continues their string of three in a row of games I have enjoyed. So, thanks for watching everybody, and a special thank you to our biggest Patreon supporters, Jay, William MF, Steve Ren, Pedro Lucas, Miles, Casey W, Andrew R, and Chris C. We'll see you at the next