How To Solo: Wingspan - The Mill
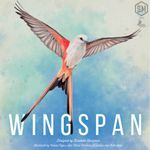
Games in This Video
1 game is featured in this video — it unlocks as you watch.
Transcript
welcome to the mill I am your host Dusty crane today we are going to talk about the automa for wingspan and how to solo this game first let's talk about the components of the automa there are 11 automa cards including an expert level card called the autobond society you would include this card if you want a big challenge or if not go ahead and put it back in the box I'm going to put it back in the Box there's also two action summary cards right here which are in incredibly helpful in remembering what each one of the I guess actions on the automa cards actually mean we also have two end of round scoring cards that tell you what the levels for or the scoring Point levels are for each end of round goal over here and finally we have a current round tracker card which is not mandatory to play the game but it does help you keep track of what round you're in so I always use it let's talk about what the automa does and doesn't do the automa does not get a player mat it does not collect food tokens and it doesn't have to pay for anything it also doesn't benefit from any bird Powers you may activate that would normally give resources to an opponent however the automa does gather birds and eggs but they'll only be used for endgame scoring let's talk about the setup of wingspan solo mode we are going to set up the game basically how you would normally before you give yourself any bonus cards
draw a bonus card for the automa there are some cards that don't apply so let's go ahead and draw a card off the bonus deck Visionary leader all right wait a minute that is one of the band cards some of these cards actually have percentages at the bottom of the card that tell you um how many birds that that goal applies to if there's nothing there or if it is the breeding manager or backyard burer you will not use those cards let's go ahead and draw another one for the atoma there that one's better platform Builder so the bonus for the atoma is birds with a platform Nest um are going to be worth some points however the atoma for endgame scoring is not going to get any points from that bonus card it's just going to help determine how we draw cards later I'll explain when we get to it it is also at this point that you're going to decide what difficulty you're going to play on you can play at eaglet eagle or eagle-eyed Eagle that means for the scoring purposes at the end of the game any face down cards that the atoma has gathered is worth either three four or five points now when you do the setup it is recommended that you use the green goal card but you don't have to but it does represent a core interaction between you and the automa another thing you're going to do is give the automa it's eight action cubes because this game of wingspan belongs to you and you have home field advantage you always go first so let's go ahead and start the game how we would normally um I am going to just kind of simulate my turn so you
won't see me pay for stuff but um I I'll try and make it look as legitimate as possible we're going to sa for my first action I am going to play a bird card I am going to put a blue J out on the out on the mat because it has one of these bold nests and that is part of the goal for round one let's go ahead and start with the automas first turn all right so for its first round and we're only going to do the round that we are in right now so this is the only action we're taking on this turn we are going to play a bird card this is the simulating that the automa actually has a bird card what that's going to do is we're going to look at these three face up cards we're going to look at the goal and since there are benefits for the automa having a platform Nest we're going to take all of the cards here that have a platform Nest which is these two we're going to pick the one that has the highest scoring value which is this one it's going to go face up right here the other one is going to be discarded that is the entire turn for automa let's go ahead and fill this back up and we are on to my turn for my next turn since it is eggs in a bowl and I don't have any other cards that would give me another bowl at this point I'm going to go ahead and play right here to gain two eggs and I'm going to put two eggs on my blue jay onto automas second
turn oh utom is going to gain some eggs too so automa we're just going to put an egg we'll just put it right there and we can see this icon right here means that we are adding a scoring token to the end of round uh bonus now what this means is when we look here at round one we want eggs in a bowl Nest here is the round one and the Run goal so eggs in a bowl Nest would be right here this one so what this means is the automa is already going to start with one egg in a bow nest because that is what that means right there now because we've added this action Cube he actually has two eggs in the bow Nest I've got two eggs in the bow Nest too so right now we are at a tie for endgame goals it is now my turn again I am going to go ahead and play we're going to pretend that I went ahead and paid one of these eggs and I'm going to play another bird into the forest and that goes down there and we are on to Thea's next turn all right so this card right here is to draw cards now that means that we are going to discard all the cards that are up here these are just discarded the atoma is going to add one face down to to its deck and then we are going to go ahead
and reload this tray at the top all right so we just refreshed the um cards up top this icon right here means that the automa has lost one of these endgame goals so for the sake of just thematically it would seem to indicate that he used an egg to pay for something um but now he is back to having just one egg in a nest and I do two so I probably need to on my turn and go ahead and use one of my action tokens to lay more eggs so I get two eggs there I will go ahead and put one again on my bow Nest bring me up to two to lead that scoring and one right there we are back to ooma's turn all right he is going to gain food that's what that icon means um and what you see here is like a little um chart or it it's a key that tells you the order in which it's going to grab gra the food so it's going to start by taking any rats or rodents we don't have any however the second thing it's going to take is fish and so I'm going to go ahead and take all of that food type out of the dice tray and looks like the atoma has gained one of those eggs back this is actually fortus that this is a card that we drew because you'll see some text on this card right here that says remove after round one now there are also cards in the deck the atoma deck that say the remove after after round two or move after round three and
that's part of the maintenance of the atoma deck between rounds let's go ahead and say that I mean and and really aside from one other automa power which is this one right here which says activate all pink cards and you would see it over on this side you take whatever action is on the card let's just go ahead and bring this deck up for the sake of showing it off let's say that um for the next action we did this one right here so we removed some more things from the dice tray and activate all pink powers now what that would do is every pink card you have on your player mat would be activated and you would gain those benefits that right there is really all that it takes to run the automa let me show you the end of round cleanup we're going to go ahead and do the scoring um the automa has um one two eggs in the bird nest I have two we tied for first this is really why that that um this green mat is preferred because your your scoring will grow more I guess diverse if if you're actually competing you know whether you got first place or second place or the automa did um it just it feels more like you're competing against another player because it's not just oh well if I have you know an egg in the nest it's fine if I don't that's fine too like I guess let's get the scoring right here it it represents competing for that
particular goal with another player we got our our end round goals scored this card right here is going to flip over to its other side which round two is now showing we are going to go ahead and refresh this tray as usual put three new cards out and we are going to pick up these auta cards and remember we're going to remove that one that says we're at the end of round one we're going to take that one out all together we're going to pick up the atoma cards we're going to shuffle those around and we're going to flip this over to round two to help us keep track of what we're doing here and set that back down there now in round two we are working towards birds in the grassland right now I have none let's clear this off too we're going to pretend I played a full round we're going to be working in round two I'm going to go ahead and take my first turn we'll say that I played a bird in the grassland cuz I want to be competitive for um for that we're going to play the bird we'll put that up there and then that slides over now on the atom's turn we're going to flip this card over and now we're taking this row of action we're not doing anything up here or these two down here just round two so the the bird feeder there's only only one type of food left so let's go ahead and toss these dice back into the bird tray bird feeder tray we're going
to take care of this dice right here any pink powers that I had on the board I would activate due to that right there that is pretty much how the the game is played with the atoma I'm going to go ahead and just skip ahead now I'm going to simulate an endgame State and we'll get to what happens next
we are at game's end let's talk about how we score the end of the game now we are going to score our board exactly the same as we would normally we would score birds and bonus cards and the end round goals the eggs the food on the cards and any cards that are tucked underneath the atoma however scores things a little bit differently the atoma is going to get points for the end of round goals as usual so in this case it would get four 5 3 and seven seven so those points are exactly the same as ours however these are the cards that the atoma would have played either um by doing the the bird cards getting cards anyway this is what we're going to do the next thing we are going to score is the face up bird cards that they have collected and those cards are worth the numbers the victory Point numbers that are on the actual card so 7633 those are scored at face value these are what you depended on or depending on what you chose for your difficulty level so if you said you playing at normal these are worth Four Points each um if you said you were playing at eaglet which is the easiest these are worth three points each and eagley Eagle are Five Points each finally the automa gets one point for each egg that they have collected so you tally up all those things tally up your mat and the winner is the person with
the most points if you end up with a tie for endgame scoring purposes for tiebreaker purposes the atoma has two leftover food tokens if you have more than that and you've tied you are the winner if not well chalk went up for the automa that is all there is to playing wingspan solo this automa was designed by David Studley and I think he did a fantastic job it is a very easy to run automa it really does feel fair and yet difficult in certain cases I think you know just like anything there's a little bit of card draws and how you mitigate when things aren't going your way but um I would say that I'm maybe about I wouldn't say 50% I think it's it's probably closer to like 40 maybe maybe a little bit lower 33% but um it's it's really easy to run it's a lot of fun to run and I I think it is a great alternative for when you don't have people around to uh play wingspan with so yeah that's it if you have any questions go ahead and let me know in the comments I'd be happy to answer them and that's all I got for you thanks for watching