Lord of the Rings: Fate of the Fellowship Review
Games in This Video
1 game is featured in this video — it unlocks as you watch.
Transcript
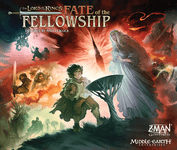
Hey everybody, welcome to Drive-Through Review 812. Today we're going to take a look at Lord of the Rings: Fate of the Fellowship. Uh, this is a brand new game that not quite out at the time of this recording. I believe it comes out September of 2025. Uh, we'll see cuz that date's kind of moved around just a little bit. Uh, this is published by Zman Games and designed by Matt Leok who designed Pandemic and a bunch of other games. And this is in the Pandemic system and there's definitely some similarities and and so on. It's basically the story of Lord of the Rings, all three trilogy, all three of the trilogy, and you'll be taking on the role of Sam and Frodo, Gandalf, Gollum, uh, Aomir, Aragon, Legless, all those people, and elves and dwarves as well.
And um, you know, trying to complete objectives, try to get the ring to Mount Doom and toss the ring into the fiery pit and not lose all hope. Uh the players will lose once hope drops to zero and they will win the game if they put the ring in Mount Doom before that happens as as well as completing at least three other objectives. Uh so the game's cooperative. I will show you a little bit of how the rules work. There's a fine watch and played video out there if you really want the rules details. I always feel silly talking about the rules if there's watch it played video. Um but yeah, we're going to go over the gist of it. I'll talk a little bit about the solo mode, which I've also tried uh during that and uh then we'll come back here and I'll give you my thoughts. Okay, so I've got the board kind of laid out here. This might be what it looks like Midame. I kind of reversed a game that I had played the other day and uh move some pieces around and that's what you're kind of looking at here. Uh you can see the main board, the map of Middle Earth, which is quite busy, which we'll get to that in a minute. And you've got some various decks of cards here and some cards in front of the player as well as some objective cards over on this side. And then also this little dice tower, which is also the uh tower of Sauron. And you've got a couple of different sets of dice down there. And you roll dice through there if you so wish. You can build that up and pack it back into the box. It actually comes apart into three spaces, three pieces. Uh you've got the eye, the kind of central part of the
tower, and the base. Those all just come off and they'll fit right back in the box. No problem. I will say I made a mistake which speaking of watch plate, he also made the same mistake. Can I ask cuz I asked him? I said when I roll the dice they get stuck. And uh he said he made the same mistake because there are two sort of like shelves inside of here. And if you don't point them the right way basically down then they'll be stuck. So I had one that was kind of more like flat and not down. So, they kept getting stuck. Once I took it apart and then fixed it, then no problem. So, I just wanted to mention that because I thought, well, this is really awesome and very sturdy and great and looks awesome and you can pack it back, but my dice are getting stuck. Sucks. But that was my fault because I did not look closely enough at the instructions which are here. And then specifically, I'll just show it to you so you don't run into the same mistake, is let's see, step five is the one step in question.
and just make sure stuff's pointed down. Just double check the picture there. Once I took it apart and took a look, I was like, "Yep, I did that backwards." And uh we go. So, I just want to give that little heads up there. Other than that mistake on my part, this tower is freaking awesome. It's great to just put it over there by Mordor and have it taunt you as it game kicks your ass. So, in front of me here, I've got what would be a solo game setup. So you always play with Froto and Sam, no matter how many players you play with. And if you're playing solo, you'll have four other characters that you play with. And you'll use this token to keep track. So let's say we start the first round, I'll have Aramir and Froto and Sam. So what happens is I'll do four actions with Aamir, one with Froto and Sam. On my next turn, I'll do four actions with Galadriel, one with Froto and Sam. Four actions with Golem, one with Froto and Sam, and so on. Now, typically when you're playing with multiplayer, each player will have two characters. So, let's say I had Airare and Colladrial.
On that case, when it's my turn, I'll take four actions with one character and one action with the other. And I can do the same way, multiple turns. I can flop it back and forth. Four actions this turn with Gladger, four actions next turn with AR, however I want to do it. And that goes for the same player that's playing Froto and Sam. Everybody is going to have a hand of cards, which are going to be face up, which is just like Pandemic. You're going to be using these to take actions and to also spend during actions to like reroll dice or get you out of a jam because they have a couple of things to know here. You've got the little sort of icon and there's four different kinds. You got the swords, the rings, these little like hoods here, these little cloaks, and then also uh these little friendship tokens, these hearts.
And they are also going to have an associated region on the board. So here you can see this one is for Gondor. It's like Swords of Gondor. And then if we take a look at the board here, you can see there's Gondor. So this will have an implication depending if you're playing solo or multiplayer. Sometimes you want to have an action. Uh to take an action, you need to have the card in the region that you're in as well. So that's usually the only time it comes into play there. Most of the time you're just looking at this icon. And it also is like a little sort of flavor text type of thing on the bottom, which is kind of a cute little thing that it has. So, what you're trying to do in this game is not lose hope. Hope will start here at six. If it ever hits zero, done. Game over. Darkness is one and there's no more hope anywhere in the whole universe. It's all gone. To win, you have to complete objectives. Now, if you're playing sort of a normal game, you'll have three objectives plus this objective, which is again to destroy the one ring. If you play, let's see, the legendary game, you could have up to six total objectives. So, in this case, we'd have five plus the one ring. But for your standard game, which is the only game I played, I've not actually played the introductory game even. I just jumped right into standard like a fool, and that's what I did. So, I just played standard. not played heroic or epic or legendary and I don't know if I ever will. One day I might but um so this is what you're trying to do and these will do there's a whole deck of these things
these objectives here shuffle these up and sometimes let's see one of these does say this it will force you to use a character. So it says setup you must use Aamir. So, you're always going to use Froto and Sam because you're always playing to destroy the one ring. And, you know, you could set up, it says set up, use Froto and Sam. So, always using them. And then one of these might force you. Otherwise, you're going to shuffle up the character cards that you have and then draw randomly. Now, of course, you can choose all this. You can choose your objectives. You can choose your characters. If you do get the Gandalf the White, um, this is not one that you actually will start with. This only comes into play um if there's a ballro objective where basically this Gandalf turns into this Gandalf. They're the same. It's just kind of like a little flavor, you know, from the movies and the books and things like that where he becomes a Gandalf the White. And uh the ballro objective will give you like a new ability as well. It'll say it on there. And it comes with like a little token. This is a promo thing that you can get, I think, if you pre-ordered it.
And um so yeah. So you got that there. So that's what you choose there. The other thing to note here, we can see a couple of tokens. These tokens here, you can basically store as many of these as you want. And these are the same icons that are on the cards here. So you're going to be spending these icons either from the cards or from your supply to do different things. So on your turn, you're going to be moving your little screen printed wooden meeples like this. So here's Sam and and Frodo, and you can be moving them around. And that's one of the actions you can do. So for one action you can move and you're going to take four actions like I said with one of your characters and one action with the other. So the very simple one is a travel. You just move. Now travel is a little bit different than in like say normal pandemic. When you travel with your character you can bring along troops. So let's say we had these three elven troops here and we had a Gondor troop there. those little tokens there.
And they're very tiny, which I kind of hated at first, but I kind of like it. See if I can get it to focus. There we go. So, there's a little elven troop. Now, they're very tiny because there's there's a lot of information that needs to happen on this board. So, if there were any bicker, it would be horrible from a game perspective. As it is, it's a little bit fiddly, you know, tiny to pick up, but I think it's fine. So my point with this is when you move, you can take with you any troops that are with you and move them to the next location there. Now you can also take if you have a character with you. Let's say A1 was with Froto and them uh and let's say either Aoan was moving or Froto was moving, you can also in addition to taking the soldiers here, the troops, you can take the other characters with you there. And so that's on your move action, you can bring anybody you want with you. So that's pretty cool. Now the thing to keep in mind is when you move Froto and Sam anytime either if they initiate the move or somebody else is bringing them along with depending on where they move into they're going to roll to search because again this is the eye of Sauron has always moved around the board trying to make you lose hope and that eye is always looking for you. So when you move into a spot, let's just zoom out a little bit here. And you move into a region here that has some of these Naz Ghoul figures. So if Froto moved in here, you say, "Okay, there's two Naz Ghoul." So that means I'm going to have to roll two search dice. But if I moved into a spot here, maybe with a
troop, evil troop, all the these red troops that you see on the board, those are the evil Mordor orcs and things. And I'd have to roll a dice for that. So, in this case, you're going to roll three dice. One for each Naz Ghoul here, and then also one for the the orc or whatever it is that you moved into. Now, normally we do this in the dice tower, but that's too hard to film. So, I'd roll three of these here. So, in this case, if you ever see this this withering tree here, you're going to lose a hope. If you see this one like that with that little border around it, you're going to lose hope unless you moving into a haven which has this little yellow sort of border around it. So if you're in a haven and you roll this then you're safe. If you're not in a haven then you will lose hope. So in this case I'd be losing only one hope because I was in a haven. This side of course is blank which you don't mind seeing. And then you have another one here which is this eye of Sar on there which what that will do is if there is a Nazoul in the region you take one of them and then put him back here over to Mordor where they'll start to collect.
Uh basically as the game goes along and Sarin starts to figure out that Froto is making his way there and then somehow magically all the mechanics start to attract him there which is pretty interesting. So you only have to worry about this when you're moving Frodo. Now Froto moves into somewhere where there are no Nazol or there are no troops in that spot and then he's he's good. You can also avoid the search if you discard a hood or cloak, however you want to call that, whether it's an icon there, a token, or you discard a card. So you can discard that and you will avoid the search altogether. So it's good to have those. Now, speaking of that, the other part of movement, and this is my one sort of like component complaint about the game. I mean, I can see people griping about the size of the soldiers and that kind of stuff, but if you look here, let's just zoom into Mordor because this is where it's really important. You can see we have these little icons here. So, I've got four of those cloaks, two cloaks there.
If we zoom over here a little bit, you can see this one here has a ring. And what that means, those are called special paths. And to move over that, so Froto was here and he was moving across there. To do that, you have to discard a ring card or a ring token. Okay? So that you're going to have to and so like to go across this one, you have to discard four cloaks. And as you can see, as you start to get into Mordor, enemy territory, there's a lot of little paths and things like that that you're going to be going. And these Naz are sort of hiding some of them there. So, as you start to get into Mount Doom, you can see all these cloaks you need to discard. So, you're going to want to store those up to be able to move through there. And what my complaint is is that you start to have a lot of pieces on the board here. You can just kind of lose track visually of what's going on. So, one trick that I have found that works pretty well is you just put a token on the board because you don't usually, you know, you go through these too much. So, I'll put these on the board like so as just kind of a little reminder. Oh, you've got to discard some some cloaks there or here, you know, you'll put a ring on it. And so, somehow that just sticks out a little bit more cuz the other ones kind of get lost. And so, your mileage might vary on that. But that's the trick that I've I've enjoyed using there. Now, the other thing to note about these tokens is how do you get the tokens, right? Cuz one part of the game is that each player has a hand of seven cards. So, you can never have more than seven. Once you draw up uh, you know, above seven,
you've got to discard at that moment. And it's like Pandemic where you're going to be drawing cards from the player deck at the end of your turn. You might get event cards like this that are not just, you know, these icons and might have some text on them. You can play these at any time, even when it's not your turn. And you can play them in like instead of discarding them, that whole thing. But the other thing to keep in mind, the reason I'm telling you this is because again, you're going to need a lot of cloaks here to get through Mordor. And the actual way that you win the game once you've completed these other objectives is discard five rings, whether that's cards or tokens. And so you might be using the rings to reroll some of the dice. So when you roll those search dice, for example, or you roll dice in battle, you can discard a ring and reroll icon you don't like. Or you can also ignore some of those uh lose hope icons by discarding the friendship icon. And so as you start to go through that, then you know, you still possibly want to keep cards at the right time, but then as your hand size limit hits, then what are you going to do? You're just going to end up discarding cards that you'll end up needing later. So what you can do is if you are in a haven like so, so let's say A1 was in the haven. If you're in a haven, you can take a prepare action. If you take a prepare action, you'll discard a card and then get the token for that card. So you can keep your hand size down. Keep those tokens for later when they're actually going to be useful. Now the trick in a solo game is you can only discard cards for prepare action if you're in the matching region. So this
one says Gondor here. So this one I can discard and get a swords cuz I'm in Gondor. But if I was trying to do, you know, this one here, that's not the right region. So can't do that in snow game. Multiplayer game, you can do that. That's that's fine. Now, the twist to that is in a multiplayer game, you can do a fellowship action. That's where you can trade cards like you can in Pandemic. So, for example, here if Aomir was in the same spot as as Ain, then on either turn, you can take or give a card that matches the region here. So, one of these players, depending on who had the card, could take it or give it to the other one, and that could be your fellowship action. Now, there is no fellowship action in the solo because you have one hand of seven cards. So, that goes away. But, it doesn't matter what turn you on. You know, which character you're activating, you can always use the cards you have. So, kind of a give and take there. But, there is that fellowship action to trade cards.
Now, the other thing you can do is you can muster. So, this is how you get troops that you want to move around and have fights. To muster, you look at the icon here. So, for example, this is where you can muster Gond troops, these blue troops like that. And then you just discard a a friendship token, a heart token there or a card and you can summon that. So you don't have to be in a haven. You just have to be in a spot that has that icon. And there'll be other icons like if we go up just a little bit. Here you can see the Roherim, the horse lords. So if you're there, you can you can summon the brown troops. So you can put those there. So it's one troop per card basically or per token. Some characters have special abilities where you can kind of do it for free without paying the cost and so on. Now, one thing to keep in mind is in these havens, one of the ways that players will lose hope is if you know the evil orc troops move in and there are no other troops defending, that's going to immediately turn from a haven into the stronghold of Mordor. You're going to put that token on there like this. And when that happens, you're immediately going to lose three hope.
So, if we take a look at the track here, you can see you start at six. If you lose three hope, bam, you're halfway to losing right there. But you can convert a stronghold back into a haven. Or if you find some other strongholds like Eisenard up here, you can convert that into a haven or replace the stronghold and put it back to a haven. When you do that, you get to you gain to hope. And the way that you do that is you have to be in the in the uh evil stronghold with some troops, at least one troop, and no enemy troops. And then at that point, you can discard three swords, whether it's cards or tokens. And then from there, then you can convert that either back into a haven or into a haven for the first time. And then again, you get the two hope that way. So that is called a capture action. And that's something you're going to want to take care of.
And then the last action you might say is a is an attack. So what's going to happen with an attack is let's say let's say Aamir had just moved into here with you can see he's got three Roherum troops and one Gondor troop and then there's four of the Mordor troops there. So I move in there. That's an action to travel. The next action I might do would be to an attack. And at that point you basically roll one of these attack dice per troop but up to a maximum of three. And you don't have to roll them all either because let's say I've got four here. Let's say I only had one mortar troop to get rid of. I don't probably need all three because what's going to happen is let's say we roll this result. We decided to roll three. So we had this one that's going to remove one mortar troop and one friendly troop. This one will just remove one mortar troop. This one will remove a friendly troop uh but not if you're in a haven. So that's a little bit useful for haven. The other symbol is here. This is you will remove two friendly troops if there is a Naz Ghoul present in that region. So even if I have overwhelming forces, you can still roll and kind of hurt yourself. So you got to be careful with how many dice you roll. And again, you can roll these with the rings. You can also um during the battle just discard swords to just straight up kill the mortar troops on top of what you roll.
And the attacks will work kind of the same way when uh you know the mortar troops move in there. Uh they will always kind of roll their maximum number of dice. So up to the number of of troops there and then again you remove and stuff. Now the only difference really is uh when you initiate attack the eye of Sauron will move to that region. And that's a good thing if you're moving the eye away from the region where Sam and Frodo is because as you go through uh the deck, there's two decks. Again, you have the player cards here, which is just like Pandemic, you know, you draw two at the end of your turn. What can happen in there is you have shuffled in similar to Pandemic. These are these are like an outbreak card where you have the sky darken. So, you're going to increase the threat rate by one, which will basically start to have you draw more of these evil cards here. And then if the eye is in the same region as Frodo, you lose two hope just like that. So, you want to keep the eye off of them. So, if it's not in the same region, it's going to end up moving to the region where he's at anyway. So, and there'll be other cards in here in this deck that will move it. So, you want to try to keep the eye off of Froto. do battles all over the place to keep keep it away from them. And then it'll have you add um three troops to some random spot. And then it will have you reshuffle this deck and put it back on top of that deck just like Pandemic. And then so once the players have done their actions, drawn the two cards, resolve any skies darken, then you're going to
flip a certain number of cards off of this deck depending on where the threat's at. And these do a couple different things here. So if we take a look, this is kind of interesting. So, you flip a card and have a resolve pile and a discard pile. So, I'll flip this up. And there's two parts to the card. You're either going to do the top part or the bottom part. You're going to know which part to do based on the symbol here. So, if the banner is showing, you're going to do the top part, which is just going to basically march troops along one of these lines here. So, the one thing to keep in mind with the game is there's a lot of different pathways that are different colored arrows. And so any troops of Mordor that are along this path from Ner to Helm's Deep, you're going to move one space closer to Helm's Deep. Whereas, if I flip it over here, this one, and the next card is a banner, then you're going to do the bottom part. So, you're not going to march. You're going to add troops and then do some abilities. So, this is going to add a troop to run, which gives you the location there, and then do some other nasty effect that you're going to hate. So, you're going to keep doing that. And there's a couple of special cards that aren't shuffled into the deck at the start.
And you'll use this deck to kind of seed the board with some extra Mordor troops and stuff like that. There is a layout of where stuff is at the start and so on. And then you'll add a few more to kind of randomize it. So that's the gist. You're going to be doing your actions trying to move Froto and Sam down here to Mordor to put the ring in. trying to fight off the different uh hordes that are going to be coming a after you. Not only to move the eye off of Frodo and Sam so they don't just, you know, lose all hope cuz the thing's pestering them, but also to keep your haven safe and convert any um you know, evil strongholds back into havens or into havens at the beginning to, you know, start to gain hope in that way. And then again, complete all your objectives. uh and you have to complete all three of or or more of your randomly drawn objectives and then only then after those are complete then you complete uh destroying the one ring and then that's pretty much the gist. Okay, so that was Fate of the Fellowship.
We'll just jump right into my Pillars of Review. Uh first of all talk about player count. And I've played this one and two player. Uh, I would say as far as player count that I like, it's tricky. I think I'd like it with players more than solo just because of a couple of the rules. Um, for solo, it's a little bit frustrating, like I mentioned in the in the the walkthrough rules part of it, where you can't uh do the prepare action unless you're in a haven, which and I kind of understand why it's there, but it just makes the game it's just like a little bit of an extra hurdle that I don't really want to have to do. Just kind of inconvenient. I'll get to that more why in in a minute. But um and it's I'm really kind of splitting hairs because I kind of do like the solo game.
It's just that rule is kind of a stickler for me. And again, I'm not trying to say like it's a problem or throws the game off or breaks or anything. It's just like my personal sort of reaction to it. And I also uh find the game very difficult and having the extra heads at the table. Although I haven't won it with a group yet. I've only won it solo. So there is that. But in terms of like the kind of information overload, so to speak, um it's better to have I think more heads at the table. And like I can't speak to playing it with five players. I don't know that I'd want to play it with that many because I don't know if I could find that many players that would want to get their teeth kicked in as much as that. So that wouldn't be fun. I don't mind it, but you know, people like to whine and stuff. I like to whine, too. Let's let's be fair. I did whine. I know somebody in my group or friends will call me out about whining about not winning this game. Uh I have won the game one time out of eight plays on standard. I um anyway, so that's the player count. Like, you know, I like it with more players just generally cuz I find it fun to, you know, commiserate and try to defeat Sauron. The play time, I don't know what the box says. Does it have time on here? This probably Oh, here it is. An hour to two and a half hours. Uh yes.
I would say that seems right. I would say you can get a little over two hours because if you're if you're in it for a while, you're probably in good shape. You know, if the game time is short, it probably means cuz you lost kind of quickly. Um I've never seen any like really immediate loss, but you know, the longer you go, like the tide starts to kind of turn towards you. Not like completely, but um so I would say yeah, you're kind of you're in here for like an hour and a half or two hours roughly. And I think once you get used to not only the mechanics of the game, but also like the strategies and things like that, that'll start to come down a little bit. Uh but it can vary, you know, sometimes you can just get, you know, punched right in the eyeball and the game will end. And that can certainly happen with this game. Now, what is this game like? You know, my final pillar of review. Uh well obviously compared to Pandemic and also like Defenders of the Realm a little bit which is based on Pandemic in some ways and also uh you know War of the Ring because it has that kind of dual aspect where you're trying to get March Froto and Sam down to Mount Doom but also kind of fight army things and you know keep troops back and keep keep uh flanks taken care of and not leave any openings for mortar to come in and slaughter you and that kind of stuff.
And uh yeah, so it kind of has a War of the Ring vibe, but a co-op vibe to it. So, I will say this, I've said this a couple of times during the review here, that is it is difficult. And I'm either dumb or bad at the game or the game is difficult. I've talked to most of the people I've talked to has said it's it's definitely on the difficult side. I had a couple people tell me said, "I don't know what you're talking about. It's super easy." And I'm like, "Hm." Okay. So now again I not played introductory game cuz I was like oh I played pandemic you know dozens several dozen times and I was like I'm not doing you know intro stuff you know and so I went right to standard and I've won it once out of the eight times I've played it. Um I will say this I think this is this is like the the headline if you want to take it away from this review is I really enjoy this game. I don't mind getting my ass kicked.
I think it's, you know, it's a good level of difficulty. I think it's a it's the right amount of difficulty because this is not I mean this is like the you're fighting for like the soul of this universe, right? In a way um good versus evil like in the most like primal sense, you know, that's kind of what these books and everything sort of evokes. And you know, it shouldn't be hard, right? It shouldn't just be a cakewalk. This is not a fairy tale. uh although it is in a lot of ways, you know, but it it's a difficult fairy tale in a way. And so I think that's good. The one thing that I've kind of come around on, but I think others could, you know, rightly or wrongly not appreciate about the game. And to me, it comes down to every single action that you do basically you need cards for. other than travel, but sometimes you need uh cards or or tokens for the travel and you know even like mustering troops.
Now there are certain characters that you don't need to spend an icon for like to muster troops. So with um I believe it was uh no it was Arwin that you can summon elves without troops and with Gimy you can summon dwarf troops without icons and stuff like that. So that makes it difficult unless you have a character like that to summon troops. And sometimes you really need to get some troops out there because you know a horde of these orcs is coming right down one of these lines and they're going to ransack all your havens or you know you get to the point where you really need some swords for example to capture and all that which is fine. Like I I I don't think that's like a huge issue. I mean you have that same thing with pidemic.
you need to draw the right card so you can cure the diseases, all that kind of thing. So that that sort of like established, you know, board game mechanical lore, right? But there's something about it in this case where it's like, man, I had a turn with, let's say, Galadriel and whoever, and there wasn't really much we could do at all. There was nothing to do. You just there was you just didn't you needed a card to do something like, "Oh, I could have moved her around or something. And you know, most of the characters have special abilities that you can do, but there are enough turns that it's noticeable that you just cannot do a thing, whatever that thing might be, there's nothing worth doing on a turn, you know, and even with two characters in play.
So that is not a deal breaker for me because there's enough going on in the game and there's enough going on in the rest of the game that you know when you have those turns and they're like they feel bad. Let's be I say that okay this sucks because I really need to do a thing and we're going to lose and I can't do anything even if it wasn't something that would directly stop this loss that I can see staring me down. So that's that's a that could be a problem. Uh, but you know, I've played this eight times now and I've sort of found to kind of work my way through and around certain things and learn from my losses and learn certain things about how the troops kind of form and march and where they seem to kind of like to spawn and where they like to march from and how to sort of control what the characters are doing because, you know, you need to get you need to sort of help guide Froto and Sam down to Mordor and get all that stuff taken care But you don't want to like forget about the rest of Middle Earth behind you because, you know, Sauron will pop up troops behind you and you'll be like, "Oh, they're just going to run right through the Shire or through Rivendell or whatever and just, you know, flip all the havens into strongholds and you've lost all your hope even though you're really close to victory." That kind of thing. So, um, but again, sometimes you can get in a situation where it's like, well, even if I could do something or even if I wanted to do something, let's say I couldn't do it, cuz it's just not the game's not giving me the options to do that, which again, I think is okay in
this kind of game. It's just I wish there was like some other action that you could just kind of do like drawing a card wouldn't work because, you know, the way the deck works, but something like that. That's my only kind of like minor sort of criticism with it. Um, that being said, like I said, I I lost seven times and I was getting discouraged and frustrated by it, but it was like I kept kind of coming back for more cuz I kind of like learned a little bit from each loss and kind of seeing the interesting ways that things kind of work out. And the the other side of that, the whole other side of the and this is why I'm getting back to my initial sort of why I like multiplayer over solitire is the prepare action because that's such a cool part of the game because you know at the very very very end you're going to need a lot of the little ho hoods or cloaks to get through Mordor into Mount Doom. You got to have those and you got to have the five rings to, you know, take the action to dump the ring into the volcano.
So, you have to take time preparing and you and I really like that sort of it it's such a simple just, you know, really basic action. Discard a card to get a token and to keep yourself from hitting your hand limit and also just to kind of bury stuff for later. And it's like it's almost like this weird introspective little um time that the characters are having on this this, you know, larger than life journey. is like I got to make sure that I'm in I'm I'm in good like mental physical shape to take on whatever the next challenge is so I can spend a little time. So it's almost like a little rest action in a way. Um and it's very very important that you do that from the beginning. But the thing is with the solo game like you have to be in the region to prepare and stuff like that. So it again you can work around it and like I said the only time I've won the game is solo but that's where that's if you had to ask me cuz I like just being able to prepare wherever you know cuz I'm like I know I need this and it sucks to have like a hand of cards you're like well even if I wanted to prepare I couldn't you know which is it's more pronounced in the solo game that whole aspect. So anyway, that kind of loops back around full circle to why I would say let's play with more players.
But uh the one last thing I'll leave with as a positive note is it's very interesting how the game sort of organically seems to eb and flow with where the Nazoulool kind of move around where the troops sort of spawn and the different sort of paths they take where they can kind of go out one way and kind of come back in and go back down a different colored arrow on the board and that kind of stuff. and how to sort of time, you know, trying to get the eye to move around to different regions so it's not focused on Froto because I mean that'll just drill you if you don't just take care of that eye. Um, and then the way that the different objectives will make you kind of play the game out a little bit differently. Um, and it adds like a real kind of cinematic, you know, narrative uh, plot kind of driven stuff to go going on in the game and and things like that. So having that objective stuff is is really really a neat part of it and you know presents itself a new challenge. Um and again having the different characters um you know the game that I won with I had Froto and Sam obviously had Aamir and Ain and I did have kind of two sort of Roherum focused objectives in that game. So I think that made a game probably a little bit easier on that side. Then I also had Galadriel who allows you to go fish out extra event cards that are not even shuffled in the deck. You go from outside the game, get those in. Those came in huge.
And then Gollum, who was kind of a dead character cuz I couldn't get him to move with Froto and Sam. He's really works well when he's, you know, traveling with them, but he's able to fish out those cloak cards out of the discard pile. So that was kind of the the landscape of what I had there. And that's where the real fun of the game comes in is sort of, you know, playing around with the objectives and also with the characters and and seeing uh tailoring the game. And if you watched my channel in the past, you know, I've made mention of this before where I like a system that can be kind of plugandplay where you can kind of modulize. Is that a word? Modulize. Modularize. I think that's the right word. Um things so you can play with the objectives. So the game tells you, you know, randomly shuffle the objectives, take random characters, but you know, whatever. You can you can set up how you want and so you can you can play a certain way and you can I don't I don't know how you're going to beat like legendary or whatever, but maybe if you get really good at the game and you can set up a real epic thing cuz like I really want the objective with the ballro to turn into um the the white wizard and all that stuff and just to have that cuz that's just a cool part of the story where Gandalf comes back to life and he's like he's the he's the same person, different person, you know, you don't know. Um, and you can add in some of your favorite moments, you know, from the books to the movies and then play a big epic thing. Uh, so it's cool. It has all those little little things to plug and play there. Um, but anyway, I recommend the game, but just caveat it that, you know, it will it will punch
your face in and uh it will seem probably at times like it's just like this sucks because I can't do anything even if there was something, you know, there's like nothing to do that whole thing. But again, I I gave it like eight tries because I was like, man, I keep coming back to this because there was a point that I was like, man, I don't I don't even want to review this game. I don't want to talk about this game. I don't want to give it a negative review because everybody seems to like it and I don't want to hear their bull crap about I'm dumb, you know? I don't want any of that. I don't care. I was like, I'm just not going to talk about it. And I was like, man, but I still like, you know, like it kept taunting me, you little sucker. and um and I finally beat it and now I'm like really love the game which is you know what is that what kind of biases kind of reviewer bias nonsense is that he likes it cuz he finally won it anyway I had fun with it but I think it's I think it's difficult and tricky sometimes and uh but it's fun you know if you don't mind tough stuff then it's cool I I recommend it so thanks