Terminus - Learn While Playing
Games in This Video
1 game is featured in this video — it unlocks as you watch.
Transcript
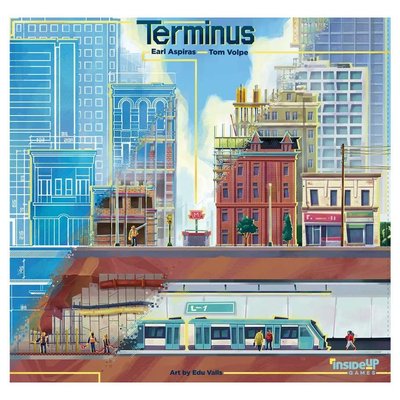
welcome to the Jung its games tutorial for Terminus in this video I'll be teaching you the rules to the game as it's being played and I'll be showing you one out of three rounds today now before I go into that I would like to ask that if you enjoy this video that you please click the like button for it down below as well as the Subscribe button for the channel in addition to that if you'd like to directly support the channel and gain access to a wide variety of exclusive perks then please go to patreon.comes some of those include watching my dozens of opinions episodes where I go in depth about the things I like and don't like about all the games that I'm playing recently also I give my updated thoughts as I continue to play those games in addition to that you can get access to some videos early and advertisement free and get access to an exclusive podcast feed where you can hear audio versions of all of the Vlogs that I make including those opinions episodes I mentioned before now the last thing I'd like to ask is if while you're watching this video you see some part of the game that jumps out to you as particularly interesting then please comment about that down below because I'd love to see that kind of feedback alright let's jump into the game out here we have the game fully set up and ready to play for our three different players now before I start I would like to ask that you please turn on the Klingon subtitles I might make mistakes as I'm showing you the game and those will let me put Corrections on the screen where you should be able to see them and I will also put Corrections below this video in the top comment one other thing to point out is that today I'm filming with a prototype version of the game that means the art and components that you see here won't necessarily match those in the final version well let's start things off with a brief overview of the game in it each player is in charge of a Transit company and each one of us is going to be constructing our own subway line through
the city the goal of the game is to gain as much Prestige as we can for our specific Transit company as we are doing this and in order to do these things we're going to be moving our actions around this Loop each time we stop at a space going clockwise we're going to perform an action there and once all players have gone around this loop three times the year will end and we'll move it into the next year and then do that again the game takes place over three full gears and at that point point the player with the most prestige will be the winner now in order to actually perform this construction players are going to have to acquire various resources they will also be able to build out various developments onto the board which will give them new action opportunities and they're going to work towards long-term plans and agendas that we have in front of ourselves we can also upgrade our specific boards giving us asymmetric effects and on top of this we're gonna have to plan well to make sure we have things in the right order as we proceed around this Loop so that we can actually build out those lines now I'll be explaining how all of these things work in detail while we're playing and on that note I think let's start playing the game for today's tutorial we are going to play as the purple player right over here and we can now start the first year off with the annual income phase this phase is split into multiple steps and the first step involves each player simultaneously choosing a bonus the bonuses are listed along the top of our boards and we all have the same options and again this is simultaneous now there's no penalty or benefit for choosing the same bonus as somebody else and again we are all thinking about this at the same time we've decided to go for this first one the yellow player is going to go for the
last one and red is going to go for this one right here after making these selections we then take the associated benefits the one that we chose is going to give us access to one rail token so we can take that from off to the side and put it onto our board that means that this is a piece of rail that we have to build out onto the map and we're definitely going to need more than one in order to start building our Subway but having one is certainly a good start now the other thing we're going to get is two documents documents are one of the four different types of resources in the game and whenever you take any resource you take them from the farthest left column so we're going to take these two here and normally you have to pay to take these resources when you perform these actions but when you gain resources from bonuses like what we're doing right now you get them for free so we can take these two and then we'll put them onto our player board into our storage as you can see we can hold a maximum of eight resources of any type and if we ever go over that we simply have to discard down until we have eight and we store them right over here we've taken our bonuses and red will now take theirs they've decided to take two engineering and one construction resource the engineering come from here and construction comes from over there finally the yellow player decided to start with four pieces of rail on their Board and they'll also start with two construction so they'll take the construction from here and now it's time to move on to gaining our annual budget now the way this works is everyone will collect money equal to the rightmost empty spot on their station track and at the start of the game that's going to be 12 money for each player this money will come from the supply and we can simply store it on
our player boards after this it would be time for us to gain our turn order bonuses now this is the turn order for the game and we're going to be starting things off but you don't gain any bonuses from here in the first year once we're in the second or third years when we are doing our annual income we will also gain the bonus indicated above our tokens and as you can see the number of spots is going to vary with the player count if this is a five player game all of these would be available and players would get these bonuses which involve gaining resources and or money now once again we don't gain this in the first year of the game and we've now finished the annual income phase now it's time for us to move into the actions phase and the way this works is going in this player Order each player is going to move their action token around the action Loop stop on a specific spot and then perform one action option at that location now as I said we are the purple player and the turn order is dictated by this card now this is going to be the first player that'll be second and that will be third which means we are the first player and we can now perform the first Loop action of the game so let's focus out now as you can see this action Loop has six different spots that we can stop at and as we are taking our turn we can go as far as we want to around the loop in fact we could go around multiple times on the same turn although that's generally not going to be a good idea the reason for that is because every time we cross over this section we have to lower our tracker down once and that tracks just how many Loops we've done once we've gone around three full times
this will be at the bottom and we'll then pull this token off and we don't perform any more actions for the rest of this year so the farther we go on each one of our turns means the less actions we'll do overall in the year with that in mind I think we'll go as slow as possible and stop right over here in the development Zone after doing this we must perform exactly one action from the available options over here we can see this is the development Zone icon and going out from it we have these lines which show us the various action options some of these actions are shared with other zones for example this action over here and that one there whereas this one is only reachable when you stop at the development zone now some of these actions have a cost for example this one costs one document and that one costs one power whereas others don't have a cost at all like this one over here now again we have to choose one of these and I think we want to choose this action here which lets us put a development onto the board now there is a cost we have to pay one document in order to do this fortunately we planned ahead knowing we wanted to do this in fact we have two documents so we're going to spend one of these from our board and then we're going to place it back into the supply and whenever you do this you have to put it into the rightmost empty spot so we'll put it right over there after paying this cost we can now do the action and that lets us take any one of these development tiles and we'll place it onto the board along with one of our lobbyists now the number of tiles out here varies with the player count in the three player game we have four of each of the green red and blue color development options these were taken randomly from a larger subset of tiles
and these are the only ones we'll have available to us in this play and I think the one that we want to go with is this one now we have to place this development down into the city into an empty block now a block is defined as the area between four spots where stations can go those spots have circles on them so this is a block that is a block and as you can see there are many blocks out here now when we place this down there has to be at least some part of the block that matches up with this color this is blue and when we put it down it has to be adjacent to one of our stations and this right here is our primary Hub now this also counts as a station so we have to place this either here here here or there but since this must go into a block that has at least some blue in it we cannot place it over here I also want to mention that it can only go into an empty spot so there can't be a development there already also there can't be any amount of track on that specific spot because that would block the development going down now I think we're going to place this right over here there is a little bit of blue so that is going to satisfy the condition and I do want to point out that every one of these developments had a random demand tile placed on them this one is blue on a blue development but that's just a coincidence as you can see the random demand tiles do not always match up now these demand tiles are associated with various districts on the board the color of that demanded tile helps point out which district it is but as you can see there are two blue districts but then it says th which matches up with tarragon Hills so that means this demand is associated with this area and that means this demand can
be satisfied by a player that builds a station over there that means we have a little bit of an incentive to do that and I'll explain how demand Works later on now after we place a development tile down we have to take one of our eight lobbyists and that's going to be placed directly on top of that tile this means we now have access to the effect on this tile and this is going to give us a new action opportunity when we go to the action Loop spot that matches up with the icon this development is associated with the build Zone on the action Loop and I'll explain how this works in more detail later on alright that's finished our action and that means our turn is done so we can go back over here and see that red gets to go next and they've decided to start by moving all the way over to the Improvement zone for their first turn of the game over here there are just two action options and both of them cost money this one down here would let them pick up new engineering resources and that one over there lets them purchase an upgrade it looks like the upgrade is what they want to do let's focus in a little more and as you can see there are six different upgrade types in a three player game there are two of each of these upgrades so when we look underneath you can see those match and the red player can purchase any of these you're not allowed to have two of the same type but of course this is the first upgrade they're grabbing and it appears that they want this upgrade here now in order to pay for this they have to spend the resources associated with that spot on their board the first upgraded player gets is going to cost two money and then the second upgraded player gets costs two money as well as one engineering resource players can only have two upgrades in the entire game once you have these two you're not
allowed to perform the action anymore which means you are locked into those decisions now this means they do have to spend two of their money back to the supply and they now have access to this effect for the rest of the game now that effect says every time they perform an action that requires the construction resource they always act as if they had one more of that resource now you may be wondering what's up with these two upgrade slots down here those are special upgrade trades associated with specific tiles that players start with and you gain access to these upgrades by moving your capacity token down the station line and I'll explain how that works in more detail later on well red is done and that means yellow can now take their turn and it looks like they've decided to also skip forward to the Improvement Zone and I do want to mention that as they enter this area there is no effect due to there being an opposing token there already any number of player tokens can be in an action zone now of course yellow has to choose one of these two options and while they like the idea of those upgrades they would really like some engineering resources so they're going to do this action instead now what this means is they can buy as many engineering resources as they want they simply have to pay the money that's on top of that column and they have to purchase from the left to the right which makes sense because that's the order they go from cheaper to more expensive after thinking this through yellow has decided they're going to spend seven money in order to buy four of these engineering resources that is one two three or five six seven that's pretty expensive but they're gonna have access to these for a while and they figure that means they don't have to
stop here to perform this action again for a while as well that also means that the next person stop over here to buy some engineering resources we'll have to spend three money per Cube and as the purple player we too kind of need some engineering resources so that's not great news for us either way yellow has spent this seven money and now they can place those resources into their storage they only have two more empty slots in their storage all right yellow's turn is done which means it's back to us and as I said we do kind of need some engineering resources they are mandatory if we want to build some stations although we don't necessarily need to pick them up immediately I think maybe what we'll do is move over here and we're going to skip over this zone for the moment it does some really good stuff for getting points for us but on this first loop around I don't think it makes sense to stop and I'll explain what this is going to do in more detail later on so we're going to go over here and I think we're going to be purchasing an upgrade and perhaps the next time we come back around here someone will have spent some of those engineering resources which would put some cheaper ones back into the market so we can now take one of these upgrades now these provide some pretty great benefits for us throughout the game this one over here adds a flexibility with our lobbyists out there on developments this one right here will give us a rebate for some of the money that we spend on actions that one over there essentially lets us place a lobbyist onto an open block on the board and get some extra money when we or somebody else builds there that one right there gives us some flexibility that says once per transaction we can spend a document
engineering or power Resource as if it's one of any of these types including construction and lastly this one says once per year we can flip this over to gain an entire extra action from any of the loop zones the ones I'm pulled to the most in this moment are these two this one says every time we spend money we take one of that money and we put it onto this upgrade and then when we start the next year we'll gain all of the money over here so we wouldn't gain access to it until the start of our second year but every time we spent money we'd bank one of that money and get it back later on that does seem pretty nice but the flexibility to spend certain resources as other resources also seems great as I mentioned those engineering resources just got really expensive so perhaps we can take this and then buy some cheap documents or power and then we can spend one of those as if it was engineering essentially getting around that expensive resource issue yeah I think I like the flexibility of this one so let's grab it and then of course this is the first upgrade we have so that's going to cost us two money all right we are done which means the red player can go and they've decided to move forward one step over to the market Zone once there they have to choose one of these two actions and they work just the same as this action over here where we purchased engineering resources over on this side you can spend money to buy documents and on that side you can spend money to gain power I do want to mention that if you want to purchase a resource there must be some there if there is none of that resource cube in one of these spots then you obviously can't buy any of it now red has decided they'd
like to buy documents and in particular they're going to buy three of them these first two will cost one money each and the third one will cost two money so that's going to cost them for money total they still had 10 money so they're going to spend four of that which leaves them with six left over now obviously I don't love seeing that because the cheap ones just got purchased as you can see by us stopping over here and putting a development down we're seeing the cheap resources being purchased in front of us hopefully our decisions in the past will end up being worth it but either way red is done with their turn which means that yellow now gets to go after thinking through their options they're going to do just what red did and they're going to pay more money for it they're going to stop here at the market and they also want documents currently they don't have any and they are going to purchase two of them that is going to be two money each so they're going to spend for money for these and as you can see they now have eight resources total so they are at their cap and after they spend this money they only have one remaining after yellow is done we get to go and I think we're just going to be following our opponents over here to the market but let's buy two power instead of buying documents the documents are very expensive at three money each whereas the power is still very cheap at one money each for the first two and I think we're just gonna buy these first two before they get more expense Now power is a great resource to have generally and it's even better for us considering we can spend it as if it was one of these other ones so with this flexibility these power could be documents or engineering or construction we can only do this once per transaction
but I still think this is worth it we do have to spend our two money though and that's going to finish our turn so red gets to go again and they've decided to move just one space over here into the materials zone now as you can see there are three different action options over here this one is actually shared with the building Zone and out of these they've decided to go with this one here that says they can spend Construction in order to move their capacity marker over currently red has one construction here but remember they always have an extra construction every time they do anything that costs construction so they effectively have two of these and they've decided they're going to spend this and then obviously spend this one here which they don't actually need a token for so they are functionally spending to construction and with this they can move their capacity over two times now some of the spots along this track also cost power they didn't quite get to that level just yet and the reason they're moving this over is because when you go to build stations out onto the map you can only play stations down that are to the left of your capacity marker so before they moved this over they actually couldn't put any stations down at all now they have a couple of stations that they could place at some point in the future this cube is then going to be added into that supply and that finished Red's turn this means yellow can go and currently they have eight resources which means they have no space for any others they've decided to come here and do the same thing that the red player did yellow has two construction and they're going to spend both of those in order to increase their capacity twice and then of course these will go back onto the board and they now have two spaces for
other resources those get placed back onto the board and that finished yellow's turn now so far we've been unhappy that we're behind our opponents they were buying a lot of cheap resources that we kind of wanted however sometimes being at the back is good and this is one of those times let's move forward to the materials Zone and currently we don't have any construction to spend so let's get some now when we acquire construction it doesn't actually cost money instead we take all of the construction in the leftmost column what that means is if we had done this on the previous turn and jumped ahead we would have only gained one Cube but because both of our opponents spent their construction before we got here this leftmost column filled up and for a single action and no money we gain all four of these now of course our opponents could see that coming but they felt like it still made sense for them to spend the resource versus when they did and obviously we're pretty happy about that so we can place these onto our board and just like that we only have one spot left in our storage now it is true that our flexible upgrade cannot use construction to turn into anything else but we'll still definitely find ways to spend this we need to move our capacity marker up as well and as we've seen that does cost these we also want to dig Subways out in the city which does cost construction resources well we're done so that means red can go and they've decided to move one space forward into the building Zone and once here there are three options they can choose two of them are shared with other zones and they've decided to perform this action here which is shared with the materials Zone this action lets them
purchase rail tokens that they can then put onto their board which means they can use them in the future now whenever you purchase this action you spend a variable amount of money and you will gain a variable amount of these rail tokens now you can purchase from any of these rows as many times as you want for example they could spend three money and five money which would be eight money total in order to gain nine of those rails in this case though the red player currently has six money and they've decided to spend five in order to get six rails so they'll spend that to the supply and then take these and put them onto their board this means they now have rails ready to dig out into the City and they have stations that they can put down into the city so they are well on their way to actually digging out their Subway all right let's finish Red's turn which means yellow can go and yellow is gonna actually bypass the entire building area they took four rail as their bonus for this round so they don't really feel a need to stop here and buy rail they actually only have one money so they couldn't even buy rail even if they wanted to they don't have the resources necessary to dig out just yet in particular they need construction for that and they don't have any power to do this action so yeah they're going to move right on past and as they go by this spot they're going to move their Loop tracker down once that shows them that they've completed one full loop and you can only complete at most three Loops within each of the games three years now they can keep on going as far as they want they've decided to stop here and they are going to spend one of their two documents in order to place a
development onto the board that document will be placed back into the market and then they're going to take this development here that is a blue development and they've decided to place it right over here that went over a piece of blue and it is adjacent to one of their stations after that they have to put a lobbyist down on top of it and they've gained a new action option when they go to the materials Zone this one in particular says they immediately gain money equal to two times the number of empty spaces in the rightmost construction column that has at least one construction token in it and then they take all construction from that column so essentially they get paid money for the construction cubes that they are not Gathering because somebody else took them of course if the rightmost column is full they'll just get a bunch of construction and not gain any extra money all right yellow's turn is done which means we can go and let's move one space forward to the building Zone and then instead of doing any of these actions let's finally activate the action on the development we picked up on our first action of the game now we can see that icon matches the building Zone icon and again that means because we have a lobbyist here this is a new action option for us and as you can see it's simply a more efficient way to spend our money to gain more rail tokens we can spend three four or five money to get four six or eight rail which is much more efficient than spending two three or five money to get one three or six now we don't need a rail but that is the most efficient way to activate this action and we only get so many actions in the game so I think let's spend five
money to get that eight rail as you can see we could spend three money to get four but for two extra money we are doubling the amount of rail we get access to and this means we won't have to perform a rail purchase action for quite a while in the game so yeah let's spend five money which leaves us with three remaining and we get eight more Rail and we already had one so we have nine rail total which is definitely gonna do us for quite some time I do want to mention that players have only 32 rail total and if you've taken all of it then you can't actually get any more also there is no limit to the amount of rail you could have purchased on your board we've maybe over committed but either way we're going to stick with our decisions all right we are done which means red can go and no matter how far they move they're gonna have to move their lap token down because they're at the very end of the loop currently they have three documents and they think it makes sense to stop over here and place a development down as well of course as they cross over here their lap token will go down once then they can spend one of the three documents that they have and they've decided to take this green development they must place this adjacent to one of their stations on an empty block they're gonna go here and then they'll Place one of their lobbyists on top of it now this gives them a new action option when they visit the lobbying Zone and that lets them permanently remove one of their eight lobbyists in order to gain six money now again you only have eight lobbyists for the entire game and they're useful not only for activating actions out here but also for getting points from agendas and plans and I'll be talking about those
soon but it looks like the red player is planning on losing at least one of these to gain some extra funds in the short term all right red is done which means that yellow gets to go currently yellow has one money one document and four engineering they're feeling like maybe they over committed especially buying that fourth one but what this means is two out of these three options do require a document but they want to save that document for a build action which we'll see soon so they've decided they're going to cross over the lobbying action spot and then over here they don't have enough money for an upgrade or for more of these engineering resources with only one money that means they're gonna have to skip past to here one money isn't going to afford either of these options so they found themselves all the way over here passing through three different zones without stopping now over here they've decided they are going to gain construction this means they'll gain everything from the leftmost column and this means they get all of these although they are a little unhappy that maybe there wasn't just three in there instead of four obviously every Gap in that rightmost row that has at least one of these would be worth two money to them and they do really want money but they're also not feeling too bad about gaining all of these construction although technically they can't even hold all of it they only have three spots so they could get rid of one of these but considering they invested money in these engineering resources they've decided they're just going to take these three construction and this last one will have to go back onto the board so that'll go there and I suppose for the yellow player if by the time they make it back over here there are
three empty spots then they'd get six money for this location so maybe that'll work out for them we'll just have to see how the timing goes well yellow is done which means we can go and as you can see yellow has almost lapped us over here but it's now time for us to move we have one permit so we could stop over here but much like the yellow player I think we want to save that permit for this right over here so that we can build out our Subway one thing I would like more of are these engineering resources now we only have three money so we could only buy one of these right now which does not feel terribly good although if we want to try and stall out and wait for maybe yellow to spend some of those engineering resources we need to do something else that is before this now we could stop here or here I suppose both of these locations give us access to this action which does not cost anything now specifically this action lets us move one of our lobbyists from any one of these three spots to any of those three spots these spots in particular are our player board agenda cards and developments so we could use this to place lobbyists onto other developments that are already on the board and that will give us access to their benefits but in order to do that we have to have a station adjacent to that development and right now these are the only two we can Target and obviously they are not adjacent to any of our stations nobody has expanded out just yet with our Subways although I think that's going to be happening very soon now we haven't talked about agendas just yet we can gain agendas from this lobbying Zone and we all start with a hidden agenda from our opponents and I
think I'll talk about these in more detail later on let's not stall I think let's head right over here we currently have seven resources we only have one slot anyway so spending this action to buy one engineering resource while it doesn't feel great is I think still going to be worth it to us as you can see the cheapest one costs three money so we're gonna spend all three of our money and we are full of resources and we have no money at all also since we went from here over there we crossed over the spot which will move our Loop tracker down once alright it's time for red to go and they're going to visit the lobbying zone for the first time in the game now this Zone gives them access to the action that lets them move a lobbyist around they could also go here spend a document in order to gain an agenda which gives ways to score points or they can go here spend a document and place lobbyists down onto these face up plans which are another way to get a bunch of points now they've decided they're not actually going to do any of these things instead they're going to activate this development now that of course matches up with the lobbying Zone in this sense they have to take one of their lobbyists from their area and permanently remove it from the game but then they gained six money losing lobbyists does mean they'll have less flexibility to gain access to those effects from other developments as we go and less access to ways to get points for those plans and agendas near the end of the game but for now they think having some money in the early stages of the game is going to be worth it as they try to build out their infrastructure alright red is done which means yellow can go and they've decided to do the first Subway construction action of the game this action is over here and as you can
see it costs one document and two construction resources and then they can place as many rail tokens down into the city as they have available on their player board now there is a catch here and that is that every time those rail tokens meet up with an empty station spot they have to spend one engineering resource and then they have to put a station down as long of course as it is to the left of their capacity marker so they have to start by spending the two construction as well as this one document and then those will go back into the supply after that we can see they have four rail in their area these are the four they got from this bonus at the very start of the game now they're going to begin by putting two of these out and again the number of these that they put out is not dictated by the amount of resources that they spent but they are limited by the stations that they can put down every station they place is going to cost them one engineering resource although they invested maybe too heavily in getting those so they have four available now let's focus over here on the city and in particular on their primary Hub now this is their starting station and it is also their terminates now you have to build out from your Terminus and as you do this you're going to place these rail tokens down until you reach either an empty spot for a station or a spot that has an opposing station on it now in this case that spot is empty and they must place a station here if they could not place a station here either because they don't have the engineering resource or because they don't have the capacity then they would not even be able to build the track towards that location fortunately for them they do so they can put these
two here and then spend one engineering resource to place their leftmost station down again as long as it is to the left of their capacity marker that engineering resource will go back into the supply and then they're going to place their station right here now at this point that is their new Terminus when you build out your Subway you only go in One Direction so if they want to keep building they must build out from this spot they cannot build out from their primary Hub there is a way to build from both ends and that comes from one of these special upgrades that we have on our board and I'll explain how that works later on now they can continue to build if they want to and of course this is the Terminus so they have to build out from here they currently have two rail left over more than enough engineering resources and a station to the left of their capacity marker so they're going to do just this they're going to put one more station down which is going to cost them one engineering resource which will go back into the supply after that they have to put these rail tokens down and as you can see they can't actually build like this because they would need three tokens to make it to this spot here so there are options to put the station down are going here there or there and then putting a station down and they've decided they're going to do this so I'm this has become their new Terminus and again it's easy to tell because your primary station is technically a hub and it's twice as tall as the other tokens it is possible to make other hubs by stacking tokens on top of each other and I'll explain how that works later on but either way they can now see that this is their new Terminus so the next time they build they will build out from here at this
point they've run out of rail and stations available to them so this is going to stop their building action and I do want to point out that by removing these stations they've increased their annual budget by two at the start of the next year and of course that could go even more if they find a way to move this over and get more of these stations out before the next year starts well yellow is done which means it's time for us to go and we are just about ready to start digging our own Subway the problem is we have not increased our capacity just yet so I think that is what we're going to do we currently don't have any money so there's no reason to stop over here anyway once here let's activate this action which lets us spend our construction to increase our capacity and as you can see we have for construction now technically we could have five construction if we wanted because we can spend one of our other resources that are not construction as one construction again we can only do this once now if we were to do that we go one two three four five all the way over here which would be a very efficient action for us however once we reached this spot we'd have to spend our other energy in order to pay for that extra cost as you can see those energy costs get more frequent as we go farther down the track I don't think it makes sense to spend this energy for that but one thing we could do is spend all four of these to go one two three four now once we reach this spot here that would immediately unlock one of our two special upgrades you can see there are two of them down here and that's because once the capacity marker reaches this second one over there that's when we'd gain the other one now these upgrades
directly match up with the icon that we see on our board and we get to choose either one when we reach the first one and obviously the second one we'll put the new one down these upgrades are good the first one would let us build hubs now essentially that means when we do construction actions instead of placing stations down onto empty spots on the board we could stack one of our station tokens on top of another one of our station tokens we can't stack on top of anybody else's and the main reason to do this involves end game scoring when you have hubs they score more points for being adjacent to developments and I'll explain how that works later on but also there are agendas that can have something to do with this for example we got this one at the start of the game none of our opponents can see it but we can and it says that for us hubs within the old cross and Knight Bridge districts which are these two right here are going to be worth extra points to us depending on the number of hubs we have in those spots so we are certainly motivated to start placing more hubs down onto the board as we go and if we have this that also means we could put stations down again spending those engineering resources but not needing to spend a bunch of rail in order to do that we currently don't have much in the way of engineering and we have a bunch of rail so I don't think that is an upgrade we desperately need anytime soon but considering we have this agenda I do think it's likely to be the first one of these special upgrades we'd get the other one would let us get a second Terminus specifically that would let us build off of both ends of our Subway having the second Terminus start at our primary Hub and then we could work out and when you construct you could construct from both ends that
flexibility is certainly nice but for now I don't think we desperately need either of these so it does not make sense to Sprint all the way over to this spot here currently we only have one engineering token although we do have the ability over here which could turn one of these into engineering so technically the most stations we can add to the board is going to be two and of course in order to construct we need two construction resources so I think the decision is actually a little obvious for us in this moment let's spend these two to move the token forward twice getting us to capacity and that leaves us with everything that we need to construct on our next turn so let's place these back into the materials Zone and now it's time for red to go currently red is over here and they've got seven money because they utilized that development that they picked up because of this they don't feel the need to rush around in fact they've decided to head over here to the Improvement Zone once here they've decided to purchase their second upgrade of the game and they're going to take this one now this is going to cost them two money and one of their engineering resources and this is also the last of these upgrades they can get for the entire game they figure getting access to both of these relatively early is going to be good for them now this effect right here says at the end of every one of the red players turns they have the option of moving one of their lobbyists onto any development in the city now they can only do this if there is a spot for that lobbyist and every development has two spots for lobbyists on them now at this point red is ending their turn so they're going to activate this allowing
them to place this lobbyist down and they're going to put it right over here to gain access to this development that the yellow player put down which gives the option of gaining some money when there are empty spots as you gather construction resources alright that's finished Red's turn which means that yellow can go and they've decided to move over to the lobbying Zone they crossed over this which means they are beginning their third and final trip around the action Loop and once here they're going to perform this lobbyist moving action that does not have any costs associated with it and that lets them move a lobbyist from their board area an agenda or a development on the city into their board area an agenda or a development in the city currently they don't have access to any other developments on the city though and they've decided instead to take this lobbyist and place it on top of their face down agenda now again these are hidden from your opponents but each one of these can have at most one of these lobbyists on it and you can remove these from here later on so they figure this is a good idea they're functionally using it as a stall now with that in mind let's talk a little bit more about agendas and why you might want to have lobbyists on them in particular let's take a look at our agenda because obviously we're not allowed to see what yellow is working towards now this one as I mentioned before is going to get us points at the end of the game depending on the number of hubs that we have which are those double High stations within the knights bridge and old cross areas which are highlighted on this map specifically if we have four hubs in those areas we'll get five points and if we have six hubs in those areas and we've placed a lobbyist on top of this
agenda then we'll gain 10 points now if we have a lobbyist over here and we don't make it six we can still get those five points and if we have six or more of them but no lobbyists we're still only going to score the Five Points so essentially having a lobbyist over here is going to increase the potential points you can get if you meet the other requirements well let's finish the yellow's turn and for the most part this was a stall and now it's time for us to go again well let's dig out our subway line this is going to cost one document and two construction and then of course one engineering for every station that we place out onto the board so we can spend the two construction and the document and now we have one engineering resource left although because of this upgrade we could spend one of these Powers as an engineering and I think it's likely we're gonna do that now let's start by putting these back into the supply and by doing that there's now a one cost document available for somebody to grab now we can place track out onto the board and remember we can afford up to two new stations being added down now I mentioned before that as you place your track down you will arrive at either empty station locations or you could arrive at occupied station locations let's talk about what happens when you meet up with an occupied one now for example this isn't what we're going to do but if we wanted to we could start by putting three of our track like this and then we could build a station and then we could build three more track and that would find us right over here now once
we connect up with a spot that has an opponent station we don't spend anything in fact we are going to gain one power as a bonus at the end of this action now you gain one power no matter how many opposing stations you connect to but when we're done with this build action our opponents will gain one money from the bank for every station that somebody connected into also in this moment that is our new Terminus station so we'd be building out from it and we could uh we only put one station down so from this point we could build up there and then put a new station here obviously that would become our new Terminus then we would get a power because we connected up to at least one opposing station and the yellow player would get one money for that one station if we connected to multiple yellow then they'd gain one money for each of those stations that we connected to the player boards have a cheat sheet for this as you can see you gain one money for connecting at least one and everybody else gets one money for every station that you connect up to now this can be a creative way to get some extra power and having power is certainly a good thing but I'm not sure if this is the plan that we necessarily want to start off with instead of doing this I think let's build up from our primary station and then build a station here that is going to cost our one engineering resource and the reason I'm doing this is because we have this agenda that says that we want to have hubs within the old cross and the Knightsbridge area and this is the Knightsbridge area obviously this is not a hub just yet but in the future we could get The Hub upgrade and turn this into a hub which should help us out with
this agenda that we're working towards now I do also want to point out that whenever there's locations like this that show two track locations that means two players can run track through those locations we are never allowed to double up with the same track on one of those sections now we can continue on with our turn and this is our new Terminus and I think we're gonna head that way essentially wrapping around this development let's put these two track tokens here and then we can spend a power as if it is an engineering resource in order to place this down as a station so there is now a one cost power in the market and we can put this station over here now that one does not match up with our agenda but it does match up with this demand token right over here and I'll explain that in more detail on our next turn alright that's finished our build action this means it's time for red to go and they've decided they're gonna head over here and then they're going to acquire construction although they're not going to use this action instead they'll use this one so they'll gain two money for each Gap in the leftmost column that has at least one construction resource and then they'll take all construction from that column currently there's one Gap so they'll gain two money and then all three of these construction resources this means they're back up to seven money so they're feeling pretty good with red done that means yellow can go and they've decided to head over here to the market once here they're going to spend their one money and buy this single power for that one money after
that we good to go and let's move over here now that crossed over this line so we have started our final Loop and now let's perform this action over here that's going to cost one power and it lets us gain one demand token from the board we have a power so we can spend that which means it goes back into the supply and then we can take any demand token from developments on the board as long as we have a station in the indicated District now that means we could take this demand token even though we're not next to it as long as we have a station in The Verdant Park District obviously we don't so that doesn't quite count but as you can see adjacency does not matter with the development that that demanded token is on now for us there is a tarragon Hills demand token over here and we've now built into the tarragon Hills so we could take this but another option for us is this that is associated with Knightsbridge and we built into Knight's Bridge it's very likely the red player was hoping to do this considering they are also in Knightsbridge and no one else currently is in tarragon Hills so I think let's take this one so that the red player doesn't get access to it and then we could potentially take this one at some point in the future again spending one power when we get there remember we are flexible we could spend a document or an engineering as a power so that means it's even more likely we could cash in this one now before we move on there is one extra thing to talk about here and that is that if you want to gain a second demand token for a district you are allowed to do that as
long as you have a number of stations in that District at least equaling the number of demand tokens you will now have so what that means is after taking this if we want to take another one of these ninth Bridge demand tokens for example this one right over here we would need a second station in Knightsbridge and then if we wanted a third ninth Bridge demand token we'd need at least three stations in Knightsbridge now the reason we want demand tokens is prestige at the end of the game the person with the most prestige wins and at the end of the game we're going to gain Prestige equal to the right most number that has a demanded token under it so by gaining that one we just got three Prestige if we get a second demand token we'll gain three more then four more seven more and then eight more if we get that Fifth and final demand token all right that has finished our turn so the red player can go and they've decided for now to skip over this build spot and they're gonna head all the way back to this lobbying Zone when they cross over here that means they are now in their last Loop in fact they've overtaken us and then at this location they've decided to spend one of their two documents in order to perform one of these two action options both of these have their merits so let's now talk about how they work and then we'll see what red ends up doing the first option is over here that says that they can draw a number of random agenda cards from the top of this deck that depends on the year then they keep one of them and then put the other ones to the bottom of the deck the one that they choose will go face up in front of them and just like the hidden ones that we have that will potentially score Prestige for them at the end of the game
depending on how they meet its condition now if they do this in the first year they'll draw three cards and choose one in the second year you draw two cards choose one and in the third year you only draw one card and it is worth noting that players can have a maximum of three agendas total including the face down one that we all have in front of us you're not allowed to gain any more than that so functionally that means you can gain up to two agendas over the course of the entire game now the other option is over here that also costs one document and it allows them to place lobbyists onto a plan now the number of plans out here depends on the player count with two and three players there are going to be three of these and each one of these plans has two different rows now whenever you add lobbyists down to one of these cards if you don't have any lobbyists there already you must put at least two of them down and you place them on the leftmost side as you can see there are these twos over here now you could place up to four all at the same time if you want to or in the future you can come back and do this action again and add one or even two more to a row that you already have lobbyists on you are not allowed to add lobbyists to a row that somebody else has any number of lobbyists on so as you can see each plan can have at most two players participating in it now every plan has a condition printed on it and these will give a variable amount of prestige at the end of the game depending not only on how well you achieved that goal but also depending on how many lobbyists you've placed onto that plan if you place the minimum which is two then the best you can do is this first option for example let's take a closer look at this one here that says at the end of the
game you counter the distance of blocks between your two farthest stops counting orthogonally and as you can see if there's at least eight distance between those two then you'll gain eight Prestige points again that's the minimum because you have to have at least two lobbyists placed in order to even go onto this card but if you've placed a third lobbyist on that line and you have nine or more you could get 15 prestige now if you have three lobbyists here and you're only at eight you're still fine you'll still get those eight Prestige but obviously you are missing out on a whole bunch of extra Prestige and then finally if you put four lobbyists down which is the most you can do and you get 10 distance between the ends of your line you'll get a whopping 22 Prestige now one important thing to keep in mind is once you put a lobbyist onto any plan there is no way to remove it you are allowed to move lobbyists from developments agendas as well as your player board through actions that we've already seen but nothing removes lobbyists from these plans also remember that each player starts the game with only eight lobbyists and obviously if you put four down on one of these that's committing half a of your lobbyists but it might be worth it considering the prestige amount you can gain from these now the red player has already permanently removed one of their lobbyists so they are down to seven and I'm sure you're starting to see why that could cap the number of procedures they get to the end of the game based off of all of these ways you can use lobbyists to gain Prestige coming back to this action they've decided they're going to do this side over here and dig for an agenda it's currently year one so they're gonna see the most options they will see in the game if they waited until year two they would only draw two cards out of these options they're
keeping one and the others will go to the bottom of the deck and this agenda is going to be placed face up although they are the only ones who can gain access to this Prestige now this agenda right here says at the end of the game they're going to gain four or potentially eight Prestige for the number of stops they have within the tarragon Hills Knightsbridge and the upper Ward essentially all three of the districts along the top of the board now if they have seven they'll gain a Prestige as long as they have committed a lobbyist to this and again the red player currently has less lobbyists than the rest of us so far they only have one station on the board but it is in one of those sections so obviously they're working towards that in order to gain the minimum benefit from here they would need five stations in these three districts and I'm sure that is going to affect their decisions as they continue to build well red is done which means the yellow player can go and they've decided to head here to the materials Zone and they're simply going to gain for construction that feels pretty good to them if there was any gaps over here they could use the development they have to also gain some money and they probably would have preferred that but this is the current situation and having for construction is still not a bad thing in the future when they loop back around they could spend a bunch of construction to move their capacity limiter which is something they're pretty motivated to do considering currently they are at their maximum capacity speaking of that they are also at their maximum holding for all of these resources overall they are definitely regretting that huge investment in these engineering cubes they feel like if they had bought even one less of these they'd probably be in a better situation but
they have to deal with the decisions that they've made well yellow is done which means we get to go again we currently don't have any document resources actually we have no resources at all as you can see we have no money and no cubes over here we do have a pile of these rails perhaps we went a little bit too hard in spending money for those but obviously we'll have these into the future and I don't think we'll be too sad to have these as an option in the next year of the game so looking at our options we could go over here and do this action except we don't really have anywhere to realistically move our lobbyists over here everything costs money over here everything costs money so the first thing that realistically makes sense is to stop over here and gather some construction resources unfortunately we're only going to get three instead of or the yellow player just swooped in and grabbed for but I still think this is worth it it doesn't cost us any money which is good because we don't have any money so we can place these over here and we'll be happy to have these in the next year of the game we are done so red can go and they're going to move one space over here and then purchase two engineering resources which is going to cost them for money total out of all of us they're the ones doing the best with money so far although a big reason for that is because they got rid of a lobbyist to get that six money either way they have to spend four which means they do still have three money left over all right red is done which means yellow can go and they've decided to come over here and now they are going to spend a power to gain one demand token so they
can spend this power right here which means there are now two cheap power tokens in the market and then they'll gain this demand token here because they do have one station in verdant Park so that is worth three Prestige to them and now it's time for us to go again from this position there's only one more spot that we could go to and at this location we need to either spend money which we don't have uh resources that we don't have or resources that we don't have so we are going to skip right on by this and because our token is down here that means instead of continuing on we are going to put our token over here onto the player order card this means we are passing for the rest of the year and when we do this we take our tracker token from wherever it is let me put it on top to show that we will not take any more turns for the rest of this year now I do want to mention that if somebody built track that connected up with one of our stations we would still get paid out money for those even though we can't take any more actions this also means when we do the annual income we are going to gain one resource of our choice and we'll be the starting player when it comes to actions in the second year of the game well we are done with our turn and we're effectively done for the year and now it's time for the red player to go they are pretty far behind the rest of us and they're going to continue going slowly they're going to head over here here to the market and then buy two power resources for one money each now currently they only have space for one of these but they can get rid of any other resource if they want to and they're going to get rid of one construction token remember they always have a construction that they can spend whenever they need to spend it and then
they'll put this power over there so they are currently maxed out that construction resource that they discarded will go back into the supply and now it's time for a yellow to go and the only thing that they can do is pass so they'll put their token right over here and that means they'll gain an extra money when we do the annual income and this token will go here and that means yellow will go second in the next round of the game now at this point red is the only player out there so they're going to continue taking turns until they have also passed from this position red is going to continue going slowly they're going to stop here and then they're going to spend Construction in order to advance their capacity limiter now they've decided to spend one construction along with this construction that they get from their upgrade which effectively means they're spending to construction and then they will also spend one power because when they move the limiter here they have to spend a power so they moved one two they spent two construction and one power and as soon as this token reaches this spot they can gain one of these upgrades on their board after considering it they're gonna gain this one and that means they can now build hubs by stacking a station token on top of one of their previous stations that was not already a hub well that's finished Red's turn so now it's Red's turn again they are gonna move on over here and finally they're going to be constructing now this is going to cost one document as well as two construction and then one engineering resource for every station they want to add onto the board even if that station is placed as a hub on top of one of their previous stations so they can
spend one two construction and then one document and we can see that they have three engineering resources which means they could place up to three stations onto the board these resources can be added back into the supply it looks like all of the documentation in his back and now they can build they have six track available to themselves they're going to start by building to the left once here they have to put a station down and of course that's going to cost them one engineering resource that is their new Terminus and they've decided instead of going up and around they're actually going to head this way so they're going to place this here and that there and when they do that they've actually connected up with one of our stations so they don't put a station token down instead they are going to continue out from here and they're going to head up once they reach this spot they're going to put a new station onto the board and of course they're going to spend another engineering resource and now they're done laying track however they got this Hub bonus now it's possible their secret agenda has to do with hubs because they've decided to make this a hub right here and now they of course have to spend one more engineering when they place that out now of course we can see they did connect up with at least one opponent and that was us since they connected with at least one station the red player is going to gain one power resource and remember if they connected to multiple stations red would still only gain one and then every opposing player who was connected is going to gain one money for
each station that was connected this is good for us they connected to one of our stations so we'll gain one money from the supply and of course red gets to keep this power red already had a power resource so now they have two but as you can see they have to spend more and more of it as the capacity goes down and players also spend power for demand in addition to there being other ways to spend power with these various developments for example this one right here says you can spend a power to gain the development and three money and that one right there says when you go to the material Zone you could spend one power in order to move up twice on the capacity track instead of once well at this point red is done with the biggest build that we saw over the course of this year obviously they spent the first two loops around so they that they could build this big one here at the very end this right here is their Terminus so the next time they build they'll have to head out from there but they still have a wide variety of options it's possible they're hoping to continue building this way and try to take this away from us we currently don't have a power but they do although we do have the flexibility of this bonus so I'm still feeling pretty good about it but we do have to pay attention to it so that the red player doesn't sneak it out from underneath us either way the red player is done and when they go to cross over here we can see this is their final lap so they'll put their token here and there is no bonus associated with going last in the next round because they did go slowest although they're feeling pretty good about how that first year went well at this point everyone has passed and that means that this first year of the game has come to a close so what we have to do is slide this token down to show we are now entering the second year and then we can drop all of our Loop
tracking tokens down onto the first slot underneath our token and now we can once again gain annual income now we can all simultaneously gain our benefits now we've got a bunch of track so I don't think this makes especially considering we have a bunch of construction as well I will say that getting a couple of documents would be pretty nice we haven't gained any extra agendas and that also could help us out with plans and gaining more of those developments onto the board that being said if we went here we'd get an energy and we could start things off by grabbing this demand token before the red player is able to take it away from us that would be worth three Prestige to us at the end of the game we could also just go here and lock in a couple of those engineering resources so that we could prioritize getting another upgrade which we can actually use that engineering resource to get the second upgrade early on in this year I feel like that might be the best option for us although we'll have a bunch of construction then again we could probably spend that construction to move our capacity limiter down which would cost us energy but we could stop off and get energy before we get to that action I do like the idea of getting an early upgrade so I think this is the one that we'll go for so we're going to gain another construction as well as a couple of engineering resources then we can see over here that red decided they wanted a couple of construction and they wanted four rail tokens lastly we can see yellow decided they wanted a couple of documents as well as one rail although they don't have room
for all this but they don't think they needed this much construction they're going to send this back to the supply on the board so that they have room to hold those and they're starting the ground off with a full Supply now it's time for everyone to gain their annual budget so yellow is going to gain 14 money we will also gain 14 money and then red will gain 15 money because they got one more station out than the rest of us and they also ended the rounder with three money so they by Far and Away have the most money of any of us at this point the final thing that happens is we can gain our turn order bonuses yellow is going to gain one money and we gain one resource of our choice so yellow has 15 money total now and for us well we certainly shouldn't take construction or I think engineering we should grab power or a document and I think we're gonna go for the document this means we're going into the next round with construction engineering and documents so essentially everything that we need in order to build more track although we do have to move our capacity token down and with this flexibility and a pile of money we should be able to easily do all of those things one thing's for sure we're starting this second year with a lot more stuff than we started the first year Well we finished gaining all of our annual income so now it would be time for us to enter the second year of the game with us once again moving around the action Loop performing actions now I think instead of continuing on with the game I'm now going to discuss what happens when the game ends now the game will be over once we've completed three full years and again that will happen once this token is here and everyone has
passed putting their tokens onto the player order card at that point we'll move into final scoring the first thing we'll gain Prestige for are the stations and hubs that we have out on the board every station is going to gain one point if it's next to at least one development now again a station is when you have a single disk and then hubs are when you have two disks or if it is your starting Hub now hubs are going to score two points if they are adjacent to at least one development and they will score three points if they're next to two or more developments so looking at the current board State our Hub right here is worth two points because it's next to one development and then these are each worth one so we are looking at Four Points the red player is getting two points for this Hub and then well zero points for this one and that one there because they're not next to any developments so obviously the red player is very motivated to add more developments down in particular here and there so that they can double up and have at least two developments next to their hubs to gain three points each instead of two points each for just one again currently though the red player is just looking at two Prestige for their stations and then finally down here yellow is looking at two for this Hub and one for the station so three obviously at the end of the game we've gone through three years and we've built up our economy to the point where our Subway Lines will be way longer going back and forth across the board and there will be tons of these developments out there and we're going to get potential a bunch of prestige points for the stations that we have next up players will gain Prestige for the plans that they have invested in once again if we had placed our lobbyists down like this with an action at some point in the
game we could potentially score points for the distance between the end of our subway line other spots are going to give you points for other conditions for example this one is going to give you prestige based on the stops that you have built in one type of District of your choice so you choose one district and then you count up those stops and again they could be hubs or they could be stations and this one over here says that you're going to score based off of the hubs that you have built that are adjacent to at least two different developments now the game comes with a bunch of different plans and again the plans that come out here are definitely going to dictate your strategy as you're playing the game because you certainly want to work towards at least one of these and then of course enable it by committing your lobbyists to it speaking of lobbyists the next thing that we will score are our agendas we'll flip our face down ones face up and then we'll potentially score Prestige for those agendas again you might be able to get even more points if you have moved a lobbyist onto that agenda during the game and if you meet the secondary condition that's printed on that agenda next up players will score Prestige for the rightmost demand token that they place down if they get five demand over the game that would give 25 Prestige currently we're getting three Prestige from this so we are certainly working our way down finally all players will gain one more Prestige for every four money they have remaining rounding down so players will add up Prestige for all of these different things and then the player with the most prestige will be the winner if there is a tie then the tide player who has the least number of station tokens still on their board will break the tie in their favor if there is still a tie then between those tied players the person with the most coins will win the game and if there is still
a tie at that point then those players will share in the victory well at this point I do believe I've taught just about all of the rules to the game so that's going to bring this tutorial to a close I hope you enjoyed learning how to play Terminus as always I'd like to thank everyone who's been supporting this channel including these producer level patreon supporters if you two would like to directly support the channel in the creation of future videos like this one then please go to John getsgames.com Support also if you enjoyed this video please click the like button for it down below as well as the Subscribe button for the channel thanks for watching