Tenpenny Parks - Learn While Playing!
Games in This Video
1 game is featured in this video — it unlocks as you watch.
Transcript
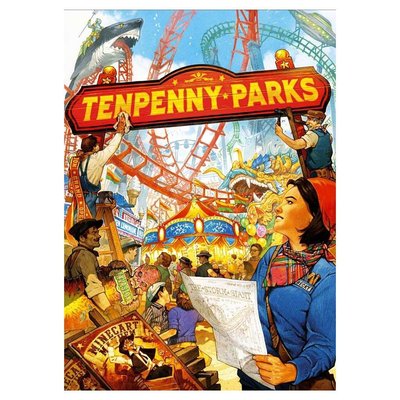
welcome to the jungkook's games tutorial for 10 penny parks in this video i'll be teaching you the rules of the game as it's being played and i will be showing a full three-player game today now before i go into that i would like to ask that if you enjoy this video that you please click the like button for it down below as well as the subscribe button for the channel in addition to that if you'd like to directly support the channel then you can learn about that by going to patreon.comgames there you'll learn about a bunch of perks including exclusives like my opinions episodes where i go in depth about my subjective opinion about all of the games that i'm playing recently and you can also gain access to some videos early and advertisement free the final thing i'd like to ask is if while you are watching the video you see any turns where you think we should have done something differently or if you see some part of the game that just really jumps out to you then please comment about it down below because i'd love to see that kind of feedback alright let's now jump into the game out here we have the game fully set up and ready to play for our three different players now before i start i would like to ask that you please turn on the klingon subtitles because i might make mistakes as i'm showing the game and those will let me put corrections on the screen where you should be able to see them i'll also put corrections below this video in the top comment now let's start things off with a general overview of the game in it we're gonna go through five months and each player is going to be starting and expanding competing theme parks in the same town now each player has their own specific plot of land that they can work with and as the game goes on we are going to be sending our workers out to various spots on the board in order to build these different attractions into our park we can also add concessions and remove these trees that get in the way in addition to that
we can go to the realtor to expand our area adding more pieces out here and ultimately what we are trying to do is get the most visiting people in the form of these vp tokens to our parks now as i said we're going to go through five months and within each of those months we are going to have an income phase we will also have an action phase where we send these workers out to do the things i've talked about already we will also gain bonuses for the level of thrill awe and joy that we have instilled in the people who are visiting our parks and in addition to that we can spend money on advertising after each month we will clean up and the player with this shovel right here can spin this around as far as they want and this carousel shows positive and negative modifiers for the different attractions that we can build so that's a very high level overview of how this game works and as we're playing i'll explain each of these things in detail now on that note let's actually start playing the game and for today's tutorial we are going to play as the purple player right over here now as i mentioned we are going to go through five months in the game and in each month there are five phases the first of these steps is called income and in the income step every player will gain three dollars and they will also gain any money that potentially shows up on the concessions as well as potentially specific attractions that are within their park now at the start of the game we don't have any concessions or attractions so we will each get three money we all started with seven money during setup so this means we will all be brought to 210 money total as we continue along with the first month after income we now have the action step and this is where most of the game is played now in player order starting with
the person who has this shovel each player will send one of their workers out to a worker placement spot on the board and immediately perform that action we are the starting player so we can now send our first worker out with that in mind let's focus over here on the board now there are 10 different locations that we can send to our worker in the first four are printed out here on the board like this now each of these four can be visited by any number of players workers there is no penalty or bonus for getting to one of these spots first the other six spots are right here on the actual carousel itself and these are building locations where people can go in order to construct the specific attraction that is listed with the card on top of the associated spot now these are going to modify the price of these cards and only one worker can go to each one of these six spots within each month of the game now for our first turn i think we want to go right over here now this is a building spot so that means this is the only worker that can get placed here within this first month in order to do this we have to pay the price of the top attraction in this case that's dino adventure which costs six dollars but then we will have a modification based off of this carousel in this case it has a minus two dollars modification so we can build the dyno adventure for only four dollars we started with 10 so we can easily afford spending four and now we can simply take this top card and then find the associated attraction tile and place that into our park down here we have all of the attractions laid out so that we can easily find them and in this case we are looking for dino adventure and we can find that right over here and you'll note the shape of this tile is dictated
by this icon in the bottom left corner of the card and now we have to place the dino into our park now i do want to point out that when you play 10 penny parks you can have each player have an identical layout in front of them that they're gonna work with or you can flip these boards over and go with some asymmetries and we are going with the asymmetries here we are at thunder point and the yellow player has valley of marvels while the red player has daring horizons up at the top so let's add dino adventures into thunder point now when we do this there are a few simple rules we have to keep in mind the first is that you cannot overhang at all and the second is that you have to place down into a spot where there aren't any trees in the way that means this would be an illegal play because that tree is currently right there there are ways to remove trees and i'll explain how that works later on for the purpose of example i'm going to place this right over here and the next restriction is that you cannot place one tile so that it overlaps any other tile the final restriction to keep in mind is that you can never have a tile placed so that any part of it is orthogonally adjacent to a previously placed tile so that would be an illegal placement because in this example that would have been there already however if this was right here then we could place that like that when tiles touch each other on a diagonal that is illegal the last thing i do want to point out is that new tiles do not necessarily have to be placed with any specific proximity to other tiles as long as there is no orthogonal adjacencies obviously we don't have sticks and stones so now we have to place the dyno adventures down and there are only a couple places we can put this realistically i think our options are this or that and let's go
ahead and put dyno adventure right over here i do want to point out that you can spin these around and flip them over if you want now we're going to put this right over here and every icon that you cover up will immediately give the player the indicated benefit as you can see most of these are circular icons and those increase our tokens on the emotion track and this over here simply would get us to money that icon in the middle would let us increase once on any one of the three emotion tracks now those tracks are joy which is shown with this heart the next one is awe which is shown with this yellow star and the last one is thrill which is shown with this blue lightning bolt now at the moment i think we're gonna place this here and that will increase our joy by one and the reason we're doing this instead of that is because i'm not exactly sure what wild emotion track we want to push up at this moment and if we leave that open then in the future we could cover that up and gain a benefit that we specifically need in that moment so let's go ahead and increase our self once on the joy track the motion tracks are over here at the bottom of the board so we can go up once on the joy track and there are reasons to be farthest along these tracks and i'll explain how that works when we get to the bonuses step of this month now we've gained that joy from covering up that icon on our board but we also gain the benefits of the icons on the card in this case dino adventure is going to increase our awe by two and then give us another joy so joy will go up once and then we will gain two ah on that track the final thing we have to do is flip this card over and this shows that we will gain two vps once the game is over and it also shows us the advertisement
pricing and rewards and i'll explain how advertising works later on well that's finished our one action which means play can move clockwise to the yellow player and now they can put one of their workers down onto the board after considering their options they would like to build as well and they're going to go right over here now that has a plus zero modifier and then they're going to create the atlantis attraction in this case that is going to cost them three money so they can spend that back to the bank and then they can find this tile and place it into their park atlantis is right over here and they are going to place atlantis like that onto their board that is going to cover up one thrill icon and we can see on the card this is also going to gain them one enjoy so they can increase themselves up on both of those tracks now which means they have one thrill and they have one joy now when you increase yourself on these tracks and you get to a spot where there are other tokens you simply put yourself on top of those and when it comes to majorities the token that is on top of the stack is considered to be farther along alright that has finished the yellow player's turn so now the red player can go after considering their options they also want to build and they'll go over here remember there are these four spots on the board and i'm sure we'll see people going to those once a lot of these building spots are full considering we all have a bunch of money at the start of the game it does make sense to try and spend that to get some of these attractions down before we go to these other action options now i will explain how each of these works relatively soon but for now the red player is going here now this will have a zero modifier so they can purchase the ray gun alley for three money they
easily can afford that and then they can take the raygun alley token and place that onto their board they're going to go right here and that is going to cover up two icons and when we look at the card itself that will also give them one thrill that's going to just barely put them in the lead for thrill and it's also going to just barely put them in the lead for awe all right red is done so that means we get to go and we have two more workers to use in this month after considering the options i think let's build again and we're going to go to the highest building modifier that shows a plus two dollar symbol which means we will have to spend three plus two or five dollars to make this armor shop now that might not seem great but this armor shop is a souvenir location each souvenir position brings in zero visiting people which are vps at the end of the game but they do increase our income for each one of the games five months in this case the armor shop will increase our income by two dollars and two dollars is the premium that we're spending right now that means after one month that will have paid for itself and then we'll have four more months worth of income to get out of it so realistically we are spending five money for this and then it will gain us eight money over the course of the rest of the game because we have four more income steps let's find the armor shop and it's right here and that is a pretty small tile we need to place this onto our board somewhere and remember we cannot be orthogonally adjacent to any previous tiles that means putting the dyno adventure here has essentially made all of these locations not work but of course these diagonals do so that took up a significant amount of space in our
area now we could place this like that if we wanted to gain one increase on one of the motion tracks of our choice we could also just go like that to be efficient essentially dodging around this tree going on the angle and setting ourselves up to be at a diagonal for this benefit somehow over here that of course does not get us anything immediately though and another thing that we could do is just go up here and cover that to money now speaking of money we do have to pay for this uh that cost three plus two or five money so that means we only have one money left so covering up a two dollar spot is somewhat appealing you know i think that's what we are going to do we'll cover that up right there and we will gain two money immediately and that's it as you can see these souvenir shops do not give any emotion track increases we can flip this over and as you can see it gives us a reminder that this will get us two money in each one of the game's income steps we are done so that means yellow can go and they've decided to go here so that they can add the basin city scramble to their park now this is going to cost them four plus one which is five money they add seven money totals so they can spend this and take some change which leaves them with two money left and then they can take this card basin city scramble is right here and they've decided to add this like that it essentially goes right around this tree it's not orthogonally adjacent to any previous tiles and that does cover up one aw icon there is also one icon on the card itself so that is going to gain them two ah total this will put them just barely in the
lead at the top of that stack all right yellow is done which means red can go and they've decided to take the final build spot as you can see all of these have been taken before we went anywhere else but that's not super surprising considering the amount of money that we started with and the fact that these other locations are not blocked by other players going there now this location right here has a minus one modifier on it but the haunted dungeon is quite expensive that is seven minus one which means red needs to spend six money in order to build this and then they can take the haunted dungeon token and then place it down into their park as you can see this is a really large piece uh they can't do something like this because even though it does not cover anything up that would make this orthogonally adjacent to their raygun alley now they do have a couple other options available to them though they could do this but that is a pretty bad move that would cover up this wild spot but it would make it impossible for them to cover up this thrill icon or that two money icon because those are adjacent so that is definitely not where they want to put this gigantic haunted dungeon instead they've decided to go like this that will cover up one joy emotion icon the haunted dungeon will give them another joy as well as two thrill icons so that is four icons total they got by placing that down two joy will put red just barely in the lead on that track and then two thrill will put them quite a bit in the lead on that track alright red is done which means we get to go again and this is our final work replacement of the round now as you can see all six of the building spots are now occupied which means we must send
this worker to one of the four other spots that are printed on the board with that in mind let's see what these actually do now this one over here is quite simple that is called the banker and by going here you spend zero dollars and then immediately gain two dollars from the bank next up there is the arborist this also costs zero dollars to activate and then you can clear up to two trees from your board as we've seen so far these trees can get in the way and when you clear them you simply remove them from your board which leaves those spaces as open spots to put other tiles now that would be a really bad set of trees to remove considering they are adjacent to this right here but maybe something that would be better to remove are these down here to make us more flexible to gain access to that icon actually these up here would probably be the best because two thrill icons is better than one awe and removing these would make us a lot more flexible for making that happen now i'm not sure if this is what we want to actually do for this turn so let's look back out to the board and the next option is the realtor now this costs three dollars and we do have three dollars so we could do this right now when you do this you then immediately take the top one of these extensions from a stack of them and you then place this next to your board and you can flip it and choose any orientation of your choice when adding these down they have to go to the far right or far left spot in your area so we could put this like that obviously moving this out of the way and then in the future if we took another one we could place that over here so you can keep expanding out to the left and to the right as i said we have three money so we could afford to do this but we aren't particularly crammed for space
right now we've got quite a bit of area where we can put other attractions so i think we'll hold off on spending this money for this extension at this point the final work replacement option is the contractor this costs zero dollars and the effect of this lets us take one concession tile at the start of each month we are always going to have a number of concession tiles face up equal to the player count times two so in this three player game we have six of them so by going over here we'd spend zero dollars and we could take one of these and then place it into our park now these have various things on them like icons for example this one right here shows a thrill icon and it has that one dollar icon now this would increase our income for the rest of the game so if we took this that would increase our thrill once and that would effectively be worth five money over the course of the game as we took one in each one of the five income steps if we didn't care about income as much we could go for something like this which just has a couple of emotion track icons on it and that is also a good alternative to keep in mind lastly if you really want money there are options that give none of those emotion track bumps but they give two money instead of one so this hot dog stand right here would end up being worth eight money to us over the course of the game if we did take it in this first month out of these four options i think i'm mostly leaning towards the contractor but before we actually perform this turn i want to draw your attention over to these bonus cards now at the start of the game every player got three of these and we got to choose two to keep and once the game is over we will all reveal these and gain three points for each one we've successfully completed for us we have best landscape and most variety for best to landscape
that says at the end of the game if we have six or more trees removed from our property over the course of the game then we will gain three points now remember by going here you can remove up to two trees so that means we will gain three points if over the course of the game we visit this spot three or more times the other thing that we have is most variety and that says at the end of the game if we have at least five different types of attractions then we will gain three points we already have two types we picked up the souvenir as well as a prehistoric attraction so with this in mind we're probably going to try to not take either of those options as we continue through the game at least until we have one of five of the different types so we have to keep these in mind and that does make me feel slightly more tempted to go here to the arborist but i think let's actually stick with the contractor this means we can take one of these options and i am tempted to take the hot dog stand to just increase our income significantly but let's go half and half we'll take this t-shirt shack that is going to get us one joy and one dollar in each one of our incomes so let's place this down into thunder point and it follows the same placement rules as the other attractions that we put down that means we could go right here and go up on one emotion track of our choice but i feel like that's really going to hamper our placement options we could also go over there and that would hamper our placement options a little bit less i suppose and getting too thrilled could be nice but i am also tempted to just go efficiently and place this right over here because realistically only a size 1 tile can go into this area since that is not orthogonally adjacent to any of these other tiles i think this is what
we're going to do so that is going to increase our joy by one which will put us in the lead on that track and that's finished our turn this means yellow can go and they've decided they are also going to go to the contractor that's not too surprising considering we are still filling our parks up with a bunch of good options and remember the banker is realistically something that you do when you need those two dollars to do something else within the round and the arborist is something that you do if you have trees that are in annoying spots the realtor makes a lot more sense as we get deeper into the game and we actually need more space in our areas so going to the contractor felt like the right move for yellow out of all these options they feel like they are going to need money so they're going to take the hot dog stand this has to be placed into valley of marvels and they'll put it right up here yellow is done which means red can go and it's not too surprising to see them also go to the contractor out of all these options they're going to go with the balloon stand and they'll tuck it right in here amongst these trees where that is a legal placement since it's not orthogonally adjacent to any other tiles that will increase their thrill by one which means they've expanded even more into the lead on that track well at this point everyone has used all of their workers so that means the action step has come to a close now we can move on to the bonuses step of this first month and we can do this by focusing down here on the three emotion tracks now on each of these tracks the player whose token is farthest along will have an optional benefit that they can decide on and then if you are playing a three or four player game then the player who is in second place on that track will gain one vp token this
is a three player game so that means we are going to score the second place options and we do these first we can see up on the thrill track yellow is in second place so yellow is going to gain one vp token after that on the ah track red is in second place since we're all stacked up here and red happens to be one below the top that means red will gain one vp for that and finally on the joy track red is once again in second place so they will gain another vp after scoring second place we can now score four first and the benefits are different for each of these tracks and we'll start with thrill let's focus in and as you can see the player in first can either move backwards once on this track in order to gain access to this extra worker or they could place the extra worker right here and then gain one victory point in this case red decides they do want access to this worker so they will move backwards once on that track and then red will have four workers to use in the next round it's worth noting they only have access to that worker in the next round unless they are in first place on the thrill track again in which case they could once again choose that bonus next up we have the aw track the player in first can go back once on this track and then they can take the shovel token from wherever it is and put it in front of themselves this shovel token not only denotes who will be the starting player for the work replacement actions in the next round but it is also used later on in the round for spinning the carousel and i'll talk about how that works very soon now the other option is instead of going back on the track they could take one point and in this case yellow has decided they are going to take this that means they will go backwards once on the track and as you can see this is why you
score the second place first because some of the first place bonuses slide you back on the track finally we have the joy track and on this one you could go backwards once in order to gain three money or you could just gain one point now we are first place on the joy track so we get to make this decision and while victory points are how we win the game money is a big way in which we actually get those points by building out our park so i think let's prioritize money and take that and then we'll go back once on the joy track and interestingly enough we are still technically in first alright we finished the bonuses step so now we can move on to the advertising step of the game now this can happen simultaneously amongst the players but if you want to you could also do it in turn order starting with the shovel now the way this works is every player can advertise once for each one of the attractions they have that have an advertisement option so let's focus over here now as you can see our armor shop does not have a way to advertise it but our dyno adventure does this says we could spend three money right now and then immediately gain two vps and you can only advertise with each attraction once per advertising step so this is a simple way to spend money to get more points but i think we probably want to hold on to this for now in order to use it to invest in more attractions in our park instead of just getting points it looks like neither of our opponents are going to advertise either the red player up here does have the haunted dungeon which has a two to two ratio which will let them spend two money for two points which is a better ratio than the three money for two points on our dino adventure they would be very tempted by that if they had enough money but right
now they only have one money in front of them down here we also have yellow and they would need to spend three money to get two points and they only have two money so in this case it looks like nobody is going to be advertising during this step that means we can move on to the final step of the round which is called cleanup the first thing that we do is remove all remaining face-up concessions from the game and then we will deal a number of them face up equal to the player count times two so that means we will see six random concessions for the next round after that we are going to return all of the workers from the board back to our player areas and then it's time to rotate the carousel now the player who has the shovel is going to do this and they must move this so that it is not the same as a previous round but when they move it they could do it in any other orientation except again for putting it back to the same exact spot that it was at so there are effectively five options available to the yellow player to spin this carousel after thinking these through they're gonna spin it like that which means it's probably likely they're hoping to pick up the star captain outfitter early in the next month since that now has the steepest discount the final thing we have to do in the cleanup step is advance the month marker forward once now if at this moment the marker was already at the five then obviously we would not be able to advance it anymore and in that case the game would immediately end and we could go into final scoring now we are not there just yet but i think now is a good time to explain how final scoring works during final scoring the first thing we will all do is flip up our goal cards and then potentially score three points for each of them obviously these are supposed to be hidden from our opponents but i'm leaving these face up since
we're playing as the purple player after that players can take vp tokens for all of the victory points showing up on each of the attraction cards they have in front of them right now red has three points worth of attractions we have two and the yellow player down here also has three after that every player who has their emotion token on one of the five final spaces on these tracks will gain five victory points whether or not they are first or last on that track finally players can potentially score the attraction bonus every player who has six or seven attractions in front of them will get five points and then every player with eight or more attractions will gain 10 points after that we simply count up our score and the player with the most points wins if there is a tie then the tied player who has the most money will break the tie in their favor and if there is still a tie then the tied player who is closest and clockwise order from the shovel will break the tie in their favor well at this point i've taught essentially all of the rules to the game and let's continue to play by jumping into the second out of five months the first thing that we do is the income phase and remember in this phase we will all get three dollars plus any money that shows up on our concessions as well as our souvenir attractions for us we gain one money from this t-shirt stand and then two money from the armor shop so that is two plus one plus the base three which means our income is six dollars now income can be done fully simultaneously amongst the players but we're going to see these in order and yellow is going to get three plus two from that hot dog stand which means their income is five after that we can see the red player's income and it appears they will get the base
three plus one from this balloon stand so that is for money for them income is done and it looks like we are rich compared to our opponents we have 12 money yellow has seven and red just has five now at this point we can move to the action step and it looks like yellow gets to begin this because they have the shovel token i don't think anyone is surprised to see them use their first worker to go right over here that will let them create the star captain outfitter and place that onto their board it would normally cost four dollars but there is a minus two dollar modifier so they only spend two dollars to actually construct this the star captain outfitter looks like that and they really like the idea of putting it just like that on their park they're doing a pretty good job of being efficient with the space they have by doing that they are going to gain one emotion track bump of their choice and they have been able to just barely work around all these trees and also not go orthogonally adjacent to any of their previous tiles so they'll go up once on one of those tracks and of course they've increased their income by three dollars for each income step that we have for the rest of the game after considering which track to go up they're gonna go with thrill they like the idea of trying to get that fourth worker for the next month yellow is done which means a red can go and they do have four workers they can place this extra one as if it was any one of their other workers after considering their options they're gonna go over here and build the kraken whirl that is going to cost them three plus zero money from the carousel
and then they can place this into their park they've decided to go right over here and that is going to get them a two money back and then the kraken whirl is going to gain them one joy on that track that's going to put them in the lead on that track and now they're done this means we can go and i have to admit that i am tempted to go over here this bandit shootout would cost seven but that shape covers a lot of space although in order to actually do this we'd probably want to clear some trees and we can look around and see that none of our opponents can even afford to go there that would be seven plus two or nine money which is most of our money so another option is we could just try to be a little bit more frugal and build a couple of these attractions instead of a big one actually hold on a second this sabic keep is a better shape for us and it's cheaper and it is worth one less vp at the end of the game but i think that's fine i think this is something we definitely want to build although again we can tell none of our opponents can currently afford 7 money if we spent 7 out of our 12 we'd have 5 left over so maybe we should figure out what we should do with that 5 money and then swing back around and take that one because obviously our opponents can't take it this mammoth valley is six minus one so that would be five although that takes up a big area and we'd be doubling up on the prehistoric type and remember we are trying to go for a variety but we also just want to take points when they're available to us and that discount is nice you know what i think that is going to be our plan we're going
to end up covering up a lot of our starting area here so we're probably going to have to invest in some realtor actions to expand the park but for the moment i think this is a good plan to take both of those that means we essentially have a plan for two out of our three workers and i think considering these icons let's make a big push for thrill now i think we do want to go for this plan and we can tell that the yellow player has five money so they could potentially build this mammoth valley with that in mind i think let's go here and build this right now before they can get to it so that's going to cost us six minus one which is five of our money and then we can take this card as well as that tile now we have to place this onto our board and i am thinking that we're going to try to put savic keep up there uh at the moment none of our opponents can afford to do this so with that in mind i think we'll probably want to put the mammoth valley down over there i was considering doing something like that to cover up this wild icon but that's a pretty inefficient move because as you can see that negates a whole bunch of spaces which we would then not be able to place anything on so by putting this like that and potentially putting that over there we have more room in here i think to get some more small attractions now we are definitely running out of room when it comes to space to put big stuff so we could remove some trees to help that out and of course i think we're probably going to be expanding the park as well to get more space for some of these attractions now i'm getting ahead of myself of course we don't have savik keep just yet but we did place mammoth valley down and that will cover up one
icon and then mammoth valley has two more so that means we get three ah total by playing this card that will bring us to a pretty significant lead on that track alright we are done which means yellow can go and as of this moment with their five money they can't afford any of the other attractions that are currently available to be built the space rings cost five plus one or six so they could go over to the banker to get two money to then build the space rings on their last action of the round or they could come up with a different plan yeah i think they're going to go with the contractor they have a bunch of options to choose from and they are very tempted to take another hot dog stand to increase their income even more it looks like they're probably not going to be constructing any attractions into their park this turn but they figure if they increase their income enough then that should help them get access to some of those more expensive ones as the game goes on if they wanted a little bit of both they could go with this t-shirt shop or this archery range that would be half as much money but it would increase them on the ah track or the joy track you know what they think they want money so they're going to take another hot dog stand they're going to put that right next to their other hot dog stand right over there all right yellow is done which means red can go and they are also going to go to the contractor and they'll use this worker here at the moment they are feeling a pinch on money so they're gonna take this that will increase their income by one and it will increase them on the joy track and remember the first place a benefit for being on the joy track could be three money or one point and if they had the option i imagine they'd go for the money in this month they do have to add this
into their park and they'll put it up there and then increase their joy track once so they're gonna extend their lead and now it's time for us to go we still have a plan of going over here to sap keep but we can tell that neither of our opponents have the seven money to do that right now so let's hold off on that and let's go to the contractor when we focus on over here we could increase our income and go up once on the odd track or we could get that aw track and go up on the thrill track again by taking this that means our opponents can't take it and this is the only one that increases thrill so i think this is a good idea because i think this will lock us in for first on the thrill track so that we can gain access to that bonus worker we do have to place this down onto our board and i think this is a pretty good spot and then we could go up once on the aw track and once on the thrill track that will extend a massive lead on that odd track and our opponents might see what's coming over here or they might not but we're gonna go up four more times on this if our plan for this month actually works out all right we're done so yellow can go and they currently have five money after thinking through their options they're going to go to the contractor again and then they are going to add this clown concession they have a lovely spot for that right in between all of these trees and that will increase their joy and awe tracks by one it looks like that will put them into second place on both of those tracks yellow is done so red can go after considering their options they've decided they're going to go to the realtor for the first time in the game that is going to cost them three of their money and then they're going to place this one
down into their area they do have some options they could go with this or that on either side and of course they could flip it over and they just have to consider what the best option is for them considering they have so many things on this line over here they feel like the left side is probably a slightly better option for them and actually they like the look of this they'll put it like that because all of those trees are over there on the edge whenever you add a new extension you do have to take trees from the supply and put those onto the new tree spots red is done so now we can go and we've had this plan all month long and let's go for it we'll go over here and spend seven money which is all of our money in order to take sabec keep that's right over here and as i mentioned before we want to place it like this that is going to cover up two thrill icons and then of course the actual card will get us two more along with an awe so that is four thrill and one awe that we get for this one attraction fourth real will make us go one two three four which puts us in the lead there and then one on the aw track extends our gigantic lead this was a very good round for us when it came to these emotion tracks of course we did spend a bunch of money to actually do that at this point we are done and the yellow player is done but red does have one more worker to use after considering their options they're going to go to the contractor they're going to take this archery range which will increase their awe by one and increase their income by one and they're going to put it way over here in the top corner of that extension that they
bought on their previous action so they'll gain one aw which will put them into second place on that track all right we are now done with all of our actions so we can move to the bonuses step the first thing we do is second places and it looks like red is second place for thrill second place for awe and then yellow is second place for joy so red is going to gain two vp tokens and then yellow will gain one after that we are in first place on the thrill track so we could gain one point or we could go back one and take that extra worker and i think that's what we want to do so we can put the worker in front of us and then on the ah track we could gain one point or we could take the shovel i do like points but i also like being able to control where that carousel is for discounts and going before our opponents is a significant benefit so i think we're going to do it we'll go back once and then we'll take the shovel finally on the joy track red is not going to take a point they're going to go backwards once on there in order to gain 3 money next up it's time for advertising now we actually don't have any money so we can't afford to advertise at all but both of our opponents could if they wanted to after considering it yellow is going to advertise and they'll go with both of their options this atlantis is going to cost them one money and get them one vp and then basin city scramble costs three money and it will get them to vp so they'll spend for money and gain three vp tokens they already had two so we'll give them a five and put these two back up here the red player has four money and they could spend all four of it at a one-to-one ratio that would be for money
for four points that is a great ratio but of course they would have no money going into the next round if they did that with that in mind they're going to look and see what their income is it appears that will be six plus three or six money going into the next month and they've decided their income is not strong enough for them to spend all of this they're gonna hedge their bets and they'll spend two out of their four and with it they will advertise their haunted dungeon so that's going to get them two more points and they have two money that they'll save into the next round it looks like they just like the yellow player have five points and right now we have none of these point tokens so we are doing pretty well on those tracks but we are definitely falling behind when it comes to these victory point tokens advertising is done so now we can do cleanup we can start by refreshing the concession options and that is a lot of hot dogs after that we can return our workers and now we get to decide where this carousel is going to rotate to because we have the shovel remember the only thing that we can't do is not move the carousel it must be in a different orientation going into the next month and honestly i am not sure what the right thing to do is we have no money and our income will be six going into the next round which means we could do something like that to make a really cheap maelstrom up there we definitely want to get a blue a purple or one of these brown ones to get our variety going the problem is we can't actually fit any of these shapes onto our board right now so that means for our first action we will likely have to either
clear out some trees or get an extension and remember we do want to clear out trees because we have that best landscaped card by spinning this around we're essentially deciding what is going to be the best option and if we did something like this i think it's a near guarantee that if we do something else then one of our opponents will snap up this one dollar maelstrom tile so we can't really set ourselves up super well here without our opponents being able to swoop in before us we had a really strong second month but it's leaving us a little bit inflexible for the third month of the game you know i think we will do that that would make this income pretty expensive now maybe we'll do something like that it does put a two money discount on this over here which we might be able to work towards but it's still relatively expensive and then over here it doesn't have any discounts and it actually makes these more expensive so it would be a bummer i suppose if one of our opponents took this because they would definitely be competing on that thrill track for us but this is probably the best call for us at the moment we can finish the cleanup phase by moving the month marker forward and now we can start the third month of the game now what i'm actually going to do is fast forward through the third and fourth months of the game and then we'll pick things up at the start of the fifth month and then we'll play it through to the end to see who is victorious
all right we've just started the fifth and final month of the game and as you can see our parks have certainly expanded out here uh we've been able to catch up a decent amount because we advertised like crazy in that fourth month and now we have 10 vp tokens in front of us or as red has 11 and yellow has 14. so i think things are looking pretty okay as far as that is concerned and now let's do income up here the red player gets the base three money plus one two three four so they gain seven money which means they have nine money total going into this final month for us we get the base three plus two so that's five then six seven eight nine ten we had one already so we have eleven dollars going into the final month finally there is the yellow player and they have a couple of these souvenir shops they get to the base three plus three plus two so that is eight and then on top of that they have another two plus two out here so they get an income of 12 money and they didn't have any up to this point so they have 12 at the start of the final month of the game after that it's time for the action step we still have the shovel right here we've been contending with that awe track all game long and the red player is in first now because we were in first and we went backwards to keep control of this shovel now we oriented the carousel like this so that we could get the biggest discount for the ad astra and the reason for that is because right now we only have four different types of attractions in our park and the two types we don't have are wild west and sci-fi now i think the sci-fi one is
going to work out better for our situation so let's spend seven minus two which is just five money and then we can place ad astra like that we cleared out a couple of trees in the last round now that covers up a wild emotion icon and then we will also gain two thrill two thrill brings us up here and remember for every one of our tokens that are in the final five spots we will get five extra points this one is just barely in there already and i think thrill is most likely to get there as well so let's use that wild to go once more on thrill and that means we are just one thrill away from five extra points at the end of the game alright we're done so the yellow player can go and they've decided to spend seven minus one or six dollars in order to place the minecart mayhem into their park they had 12 bucks so they can spend six of those and then when they place this down they feel pretty good about putting it right over there that is going to cover up two wild emotion spots and then they will also gain one thrill and two joy the thrill will get them into the five point end game area and then the two joy will get them quite a bit closer to it and then they have two wild emotions and they're gonna go with joy that will get that into the five point area and they felt that made more sense than trying to catch up with awe which was farther back than joy for them yellow is done so red can go and as you can see they have the fourth worker in this final month after considering their options red is going to go to the realtor they're going
to spend three of their dollars and then they are going to place this onto their board they'll extend out to the left they have to add three trees down for it and now we can take our turn now up to this point we have satisfied our most variety but not our best landscape we have removed two trees from our board up to this point in the game and we would need to remove six or more in order to get these three points that means we could spend both of our final workers clearing two trees each to get those three points or we could spend our last couple of actions getting concessions i think concessions makes the most sense so let's go over here and we will take this one which will increase our awe and our thrill by one we can place this right over there on top of that wild emotion icon so we'll gain one thrill which gets us into that five point area we will also gain the one aw which puts us into first place on that row and then with our one wild i think we should go with joy that puts us into second place on that track and the second place player does get a point it's possible red might go back on top of us but i figure we may as well vie for that all right we're done so yellow can go and they've decided to take a concession they're going to go with some balloons which will increase their thrill by one and then they're going to place this onto their board now i do want to point out that once you place these tiles down you can't move them but that being said i am going to cheat a little bit i didn't think into the future enough for yellow and they absolutely should have
placed this tile like that earlier on during this month as you can see both of those are legal and by doing this they have more room to actually put these down so that's definitely what they would have done if i'd given them a little bit more thought and again you're not allowed to move these while you're playing but we're just gonna go with a little bit of a cheat there and pretend like that's what they did originally now they can place this right over here and that will increase their thrill by one that means they are now in first and now the red player can go they are going to head over here and they're going to get a saber-tooth show that is going to cost them three plus zero which means they just spend the three and then they're going to place the sabertooth show just like that that's going to cover up two wild emotion spots and then this will also increase their awe by one so that puts them in the lead on the ah track and then with their two wild icons they're going to go up twice on the thrill track which gets them into the five end game area of that row after that red is done and i think for our final turn let's take another concession in particular let's take this one that will increase our joy by one and our awe by one we have to place this onto our board and i think we'll put it over here we essentially have a concession alley over there between some of these larger attractions that puts us in the lead on awe once again and then we go forward on joy which makes it a little more likely that we'll be in second place to get that point when we do the bonus step well that was our last action of the game and now yellow can go and they are going to take another concession in
particular they want this t-shirt hut that will increase their joy by one and their income by one although players don't actually take income anymore that happens at the start of the month they can place this right over here and then gain one joy they were in the lead and now they're a little farther in the lead well at this point red is the only player with workers left and they have two of them and they're honestly not sure what they're gonna do with the second one with the first they are going to go to the concession they can take this hot dog stand and they will cover up this wild emotion spot and that will let them go forward once on any track and they're going with ah red has one worker left and they are going to use it to go over here and take two money now that might not seem great but remember we will have an advertising phase so red can use this money to gain more points and they're feeling pretty good about that after this we have the bonus step let's do second place first and we can see that red is in second on the thrill track we are in second on awe and on the joy track so red will gain one point and we will gain two points and then for first place yellow is going to simply take one point instead of taking a worker because obviously the game is about to be over after that on the ah track red is going to take one point instead of taking the shovel and then finally over here yellow could take a point or they could take three money considering they have a bunch of advertising options they're actually gonna take the three money instead of that point bonuses are done so now it's time for the advertising step we can look up here to the red player and they currently have five money that they could spend
and they have more than enough ways to spend this at a one-to-one rate to gain points this one right here lets them spend three money to get to three points and then they could spend these two over there at the haunted dungeon to get two more points so that is five money in order to gain five victory points we are next and we have six dollars i think let's spend three dollars up here to get two points and then two dollars to get two and one dollar to get one i think that is the most efficient way to spend our money overall and we're essentially spending six dollars to get five points so we can take the five points and finally the yellow player has nine dollars to their name they've decided to spend one dollar up here for one point two dollars down there for two points so that's three dollars for three points then they have six dollars left over and they'll spend three here and three there to get four more points so that means they spent nine dollars and got seven points total from advertising well we're done advertising and at this point we would go into the cleanup step but realistically there's no reason to do it considering this is the fifth and final month of the game so that means the game is now over and we can move into final scoring the first thing that we are going to score are those goal cards we can start with ourselves and reveal these now we needed to remove six or more trees from a property to get these three points and obviously we did not do that we only removed two so we're not going to get these three points but then for the most variety we needed to end the game with at least five different types of attractions in our park when we focus over here we can see that we have a souvenir a prehistoric a fantasy and undersea and a sci-fi attraction that is
five different types total so that means we will gain these three points and we can simply take those tokens from the supply next up there's the yellow player they can reveal these and the first one is most environmental that says if they end the game with four or fewer trees removed from the property board they will gain three points so that means they will get these three points since they did not remove any trees over the course of the game the other option was at best souvenirs and that says if they end the game with at least five different types of concessions on their property board they will gain these three points when we focus in they have one two three four five different types of concessions over here that means they will get three plus three or six points and they can add that to their overall total now if you remember from before we did cheat a little bit having them move this a turn later and if they hadn't done that they couldn't have placed this concession down which would have had some significant impacts but we're gonna let that cheat slide because i really think if i wasn't controlling all three players then this player would have placed the tile like that finally there is the red player their goals are rough and tumble and that says they have to end the game with at least two old west attractions now unfortunately for them they only ended with one of them they were really hoping to pick up another one but they just were not able to make that happen and they did not jump on an opportunity to take one earlier in the game so they don't get these three points but then their other card is called most awesome they need to end the game with their emotion disc farthest along the ah track in order to get three points they did just barely manage to do that so that means they will get those three points and they can add those to their overall score alright now we can count up the
points for all of the attractions that we placed into each of our parks up here the red player has nine points worth of attractions so we can give them 10 and they can put one back into the supply next up there is us and it looks like we ended with 10 points worth of attractions so we can take 10 points and lastly the yellow player also ended the game with 10 points worth of attractions so we'll give them 10 more points after this we can now score points for the motion tracks we will all get five points for every token that's in the last five spots on each track we can start with the red player and they got two of their tokens over so that is 10 points for them next up we were also able to get two over and the yellow player also got two looks like all three of us were able to get two out of our three in there with the other ones lagging behind so that means we will gain 10 points and then the yellow player will also gain 10 points finally every player who has six or seven attractions will get five points and every player with eight or more attractions will get ten when we focus out yellow got seven attractions so that is five more points for them we have six attractions so that is five points for us and then the red player also ended with six attractions so red will get five more points and these are the final scores red ended with 45 points we also ended with 45 points so we are tied and then down here yellow ended with 53 points this means yellow wins the game and we technically come in second because we break the time with red neither of us have any money and the second tiebreaker
is proximity to the shovel and obviously we still have that in front of us so yellow wins the game and that completes a full three-player game of ten penny parks i do want to point out that if yellow had not done that little cheat over here they would have had three less points overall and they still would have won the game in fact technically if they had not changed that up they probably would have sent a worker over to the banker to get two more money which they could have used to advertise so it's likely they would have ended with 51 points instead of 53 but either way yellow has definitely won this game well that's going to bring this tutorial to a close and i hope you enjoyed learning how to play 10 penny parks if while you were watching this any part of the game really jumped out to you or there was a turn where you felt like we should have done something differently then please comment about it down below because i'd love to see that kind of feedback as always i'd like to thank everyone who's been supporting this channel including these producer-level patreon supporters if you too would like to directly support the channel in the creation of future videos like this one then please go to johngetsgames.comsupport also if you enjoyed this video please click the like button for it down below as well as the subscribe button for the channel thanks for watching