Explorers Of Navoria - How To Play
Games in This Video
1 game is featured in this video — it unlocks as you watch.
Transcript
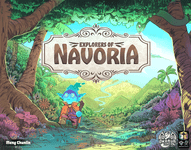
hi and welcome to watch it played my name is Rodney Smith and in this video we're going to learn the two to four player game explorers of neoria designed by m Chin Lin and published by drames who helped sponsor this video even though you live in the magical land of navor you still didn't expect to see new continents suddenly popping up out of the ocean but that's exactly what happened and now the council is sending you and a few others to explore these new lands setting the stage for a grand adventure and a bit of competition so join me at the table and let's learn how to play to set up place the main board in the center of the play area then nearby create a supply of these weapon mineral and food tokens these are the action tokens which you now add to this bag however in a two-player game like we're going to set up here you first return one token of each color back to the box now find these towns folks cards and separate them into groups based on their backs shuffling each deck separately then put each of the decks onto the matching spaces for them here on the board dealing the top three from each deck into a face up row to its left so it looks something like this when you're done the tiles with this back are known as the favors but find the one with this front and set it aside Shuffle the rest and deal four randomly onto the
spaces for them here on the board however if you want a more competitive experience in a two-player game you can use this set aside tile first shuffle all the tiles as before but then deal three of them face down shuffling those together with this set aside tile then deal these randomly onto the spaces of the board as before and we'll see the effects of this particular tile a little later either way no matter what method you use any leftover favor tiles are always returned to the box now each person collects one of these player boards or reference card and trading posts favor exploration a points and turn order marker in their chosen color add one of your trading posts to each of the square spaces you'll find for them here on your player board then each person moves one of their explorers to each of the three spaces on the board showing this Arrow you'll find these spaces here here and here also notice around the outside edge of the board you'll find this numbered points track each player now adds their points marker to its zero space here then randomly determine a first player and have them set their turn order marker onto the one space of this compass on the board going in clockwise Order each other player adds their marker to the next available empty spot and that's the setup in
explorers of navor you and the other players will be recruiting towns folk to Aid you in your adventures as you attempt to explore new continents build trading posts search for Hidden Treasures and a variety of other activities all in an effort to gain the most points by the end of the game the game is played over a series of three rounds and each round is broken into four phases starting with the recruit phase beginning with the first player and going in clockwise order around this Compass each player takes a turn on your turn you recruit in one of two possible ways one option is to reach into the bag and randomly draw out two tokens pick one of them to put onto the matching colored towns folk deck of this column and then take any one of the face up cards in the row to its left add the leftover action token you collected to this area of the board known as the Town Center while you might want to pick one card over another will make more sense later but for now just be aware that any card you take is not replaced meaning that there will be fewer cards here for other players to collect as turns continue the card you did collect you set face up in front of yourself the cards you collect should always remain visible to all of the players and they'll each have various effects some will show this income symbol which means any effects to its right will be resolved later during what is known as the income phase others will show this
end of game symbol meaning the effects to its right are only resolved at the end of the game if you don't see either the income or end of game symbols to the left of printed effects it means that those effects are resolved immediately as soon as you place the card in front of you in some cases you'll find a combination here the symbols on the far left are resolved as soon as this is collected but the ones in this area are only resolved during the income phase we'll see how the different symbols are resolved in a moment but remember I said that when it's your turn during the recruit phase you may choose to draw two random action tokens from the bag putting one in the town center and the other on top of one of the decks collecting one of the cards in the row directly to its left however you have one other option you may instead perform if there's at least one token currently in the Town Center then instead of drawing tokens from the bag you may pick any one of the tokens here putting it on top of the matching color deck and then collecting one of the face up cards in the row to its left again You' place that card in front of you and resolve any immediate effects it might show and with that in mind let's go through all the different types of immediate effects you might encounter blue cards represent merchants and always have an income phase effect but on the far left may also have an immediate effect showing either one or two of these symbols representing points when you resolve
these gain that number of points anytime you gain points move your marker the related number of spaces forward on this track two in this case if you gain enough points over the course of the game that you've traveled all the way around this track record that you've earned 100 points so far and then continue going around again purple cards represent adventurers and will always have an income phase effect their immediate effects May provide you with points like we see here but they will always show at least one of the three different types of territory symbols those symbols each refer to one of the three territories on the board that represent a glacier desert and Forest continent each territory will have what is known as an exploration track which starts on a space marked with an arrow and follows a path through various other spaces when resolving one of these immediate effects showing a territory symbol and foot icon Advance your exploration marker one step forward along the related exploration track so to here in this case if I was later resolving this effect it shows two of these symbols so I'd advance two spaces at the end of each track you'll find a space with a treasure chest containing a certain number of points five at the end of the Forest track and three showing here at the end of the glacier track and just a single point in the Treasure
space of the desert track when your marker reaches the treasure space of a track immediately gain the related number of points and if an effect would cause you to advance on a track you're already at the end of stay put but gain the Rel amount of treasure again for each time you would move but couldn't so if I now gained this immediate effect which would Advance me on this track twice I would earn five points for each or 10 points total now let's take a look at the yellow cards which represent Builders these often have immediate effects we've already seen providing points or causing your Explorer to move on one of the tracks but to the far right these will always show a territory symbol and what is known as a trading post icon to resolve these go to your player board which is divided into three separate sections known as docs one for each of the territories as indicated by the related symbols from the dock whose icon matches the effect you're resolving collect your topmost Trading Post piece and add it to the matching territories track with a space showing a one if you were to resolve one of these symbols again later you'd add the next highest trading post to the space of that territory marked with a two and a third would go into the space marked with a three ignore any future effects that would build a post on a track where you already have three of them keep in mind it doesn't matter where your exploration
marker is located when building trading posts and you can build on a space even if another player has one of their pieces already there some yellow cards may also show one of these three different symbols representing the three different Goods and we'll learn about these in a moment and that moment is right now green Artisan cards often provide a certain number of points but always some combination of the three different types of goods known as minerals weapons and food when resolving Goods collect the related tokens from the General Supply so in this case I'd gain one weapon and one food Goods you gain are stored in the three areas above each of your three docks when you gain several Goods at once as I have here each must go into a different dock of your choosing I cannot place them together in the same dock so maybe I'd put one here and the other here we'll see why you might want to assign Goods to certain docks in a moment but as a further example let's say I was resolving this card later here I've gained three minerals all at once and remember they must all go into different docks so I'd have to place one into each each of these after you've placed Goods into a dock you cannot move them to a different dock later this is important because each dock is looking for a certain combination of goods known as an order which will be shown in the spaces here as soon as you've placed Goods into
a dock area above an order that matches its requirements you would pause and fulfill it for example this dock is looking for one of each type of good so as soon as we add a food good here the order would be fulfilled we'd then pause our current turn and return just the goods from this dock that match the order placing them back in the General Supply you then resolve the benefits showing in the area here first we'd Advance our exploration marker on the forest exploration track then the symbol here means that for each green card we currently have in front of us we'd earn one point right now we have three green cards so that's three points when gaining the benefits of completing an order you also gain the rewards under that dock by any spaces where a trading post has been removed if we assume these two had been previously built then fulfilling this order gets us these benefits and two more points for this effect and another point for every Green Card we have so three more points to fulfill the order on this stock you just need to have four Goods in any combination for example like this then we'd earn the related benefits here all of these we've seen before with most of them causing you to advance along the related exploration tracks at this dock there are three different ways to fulfill its order request either by having three weapons three minerals or
three food so if we had these tokens already and then gained this one we trade in the three weapons and resolve the related benefits here now this is a new benefit and it simply means you advance one space on any exploration track of your choosing and that covers all the immediate effects you might resolve after gaining a Town's folk card so when it's your turn during this recruit phase you either draw two action tokens from the bag adding one to the town center on the board and the other to a deck collecting one of the related cards to its left or you ignore the bag and pick any one of the tokens already in the Town Center to move onto a deck collecting a related card to its left and remember you never replace cards collected from the face up display also if you would draw from the bag and there's only one token left put it directly on a deck and gain a card adding nothing to the town center once each player has had a turn recruiting their first card you go around the compass again and again taking more turns collecting cards until each person has four cards face up in front of themselves in a two or three player game or once they have three cards in front of themselves during a four player game to save space feel free to overlap your cards keeping the symbols in this corner visible along with any end of game and income effects they may have once everyone has the required number of cards in front of thems the recruit
phase ends and The Gather phase begins first return any tokens in the Town Center back to the bag and then starting with the last player on the turn order compass and going in reverse turn Order each person takes a turn on your turn pick an action token from any deck and move it to an empty space within this town area that matches the token's color so if I had taken this blue token I'd add it to any one of these three spots you then gain the reward by that space when placing a blue token I'd pick this space if it was available since I'd gain six points well going here would only give me two points in this way being the first to a colored area of town means you'll get the best pick of its related rewards many of these we've seen before but there are a few new symbols this benefit means you can build the topmost trading post from any track on your player board into the next related space of its track for example I might add this one to the first building space of the desert track this symbol means that you gain any one good of your choice from the supply and this means you advance one space on any exploration track of your choice the benefit we see on this space is similar but the slash between the two rewards means you only pick one of them to resolve these rewards will earn you some combination of mineral goods and points and remember whenever you gain more than one good at
the same time you must Place each of them into separate docks on your player board these spaces gain you food supplies and possibly one good of your choice and here you gain weapon goods and possibly Advance on an exploration track of your choice remember when placing Goods in your docks no matter when it happens during the game if you fulfill the requirements of its order then you pause your turn and resolve it gaining its rewards and then continuing with any remaining steps of your turn once everyone has taken a turn placing an action token you continue taking turns in reverse order until every action Tok token on the decks have been assigned to Open Spaces in town that ends The Gather phase and then the income phase begins which all players can resolve at the same time first resolve all effects showing to the right of any income symbols you have on cards face up in front of you these will be located on blue and purple cards the blue Merchants provide you with a point for each card you have face up in front of you matching the species symbol it shows here every card in the game comes from one of the four different types of species known as Sprites humans goblins and beasts as indicated by the symbols showing in every card's top right hand corner so during the income phase this card provides you with one point for every Beast symbol you currently have face up in front of you including itself
so if I had these cards I'd earn 1 2 3 four points and be aware red cards will always show two symbol so make sure you count both in your total as we'll see you'll gain more cards in later rounds so if I add all of these you'll notice that I'm going to earn one point for each Beast symbol I have because of this effect and I'd also earn those points again here you gain the benefits of each income phase effect you have even if you have more than one showing the same benefit purple cards all have the exact same income effect they'll show this flag symbol indicating that you now earn one point for each flag your Explorer markers have reached or passed you'll find these flags on Spaces like these so when scoring this effect I would count the total number of spaces with these flag symbols that I had reached or passed with my markers so if the board looked like this and I had my exploration markers on these spaces I would have reached or passed 1 2 3 four flag spaces total for a total of four points and you would earn those points for each one of those income effects you had face up in front of you so if I had a second I'd earn another four points finally during the income phase players earn points from the topmost position of the related chart beside each exploration track for having their marker furthest ahead on its track so
here this player would earn three points a player in second place only scores points if you have a three- player game and a player in third place only scores points in a four-player game so in this two-player game only the first place reward is collected if two players are tied for a position they each earn the reward and then the next reward that would normally be given out is skipped over if three players are tied for a position which can happen in a three or four player game the next two rewards are skipped let's say we had a four-player game and the markers were in these positions this player would earn three points both of these players would earn two points each and then this third position would be skipped over so the purple player here would gain nothing also be aware you don't earn points for your placement along a track if your marker is still on the start space in other words in this four-player example only the first and second place points would be awarded nothing would be given out for third place all right once everyone has earned any points they are owed during the income phase you move to the return phase here every player moves their exploration marker to the space on each track that has their furthest ahead trading post I've created this example to demonstrate here this player would advance to this space since it's the one furthest ahead on the track with one of their trading posts and this player would move backwards to this space for the same reason now if a player has no
trading posts on a track they return to the starting space here next collect all of the action tokens remaining on the board and add them back to the bag then discard every card remaining in the face up display and deal three new ones from each deck into a row on their left now you adjust the turn order based on player scores the person with the most points goes into the first place position and the person with the second most points goes into second and so on in the case of a tie the tied players m main the relative order that they had with each other from the previous round then you begin a new round starting with a new recruit phase you'll find all the phases of a round summarized on the back of the rule book and on your player Aid if you need reminders while playing as you continue playing rounds you'll add more cards to the ones already in front of you remember four more during each recruit phase in a two or three player game and just three more if you have four players so at the end of the the second recruit phase in a two-player game I'd have a total of eight cards meaning that during the next income phase I'd benefit from all the cards I collected in both the current round and previous one that said as you gain more cards keep an eye on how many icons you've collected from each species remember these are found in each card's top right hand corner as soon as a player has at least five icons from the
same species they earn favor with them for example let's say I had just gained this card I now have 1 2 3 four five Beast icons at that moment I pause what I'm doing and move my Beast favor token to the top half of the favor tile in the space with the Beast symbol the next player to gain five or more Beast symbols would add their marker to the bottom half section once a favor tile has two tokens no more can be added to it that said players can still earn favor with any of the other species following the same rules even if they had previously earned favor on other tiles in other words the first two players to gain five symbols in a species gets to move their marker to the related tile in a two-player game if you chose to include this tile it means you don't assign favor tokens for collecting five icons of that type we'll learn about the value of moving markers to the favor tiles in a moment but after you've resolved three rounds the game ends actually you can end the game as soon as you've completed the income phase of the third round completing the return phase won't be necessary because now it's time for final scoring first score all of the red cards you have among the face up ones in front of you these represent soldiers guarding your trading posts and always show the same type of endgame reward with the only difference being which of the three types of territories it might show here for every Trading
Post you've built in that territ forest in this case you earn two points so if I had these two cards in my Tableau this one would earn me two points for each of these trading posts and this one would also earn four points next it's time to score the favor tiles check each section where you placed a token and then earn the related number of points for each card of the colors shown that you have in your Tableau for example by having my marker here I earn two points for each and every green and or blue card I have face up in front of me just to be clear this does not indicate pairs this means every Green Card I have is worth two points and every blue card I have is worth two points the tile here Works in a similar way but my marker in this position means for every yellow or purple card I have I earn one point once the favorite tiles have all been scored the player with the most points wins in the case of a tie the tied players share the victory now if you're interested in being able to play solo or with a fifth player or if you're looking for even more variety to add into your game like asymmetric Powers bonus ways to score and other twists you can find all of that in the game's forgotten lands expansion you can also get a playmat and upgraded components all of which are available separately but otherwise that's everything you need to know to play explorers of navor if you have any questions about anything you saw here feel free to put them in the comments below and I'll gladly answer them as
soon as I get a chance you'll also find forums for discussion pictures other videos and lots more over on the games page at Board Game Geek and I'll put a link to that in the description below and if you found this video helpful please consider giving it a like subscribing and clicking that little bell icon so you get notification anytime we post a new video and if you'd like to support us directly you can join our patreon team which I'll have linked below but until next time thanks for watching