Final Girl season 3 deep dive - Ranking all killers, locations and Final girls + strategy and advice
Games in This Video
8 games are featured in this video — they unlock as you watch.




Transcript
This video is brought to you by the threeminute board game patrons. Keep us independent by supporting us on Patreon. Kyoto and welcome to this threeminut ball game special. Kyoto and welcome to the season 3 deep dive into final girl. Now this is more than just a regular review. It's going to be a review of every single box from season 3. And as a bonus special, we're chucking in the North Pole nightmare as part of season 3 as well. Like the previous two videos, I'm going to look at the killers and the locations in isolation and talk about them. I'll also talk about some strategies that you can use with each killer or at each location, and I'll run through all the cards and all the rules for them as well. I'll then talk about each of the final girls that was included in season 3 and how I think they perform. Now, I'm not going to do a big combination rank for seasons 1, 2, and three at the end of this video. I'm planning on doing a season 4 video after this. So, I think I'll do that then or as another video after that fact. So, I'll leave the season 3 ratings in isolation for now.
So, disclaimers, I actually backed season 3 for Final Girls. So, these are all my copies of the game. I also backed the Kickstarter for North Pole Nightmare. So, if you're keeping score, season 1 and season 4 are review copies. And season 2 and season 3 I bought for myself. And with that out of the way, let's start with the killers. That Terminator is out there. It can't be bargained with. It can't be reasoned with. It doesn't feel pity or remorse or fear. And it absolutely will not stop, ever, until you are dead.
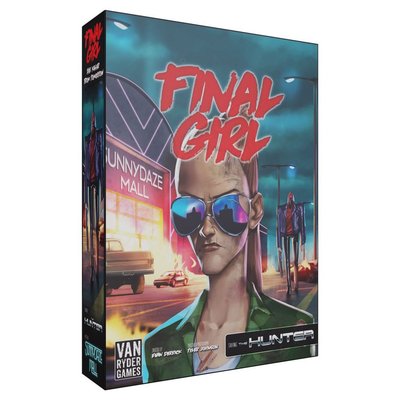
And first up, we have the Hunter from The Killer from Tomorrow. The Killer from Tomorrow is very obviously inspired by the Terminator movies. All right. Here we have the hunter who starts on five horror and has 15 health. Now, that's a little misleading because there are two versions of the hunter. The first version you fight doesn't use health at all. Instead, you place three components on a stack here. Each of these requires two hits to remove. And once three components have been removed, the countdown begins to bring in the real killer. And you track that with these two countdown markers. Only once the second stage killer arrives do you put down the final health token and all 15 health. Damage components have knocked off the killer and scatter like a victim would. You may move to the location with a component and pick it up for one time unit. Components will have between zero and three health on them.
And you can add components to the stage one killer and turn them into an ally. The dark power becomes an upgrade for this ally and it activates using these four cubes. And you can see what kind of actions it can do here, such as two damage or moving one space. At the end of the round, slide each of these blocks to the right. During setup, you will shuffle the Hunter Mark X card into the terror deck. It'll be one of the bottom three cards, and this can also activate the second stage killer. When the main killer turns up, draw a new setup card, and place a silver mele in the shownen killer spot. Now, after going through all those special rules, let's look at the basics. The hunter's default killer action is to target the final girl, move towards them, and attack. And the hunter generates blood lust differently to other killers. They do not get blood lust increases from killing victims.
They do gain blood lust from hitting the final girl, and this leads to a killer that relentlessly targets the final girl a lot more than any other killer does. Starting movement and starting attack is only one each, so at the start of the game, the hunter is quite easy to avoid. The dark powers are all about upgrading the first killer, the mark 5. Cybernetic agility is quite annoying because you do want to slow down the hunter at the start. You want them languishing on one movement and slowly following you around the board. And when it moves too, it's a lot more inclined to catch up with you. Reinforce endoskeleton is a bit of a nothing. It does mean you won't be able to use some environmental effects like say on the USS Conrad, you'll have a hard time melting this version of the hunter, but by and large this is a power you could easily ignore. Titanium laced bio tissue on the other hand is reasonably annoying because it just makes getting that initial damage off the hunter that bit harder. Still, none of these dark powers are that menacing.
And remember that the dark power goes away when the second stage killer turns up. Now, it's worth noting that the appearance of the second stage killer does not immediately trigger the finale. I had in my brain for some reason that when you remove the countdown markers that once you got to the last one, you'd flip over the finale. and it doesn't actually say to do that in the rules. For the finalies, first up, we have Relentless Pursuit, which will rocket the killer to the top of the bloodlust chart. Here, the killer will recover one health, target the final girl, move once, and attack once, but they're going to be fast moves and big attacks. Still, as far as finales go, this one's pretty easy to manage. I think termination mode active is far worse because of the two attacks. In general, you should be able to have a guard or a retaliate in hand at any given time, ideally two of them.
But it's very difficult to ensure you have two in hand. So, if the finale is termination mode active, you're going to have to do a lot more running or try to take down the hunter in like a couple of big hits cuz you won't be able to stand long against this. And adaptive AI is a funny one. Sure, it makes the Mark 5 less useful, but I found that the Mark 5 tends to last about two rounds against the MarkX. Anyway, the thing with adaptive AI is you're looking at how much worse is four damage to five damage or five damage to six damage. You're ideally going to be wanting to block all of that damage or not be hit. So, in some ways, this is the easiest of them to deal with because it's one attack around which means you can have a guard or a retaliator in hand for sure. And the difference between that attack doing five or six damage really doesn't matter because you're going to be wanting to get two successes on those defensive rolls. Of course, you can't do that for long, and you are going to have to smash through that health pool. But honestly, as far as finales go, adaptive AI, the special rules on it don't really do much. The Mark X1000 epic finale is horrific. This is one of the toughest epic finales to beat in the game in my opinion. Bloodlust is going to go up and very quickly, the hunter is going to be moving four to six spaces and attacking twice. You only have a couple of rounds to deal with the hunter if you draw this epic finale before you are completely gone. It's pretty much a sudden death round as soon as this pops out. And the epic dark power, well, this is just a fun upgrade for the Mark 5. And in many ways, I'd consider this a buff for the player because having the Mark 5 do an
extra bit of damage for the a couple of times that the Mark 5 will get to do damage is really cool. But having the range is even better cuz that might keep the M 5 just that little bit longer. Right, we already mentioned the Hunter Marks X card and this will trigger the finale, but here are the minor dark powers. Now, as I mentioned, the Hunter has difficulty increasing its blood lust to start with. Advanced AI can give it a real big power up very quickly. You're going to want to deal with this as soon as this one comes out because the Hunter scales up brutally on its blood lust track. And the longer you can keep it at one movement and one damage, the better. And titanium shield is just annoying. That's five extra health. No one needs that. So, the Hunter is really challenging to deal with simply because it has such a great toolbox at messing up the final girl. As you see, all the cards here actively target the final girl. So, that's two actions that are targeting the final girl each turn.
Shock and is a game breaker potentially because you will be relying on running away from the killer and using guards and retaliates to keep yourself alive. And rolling that one fewer dice can make a real big difference. The same is true for analyze targeting weakness. This can force you to discard a spare guard or retaliate card you've got in your hand. Mixed in with that are some interesting crowd control cards. While a hunter doesn't deliberately target victims very often, these cards represent the collateral damage it can do to them and other consequences. You can end up playing against the hunter and hyperfocusing on it and its movement and somewhat ignore the victims. and then these cards will come out and you'll regret not paying more attention to the victims. Eliminate all obstacles and move or be eliminated can both drive the blood lust track up very very quickly.
And I've seen both of them take out three or four victims at a time. So I really like a lot of aspects of the Hunter. I love the idea that this is a killer that goes after the final girl almost exclusively. I think that's a really neat point of difference. My problem with the Hunter is there's just too much going on. It's trying to do Terminator 1 and Terminator 2 at the same time. You got to do the first fight against the original hunter, fix them up, and then fight the second hunter. Then there's all the stuff with components, the special targeting rules. Then you've got those ally rules as well. There is a lot happening with the hunter. I kind of just want there to be one hunter. I want there to be one killer cyborg who's really hard to kill and is set on killing you from the start of the game. So, I think this one just got a little too clever for its own good for me. I do like the showdown against the big killer at the end of this. I think they're a superlative challenge. I just think there's a lot of busy work to get to that great showdown. I feel like this is almost the advanced mode of what the hunter could have been. And I'm really missing the basic mode of just one Terminator trying to kill me.
Next up is the Slayer from the Falwood Files, which is heavily inspired by Stranger Things. Now, the Slayer is more like the season 4 and season 5 killer than it is the season 1 killer. Next up, we have the Slayer, who has four horror and 11 health. They start with two move and two attack, which is a pretty big deal. And they scale up pretty brutally to five attack and four move. The killer action has a special action at the start. Then they will target the final glue or a victim and attack. But let's look at that special action because that's the core of what the slayer does. Here we have the killer, the final girl, two normal victims, and a special victim for the slayer. Now that special victim, the gray one, is in the mirror dimension. We use the card on the left to track whether the final girl or special victims are in the mirror dimension. But let's resolve that special little icon. We determine the closest victim in our dimension to the slayer and we swap them for one of the special victims. This shows that this victim is now in the mirror dimension.
And if that was a special victim, as I mentioned, we would instead of swapping them for a gray mele, move them down on the tracker here. When a victim is pulled into the mirror dimension, they panic and may be moved as a result. Now, when the final girl is in our dimension, normal victims will follow them like so. In order to get to the mirror dimension, you need to open a rift, which is one of the special cards that comes with the slayer. And when you move to the mirror dimension, show that on the special card. While the final girl is in the mirror dimension, victims trapped there, including the special victims trapped there, will follow you. At any point, you can return to our dimension, and any victims with you can follow. You may only rescue a victim if they are in our dimension. So, generally what the Slayer is going to do is pull things into the mirror dimension so it can kill them.
That's its focus. That's its deal. Victims in our dimension will be mostly safe from it. Let's look at it dark powers. Okay, Renewed Determination barely counts as a dark power to me. It's an addition to a finale card. If you draw this one, that's great. It's something you'll have to deal with in the finale and hopefully you'll be quite well set up by that point. The same is true for Master Plan. This only comes into fruition in the finale. So, it's not something that's going to get in your way for most of the game. And frankly, if there are four or more victims in the mirror dimension and he hasn't already killed them or you haven't got them out, something pretty screwy is going on. Next up is mind control. And this one can be quite annoying because it makes it just that much easier for the slayer to build up his victim count and get that blood lust track going. Now, this dark power comes pretty late, so he's already moving three and doing three damage, and this can really accelerate him up this chart.
So, this is so this is quite an annoying dark power. Let's check out the finales. Welcome to my world works really well with Master Plan. And in general, this is a really fun finale because all of a sudden, any victims that are left over get sent straight into the mirror dimension. Hopefully, you've got most of the victims out of the way by this point. But if you haven't, this can be a real headache. Still, there's only one move action here and one attack action. And while there is a horror increase, this could be a lot worse. Next up is Let's Finish This. And as I've said before, double attacks are the real killer in final, especially as the Slayer has pretty good movement. You're not going to want to weather too many rounds of getting attacked twice. And then interdimensional rift collapse, which is a great finale. Pretty much kills all of the victims that are currently in the mirror dimension and gets rid of that dimension hopping mechanic from the rest of the game. This is probably my favorite finale because it's a nice clean one. Even though it's got the double attacks because one of the issues with the slayer is all the tracking what's in what dimension and moving things about that gets rid of it and it makes for a really nice focused finale. Your time is up is pretty straightforward and brutal. Increases the blood lust track to the top and has the two attacks. A really straightforward finale for the slayer, but one that's going to be a real challenge. And it in my head is an awful epic dark power. Final Girl is all about card management and having the right cards in your hand at the right time.
Being forced to discard cards at random is almost always bad. And while by itself that isn't probably going to kill you, it's just an extra tax on everything you do through a game that is really tight on time and resources already. Uh here we have the minor dark powers. Interdimensional interference. You might get hit by this once or twice in a game. I don't think it's personally that big a deal. Interdimensional focus. You might have a finale that doesn't even have the symbol. So, while it's a two extra health as a minor dark power, it's not one I'm worried about at all. Zealous attack seems really bad, but I have a philosophy that a lot of the time in Final Girl, adding plus one damage to something that's already doing four or five damage really isn't that meaningful. You're going to be wanting to avoid that damage anyway. And in very few circumstances are you going to want to be straight tanking five or six damage at a pop. And at that point, the difference between four damage and five damage is kind of negligible. Both of them are just going to ruin your day.
So, here's some of the more typical terror cards you'll get. And the slayer comes with a lot of little horror increases and a lot of simple, straightforward extra actions. And because it starts moving two and attacking for two, it can start putting up the body count pretty quickly. Hyperdimensional travel is, I think, an exceedingly important card because I think just about every killer needs some form of teleport just to shake the game up a little. And this is one of the one of the more interesting ones because it allows it to teleport across the board and go after a victim. So, it's not necessarily jumping on the final girl and doing a sneak attack, but it is changing up the board state considerably. And I think that's a fun card. It can detect blood is a genius design card uh because I like running around on one health quite a bit just to get the extra die. And I have been punished for that by this card and I thought it was very funny at the time.
And I feel something evil in this place is a kind of card that punishes you for doing well. So if you've done well getting people out of the mirror dimension, this card comes along and punishes you for that, which is both great and terrible at the same time. It's it's what you want a good killer card to do. So yeah, the slayer the slayer feels like a good idea, but again, it's just that little bit busy. The little fiddly swapping everyone back to the mirror dimension and back and forth. I feel like I should like this more and it feels like it should make more of a difference, but it really doesn't. It just feels like a bit of an action tax for you to switch back and forth between the mirror dimension each turn. And I don't think the extra mechanics add enough to warrant their inclusion. Like it's a cool idea having a mirror dimension, but how it plays out is kind of a bit mundane. Still a perfectly serviceable killer with some really neat finales. like this. The Slayer has some really cool finales, but I find the amount of extra rules burden, extra fiddling around compared to the satisfaction of fighting a slayer isn't quite as high as it could have been for me.
Son of a [ __ ] Next up, we have Terror from Destiny, which is based on things like The Final Destination and I Know What You Did Last Summer movies. This Vignette is all about cheating death and escaping your destiny. Terror from Destiny is the vignette in series 3, and the vignettes don't have a single killer. In this case, the killer is fate or death, and that manifests in a game that's quite a bit different to your normal game of Final Girl. There'll be five fated victims in one of three potential scenarios. The only real difference is what happens with the destiny symbol gets triggered during the game. And that's the hand with the eye on it. We'll go with the death coaster. And when destiny is triggered here, that means the horror level goes up by one.
Now, there are five fated victims. And you're randomly assigned their tokens face down in these spots. And this has a sequence. The goal is to save each of the faded victims, but you have to do this in the right order. And how do you know what the right order is? Well, you use the premonition card. This allows you to reveal some unknowns. Obviously, the most important unknowns are this death order. You'll also have arranged for you consequences and punishments and this special marker that starts at the left. Now, let's go through a sequence. We've rescued two fated victims. We knew the first one was the first character in the death order, and we took a punt on the second one. Now, in the terror deck, there will be five fated death cards. And when we draw the first of these, we'll resolve the first death. Now, here we've got the right person matched up to the death order. So, here, because we have saved the character, we get the save benefit shown on this card. We then move the death marker one space further along. The next card we draw is this one. Now, we've saved someone, but the person underneath here is a different character. It is a different fated victim. So, the fated victim we did save goes to Limbo, and this character's marker is removed from the board and placed in the consequence space here.
Again, the death marker moves on. Now, the third fated death reveals the character we've got in limbo, and because of this, we suffer the consequences in the limbo section of the card, but we do not place that person in the consequences section on this track. That's because they have been saved, but it was done in the wrong order. So hypothetically, we get to the end of the game and we failed to save these three people. So now we would reveal the consequences and punishment for each of these victims we did not save. Here we must have saved at least six victims, otherwise we're going to lose two health. Now this is another place where the premonitioning cards can help. They can show you what the consequences and punishment will be. So in this scenario, if we got to the end of the game and we had three health but had 12 cost worth of cards in our hand, we could take the two damage from the leftmost punishment, pay the 12 cost worth of action cards to avoid taking four damage, and then the final one didn't have a cost associated with it at all. So as you can see, that plays out really differently to a normal killer. Ter from Destiny does have minor dark powers as well. The more of fate can ratchet up the blood lust track really really quickly and extra paranoia just makes it that much more awkward to save fated victims. There are always going to be five fated death cards dealt in and they are all unique. Now the ter destiny cards fall into two main categories. Really simple ones like this and then these more complex sort of narrative cards that create story moments. of these. Challenge fate is
absolutely bonkers and can completely change the nature of the game you're playing. While failing the challenge fate role is awful, those benefits are all staggeringly good. And finally, it does have dark powers, but every one of them is just attacks on your actions. Double trouble makes drawing a destiny card even worse. Algass of Despair makes it a pain to get people finally rescued. And existential paralysis, that's just a card tax. I think each of these cards is interesting, but not necessarily game-breaking. Ter from Destiny is legitimately interesting, and I really like its approach to making the game of Final Girl feel quite different. I do like the novelty factor of it, but it just takes away from what I like most in Final Girl, and that is fighting a big bad. I do like taking down the baddy at the end. I find that quite satisfying.
So, while this is a neat puzzle and I really appreciate what it does to set itself apart from a regular game of Final Girl, it's a sort of spicy treat that I don't feel myself wanting to play that often. I do enjoy it when I do play it, but if I'm looking up at playing a game of Final Girl, uh, this is not going to be on my radar very often. I'm not going to feel compelled to go back to Terra from Destiny that often. So, yeah, I appreciate this more for what it does necessarily than how much I enjoy playing it personally and want to play it again.
Next up, we have the ISIS from Don't Make a Sound, which is heavily inspired by A Quiet Place and I guess films like Bird Box as well. Next up, we have the Isus, which starts on four horror, has 10 health, and has a very straightforward killer action. I'm just moving one space. It has an incredibly short and nasty blood lust track, though, starting on three move and three attack that escalates up to four attack and five move. Five move is absolutely crazy. The special thing about the Isus though is noise. Now, you get a special noise marker that will go on the track, and every time you play a card, you'll advance that noise marker one space. If you use equipment cards, they will advance at either zero, one, or three spaces. And the game gives guidelines, but not hard rules on what items would create what level of noise. So, for example, looking at an old map might not generate any noise at all, cuz you can quietly open the map and look at it.
Using a sword, however, would generate some noise. and using the elephant gun. Well, that's going to create a whole bunch of noise. Your noise score will be referenced by the Isus' terror cards. So, let's have a look at their dark powers. Quick counter is awful. After you attack the Ius, place it in your space and you lose one health. Now, there's no check against that. You just lose the health. It also means you can be on the other side of the map and shoot it and it gets straight up to you. Quick counter can turn a challenging killer into a downright horrible nightmare killer to deal with because this isn't a once per turn thing. This is every time you attack it. Reactive swipe is also pretty nasty. Losing health every time you move out of its space. Now, once it's on to you, it is a fastmoving critter. and getting taxed for every time you move away from it is just awful. The iss really really nasty dark powers. And hard skin, well, that just adds to that category as well.
Ignores the first damage it takes each turn. And that's going to make the Isis something you're not necessarily going to kill in two turns. It's probably going to take you three or four, which might not be so bad if it didn't hit like a truck. Now, let's look at the finales. It knows my moves is one of the scariest finales in the game from my point of view because I am a player who relies on using reaction cards a lot to keep myself alive. And here it's moving and attacking twice. And when you resolve a reaction card, remove it from the game. So your two guards and you want to retaliate, they're going to be gone real quick. You absolutely need to defeat the Isus as soon as is practicable uh with this finale. Otherwise, it's going to chew you up and spit you out in no time at all. It can hear everything. Kind of shuts down a lot of gun strategies because every time you use a gun, it's going to boost up the noise level. And having to deal with two attacks is nasty enough. Having to deal with four, if you use a shotgun two times in a round, that's massive. So, if you use an attack card and a gun, that is four noise straight off the bat, and it's going to hit you twice. This is another absolutely brutal finale. You don't want to get to the finale with the isus. You You want to get it dealt to before then because these finales are horrible. And then there's no more running which just places the in your space and it attacks twice. I like that you can use the movement effects to save victims here or to do stuff with victims. That's pretty cool. But this is one of those showdowns. This is going to go like two rounds and the game's going to be over one way or the other. And I
do like that the Isly finales are like that, that they are very brutal and they very much draw the game to an immediate end. You won't end up with 17 or 18 turn long games against the Isus where you're juking and moving back and forth. Uh it's all going to be over pretty damn quickly. Then we have the epic finale final slash which is fascinating. Now, I really like this one because you drop yourself down to one health and you just try to ride having three or four dice and if you fail, that's it. It's game over. But if you don't, you come out on top. Makes for a really exciting and different end of the game. And then we got the epic dark power. And while this is advancing blood lust each turn is pretty bad and pretty gnarly and will get them up the blood lust track really quickly. Somehow this isn't as bad as some of the other powers. I would say I'd be far more scared to see quick counter come out than I would be this one. Let's have a look at the minor powers. Blinding speed is awful. Uh blind speed is a terrible dark power and you're going to want to get some hits on the eyeless as soon as is practical to get rid of that cuz you're going to run out of uh victims pretty damn quickly, especially if you're operating in an environment that just randomly panics people. A fire alarm at the mall with blinding speed in play killed like six victims in one turn. was very very very bad. Our sensors is okay. It's not great, but as far as my dark powers go, having the noise level level reset to one is something you can manage. I have
a bad feeling about this as a card that annoys me a little because it does have two negative effects. A horror level increase and the noise going up by one. But then it's also draw the next terror card as well. So it shortens the deck. It basically means you skip a turn of being able to power up before the finale and it's still doing two things that kind of suck. Okay, now we're on to the meat of the Isus, which are its terror cards. And you'll see some of these involve number on the final girl. That means if your noise value is that or higher, it will target that line. Otherwise, it will do the line below. So sh here can potentially be a double move. three attacks unless you reduce your time to zero. Absolutely horrific.
Oh, and here we have blood curdling screams. Notice it says panacle victims. If we go back to blinding speed, you'll see that this could kill practically everyone on the map. So, not only can this card potentially kill every single victim on the map and then also might have a move and a double attack as well. Absolutely horrific stuff. And the thing's too fast for us. This is a very generic card for the Isus, but that means it's probably with its speed and its attack value just taking out two victims in one turn like that. And that theme recurs here as well. A lot of stuff involving noise and a lot of fast moves and brutal attacks. One big thing to note with the Isus is because it has such a weak killer action, its terror cards are very strong. This means that if you end up with more location cards, it can slow the Isus down quite a bit.
So, I'm not sure what mix people it will end up in, but if you have a random lucky shuffle where you've got half of the cards, location cards and only half are for the Isus, the Isus is going to be a lot easier in that game. I really want to like the Isus more than I do. I enjoy games against the Isus, but it has one big problem for me, and that's that it can be super super swiggy. uh starting off of its uh three move and three attack means that when it gets some good cards coming out it just starts brutalizing things and you know that's a interesting challenge but I'm not sure the noise system is as good as it could have been. I feel like quite frequently you can manage your noise and that works out for the final girl but it just involves an awful lot of other people getting brutalized and murdered. I do like that the USS is quite scary straight out of the box. So even when the blood lust track is at the bottom, it's a terrifying thing to come across.
But that has led to some very, very short unfortunate games against this killer. Because of its three move and three attack, you can just get unlucky and die on the first turn almost through no fault of your own. If you draw a very unlucky card, you can get hit twice and six damage and you're out. There's not a lot you can do sometimes. Still, I like the challenge. I like that it's interesting. I like what they tried to do with the noise system. I don't know if it 100% works as well as I think it could, but I still have had very good fights against the Isus and it's a killer that when you beat them feels like you've actually won a really good victory. So, that has that going for it. So, yeah, really cool design, but not quite as tense as I had hoped.
Oh, you've been naughty. Next up from the North Pole nightmare, we have Grumpus. Now, I know there's been multiple Grumpus movies, but I mostly know this character from an episode of a TV show called Grim. Here we have Grumpus, who starts on four horror and has 10 health. And he starts off with only one attack and one movement, but can get up to four attack and three movement. His default killer action is to stab first and then move and place presents. Now, the presents are quite fun. What happens is once Grumpus moves, you place down a present token, roll a dieice, and scatter it. Now, these present tokens can have good and bad things in them. If they appear in a victim's space, they will be automatically revealed. If it has a Santa hat on it, that's a good card.
That's something really neat. Unfortunately, if a victim takes that, they just take it and keep it for themselves. But if the final girl gets to him, these are great power-ups. The hornedback presents are from Grumpus, and they're quite deadly and dangerous. There's only four of each of these, so I just didn't want to show them all here. And finally, there are ones with generic effects like damage or increasing blood lust. The final girl can choose to open or not open a present if she's in the same space as it. Now, let's get on to Grumpus' dark powers. Blood and cookies. Every time Grumpus kills a victim, place down a present. That's just good fun. The presents are mostly bad for the player, so it's just an extra challenge, but it's a fun extra challenge. Tantalizing gifts. If you're in a space of a present, you must immediately open it. Now, I kind of open them anyway most of the time, but this one can lead to some quite awful consequences. Sometimes you'll get fun stuff though. And explosive gifts I'm not a big fan of because it can take away some of the other fun stuff that happens with these gifts. Sure, exploding presence is pretty funny in a way, but I think this would have been better represented by having just more exploding presence in the tokens themselves. Then for the finalies, we have B, which allows Grumpus to teleport around the board and just start murdering all the victims.
This one is a double attack, but it's a double attack that can give you some time because cuz Grumpus will focus on the furthest away target, which could be victims. Once you've run out of victims, though, it's definitely coming for you and attacking twice, and you can't get away. Unholy gifts is a great advert for why you should pick up gifts during the game. Now, you can potentially use unholy gifts to move Grumpus to a space you want them to be in. For example, if Grumpus just happens to be on a spaceship, you could make Grumpus teleport into the airlock and get flushed out into space. So, it's worth keeping in mind that yes, while Grumpus will recover two health, this could mean you know exactly where they're going to be next turn, and you could be waiting there to do a lot more than two damage. And soul lust just means Grumpus is going to be moving around and attacking and cleaning out those victims real hard out. And once it's down to only you versus Grumpus, he'll still be attacking twice, which is pretty hard to manage.
Uh the epic finale past midnight is absolutely awful. This is so so unfair and unkind. A double movement, two attacks, and you can only roll one dice with your reaction cards. Absolutely brutal. If you know this is coming up, you really need to be prepared for that final battle to last only a turn or two because you're simply not going to be able to stand toe-to-toe with Grumpus with only one die on all your reaction cards. Uh the best you can do is prevent two damage each time with a guard card, and that's just not going to be enough. And Never Ending Gifts gets rid of the good Santa gifts, which is one of the fun things about following around Grumpus, hoping that you get one of the good presents. And through the course of the game, having those presents on the table that you must pick up will be a drain on your resources. And now we're on to minor dark powers. And demonic will might be the single highest priority target of a minor dark power in all of Final Girl. You want to get rid of this as soon as is practicable because it is potentially a one hit, one kill attack. And it's one of the few ways you can have a one damage killer kill a full health final girl with one hit. Yeah. Truly scary stuff.
Thankfully, it's only got one token on it, but you should really change your game plan to intentionally go after Grumpus because you don't know whether the location or some of his other cards is just going to make him turn up in your spot and mess you up. Antichrist spirit isn't a big deal until you've put some damage on Grumpus because Grumpus can't go above their health limit. So, it's not a super huge priority to get rid of immediately. And North Pole magic is a great example of why demonic will is absolutely terrifying because Grampus can potentially target you, teleport to your space, hit you once, and you'll lose all your remaining health. And these are some pretty awful minor dark powers. And then there's a real strong theme in the terror cards of taking multiple actions, multiple moves, or multiple attacks. So claws are out and oh no, he's disguised as Santa. You have regular Grumpus doing up to three attacks in a round. that can add up to a lot of bodies very quickly. And then you have a whole bunch of like random wacky thematic cards. And it has what, which is a completely bonkers card. Now, depending on what location you're in, it has what could be absolutely ridiculous as Grumpus can be walking around with a flamethrower or an elephant gun. Also, annoyingly, it might take away a weapon that you were gunning for. You might be on your way just to grab that gun and use it on Grumpus and then all of a sudden he's glued it to his arm.
Absolutely ridiculous, but a lot of fun to play against. It's one of those moments where the game just throws out an oddball thing and you're like, "Oh, come on." And you still have to deal with the challenge. So, yeah, Grumpus. Uh, Grumpus is just good, silly fun. They're a bit of a middle-of the road killer in terms of their hitting power and mobility, and that's good. Like, there's nothing wrong with being like a baseline killer. And the Grumpus does a really good job of being in that baseline killer sort of sort of level. They're very similar in feel in some ways to Hans from the original uh Camp Happy Trails. But then you've got the bonuses of the presents coming out which add these extra distractions, extra traps, extra damage to people, but also have positive things in them as well. So it's a bit of a a lottery there. They're a little bit of a silly themed character and you kind of have to buy into that.
So, I understand why they were a sort of standalone box, but Grumpus is just is is just a good time. Grumpus is a great sort of standard killer with just a little bit of spice to make them feel a bit different and very Christmassy. Grumpus is a ho ho whole lot of fun to play against. I can't believe I said that.
Hello, Amanda. You don't know me, but I know you.
I want to play a game.
And next up, we have the tormentor from the Maric murders, which is heavily inspired by Saw and in particular, Amanda from Saw because the Tormentor is a feminine character. And there are very few female presenting killers in Final Girl. Next up, we have the Tormentor who starts on three horror and seven health. Although they don't really start on seven health because they don't start on the board. In fact, the tormentor won't turn up at all until the finale. The tormentor has a very short blood loss track. It starts at 1-1 and it only goes up to three damage and two move. So looking at the tormentor, they look like a complete cupcake. And then they got this weird killer action which shows a trap. And how that works is some terror cards will end up with victims being placed in traps. draw a random victim card, replace the victim with a picture of the track, and place a victim mele on the start of the track. The final girl, if they're in the same location as a trap, can attempt to do the tasks listed on the card in order to release the victim. So, here that would be to spend three time disarm the mechanism by doing two damage and moving two spaces.
Otherwise, this mele is going to move down the track, triggering each of the effects shown before finally being killed, which not only does the usual kill result, but also the fail result shown at the bottom of the trap. The final girl can also be put in specific final girl traps. And these work much the same way. Aside from if you get to the end, you're killed. So, the tormentor won't be moving around the board attacking people, they'll be putting them in traps and killing them that way. Next, look at the dark powers. Unfair traps. Well, that just makes all of the escape tasks just that much more harder to complete. Overkill traps is phenomenal because if you try rescuing someone and you're close to them and you fail, you'll end up taking damage and so will other victims around you. And then there's horrifying traps which is going to push the horror track up quite a bit.
The final are great. So here the tormentor, there's going to be two trap activations, then a move and attack and a move and attack. So, while the Tormentor has relatively low numbers, they will be moving twice and attacking twice, which could be quite bad. The ultimate trap is a fantastic finale for the tormentor because you'll pop straight into a trap that's going to activate once each turn, but the tormentor is going to come to you and attack you. So, you're going to have to spend your time trying to get out of the trap and defending from the tormentor and potentially counterattacking as well. Makes for a very tense finale. And no Escape is a very different finale. And I like this one. I like this one a lot. The tormentor isn't staying to fight. They're there to close off the environment and just leave you to die. And I find this a really satisfying conclusion cuz you're racing racing to stop them from locking you inside their death maze. Really cool stuff. No Rest for the Weary is a brutal epic finale for a character with low move and low damage cuz all of a sudden the Tormentor can be moving six and attacking three times for three each. You're not going to stand up to that kind of firepower for very long. And the epic dark power is endless traps, which just keeps putting people in traps. Now, the finale can come on quite a bit quicker than you expect with the tormentor because a lot of their terror cards have this special feature. That is, if no victims are trapped, you put the card face up at the bottom of the terror deck. If you ever get to the point where you've got all face up cards, you immediately go to the
finale. So each of these cards makes those death traps tougher and nastier and more awful. But if no one is in a trap, all they'll do is accelerate the game to its finale. And then of course you have the cards that put people in traps, whether that's the final girl or different victims. You don't deserve to live in particular is vicious because it targets people in escape spaces. Like there might be someone you think is safe sitting over in an escape space and you're like, I'll get to them later. Then all of a sudden they're in a death trap. And that's the stuff I like about the tormentor. So the tormentor plays very differently to most of the other killers. And that's what I really like about her. I know some people might find her fiddly and find the trap system quite a complex, unintuitive thing, but I just really dig it. You don't have to worry about moving the the killer around. You just have to manage the board and then when people get trapped, you have the tracks to manage. I find it really intuitive and straightforward and also really fun and different. And then if you look at the stat line for the tormentor, they're a bit of a cupcake.
They're one of the weakest killers, but then the finales are fantastic. So this creates for me a totally different vibe and experience that is very sorlike. It captures the essence of the movies that inspired it so extremely well, and it just presents you a different type of challenge. So with the Hunter, I found the complexity a bit of a pain in the ass to keep track of. With the Tormentor, it just immerses me. And that might be peculiar to me. It might be just how I enjoy playing Final Girl, but I really like the Torment and what she brings to the table, which is drills, saws, hammers, and other booby traps. That's that's what she brings to the table. The Tormentor is a really fun killer, and for me, one of the most innovative designs they've done, and definitely one of the most thematic.
Who
are you?
Explorers in the further regions of experience. Demons to some, angels to others.
And our number one killer in this series is Razerface from Hell to Pay, who's heavily inspired by good old Pined Cet from the Hellraiser series. Here we have Razerface, who starts on five horror and nine health. The blood lust track starts on one damage and one movement and escalates to a quite impressive four damage and four movement. And they have a very normal default sort of killer action, which is just track, move, and attack. Razerface is a bit of a bog standard killer in this regard. What sets them apart is their special victory conditions. At the start of the game, you will draw three of these afflictions. Each of the afflictions has a requirement that you need to be able to do in order to purge that affliction from you. Probably my favorite one of these is a land of the slaughter where you have to actually kill a victim yourself, which is pretty unusual for Final Girl, actually making you knock over a victim yourself. But once you do that, you purge the card. You take the purge effect and it's gone. You can only defeat Razerface if you've got rid of all three of your affliction cards.
Let's look at the dark powers. Soulbound just gives you another affliction. That's just an extra thing you need to do to win the game. Very straightforward sort of dark power. Life drain really should be just you losing the health every time you get rid of an affliction because you really want to be dealing with your afflictions before you try facing Razer Face down. So hopefully he recovers no health from this through the course of the game. And Helport just allows Razerface to move around the board and kill victims. This can be a right pain and it makes it very easy for Razerface to scale up their blood lust track. It also means you can't pin Razerace in combat. You can't just use the targeting rules to ensure that Razerace is targeting you because this triggers before the killer action. So your helport's quite a tricky one to deal with. What makes it annoying is it's the victim furthest from you. So, it just makes it really frustrating to chase him down till all the victims are gone. On to finales, we have I feast on your pain. Now, my general advice is to get rid of afflictions as soon as you can. This finale is another reason why you should do that because if you're still suffering from afflictions when the finale begins, this is going to take Razer face up to four attack and four damage. And moving forward and attacking twice at those numbers is pretty hard to beat. Now, change the torment. It's a double attack. And every time he enters a space of at least one victim, the horror track goes up. Now, Razer Face is pretty good with his terror cards at killing a lot of victims, and you will want to be saving a lot of people to get them out of his way before this kicks off. So, I do recommend a strategy of clearing out the victims and dealing with your afflictions before you even contemplate taking on Razerface. He's
not a killer where you can get a early victory on him because you can weather the one damage he does per attack and just straight up brawl him from the start of the game. So, ideally, you shouldn't really be having too many victims once this one comes out. and taste our pleasures is potentially absolutely game ending. It's a double move which means he is going to get to you and then potentially three attacks. This is one where you really just have to hope that you're only getting one or two attacks if he gets to you. Uh the epic finale. Again, I like reaction cards. I like guard. I like retaliate. Uh this one giving you a health tax for using them is really mean and it does make for quite a nasty finale. And then infinite despair is a funny one because you read it and it says if at least one victim panics during the panic phase plus two horror otherwise one horror.
The horror is going up by one every turn. That's just nasty. You can run out of dice really quickly with this. The minor dark powers are another reason why you try to get rid of your afflictions as soon as possible because they're going to be an additional tax on your afflictions and it's going to be an increase in horror. So, my general advice is to get rid of your reflections as soon as possible. If a minor dark power like this comes out, that just becomes a double priority to get on top of that. Razer face has some unusual cards that manipulate time. Not something that's very common in Final Girl is to see terror cars that directly impact the amount of time the final girl has. And all of these are regular move and attack actions with some time adjustment on top of them. And I find it interesting that they're included here, and I'm not entirely sure why. Then we have some real peak razorface cards. New and darker experiences is plus three horror or draw a new affliction. And I feel like there should have been more deals and bargain type cards within Razerfac's uh terror deck. More cards that gave you a choice like this because I feel like it's a real theme of this type of character is the idea of making terrible terrible decisions where both choices are bad. Scarlet him is a triple attack. That's brutal. And you got Pleasure and Pain, which is a double move, double attack, and recover health.
So, Razer Face sometimes can just go a bit berserk. Like, take Scarlet, him, and you can have Razerface teleport all the way to the other side of the board and just start laying into a pile of victims. Brutal stuff. [snorts] So, what I like about Razerface is Razerface is a pretty normalish sort of killer. I'm a big fan of killers that don't necessarily have lots and lots of different rules and crazy wacky things going on. Razer Face keeps it pretty simple. You've got the afflictions and that's just an extra difficulty layer that you have to manage through the course of the game, but that's a thematic layer you have to manage as well. They're like little quests that you can keep track of and go, "Okay, I need to do this thing and then resolve it and then it's gone." And because you have to deal with these afflictions, Razer Face is safe from early game rushes. Some killers are quite vulnerable to you finding an early weapon and just going up and beating them down while they're only doing one or two damage a hit. You can't do that against Razerface and I do like that.
Razerace also has terror cards that feel really thematic and I do feel like I am having a showdown with the classic center characters. I like Razerface because he does what I think a good final girl killer should do. Modify the core game in one straightforward way that feels very thematic. then present terror cards, finales, and dark powers that feel super thematic and super challenging while not presenting you with a whole bunch of things to keep track of. Razor Face lets me keep the game visceral, and I love that about it. I feel like I'm in the moment trying to deal with my afflictions before zeroing in on this guy before he kills all of the victims out there because I'm having to take care of my other things before having to rescue victims and do other stuff. I think he presents a really neat challenge. He's super thematic. And yeah, this is my favorite killer from season 3.
The first location we have is the hellscape from hell to play. The hellscape is heavily inspired by hell, of course, but in particular, I would say Hellraiser 2: Hellbound. Here we have the hellscape location, which is defined by its moving tiles. There are four double-sided tiles, and they will change sides and move around during the course of the game. The hellscape has three exit locations, including the Nexus, which is right in the middle of the map. It also has three searchable locations, again, with one of them right in the middle of the map. At the start of the game, you'll randomly allocate those locations and put one victim in each space. Then draw a setup card to fill out the rest of the map. The hellscape will move about. At the end of the round, you'll roll these two dice. If you roll two different symbols, you will swap the two tiles that have those symbols on them, like so. The special symbol always goes in the top left of the tile. If you roll two of the same symbols, flip over the matching tile, making sure that the victims stay in the same boarded space that they were originally in. There is also a player card called hell shift that allows you to move around the tiles. Some of the interesting events include the sadistic speaker. Normally, you're punished really hard if a special victim dies. In this case, you'll lose four horror, and that's amazing. You're absolutely going to want to feed this person to the killer. There's also the masochistic peeon, who's like an extra tank for you.
There's quite a good character to pick up and keep for a turn or two and then take to the exit when they've only got one health left. Then stare into the abyss taxes you whenever you move a hellscape tile. And I honestly think this should be in play whenever you play the hellscape cuz moving tiles is a little too easy at times. The terror cards for the hellscape are a little underwhelming. Some of them will move the map around and adding extra victims, but there's not a lot in here that gives me a real wow factor. There isn't a single one of these terror cards that I look at and go, "Oh yeah, I'm I'm really worried about that." The housecape also comes with some of the strongest and best weapons in all of Final Girl. Every one of these weapons is great, but the ancient sword in particular is amazing. Dropping horror every time you damage the killer is just great. I'm a big fan of the spiked whip because it is a fantastic card to use with retaliate.
It's good in general being able to move the killer around is very strong. But if you have a killer that has multiple attacks and they attack you and you retaliate with a spike whip, you can then damage the enemy and move them one space so they don't get to do their second and third attacks on you. On top of having some of the strongest weapons in the game, you also have these amazing discipline cards that allow you to do some damage to yourself in order to do powerful effects. Taking a hit to reduce a horror is really good. And being able to take two damage to do one damage to any enemy on the board is fantastic as well, especially if your final girl is good at recovering health. And then you have these two controllers that are both bonkers strong. Being able to teleport around the board or rearrange the hellscape as you choose are incredibly strong actions. I would say the Hellscape might have the strongest item cards of any location in the game to date. So, why is the Hellscape from Hell to Pay my least favorite location in this season? This was a tricky one for me because mechanically, it's quite interesting. I like being able to move the tiles around. It also has some amazing weapons and a whole bunch of really cool items in it, and that's part of the problem. It's way too easy. The hellscape is one of the easiest locations in the game, and that feels very off to me. It is super easy to rescue people because you got a rescue space in the middle and with the things moving around, it's really easy to get people into that middle escape space and get them out of there. You can also manipulate the tiles quite frequently cuz you get a card that you can pick up that allows you to manipulate the tiles that can keep a killer jammed in a corner. I played a game against the
where the is absolutely nothing aside from kill two people at the start of the game and I kept them in the top right corner for the entire game until I was ready to go deal with them. and I could do damage to them by remote. And every time the map changed, I'd use a card or an item to rechange it back. And that felt way too easy for me. So, while I like the theme, and I think there's some really cool items on there, I think the ability to move the map around is a bit too easy for the player. And if a killer doesn't have teleports and other things to get around that, you can end up with a very, very easy game here. I think next time I play it, I might get rid of the player cards that allow me to move the map around. I think that would make the map work better for me because it just feels too easy otherwise.
Oh no.
Girls, do you know John Connor?
No.
Hey, do you know this guy?
No, I don't know. Next up, we have the Sunny Days Mall from The Killer from Tomorrow, which is clearly inspired by Terminator 2 and very much only Terminator 2 because it is not just a generic mall. It's all about the savior. Next up, we have Sunny Day's Mall. Sunny Day's Mall has two escape areas and three searchable locations. The Zap Track, Stan Sporting Guns, and the Military Surplus R Store. The main feature of the mall is the Savior. The savior is an ally and special victim and they start off not well disposed towards you. You have this trust card over here and it starts at go to hell. You'll want to get to the savior, get some build trust cards and roll well on these in order to increase the savior's trust of you. The savior has four action cubes and you can only use the action shown up to the level of trust. So the savior is still on go to hell. You can't control them at all.
These action cubes work just like the hunter ally. At the end of each round, you'll draw a savior card and then based on the trust level, resolve what the card says. Clearly, the more trust you have, the more you have control over this ally. If trust is low, the savior can attack you as well. Now, the big thing here is in order to win a scenario on Sunday's mall, you have to get trust to I believe you and then you have to take the savior to the exit and let them go. Until that point, anytime there is a card or an effect that targets the final girl, it's going after the savior instead. How effective the killer is at hunting the savior really does vary quite dramatically. A few other things to note about the mall. One, it's on two levels, and these can be accessed going up and down by the escalators. Two, some actions will result in walls being blown up, and these will create new spaces that you can move back and forth between. And thirdly, there are the railings here. The final girl can jump off the railings and if they roll a success, they don't take any damage.
Otherwise, they'll take a damage in doing so. The killer cannot do that. Onto the events now. Flash Mountain brings down a lot of victims into this map, but it's not the only card within the sunny days event deck that brings out a bunch of victims. This place can get really, really crowded. That can be quite advantageous if you're very good at saving victims, but it can also lead to a blood loss track accelerating very quickly. Bart the mall cop is clearly a reference to Paul Blunt. And I love that there's a doofy cop character in the mall. Although I think less about Paul Blunt when I see this card than I do the dead meat guy. And then there's food fight. Now sadly food fight only works when they enter the location. It doesn't work if they stay there killing everyone that turned up in the flash mob. There's a location minor dark power and this is a bad one. You're going to want to get rid of this pretty damn quickly because the savior is already a pain in the ass to keep control of and having them move one step towards the killer each turn.
It's going to drain your resources really quickly. It's coming for me. I got to hide. Having to save you panic three times can be a great pain, but not as much of a pain as the fire alarm. If you've had a couple of events that add in a whole bunch of extra victims, then everyone panics twice. It's a logistical nightmare. Like it's a fun enough card, but when you first pick it up and look at that, there's 16 victims on the board and go, "Oh, this is 32 rolls. This is going to take a while." Still, it can be interesting and dramatic. And I love collateral damage. I really like terror cards that feel like they are location specific, but take advantage of a location special mechanics. And this one, having the killer run through a whole bunch of people, just pushing them over the railings. It's just a great cinematic moment. The boomstick is a fantastic weapon design because it creates fun mechanics that work with the location special rules. It encourages you to shoot people off the railings or blast them through a wall. That's really good stuff. The flower box, on the other hand, is a bit more of a situational item that exists almost entirely for the flavor, and that's because of that one moment in Terminator 2. That's that's why this card exists. Then you got leather jacket and self-help book that both help you with the savior. of these though, I think the leather jacket is a much better design because at least it can do something once the savior's been dealt with. So, Sunny Days Mall. Tricky thing here is I really like the mall location. I think it's a great location.
I also really like the savior as a concept. I think having a savior, another person that you've got to try and get on board and save really neat, but I feel like the savior should have been a challenge mode. It should have been like an extra thing that is added in to another game and that the savior could pop up at any location. Now, I'm not entirely sure how that would work, but I think the mall as a standalone location without having the savior there could still be a great place for a showdown with a killer and the savior itself. I know there are people out there who absolutely loathe this lad, but I think he's a really interesting side challenge. I think it's a really interesting extra goal to put in front of you. And it does feel like, you know, a a bonus challenge. I just really wish that that bonus challenge could happen at other locations. I want this awful kid running around Maple Street. I want them running away from you at the camp.
Like the savior could have been used so many other places. And I think that would have just been a little bit better than than bundling him with one location. And the location itself has enough going for it without the savior. It's got the different levels. It's got throwing people off railings. It's got explodable terrain. There's enough little mechanics in here to make this an interesting location without the savior existing. So, yeah, it feels like a little bit of a missed opportunity or conflating two ideas. I do enjoy interacting with the savior and as I say, I just wish you could do it somewhere else. [screaming] Game over. The next location up is the Marrick warehouse from the Marrick murders. So, I guess this is mostly inspired by things like Saw 3 and four where a lot of people are trapped in a big warehouse that's been converted into a death maze.
Uh, but I kind of struggled to find actual sort of warehouse murders for it. Here we have the Mar warehouse, which is a very crammed location with a bunch of special features. First of all, it has three searchable areas, a supply cage, manager's office, and receiving area, and then three escape areas. The trick is each of these escape areas starts the game locked. In addition to your normal terror cards, you will add in the click cards and each of the click cards will open up those locations. You can't escape until those locations are opened. There's also the central pit location where panics use two dice and you'll have a whole bunch bigger numbers around the outside there. You'll also notice the red boarded locations. These are where all the boxes are and you can't just move through those. What you need to do is leap and climb. So during the action phase, you can discard walk and sprint cards to pick these up. Climb allows you to get up on the boxes and leap allows you to jump to another box.
So while moving over those boxes is a pain for you, it's not a problem to the killer at all. Let's look at some of the events. It's been zero days since. What this does is whenever a victim in a box space panics and they move to a normal space, they are killed. If this comes out early, it can kill a lot of victims by itself. Can be a very frustrating card to deal with. It means you have to prioritize the people on the boxes, but people will just panic into boxes or get moved into boxes by other events. You aren't going anywhere. All the unlocked doors are locked again, and you put all the click terror cards from the discard pile back into the deck. This kind of resets the game and relocks everything down. Slightly frustrating if you've opened a couple of them already. And it is going to trigger a lot more events cuz each of those unlocks does come with an extra event as well. And I really like smarter than they look, even though it's quite a beneficial card. When a space becomes unlocked, you can save any victims in that space, even if you're not there. So, it's quite thematic. You can guide people to an entrance and say, "Wait here until the grill comes up."
And then when the grill comes up, they leave. I think it's a really thematic event card and one I'm really happy to see pop up because it does make managing the warehouse a lot easier. So, one big theme in the terror cards is involving those box spaces. So, were they all pushed, all victims of those spaces panic. Now, if you've got that event out already where people who panic from a box to a normal location die, this can kill off a bunch of people and then will be safer up there or victims adjacent to those boxes panic. So, that can panic people onto the boxes. I know Final Girl is full of incredibly unfair things, but sometimes these cards feel super unfair. And then you have an incredibly strong beneficial player card. Let's open some of these boxes. Roll a dice for each unused item card that was set aside during setup. You lose a time for each card that you choose to roll for, but it's usually worth it. If you pick up one or two items from this, it can be a real gamecher. I once had this as the very first terror card drawn, and it gave me a weapon and some bolt cutters, and that's all I needed. Let's look at some of the signature item cards. The power drill is one of many items in here that can be used to unlock a space. And I like that you can be proactive about that. If you find an item card that allows you to unlock spaces, you don't have to wait for them to open. That might be my favorite thing about this map is being proactive on getting rid of those locks. I really dig the two-way radio as well because it allows you to get people off boxes and get them to escape areas without you having to be present to do that. And then there's a good old chainsaw, a three damage weapon. You've got to love that. Even though it ends around when you use it and you can't use it on reactions, it's still a mighty fun card. And then we have odds and ends that allow you to
place booby traps around. And this is a very cruel use of a two-way radio. You can place down the odds and ends booby trap. Tell someone over the radio to go stand there knowing that the killer is going to target them. That's a very mean tactic, but a great example of some of the things you can do in Final Girl in order to pull out a win. Yeah, we have the Merrick warehouse from the Merrick Murders. And there's a lot in this I like. I really do like the lockable locations. I like the click cards. And I like the fact that the exits, you know, you can't just escape straight away. That presents a different challenge. I'd like it a lot less if there weren't item cards that allowed you to circumvent that. I think that's the key to making this bit good. What I don't like are the crates. I think the crate mechanics, jumping up on them, jumping across them, uh having people panic off them to their deaths, I just don't think that's a particularly fun or interesting mechanic. And I don't find it that thematic either. Like the killer can just waltz through them, but it's really difficult for the final girl to move around them. I don't quite get why the killer's more capable of going over boxes. It's It doesn't make a huge amount of sense to me and it takes me a little bit out of it. So, it is a challenging location. It does have that going for it.
85 85. That puts you 915 off the pace.
Why don't you just say it? I'm the worst toy maker in the world. I'm a cotton-headed nin mugggin.
Next up, we have Santa's Village from the North Pole nightmare. Santa's Village is a remarkably straightforward location. It has three escapes and three searchable areas. The stables, Santa's house, and Santa's workshop. It has one big special rule, and that's that elves are annoying, jabbering little bastards. Every time you move into an elf space, you must lose one time per elf that is there. So moving into Santa's house here, that's going to lose you full time. So even if you're desperately trying to save the elves, they just want to jabber at you about something. It's both adorable and mechanically frustrating, which is a great combination. Santa's village is a bit of a gonzo location. You have to kind of suspend disbelief even more than normal to play a game here, but that's fine because you have Santa turn up and Santa acts like a pied piper. He completely breaks the rules for how many victims can be following you. So, you can have this massive gaggle of elves following around with Santa, leading them to the exit. It's real fun stuff. Northern Lights is an intriguing card because it buffs one action card while making another action card more difficult. And I find that a really curious thing that they haven't done a lot in Final Girl.
This is a bit of an outlayer of a card and it feels like a design space they could do more in. And then you have Caroling and this is adorable. So, you have Santa, you're roaming around, you've got all these elves slowing you down, but that's okay because if there's a whole bunch of them singing, it's going to reduce your horror level. It's a very, very dinky location. The terror cards, on the other hand, remind you that this is a horror game. And Public Execution has a killer turn up in the middle of the village and start murdering people. So, the elves are fighting back is super fun. Again, if you have Santa and a massive entourage of elves and this comes up, you can have the enemy be really, really wrecked and then a whole bunch of elves get brutalized. It's very silly. Alpha is just a brutal, brutal card. And then where did it go? I I think this is another sort of card that could appear in a lot more locations because it's a variant on a teleport card. And I think to stop locations getting a little stale, having the killer be able to move dramatically does make things good. Just the potential of that happening doesn't have to happen every game, but knowing there's the potential that the killer can just move and surprise you is a very big thing in Final Girl for me. And then you have the items. The wood cutters axe is just straightforward. Excellent Malay weapon. Sort of my ideal weapon really.
A single two-handed weapon that does two damage. You can't really go wrong with it. I'm a big fan of traps in Final Girl. So, Misfit Toys is another neat one. Three of them will come on and they're just mobile little bombs. The red wagon's really neat. It's like a discount Santa. You can have an additional victim follow you. And that's really good in this map because you don't want to keep moving back and forth to ferry victims because every time you move into their space, they're going to drain the time off you. So being able to pull them along with you just saves you that effort. And in the Santa sack, well, that just allows you to look at a whole bunch of item cards set aside during setup and take one of your choice. And that can just be fantastic. This can be a really big deal if you've had bad luck searching for weapons because all of the weapons were set aside. And just in general, being able to choose an item rather than just get what's available usually a very good thing. Uh this is just a fun location. I I don't really want to say too much about it. It's got one simple rule and that's that the elves bug you when you go there and it's just it's a great fun place to play. It is a little gonzo and you have to sort of suspend disbelief a little bit more than usual when playing final girl. But I love that this exists.
See, I'm not a big Christmas person, but for some reason, I find this just charming. It's a great location, and probably my favorite combination of location plus killer in all of season 3 is the tormentor at Santa's Village because I think the tormentor is an elf that's gone completely mad and is using their Santa's workshop skills to create death traps for the other elves. And that that is a really funny scenario for me. So yeah, Sanders Village. It's a very safe location. It's a very rules light location, but it's a very fun and silly location. You can turn any horror movie into a Christmas movie, and that's just kind of fun.
Next up, we have Utopia from Don't Make a Sound. And this is a really interesting case of a location and a killer not really matching up with each other at all because the location of Utopia is very much tremors as are the sand snakes. Here we have Utopia. Utopia has three searchable areas, the bunker, the general store, and the sheep farm, and three escape areas. One is branded as the mountain pass, and that's because there are some cards that specifically target the mountain pass. Also on the map are three dark boarded areas with a rock symbol on them. These are called boulder spaces, and they're important because they are safe spaces from the special thing on this map, the sand snakes. Now, during upkeep, you will draw two sand snake cards, and you resolve them one at a time. The first one here targets the house and kills the person in the house. They target the victim first, then you, then a minion, then killer. The second one targets a jeep trail, and that's where we are currently, so we take one health and damage. You don't reshuffle this deck until you are told to. So now you got a pretty good idea that they're not going to attack the jeep trail or the house again anytime soon. And of course, because the blood lust track increases regardless of how a victim is killed, the sand snakes can get a slow starting killer off to a really rapid start because they'll just pop up and start eating one or two people a turn. You got to get those people to boulders and then get them out of there. And we have to stick together is amazing. Having three victims be able to follow you is really good, especially if you've picked up a special victim. You might want to keep that special victim and still be able to drop off two people at an escape.
Earthquake represents some of the sinkholes that happen in this game and that is locations just disappearing and they will just fall off the map for the rest of the game. Any victims in a sinkhole space are immediately killed and the final girl and the killer take one damage and then scatter. I love the doomsday planners. They are super thematic for this particular map. I really like that it's a couple. It's two special victims. You don't see that very often in Final Girl. Then we have some terra cards. A lot of ways to die out here is really nasty because there's so much already happening in this location, but having a rattlesnake that just turns up and attacks you off a terror card feels a little extra. I think with the sand snakes happening, this card's a little overkill. I love untimely encounter. I think just about every location should have a teleport card of some sort. So seeing one here is really good. Then we've got the sinkhole that I've already talked about and this one can pop up at a random location. And then we have if we stay here, we'll starve. So the general advice of getting victims to the boulders is sound until this card comes out. And I do like that it is in here. It can just be a bit frustrating to have to go and reather them and then try to escape with item cards. We have some of the biggest and best damage dealing in the game here.
The scope rifle can be used at range four while you're on a boulder space. So that means you can shoot people from the other side of the map. Now, the Isus who comes in this box set has some strong counters to this, but a bunch of other killers do not. And if you have a slowmoving killer, you can do a heck of a lot of damage before they close with you. Then you have the elephant gun, and I just love this. Can only be used with the critical blow, but boy, what an attack. Then we have the household chemicals. Another big boom. So, you know, between the household chemicals, the elephant gun, and the scope rifle, you can do a whole heap of damage with the items on this map. Then probably my favorite card in the whole set is the seisometer that allows you to have a look at the sand snake deck and plan accordingly. If this is face up on an item deck at the start of the game, I do recommend going for it. It'll make a world of difference. So, Utopia is a fantastic, rich, interesting, and thematic location. It's got some great items. It's got a great layout. It's got a cool special rule with the sand snakes, but isn't an overwhelmingly complex one because you flip the two cards, you resolve them, and you don't necessarily have to think about when that triggers because it's just at the end of the turn. It can be pretty unkind as well because those sand snakes can kill people pretty early on and accelerate some killers. Having a challenging map is is a good thing, but this map also has some interesting counters as well, like being able to get up on the rock with a sniper rifle and shoot some killers from the other side of the board. That's different. That's interesting. And I like that Utopia feels like both an interesting challenge because of it up difficulty, but it
gives you some cool tools to deal with that. So yeah, I would consider Utopia one of the best locations from season 3. It has a great combination of difficulty, randomness, but also introducing interesting and new tactical approaches to the game. You rock into Utopia, you have to treat it differently. You have to take the location into account, but it does that not by overburdening you with too many special rules. Those rules are very straightforward and they're driven by the cards from the Sand Snake deck. Yeah. And if you use uh this location with a knock at the door, it gives you a very weird hills have eyes vibe as well, which is makes for a really fascinating combination. One of my favorite things about Final Girl is mixing and matching locations. And Utopia is a really interesting one for that. Uh against people like Japetto, for example, the sand snakes can eat the little puppets.
And that's cool. I I like seeing a puppet get eaten by a sand snake. If you get the seismology machine here and you can figure out where the snakes are going to pop up, you can actually do some really interesting stuff against killers with minions in particular. So yeah, I think this is a really interesting location and uh definitely one I enjoy playing quite a lot.
I saw something too.
You saw blood too?
Not blood. I saw Georgie.
And my favorite location for season 3 is Falconwood from the Falconwood Files, which I would say is inspired by Stranger Things, but really it's inspired by every Stephen King thing ever and a couple of Dean Coots books as well. It's the whole kids on bikes phenomenon. Next up, we have Falcon Wood. Falcon Wood has quite a lot of locations. It has a river going through it. It has three escape areas and three searchable locations. the government lab, the police station, and the shopping mall. There are also three very clear bridge spaces as well as these blue lines that represent river crossings. You normally can't use the river crossings unless one of the other cards mentions it, but you can almost always use one of the bridges. What sets Falcon Wood apart is each time you play this, you have a quest, and you have to resolve that quest and win that quest before you can defeat the killer. So, you'll take one of these five quest cards and do the setup shown. Then, there will be special rules for each of them and how you progress that task.
Now, this might seem ownorous and quite convoluted and a lot to take in, but I found every single one of these quests is quite straightforward. It's just an extra miniame you have to play, but it's not a mini game that sort of interrupts your normal processes. It's just I have to move here and do something at some point. You have to be proactive about it. So unlike some killers and locations where the rules burden is sort of incidental, here it's quite targeted and I find that much easier to digest. Most of these missions will involve you traing around the board and going to different locations and picking up key tokens. And when you complete one of these quests, you will get a special ally. And those special allies are very good. Let's look at some of the events. So grand opening allows you to put in a new bridge across one of those river crossings. The head research is a very interesting special victim because they start killing other victims. When he comes out, you really feel the need to go over to the government lab and drag him off the map as soon as practical, otherwise he's going to kill a whole bunch of people. Then we have the dry spell that allows all the river crossings to be used for a time. The terror cards are quite an interesting mix. You have some that impact the mission, others that add in extra victims, and then others that have these random D20 results. It's worth noting that you got the survive the hunt card.
Take that aside at the start of the game. It only gets put into the terror deck if you are using the survive the hunt mission. I have accidentally put this into the terror deck just about every time I have played on Falwood by mistake. Then we've got the item cards. And we have a whole bunch of good stuff in here. Flamethrowers and AK-47s. Wonderful stuff when you're trying to knock down a baddy. Now, what I find fascinating is the AK-47 and flamethrower are fantastic at dealing with minions. And the Slayer who comes with this box isn't a minion killer. Like, these are both really good against zombies, for example. And Chapetto absolutely does not want to see you coming towards him with an AK-47. So, I find it interesting that these cards are in here. I like it. I think it's good because I think locations shouldn't just serve the killers that they come with.
And this makes me feel that this location was designed with other killers in mind as well. Then you have the lucky dragon's foot, which is a really bizarre card. Roll the d20 and you might get massive bonuses. You can choose the same effect multiple times on this. So you can discard this card and potentially get eight time or reduce horror by four. Really, really strong stuff. Oh, and of course the shock stick, which I just kind of jumped by. I am a big fan of attack cards that move the enemy one space mostly because you can use them with retaliate and that keeps you alive from multiple attacks. So, I like seeing locations that have that option in them. So, the thing with Falcon Wood is yeah, it's got this complex special mission you have to do each time. It's not that complex, but you have this unique special mission and there's five of them you can do. And I really like that. I like having this additional goal. I like having this task to do. It's really well spelled out. You've got your straightforward step-by-step instructions on how to do it. And it doesn't necessarily feel like you're adding in a whole bunch of extra mechanics because it's just a task you have to do. It's not separate phases.
It's not special symbols on the board or whatever. It is just do this thing and that thing gets you a reward and then allows you to complete the game. And I really like that because it means you can't use some degenerative strategies against some killers. You can't just walk straight up to Jeppetto and punch him in the face until he falls down because you have to complete the task first. You got to complete your assignment. It's a lot of why I like Razerface as a killer is having those extra to-do things to get out of your way before you can go on to the process of wearing the killer down and defeating them. And I just like that there's five different scenarios here that keeps it a little bit fresh. Sure, they're they're mostly the same sort of thing of moving to location, picking up things, but it still feels like each time I play this map, I'm doing something a little bit different, especially once you add in the different killers here. I also like that a lot of the item cards take into account that there are going to be different types of killers at Falconwood. It doesn't feel like it was just paired with the Slayer, and I love that about this design. If there was only going to be one location in Final Girl that I had to play over and over again, it' probably be Camp Happy Trails. Woodward Files might be the next one I pick up because it's a really strong location that'll keep you occupied for a very long time.
Next, we'll take a quick look at the final girls and I'll evaluate their strengths. I'm going to rank them from who I think is the weakest to who I think is the strongest final girl. Here we have Rond, who has six health and four safe spots. Of these, I'm a big fan of a double horror reduction. That is a great spot. However, her ultimate power is very lackluster. Bloodlust tracks aren't that long. And really, you do want to keep them down. So, getting some reward for them going up really isn't worth it. It's not something you want the blood lust track to go up just so you can get the extra time. You certainly don't want that at all. And in general, I'm a big fan of powers that allow you to win more rather than powers that let you lose less. And I think Rhonda's is very much a lose less power. Next up, we have Christy has five health and four spaces, including again the double horror removal, which is a great space. Her ultimate ability is during the killer phase, draw two terra cards instead of the normal one, choose one to resolve, and shuffle the other back into the deck. This doesn't help you in the finale. Now, it's potentially a very good card if you want to go for an early win, but once the finale comes around, this is a blank character card, so you're going to want to reveal this really early. And sometimes you can draw two terra cards, look at both of them, and they'll both screw you over pretty much equally. There's sometimes where this will pay off really well, but an awful lot of the time, terror cards are just bad. So to me, this is an ultimate power that looks way better on paper than it plays in practice. And in practice, I found Christy quite disappointing. Next up, we have Cat, who has the dangerous combination of only
four health and six save slots. Now, these save slots do have three moves on them, but six save slots is a lot of work to get that ultimate unlocked, and you have to hope that the ultimate is going to be really good, and it's just not. This is a very swingy ultimate ability. If you get a gun, it is pretty damn good. It's excellent, in fact. But there are multiple locations that have no guns on them. So, it means that Cat kind of has to game what locations you play her at. If you play her at a gunrich location, she is much better than where I'm putting her. But if you play randomly and she picks up at a random location that doesn't have any guns, this is a blank special ability. It's completely useless. So, I find her just a bit too swingy for me. And I personally don't like gaming it too hard to pick the perfect final girl to take on a killer location combination. So yeah, potentially this is a game-winning ability, but it might be the most location dependent ability on any final girl. I'll tell you has five health and four save spaces. Really basic ones, too. Her ultimate ability puts a marker down, and you'll move this marker every time you have a fail, and you also move it every time you save a victim. You move it one space to the right. When you're about to receive damage, you can reduce it by the number on that space with the marker and then return the marker a zero value. This seems pretty good. When you first look at it, you're like, "Cool, this is extra hits. This allows me to survive better." But it falls into a mentality trap for me when playing Final Girl that this is a lose
less ability rather than a win more. Sure, not taking hits is good, but I'd rather be doing more hits. And that's why I don't think Octavia's particularly strong. She's not terrible by any means, and being able to survive like one really big attack could be a difference maker. But all in all, I find this quite an underwhelming final girl ability. Next up, we have Tally, who has six health and only four save spots, including take a retaliate card, which I always like, and take any top item card. These are both really strong save spots. Hey, Tally is a tank. When you unlock your ultimate ability, you got to take a reaction card to your hand, and we know that's going to be a retaliate if it's available. All reaction cards now cost one time less. That's also pretty good. And while she does fall into the same thing as Octavia, where she's about surviving more than attacking, I feel she's a considerable step up from Octavia. Talia is a rockolid final girl that will do well against most killers.
Then we got Mrs. Claus, who has six health and four spaces that are all health recovery, and her special ability is that she no longer has a maximum health limit. And this can allow you to do some really strange things. Mrs. claws on the hellscape if she gets a whole bunch of those whips that allow her to do damage to herself and she just takes rest actions can do a whole bunch of crazy things. Again, she is another defensive character and like the two before her, you can get into a defense first mentality and I always think offense is better than defense, especially when you're up against a killer that might be doing four or five hits. Mrs. special rule about having no maximum health limit just allows you to do some real gamebreaking things at times. You can theoretically sit in the corner just taking as much healing stuff as you can and get that number up really really big. And it really doesn't matter how many times you're being hit if you walk into the final battle with 30 health. Then we have Megan who has five health and five safe spots including again my favorite lose to horror. I also like there's a move and a sprint action card as well that can keep it moving really quickly and clearing out some more victims. Now, I really like this ultimate ability. When the killer moves into your space or you move into theirs so you can use it proactively, you may recover one health. If you're already at full health, this is the big thing. You lose a horror. If you're managing this well, this could cause the killer to lose two or even three horror in one round. And that's ensuring that you're rolling big dice. This is going to really help you keep the horror at the
lower end. So, you're rolling a minimum of three dice. And that saves you on guards and your retaliates and your attacks. And even if the killer has some effects that are boosting up the horror, you can take a walk action to move out and move back in and drop that hor down straight away. That's in addition to doing focuses and whatever else you need to do. Megan is really good if you have a weapon card that allows you to move the killer as well and get maximum use out of those horror drops. It's a really neat ability, but it's one you have to think about quite a bit to get the most out of. Then we have Cindy. Uh Cindy has five health and four safe spaces, and they are all move one space. Love that. When resolving a walk or a sprint card, you may treat a fail as a single success result. This is so good. This is a really, really good ability. Cindy is one of the best characters for getting all the victims out of there and for having a hit-and- run strategy. The number of times you try to walk away from the killer and get a fail result and just have to take the damage or have to reroll or do something, it's really really quite frustrating. But Cindy doesn't have to worry about that. She can hit and run along with the best of them. Here Kenzie who has five health and five safe spots and they're a real mixed bag. So Kenzie, once during each planning phase, you can take all copies of a single named action card from the tableau for the price of one. Now, this is probably going to save you two or three time each turn and allow you to build up some pretty powerful effects.
Also means if you're going to go search and you fail the first search roll, that's okay. You've got another card in your hand. There's also a couple of location specific cards that have multiple copies and you can get multiple copies of them as well. I think this is a great general utility power that can do a whole bunch of good for you. Whether it's getting two sprints or two guards or two searches or two distractions, at the very least, it's an extra card you're picking up that you can discard in order to turn a maybe into a success. Next, we have Cassie, who has five health and six save spots. Two card pickups, which I think are really neat, and two moves, which I like. Cassie is the ultimate offense. Spend six time to double the damage from your next attack, including the damage from weapon modifiers. You cannot use this ability reaction cards or if it would take your time below zero. Put Cassie on a rock with the sniper rifle or give her the elephant gun and you're talking 10 12 damage with one shot. I really rate Cassie. Sure, it's like hit and hope. But if you succeed, if you've got the right cards, you got rolls, you got other things up your sleeve, Cassie can just look at a 15 health bad guy and go boom. All right, now you're much more manageable and I can deal with you next turn. Cassie is a great counter to strong finales because she goes, "Right, cool. We're on the final round. I'm going to do this one attack and that's probably going to kill you. And if it doesn't, I guess I survive one round and have to do the one extra damage to kill you." Really, really strong and more
importantly, just deeply satisfying when you pull this off. Next up, we have Gabrielle, who has five health and four save spots. Pretty conventional safe spots, too. Once per action phase, you can look at the top card of any deck or the dark power or finale card. This is a pretty good ability, but it's not necessarily one that helps you in the end game either. Now, it is worth noting that you can see what the next event coming up is, then that could be quite important. And if an item deck doesn't have a revealed card, you can look at the top of that as well. It's also a useful ability in locations or against killers that have their own special card deck because it is any deck of cards. That includes, for example, the sand stakes from Utopia and the Evoorphs deck as well. Against some killers, this ability to look at the top card of a deck can be an absolute gamebreaker.
Against a lot of others, it's just a good ability. So, I'm putting it towards the top half because knowledge can be power, but this does have a bit of a drop off against most killers in the finale. I think this is absolutely better in every way than Christy's ability. Next up, we have Janelle, who has five health and four safe spots. Nothing particularly interesting there. Janelle has a similar ability to Octavia. The tracking marker moves up if you fail or if you save a victim, and it starts on zero and it goes up to plus five. The big difference here is this is bonus damage. This allows you to do something quite similar to Cassie, build up for one big devastating attack. The reason I prefer Janelle's ability is you can do it on even a weak attack. You can turn a weak attack with no weapon into a six damage attack. That is a big deal.
And again, from my offense first mentality, Janelle really leans into that because every time you save a victim, you're just powering up a big strike that you are going to use against the killer in the finale or preferably before the finale. Janelle's a great heavy hitter. And then we have my favorite final girl from season 3, Mandy. She has six health and five slots. Two of those are move one space. The rest are a mixed bag. But that's not what makes her great. What makes her great is her special ability. You add two damage to attacks made without an item or weapons. And you can't use this ability on reaction cards. What this means is Mandy is automatically armed with a big bad weapon that is just herself. Two damage is as good as a woodcutter's axe. You get that straight away as soon as you unlock her ultimate.
And Mandy changes how you think about the game. You straight up want to beline towards rescuing those five people as soon as possible and then possibly force the fight with the killer as soon as it's practical. You don't want to be powering up getting items and doing other things. As soon as you've got this ultimate unlocked, you kind of want to be making for the bad guy and just start laying in hits cuz even a weak attack is three damage. I really rate Mandy because of the pace and tempo she brings to the game. don't have to waste time searching for a weapon to fight people with because you are the weapon. And the thing is, you can still make use of guns. You get her a sniper rifle, she can still use that sniper rifle effectively at range and then she still counts as having a melee weapon. She's straight up a fantastic brawler. And I really, really rate Mandy. She's good against practically every killer in the game with the exception of the poltergeist. All right, so that's the end of season 3. I'm actually waiting for season 4 stuff to arrive very shortly. I currently have two boxes from season 4, and that's Bad Time at Buddy Lands and the Shriek Box, which I'm going to include in the season 4 review as well. Now, I have no idea how long it's going to take me to play through all the season 4 content enough to be confident talking about it, but it usually is, you know, a good couple of months at least. So, I might not get to that review this year. Hopefully, I can, but it might be in quarter 1 next year.
We'll just see how it all shakes out. So, that's my thoughts on season 3. Let me know what you think in the comments. And a reminder, Three Minute Board Games does not do paid content. Keep us independent by supporting us on Patreon. And if you enjoy this video, like, share, and subscribe to the channel. Take care all.