The Plum Island Horror: More of a Bad Thing | Scenario 3 | Playthrough
Games in This Video
1 game is featured in this video — it unlocks as you watch.
Transcript
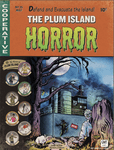
Hello everyone and welcome to Meet Me at the Table. This is Colin and today we're going to do another playthrough of Plum Island Horror, but you might notice we're only using about a half of the board. Well, that's because I'm using the expansion that just came out. More of a bad thing. There are five new scenarios for this game. This is what this game really needed. There was only one scenario with the base game. It was surviving nine total rounds trying to get a total of 26 or more escape points for saving civilians. And that was the game. Now there are five scenarios. Three are shorter length scenarios. And that's what I'm going to do today. One of those three. And then two more fulllength scenarios, which is the full 3 days worth of playing with different objectives, which is really cool.
There's also an alarming mode, which is what we're going to be using for this playthrough. And nightmare adjustments, and I'm going to play with one of those adjustments, but I have not won this game yet, so I didn't want to play with too many. I'm going to get killed anyways. I love that about this game, though. It's so good. If you know the game Dawn of the Zeds, this game was also designed by Herman Lootman. I'm really excited to show this to you. We are essentially playing a tower defense game while also trying to uh save all of our civilians out on the board. Let's go ahead and do a quick setup and then jump into our playthrough. Scenario three. Goodbye cruel world. You and your compatriots have really messed things up badly. And I mean badly. You got overly confident, too full of yourselves, and honestly a bit arrogant. It's all pretty unbecoming. So, let's call it like we see it. Here you are, the last day of the campaign to save Plum Island and possibly the entire good old US of A from the utter destruction and it's looking bleak. The horrors are poised to form this mammoth wall of baddies with a couple ground pounding mutations leading the way right into the heart of Greenport and probably beyond. The docks have been badly damaged by the torrent of VIP citizens who have been hastily and carelessly evacuated already, much to the chagrin of the thousand of regular civilians left behind. Most have hunkered down now in their homes, the police stations, firehouses, and wherever else they can hide. Others are streaming towards Greenport, hoping against hope to get
out of town and away from the monsters. Needless to say, they all have lost confidence in you and the powers that be. Nice work there, Skippy. Let me be the first to say thanks for nothing. But you do have this one last ditch opportunity to save face and redemption. So try not to trip over yourself as you once again attempt to save the island and the world. For this scenario, we have three rules that are required from the alarming mode. First of all, we're going to use the nastier biohazard track. I'll show you that in a second. We have the death will have its day. That means every time we have a civilian killed, we'll actually gain negative evacuation points. In the base game, if you lost a civilian, eh, but now, every time we lose a civilian, their number is subtracted from our evacuation points. And then we have it's dangerous to go alone. That means we can only have one follow action during the night phase of the game, and we'll have two day phases and one night phase. The expansion came with a new board track.
So here we're tracking our evacuation points. That used to just go from 0 to 26. Now it goes all the way from -9 to 46 points in the regular game. Uh so if you played with the alarming mode, you would lose if ever this gets to -9 and you automatically win at 46. We're still going to have if we get to -9, we've lost. But even if we get to 46, we do not win. We have to survive the three rounds and then we're going to actually count up points and score a a victory point value and compare it to a chart. The biohazard track is also slightly different where we now have an area where we can spawn up to five zombies. It used to be threes or fours, but now it's threes all the way to here, then fours over to here, and then fives all the way to the end. You still lose if your biohazard track gets to 17. Our overrun points track isn't any different. eight plus of those points and you lose. For the regular game, you'd start off on October 25th, the morning, then afternoon, and night.
We're doing only one day and we're doing the October 27th scenario. I've got to say, this is cool. They have a scenario for each of the days. So, one of them, they have a scenario 25 or October 25th date, October 26th, and we're doing October 27th. That means for our first turns, we'll have three actions each round, then two, and then only one during the night phase. And we only have one follow action as well during the night phase. Because this scenario only lasts three game turns, all of the yellow cubes are already in our biohazard bag. When you play the full game, you would have all of those there, but now all you have are the red ones. And remember, if ever you gain biohazard cubes, and there aren't any here, you get pushed up on the biohazard track. In Plum Island Horror, you can play between two and four factions. And the expansion came with three new factions. I'm going to show you two of them. We've got the ZZ Big Top Circus. And for this scenario, you have to choose only three of your faction units and your compound.
So, I'm going to be playing with my leader. I'm playing with Fanny Oakley and the Flying Beard Brothers, as well as, of course, our clown car. We also start with six total supplies instead of only two. The other unique item for this scenario is that all of these will start off on the board. So, we'll have four units on the board. Our second faction for the game will be the Oceanside Construction Company. We're going to use Becky. We have Mike or Tim the Toolman Taylor. I love that one. We have the tie tough Murray and we have our towering crane. Both of our compounds for these two factions can move. This one cannot move except for with vehicular movement, but the clown car can actually move with regular foot movement. In this game, the turn order is determined by a random draw from the initiative bag. I have two tokens for each of our faction units, three fate tokens, and one impending doom token. Once we've drawn all of these, that will be one day, or I shouldn't say one day, one game round.
And there are three game rounds for this scenario. The third game round will be during the night phase. So, I'll take all of those and just put them into my bag. The expansion also came with three new mutation units, and for this scenario, we spawn two randomly. I could have randomly chosen the other basic ones, but I wanted to show you some of the new ones. So, I specifically spawned two of the three of these. We have the reanimated grizzly bear and the frantic tumbling cockroaches. Both of those have been spawned on the board. And so this is a new tracker sheet to track their health and it still gives you the uh murder movement allowances as well as how hits will work depending upon what location they're at. The single nightmare adjustment I'm going to make, there are six tough fate cards. I'm going to shuffle those in with the regular ones. The important thing to note is that there are three more draw event cards. So, there was 10 in this deck. Now, there is going to be 13 in total uh with all of our cards.
So, I'll shuffle all these up. And our fate deck is ready. In this specific scenario, the only two decks you're going to need are the fate cards and the event cards. There will be no searching during the game. So, that means no VIP civilians, and we're not going to have any of the additional uh mutations. They have us remove all of the mutation event cards out of the deck. One of the biggest changes for this scenario is we're only using the bottom section of the board. You can see where I have these black cubes. These are our spawning areas for each of the tracks. So, we start with enemies already halfway to 34 away down our track. We do get the benefit of being able to place any of our units anywhere we'd like, except for we cannot have our compounds, which by the way normally aren't on the board, but for this scenario, start on the board. They cannot start off in one of the overrun locations, which is just fine by me because both of them can move. I actually have the clown car way up here hoping to pick up some of these civilians and run away. Because we're playing with two factions, I do get two NPC units. We have our wolverines who will show up here. And actually, I mean, we can show them up anywhere we'd like.
I've placed them here. And then we have way over here, this is our shore patrol. I've placed them over here. If we were playing with three factions, we'd only get the shore patrol. And if we were playing with four factions, you wouldn't have any of those NPC units. You do, I believe, still have your boat over here for evacuation. You have your uh Alyssa here and you still have the airmed plus the coastal guard here at the helicopter site. The next part of setup is randomly placing out your civilians. So, I've already done that. There's 30 in total, but it's told us the different locations. They'll either have three, two, or one civilian. And there's 30 in total that we've placed out. their names aren't going to matter because we don't have any of those search of of search cards that maybe are looking for a specific type of civilian. So, I flipped them all over so we can see their numbers, which is helpful. We had to do some preset damage. Two damage here, and two damage over here, four damage here, four damage here, and four damage all the way over there. What damage does is it compromises that location. You can't do location actions or save civilians in a location that's been compromised with damage. So, we need to repair that damage before we can deal with saving civilians in that area. We start the game spawning four zombies in each of the six tracks. And then I have used a fate draw to determine where our two mutations spawn. So, our uh grizzly bear is here and our cockroaches are over
here. Due to the fact that this scenario does not use the search deck, any of the binocular symbols on the board are wild. They can either be used for a forage action to give you extra uh supplies or a biohazard uh symbol to reduce the biohazard track. So, just know that. And whenever you do that with one of these locations, it exhausts and normally at the end of the night phase, those will refresh. It won't matter because we only have one night phase. So, each of those are going to be one-time uses. Just so you understand how we score the best VP for this scenario. We are going to try and score as much evacuation points as possible. Then we will subtract VP equal to twice the biohazard level and three times the overrun level. And then we're going to look at this chart and see how we do. It goes from -1 VP all the way up to 21 VP. The last time I played this with my kids, I had -5 VP.
Oh yeah. So, I'm hoping to do better than that, but we'll see. That should be it for setup. Let's go ahead and walk through how a round works in this game and just start our playthrough. There's tons going on on this board. So, I'll explain as we play if you've never seen this before. If you've seen my original playthrough, you can also see the differences with this expansion. I mean, heck, this is a huge difference with this specific scenario. Let's jump in. Each round consists of three phases. We start with the hunger phase, but only during the night round. Well, we're starting in the morning, so we can skip that. Now, we just draw turn order tokens. And when we draw them, we resolve them based upon what type they are. If they're a fate token, we draw a fate card. Impending doom, we draw an event card. We're done. Those are easy. Faction token, you draw it. And then you get first a crisis adrenaline where all of your units may do one free foot movement. After that, you can take actions up to whatever limit it is. For us, in the morning, it's three actions.
And then after that, we have a follow action for our other faction. So, let's say we draw ZZ Big Tops uh circus token first. They'll get to do three actions. And then the Oceanside Construction Company would get the option to follow with up to two actions because I'm playing a two faction play of this game. After each follow action though, we have to draw a fate card. And if we draw one that says resolve an event card, we have to resolve an event card. Now, if we were playing with three or four factions, that would end the follow action phase, and we'd move back up to drawing a new turn order token. For two player, you still get two actions no matter what, even if you have an event. But that means you could have two events with two follow actions. Once we've drawn all eight of the turn order tokens, we'll move to the end phase. For the end phase, we can skip replenishing locations. The mutations will regenerate by one health. And then we draw two tokens from the biohazard infection bag.
And depending upon the type. Right now we have green and yellow ones in there. We're going to get red and ones in there for sure. And we're going to move up on that track. And remember, every time we move up on that, we have to think of it as negative VP times two of whatever number is there. Then we just refill the turn order bag and advance the game marker one step. So let's see who's going to go first. We will draw our first token. Oh, it looks like the Oceanside Construction Company can go first. Before we do our activation, let's meet our four units. So, we have Becky here. She has the measure twice leader ability. If this unit is with or adjacent to any of its faction units. When those faction units draw a fate number as part of an action, they get to draw two and choose one. She's got four health. She can move a total of three without spending any supplies. Or for an action, we when we move her, we can discard a supplies to move five. We have Mike the toolman tailor. He actually his melee is only one and her melee is only one as well. And they both can't range attack. He has hammer time. This costs one action. This unit may attack one horse unit in the same area. Draw a fate number and inflict hits equal to the fate number drawn. Add a biohazard cube to the biohazard bag. So instead of using his melee of one, and I believe this is in place of doing a a close combat attack where the can actually attack back, I think he just draws a fake card, deals that damage, and adds a biohazard cube. Next, we have Tai Tough Murray. Four dice on a close
combat attack, but no range. Uh, this one says, "When conducting a close combat attack only, each shielded result cancels two horror hits instead of one. If the close combat attack is against a murder of horror stack of seven or more, it also treats all miss and light hit results as one hit. So, we can hit back pretty hard. Finally, we have the towering crane, which is probably one of the coolest compounds in my opinion. Can't move with the foot movement. You have to spend the supplies to move, but it has the hold on tight special action. This costs one action. Draw a fate number. You may move that many nonh horror units and/or supply markers from any one area within this unit's reach to any other one area within this unit's reach. This unit can reach its area and any orthogonally abuing area. Adjacency is not required cuz he can go over the water, which is so cool. Due to how this scenario has set up the board, I do not think I'm going to do any crisis adrenaline move. I have all of my units where I wanted them. So, we're going to move right into our actions. There's lots of actions in this game. I'm just going to talk about them as we do them.
Otherwise, it can be a little bit overwhelming. For our first action, as the Oceanside Construction Company, we are going to activate our crane's special ability. That means we draw a single fate card, and that will tell us how many units we can potentially pick up and move to another area that's orthogonally adjacent to us. One awesome thing for us though is Becky is adjacent to us. So, we get to draw two cards and choose one to use. We've drawn either a two or a five. It's actually not going to matter, but we'll say we're using the five. What I'm going to have this crane do is actually pick up this single unit, and we're going to place it right over here in the beach. That's because we have a helicopter here that could potentially save those two units. All right. Our second action we're going to do is called a move action. We are going to spend a supply because I want this crane to move. So, we're going from six down to five supplies. And we're going to move this crane into this location.
Now, when we do that, because there are two units here, we can place these two units into our crane. Each of the compounds can hold four of the civilian units. And at the end of the game, those units can actually be counted as evacuated safely, so long as the crane doesn't die. But I'm going to have to spend supplies to keep them alive. That's okay. That's a free action to pick them up. It now will take us a crowd control action to put them down if we want to. But I kind of want to keep them in the crane. That was our second action. Our third action then we're going to have our crane here do a repair action. When you do a repair action, you're going to repair either a disabled unit or a location with damage. This is once again a fate card draw. You're going to look at the number that you draw and see the result. So, the nice thing is we get to draw two fake cards for this instead of just one. We drew both a four and a three. The higher the number is always better. So, let's choose the four. And that's our second event card already. We have a repair table chart. We can look at the four. It says for a damaged area bridge, remove damage markers equal to the admin rating of the unit. Uh, so let's see how much our admin rating unit is for our crane.
This is the sand part. Our admin rating for our crane is only two. So, we can repair two damage. That's good and all, but that does not repair this location in full. Once we do repair this in full, though, then we can start evacuating units through this uh ship over here. We've now completed our three actions, our circus faction can now follow, and they most certainly are going to follow. We're going to try really hard to save some civilians. So, we have our flying bros here. They have an admin rating of three. They can do a crowd control action. We can move some civilians units one area each if they're in the same area as the active unit. The maximum number of civilian units is equal to our admin rating. Well, our admin rating is three. There are three units here. So, we're going to spend one action and move all of them one area away from us. Uh, do we want them to go that way? You know, I'm actually thinking I'd like them to go this way because we can always move a helicopter over here. It's not damaged. That's actually a really cool and interesting idea. I didn't do that last time with my kids and that may have been a better idea. Once we complete that follow action, we have to draw a fake card. And this one says no event card. So, no event card we need to draw. Let's do one more uh follow action, shall we? For that second follow action. We're going to do an evacuate action. We can do this in a location that either has a helicopter and is at a helellipad that's not been compromised or it can be at one of the dock locations with a boat, for example, here that has no damage. But unfortunately,
there is damage. So, we can't do that one. But we can do this one. And we have a number two. That means we can evacuate two civilian units. So, we can just remove them from the board. And we are going to increase our evacuation points by 2 plus one. That's three points for us right now. That is positive victory points. Woohoo. Then we have to draw one of these. It still says no event card, so no worries. That will end our follow actions. We can't do any more. That will end our first uh player turn token. Let's draw our next one and see what we get. Oh, this one means the circus gets to go first. And of course, I mean next, not first. Oceanside already went first. Okay, let's look at our three units plus our faction unit for the circus. We have Kaman Kamal. This one says, "If this unit is with or adjacent to any of its faction units, those faction units may conduct a crowd control action to move civilian units from an adjacent area to their area instead of the other way around where they have to be in the area with the civilians and move them. The other three faction units we're using is Fanny, and we have the Flying Beard Bros and the Clown Car. So Fanny, her range attack is a four, but remember with range attacks, you have to spend the supplies, so it's expensive. She has the trick shooting ability. When conducting a range combat action, this unit may first move one area for free, conduct the range combat, and then may move one more area for free. The Flying Beard Brothers has Dusty, Billy, and Frank use their enormous beards as trapezes during
a foot movement action. This unit does not have to stop when entering an area with horse. And then finally, our clown car, which is awesome. It has quick handling and lots of leg room. When defending in close combat, have the number of hits scored against this unit. Also, this compound may hold up to eight civilians. So, my goal is to collect eight civilians for sure. The other interesting thing about the clown car, it actually has foot movement. I don't want to move it now because we have not picked up the civilians in our space. But going forward with that uh crisis adrenaline movement, we can actually move it one space for free. For that crisis adrenaline move, we're going to have Bailey move along this road to here. That's a small bridge. And then the flying brothers also move over here. Don't forget there is a limit of two player units per location with the exception of course of compounds. They don't well they count as player units but they don't for that rule. So you can have two player units and a compound in one area. I do think we're going to also have Fanny move here cuz we can crowd control those guys over. I think that's worth it. Our car we're going to leave up here. Our first two actions then will be two more crowd control actions. First we can bring all three of these civilians into here. And then we will use Bailey and her five admin rating to move 1 2 3 four out of our area into an adjacent area. But that was two actions.
It's great to see all those civilians that we can save though. For our final action, we are going to activate our clown car. Because these two civilian units are here, we can pick them up for free. That's not an action. We can move one space. So we're going to move here and pick up these civilians. So now we have four in the car, but don't forget we can have eight in total. And those evacuation points won't be scored until the end of the game because that clown car could be destroyed. And if it's destroyed, all those civilians, they're not dead, but they all get dropped in the location where the clown car was destroyed. That was our three actions. Let's do our two follow actions. I most certainly am going to try and repair again with my crane. So I'll draw the top two cards of the fate deck. We either have a one or a five. I'm definitely going to choose the five. And that's another event card draw. That is awesome. One, two, three of them have been drawn. There's only 10 left. A five draw is the same as the four. So, we can remove two damage. This means we've just repaired this location in full. And now we can start evacuating people through this boat. That can evacuate four civilians with one action. But that was our first follow action. We need to draw a card. Oh no, we do now have to draw an event card. Our event card is trolls. In the large basement of an undisclosed warehouse, some scouts observe repulsive pale green figures reminiscent of Norwegian trolls. But they soon realize their error. These figures are sitting at the computer terminals and their unhealthy por is a consequence of a lack
of fresh air, healthy food, and exercise. These are in fact internet trolls. And your scouts report that these ghouls have hacked the headquarters of each of the factions. Each player loses three supplies. Oh my gosh. That means we only have two supplies left for our clowns and two supplies left for our oceanic construction as well. Ow, what an annoying event. I love it. So now our second follow action, which we don't ever have to do a follow action, but we want to right now is where we have the most actions. We're going to have our Wolverine here with an admin rating of four. crowd control three of these over to the beach. We can save two of them with an action later. Maybe we can get one more over here to make it worth it.
Let's then draw a fade card. No event. All right, that's good. That was our two follow actions. Let's see who's next to activate. We haven't had any zombies move, but that's going to happen soon. Yeah, here's our fate card draw. We have to spawn on track one and then activate on tracks two and three. To determine the amount of zombies that spawn, you look at your biohazard track. We're going to spawn three more zombies. Track one is at the bottom left hand side of the board. You can see this says one C. That shows us it's track one. We already had four zombies there. We've added three more. This horror stack is seven large. Yes, I'm using dice on there to help me remember how many there are in that track. It's a lot easier to do that than having to count the little tokens. So, I highly recommend getting some red dice to do that. Now, we need to activate tracks two and three. This, unfortunately, is not going to be great.
Track two is here. There are four total zombies in that stack. That means they can move up to two areas. But once they move into an area with any civilians or player units, they're going to stop. So, they're going to move here, and we're going to place a combat token here to remind ourselves we need to activate that. Then, we have to activate track three as well. We'll move the mutation first. This grizzly bear can move too. Well, it's going to move here and stop. Same with these zombies. So, we have two combats we need to resolve. Each of these combats are close combats, which means we have to place a biohazard cube in the bag for each combat. So, this is a one v one over here. So, it'll be one biohazard cube. There's two enemies here, but only one civilian. This one's going to be easy. We can just resolve it right here. We're going to grab one of those red cubes, placing it into our biohazard cube, or I should say bag, and we're going to lose this civilian.
They're gone. That civilian had a number two on it, so we lose two evacuation points. You can see now how much more important it is to protect all of the civilians, and I love that. I'm so glad they did that. We've now resolved the one attack. Now, we have to deal with the murder of horrors attacking poor Tim the Toolman, Taylor. Of course, his name is Mike, but whatever. I'm going to call him Tim. Uh, we have a murder of horrors at a level of four. There are four tiles in it. We are in a building. So, that means they're dealing one damage to uh Tim or Mike. He now can roll equal to his close combat rating, which is one. And we'll see if we deal any damage or block that attack. There are civilians in our location, but we protect them. They are not going to get hit by this murder of horrors. We'll roll up our single dime. We have a crit. That means we deal a damage and we can roll another. Okay, we dealt one damage, but we take one damage. We only have three health, so we're down to two, but we'll remove one of these zombies in the stacks. Now, there's only three in this stack. And I can't forget when that civilian was killed over here, we should have increased the murder of horrors by one because guess what? It turned into a zombie. So, this stack is now five large. So, we have a five large and a three large over here. And this combat has been resolved. We can stay in this location with that murder of horrors. No problem. We can move out of it. No problem either. We can help those civilians get out of that location. The big thing is though, if they activate again, they will attack yet again. That will complete our fate draw. Let's draw our next token. Okay, our oceanside
construction faction will activate next. During our crisis adrenaline step, we can have all of our units move with their feet if they want. We're going to have Becky move over to here where there's tons of units of civilians because she can move five at one time. I am a little bit worried about this grizzly bear. I have not told you his special ability, but he negates last stands for any of our NPC units. So, I do think Tai Murray is going to move over here for free, but it's still going to take us an action to move into here. I don't know. Is that worth it? We could just stay here and wait for him to move in. I might do that. I might just have him here for protection. And Mike over here will stay right where he's at. We'll now do our three actions. First action, crowd control. We're going to get all three of these safe for action one. Action two, we're going to do another crowd control. Moving one, two, three, four, five. We'll leave this one here for our second action. Look at all these civilians. We could for our third action activate our crane, but I think I'm going to wait. I'm going to have Mike do one combat action. Mike is going to activate his hammer time ability.
This will mean though we have to place another red cube into the biohazard bag. It is what it is. But now we get to draw one fate card and we get to deal damage four. Beautiful. That just clears all of these out. No problem. That's what I wanted to do. Get rid of those zombies. We now have none in track two. Our circus faction can now do two follow actions. And the first thing is we're going to have Bailey move one, two as a foot action. We're going to get all of those civilians saved. No event card. I love it. Second action. We're going to crowd control. 1 2 3 4 and five. That is amazing. Look at all those civilians we can save. But we have to draw this. And we do have an event. Our event card is crisis at the ER. The Good Samaritan Hospital Area 2G. Is that area compromised? Yes, there's damage there.
I haven't cleared that. Draw four cubes from the biohazard bag and apply their effects to the biohazard track and then place them back into the bag. Well, we have increasing the track by one, by two, oh my gosh, by three, four, uh, by nothing. The green is nothing. So, four increase for the biohazard track. That means we go from zero to four. And if you think about it, at the end of the game, that's minus 8 points. And now, well, we're still at three, but only for so long for spawning. Oh, that was terrible. Okay, that was our second follow action. Let's see who wants to go next. I can tell you who wants to go next, but we still have a fate card. A fate token. Yeah, we've got that fate token. Let's draw a fate card. We need to spawn in tracks one and two and activate tracks three and four. We've spawned in tracks one and two. Look at this. We have 10 zombies in this track.
I have to use a D12. They're going to be really slow at least. We do have the clown car, but I'm actually not worried about this one because it hasn't activated. Track two, we just have three measly zombies, but three and four are going to activate. What this means is this grizzly bear and these zombies are going to attack Tai Murphy. So, that's going to be a combat. And don't leave one of them behind, even though I wish you could. We'll grab that. And that is going to be one biohazard cube into the bag. And then this one's going to move here and eat this civilian for lunch. That's another biohazard cube in the bag. And that means there's five zombies in this set. I hate to say it, but I think we need to place another red biohazard cube into the bag because there's two individual combats happening here. That means I only have 10 left of the red cubes going forward. After those 10 are in the bag, anytime we have to place biohazard cubes in the bag, we just move up one on the track instead.
We can choose which enemy to attack us first. Let's do the grizzly bear. That's just hitting us for a straight four damage. We are most certainly hoping for some shielded results if we can. Okay, these are each considered as two shields. That actually blocks both hits. And we've got two hits here with one of them being a crit. With a crit, you can roll in another one. Oh, that's a light hit. Light hit does nothing for us. But we deal at least two damage to that grizzly bear. And we take no hits thanks to those shields. That's because we're on this huge tractor. This grizzly bear does have five health, though, so we still need to deal three damage to take it out. Now, we're in a clear location with five zombie tiles that's going to attack us. That's three damage to us.
So, we need to defend against that. Rolling four dice. Hoping for at least one shield here. We've got one shield and a crit. So, right now, we're taking one damage and we're dealing one. Let's roll this one up. Nothing. So, we at least knock one off the board. So, it's down to four. And we only take one hit. We have five health. So, we're doing okay. We're down to four. I also can't forget we should decrease our EP down to zero because we lost another civilian. That will end that player token draw. Let's see what our next one is. We have another fade card. Oh boy. We need to spawn at track three and activate track two. Spawning at track three means three more zombies show up here. and then activating track to these zombies. Hit Mike the Toolman yet again. So, another biohazard cube is added and we're going to have to defend. We're getting attacked for one damage and we only roll one die. And we'll place this into our biohazard bag. Hoping for a shield here if we can. Well, we take one of them out, but we take a damage. We're down to one health. There are two zombies in that stack. There are only two more tokens in this bag. Oh, the next one is the impending doom. We have to draw an event card. Our event card is social distancing. That brings back horror memories from 2020 and 2021. The civilians are panicking and lashing out.
Draw a fate number. Okay, we're going to draw one from right here. We got number three. And it states, "All player units on that track number which are currently sharing an area with a civilian unit take any type of or of any type take one hit." Unfortunately for Fanny, that means she's going to take one damage. She's down to three health. Ow. These two civilians attacked her. We have one final token in our bag and we know it's going to be the circus units. They get three actions and then two follow actions for our construction team. And I think since we're sitting right here, Fanny is going to take her first action and push away or crowd control those two units over here. We've got a ton that we can save. Next thing we're going to do with her, she's going to take an action and she's going to attack. She's going to do a range attack. So, she has two supplies. This faction, we're going to go down to one supply. We can do a range attack, which is slightly different than a close combat attack. First of all, we don't have to place any biohazard cubes in our bag. Second, we can attack in from an adjacent area so long as there's an arrow. And I haven't said this specifically, but we as players can move through these arrows in any way we'd like. All of the zombies will always move towards the overrun locations.
That's what they're trying to do. We are going to range attack this grizzly bear. We have a nice chart here for range combat. Any of the misses are just misses. Shields are considered a hit unless the horror is in a building or forest space, but no, they're in an open terrain. That's why I wanted to do this. This just inflicts a hit. This is a half a hit. So, we need two halves to make a hole. And this is a crit hit where you can continue to roll and you can roll multiple times. Her range attack stat is four. So, we'll roll four dice. We've got two damage there with a crit. I just need one more damage and we can take him out. Yes, that's three damage. Three plus the two from before and one of the two mutations are off the board. For our final action, we will crowd control these two civilians into this area. And look at all of these units. Now for the two follow actions. Let's see. This crane is going to save four units because the Cheyenne Sky can save four with an evacuation action. So, you've got a three, one, two, three, four. All four of those. We'll move up that track in a second. Let's see if we have an event. No event. And our second one.
We're going to save the next four. We want them off the board. One, two, three, four. Oh my gosh, we've saved so many civilians there. But we do have to have an event. No, our total civilian save was 3 6 7 8 9 10 11 12 13 14 15 16 17. and we are at zero. So, let's move up to 17 victory points and draw our event card. We unfortunately have the vulnerable immune systems. Each player must assign one additional hit to any one wounded unit in their faction. Our circus faction only has one unit damage. That's Fanny, thanks civilians. So, she now has two damage. And I think we'll take our chance with Tai Tough Murray here taking the second damage as well. This ends the activity phase. We'll now move to the end phase. We're going to draw two of these tokens from the biohazard bag. That's a two and that's a zero. One, two. So now we're going to be spawning at four going forward unless I reduce this, which I might want to.
We're going to move this down by one. We're not in the night phase, so we don't have to worry about feeding our units. We're going to have to feed our units during our night phase. We're going to have to spend the supplies for every one of our units. So I need to get some supplies soon. We're then going to grab all of those player tokens, put them back into the bag, and draw one for the next round. Just know that during the afternoon now, we will only get two actions around instead of three. So, let's go ahead and draw our first token. And we have a fate draw. Oh no. Unfortunately, we've drawn our first tough fate card. This says draw two fate numbers. So, I've got six and I have two. Okay, both of those. It says spawn murder of horror units on the track numbers equaling each of the drawn fade numbers. So I think that means I'm spawning four zombies on track six and on track two. Then we have surge draw a fate number. Activate the track number equaling the drawn fate number two times. And we have one for that. Track six now has eight total zombies. And track two, I cannot believe this. Poor Mike the Toolman Taylor. He is having to protect this row. It keeps spawning over and over again. There's four zombies.
Then this row one needs to activate two times. The first time we have to determine which way they're going to move. This is one to six. This is two to five. We have a six. No flipping way. So the first activation because there's so many zombies here. They only move one area. But the second time they're going to move in and attack the clown car. I was hoping that wasn't going to happen. We have to grab yet another one of these biohazard cubes, put in the bag, and we have to have a combat. 10 zombies in a building will deal you three damage. Our clown car only rolls two dice for defense. That's a shield and a crit. Uh, that's it. So, we deal one damage. They're down to nine zombies there. And we have what? Two damage to our car. One more. And we'd have to do a last stand.
If we lose that clown car, I'm going to be very sad. Now, we'll end that fate draw. Let's draw our next token. Oh, don't worry. It's another fate draw. We're going to spawn on track two yet again and activate track five. We now have eight zombies standing here ready to attack Mike the Toolman Taylor. And then these four zombies are just going to move in and eat this civilian. Adding one more biohazard cube. And we're going to have to reduce our EP by two. We're back down to only 15 and another biohazard cube into the bag. Eventually, we're going to be able to go right. We'll draw the next token. There it is. That will be our circus faction. Let's go ahead and move that clown car. Without a doubt, our clown car with that one foot movement they have. They're going to move one away. I almost forgot this murder of did eat that civilian and turn them into a zombie.
So, this actually should be five. Now, we're going to have the flying bros move. They can move five. One, two, three. Yeah, have a move there. Bailey can move a total of two. We're going to have a move one, two, starting to get back over here. Our first of two actions, our clown car is going to exhaust this site and we're going to collect two supplies. So, we go from one to three supplies. And then our second action, we will use one supply to move our clown car up to what is it? Four spaces. We're just going to move them one here and collect this civilian. The construction faction will then follow by using an evacuation action, saving these two civilians. is moving up five on our EP track. We'll move from 15 1 2 3 4 5 to 20 VP. But then we have to draw a fate card and we have no event. That's great. And then we're going to do our crane special action drawing. We have a six. We can move up to six units that are adjacent into another location that's adjacent to ours. Even if it's not connected, that's okay. I've got three units here. If we can get one more, we can save all four of those units with one action. And we have to draw to see if we have an event. We don't. Okay, that was good. That was a good turn. Let's draw for our next player token. We have Oh, the construction units get to go. At this point, Mike is going to get out of this space. He's going to move here and start trying to save these civilians. Our
movement is three for Becky. So, let's have her move one, two, three, and she can start pushing these units along. We're trying to get all of them that we can over to the Cheyenne sky. We're going to leave Tai Murphy right where he's at. He's ready to take down these zombies when they activate. With our two faction actions, we are going to crowdcontrol these three civilians here. And then the werewolf or the Wolverines, I should say, will crowd control these three here. Look at that. Then the circus as a follow action will go down to one supply to move their clown car yet again. Grabbing this civilian and we have to see. Do we have an event? We don't have an event. And we have one more action. Do I want to go and save those two? No. I think I'm going to do the coastal guard and save two of these civilians. Let's just see if we have an event. Oh, we do have an event. Two more saved on our evac points though puts us at 22. We drew the toxic wall. Check the biohazard track level and apply the result as below. We are at level six.
Spawn a murder of horror stack with X number of tiles in the spawn zone of track X. X equals the biohazard track level. Well, that's at six. So, we need to spawn six more zombies at track six. Oh my goodness gracious. We have 14 zombies in this stack. I don't think I'm ever taking that out. On the two edges, we have 10 and 14, respectively. This is insane. At this point, we really need to start thinking about supplies. And we have the oceanic going a second time. Based on where I have my units, I think I'm just going to leave them as is. We're going to have our patrol here do a crowd control action, moving two more units to this uh side. That means there are four units over here. Oh, that means the Flying Bros can't move all four in one action.
For our second action, we're going to have our shore patrol pick up some supplies for us as well. So, we're back to two supplies. That's because I need supplies for food tonight. I'm realizing I gave those supplies to our circus faction. That should have been the Oceanic. So, they have three supplies. Our circus only has one. We need at least two. And you're going to see why. Otherwise, civilians are going to die. And I don't want them to die. Not with all the work that we've done to save them. So, our first follow action by our circus. Well, maybe I should change. No, I'm going to do it. I'm going to do this for our first follow action, saving two more civilians. And we'll have to draw this to see if we have an event. We don't. We've now moved up to 24 EP. And then for our second follow action, we will gain a second supply from this location. There's not a ton of locations on this bottom half of the board for supplies. I think they do that on purpose. So, now we have two supplies.
Oceanic has three. We'll draw for an event. We don't have an event. Okay, now we're just going to see who is going to activate next. We still have a fate token in here. And we have our impending doom. Let's have another event. We've drawn an engine failure card. The Coastal Guard helicopter unit suffers engine failure. Now, normally you draw a fate number for this, but for this scenario specifically, anytime there's a vehicle check like this, they immediately become disabled. That means we'll just flip this over, and we cannot rescue anybody else from this beach until we repair that. We have two more tokens in the bag. Next to go is the fate card. We just have a chaos spawn. Draw two fate numbers. Spawn murder of horror units on the track numbers equaling each of the drawn fate cards.
And then we activate tracks two and five. We'll be spawning on tracks five and six. This does not look good at all. We've got nine Murders of horrors here and 18 in this stack. Uh this sixth row still hasn't activated though. So what else can we do, right? We have to wait for them to move off of that space before we can attack them anyways. But they are getting ready to wreak havoc. I do want to call out if we run out of zombies, which I think we've only got about 11 or 12 left. Every time we need to place zombies and we can't, we just increase the biohazard level by one. So, I got to take out some of these zombies. We do have to activate tracks two and five. Well, for two, these are certainly going to move in with Mike the Toolman Taylor. And since there are eight zombies here, they are slow. They only move one space, but we are going to have a combat in this location for five.
These zombies will slowly move to this location. So, only one combat. We only roll one die, though. That's our biggest problem. We have one biohazard cube going into the bag. Tim already has two damage. He's taking one right now. Now, we do take out one of the zombies. So, we're just going to go down to one zombie, but we're actually killed. We get to do a last stand. Our bravery is four. So, that means we're going to draw one of these fake cards, and the number is below or equal to four, so he's alive. That will happen every time he's about to be killed. So, the higher you have for your bravery level, the more likely you will not get killed. We've completed our fate card draw. Now, it's just the circus to go last. Without a doubt, we're going to have our car move into this location for the one foot movement, picking up these two civilians. We now have our max of eight civilians saved with us. We should at the end of the game, as long as that car is still alive, we will get all of the EP points for those. This is a little risky, but we're going to have Bailey do a free move of one, two, because this location we can get two supplies.
Everybody else, we're going to leave as is. Let's take our two actions. Our first action, we're going to collect the two supplies. That has us go from two to four very much needed supplies. For our second action, our flying bearded brothers are going to move three of these units. Are they all ones? Yes, they are. We're going to move three of them into this space for action two. And then for our first follow action, we can have all of these move one, two, three, four to this location thanks to Becky. But we have to draw to see if we have an event card. And we get for that fate draw. No event. Okay, we're good with that. And then for our second follow action, we are going to follow with them. So we can continue having them move. And we don't have an event. Thank goodness that's going to end the afternoon phase. Now we get to see how far up the biohazard track will move.
Our first one is yellow, so that's only one. And our second one is green. That's okay. We can do that. Moving it up one space. And then we're going to move this here to nine. Now we're only going to have one action and one follow action. And that's it. We also have to do the hunger phase, which means we have to feed all of our units. Let's start with our circus faction. We're not going to feed the bearded brothers. They take a damage. We're not going to feed Franny. She takes a damage. We're not going to feed a behilly brown. They're going to take a damage. We are going to feed the car. So, that's going to cost one. And then because we have civilians, eight of them in there. We have to spend one supply to keep all of them alive. If we didn't spend that one supply, we'd have to lose one of those. And that would hurt our EP. So, I don't want to do that. On the construction side of things, we will most certainly have Becky take a damage. If Mike takes a damage here, and it's his third damage, he does not get a last stand and he's dead. So, I'm going to spend the supply to keep him going. I'm going to spend the two supplies here. So, I have no supplies left. One for the crane itself and one for the two units it's protecting. That means we have to deal a damage to Tai Tough Murray. Okay, we're good with the hunger step. Good. Is that good? Uh, at least we didn't lose any units, right? So, now we'll draw our tokens. We just have to survive this night phase. And the first thing we have is an event card. You know, we get swamped in the heavy seas. The ferry unit is taking on water. That means it's immediately disabled. That is just absolutely terrible. That is our only
way we've been getting people out. Well, and the Coast Guard. And both of those have been disabled. I guess that's theatic. They've been running back and forth. Ow. Let's see who's next to activate. We have Oh, the oceanic faction activating. I think for our one action, our crane is going to try and repair that ferry. We need that ferry. And we've got a five. With a five, we get to flip this back over to its active side. Thank goodness. So, the people in the crane helped fix the uh ferry. And we're back up and running. But now, we only get one follow action. And I think I'm going to do it. I'm just going to have all three of these escape with our circus faction. That's going to give us three more EP. And then let's draw. And we don't have an event card. This means our EP is currently at 26. We'll then draw our next token and we do have a fate draw. We have reanimated draw a fate number. Well, this is our last card in our deck. It's a two. Okay, so we have a two. Add two tiles to each murder horror units located on the track equaling that number. So, we have to add two of them. And then we're going to activate track four. Track two now has 10 zombies here and three zombies here, but they don't activate. We're activating track four. Activating track four is terrible. These five zombies will move two areas if they can. If I flip a two, three, four, or five, it's going to go one, two, and overrun that area. Well, it's not going to matter. I got a six. That will mean though we have a combat here. So, let's get a red cube.
And our combat rating is a whopping two. Five zombies in a building deals us two damage. And we still have three health, so we're going to be okay no matter what we roll. Well, we rolled a crit, so we'll roll in another one. Okay, we deal them one damage. They deal us two damage, so we're down to one health. That wasn't great, but it certainly could have been worse. Okay, the circus will activate next. I can't believe I'm doing this, but I'm going to have Bailey move over here for her crisis adrenaline move, and we'll have Fanny actually move into this zone. We'll have the bearded brothers, who can move five, go one, two, three over here, just in case we do want to try and save those units. And then for our single action, we are going to use Fanny. We're going to use her special ability where she can move one area, do a range attack going down to one supplies, and we're going to attack here. We get to roll four dice for this attack. Ooh, two crits. And this one we might want to keep just in case. So, two more dice in. Okay, that's another crit.
We'll just pick up this miss. And that's another hit. So, one, two, three, four. That actually clears out that zombie stack. Yes. We're then going to be risky and do a follow action moving all four of these units here. There are five there, but now the brothers can protect those civilians. We have to draw to see about an event. Still no event. Okay, we are good. Let's draw our next token. We have for our next token draw the ocean side activating. And that most certainly means the uh what what is this? Becky is going to move here for one. Tim the toolman is just going to run one two back to here. And then for our single action, we are going to crowd control. 1 2 3 4 over here. And we are slowly getting them into safety. Our circus faction will do a follow action moving Fanny to this location. We'll draw to see do we have an event. We still don't have an event. Now, if I think of this right, we can do uh one of the crowd control to move them over here. Then we can bring them here from the crane and then we'd have to try and have them escape. Maybe we can make it work. In the meantime though, we're going to have to deal with a fate draw. We have to spawn in track one and activate track six. No, that means we've spawned four zombies here and we have to activate both of these zombies. So, let's start with this mutation. Let's see. What do I need to draw? It's a one to a six going that way. We'll draw our card. and it's
a six. So, this one's going to move here. And then our next one is going to move at a five. So, they are actually going to move to here. So, we are going to have a close combat. This is in a building. So, this guy, their attack is higher in a building. It's for five damage against this patrol, which is only for two. And that's still a close combat. So, we have to put a biohazard cube into the bag. We'll roll up the two dice. And we have absolutely nothing. That's going to kill our shore patrol. His uh what is it? His bravery is three. We flipped to two, so he's not dead. He has two damage on him. Has one health remaining. I was certainly not expecting him to survive that attack. Okay, we have our final fate draw. We'll spawn at track six and activate track five. We've spawned at 6H and then these are going to move into here, placing another cube.
Who do we want to have defend? I think it's going to be the bros because they at least can roll two dice for this defense. Nine zombies in the open area is five damage and we uh take four damage and take one out, but we are most certainly dead. Our bravery is only three. So, it needs to be a three or less. No, we're definitely dead. So, that unit's off the board. And guess what? They're going to go back up to nine because they just killed a unit. So, it's like we did absolutely nothing. The good thing is there's only one more token in here. the circus will get to activate. Crazy enough, I think what our best action is is just activating this space. We're going to remove or decrease the biohazard track by two. That will net us four points. And something I forgot, you guys, I'll make sure to make a note. Horrors would all get plus one movement at night. I don't think it matters cuz they all moved in to where units are, but uh that is something I should have called out for the night phase that I totally forgot. I don't see any actions I'd like to take for the follow action. So, we're just going to end the game right here. That means we're going to draw two of these cubes.
A, they're both red. 1 2 3 4. That means we're going to lose 18 victory points at the end of the game. However, we can add 3 + 1, which is four. 1 2 3 4 Thanks to the ones saved in the crane. Plus, we have nine more points for all of the civilians in the clown car. So, nine, that puts us at 39. Then, we lose 18 victory points. So that would put us down to a total of 21 victory points and we don't lose any for our overrun track. I think that was actually quite good. If we look here, we score as many VP as we have EP. Then we score as many VP as the total EP value of civilians in our compounds. We lost the 18 victory points from our biohazard.
And uh then we had no overruns, which was a little bit lucky, but that puts us at 21 points. The citizens of the island forgive you for your initial abandonment of them and instead hold a ticker tape parade through the streets of Greenport with you as the grand marshall. They then rename Route 41 after you, but also erect some new toll booths to pay for the parade and the new highway signs. Oh, that's awesome. Well, there you have it. That was Plum Island Horror with one of the shorter scenarios. I hope you enjoyed it. It was fun to see how different it played out. I will say you miss out on the really large uh emergent story when you play all three game rounds, but I'm telling you time if that's an issue, and for me it is with four kids at home, having these shorter scenarios is super awesome. And they have one for each of the days. That's the first one that I've played. I want to try the other two days as well. The other two days does use the whole board, I think, which is why I liked this one for recording cuz it's a little smaller.
I like how you still feel that t intensity of them chasing down. You still get the actions of needing to get your supply tokens and all of that. And I think with the other scenarios, you'll get the search deck cuz I did miss that. It's fun to search in the game, see what you can find, see some good things and some bad things. Yeah. And I also love that this game now has tons of levers. You find it too easy. There's uh well, first of all, there's the alarming mode you can always use, but then there's all these nightmare modes you can add in to make the game more challenging. For example, anytime a horror stack gets higher than eight or more, they get a free activation. We would have died so fast if I played with that. Uh yeah, because look at this. One, two, three, four. Four of them would have activated multiple times because they had more than eight, right? So, there's lots of ways to make this game more challenging, and they give you ways to make the players better as well. I played with all three new factions in this box, and I will say these two are my favorite.
The cultist one is fine, but it's not nearly as powerful. And those characters, they have no bravery, so they die real fast. Uh, that's the other thing. So, not really my favorite, but you've got a ton to choose from. Now, you've got six, seven, I think you've got a total of nine of them to choose from. I also thought the clown car and the crane were really cool and unique compounds. I've really liked having those out on the board. And I do want to call out the one that I played with in my last playthrough. They actually eroded to make much better. They actually gave you a new faction mat. That was the sporting center one. It let a couple of the units attack range for free. And I should say the supply cost was free. Now that only happens if they're adjacent or in the same location as that building uh that building compound. Makes total sense and it makes it so it's not so gosh darn powerful.
Hopefully this video helps you determine if this game and the expansion is for you. I want to give a huge shout out to our patrons and subscribers. It's because of you that Barrett and I do what we do on this channel. And if you're excited to see what Barrett and I have coming next, then I need you to meet me at the table. Goodbye, everyone.
Your master went to set me up against your enemies.