The Red Cathedral - Playthrough & Review
Games in This Video
1 game is featured in this video — it unlocks as you watch.
Transcript
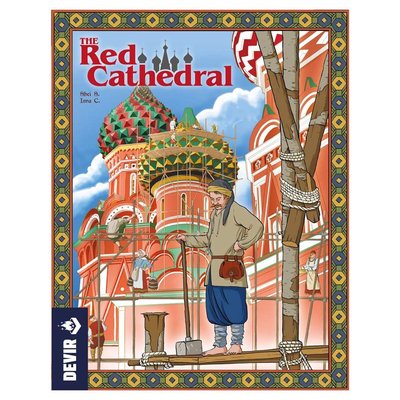
hi everyone my name is moani and i'm naveen from before you play and today we have another playthrough for you this time it is for red cathedral this one is published by devere games and designed by two different designers uh israel sandra and sheila santos this one plays one to four players in about an hour and a half roughly uh and this was a highly anticipated game for me on our sn preview list um and so we're really excited to showcase it yeah this is actually the number one most thumb game on that list and it has some interesting mechanisms that we are really excited to showcase and so as per usual we are going to start with a rules teach going into the play through and then a review at the end but before we get started we would like to kindly please ask that you turn on your klingon subtitles just in case you make any of those mistakes and if you enjoy content like this and would like to see more please consider subscribing and without further ado we are going to get started so if you please direct your attention to the center of the table we are all set up here for our two player game of the red cathedral we have the red cathedral right here all ready to go as well as our main board for acquiring resources and each of our own workshops aka our player board yes exactly and so the theme of this game is each player plays as an architect who is trying to help build st basil's cathedral back during the 15th century for i've been the terrible i am in the terrible who was this are at that time over the course of many rounds we are going to be claiming different sections of this cathedral acquiring resources in order to deliver them and essentially build the cathedral right now we are probably not going to end up completing the entire cathedral during this gameplay but we're going to try our best to get as far as we can
and so the way that this game works is like we were mentioning earlier this is the cathedral that we're building and now the size of the cathedral varies depending on player count so in a two-player game there's actually a deck of these cards that show you different ways to configuration configurations of building this cathedral and so in this specific gameplay we've used this card in order to replicate the look of the cathedral here on the table and so what we're going to be doing here is we're going to be claiming different sections of this cathedral in order to build them at the very top of the card here shows the type of materials each section requires in order to complete it as well as the amount of money in rubles and the amount of points in recognition that you will be receiving receiving upon completion of that section right and last but not least we have the actual main game board which is specifically for acquiring resources now this is a very interesting mechanism which we'll get to in a second but i also want to point out that the main board also holds the score track and scoring in this game is a little bit different so on the score track i don't know if you can see it clearly there are two different uh symbols there's a regular standard score track that just kind of goes around from zero to i believe looks like uh 79 79 and those are recognition points in addition you'll also see these kind of like bird-like symbols and these are prestige points there are different ways to earn both types of points but at the end of the game it's whoever has the most prestige points wins and so the way that the score track works is in the beginning the prestige points are kind of spread out by like five or so and as you get closer and closer to the higher
the higher point range they equal out yeah and so on your turn you're going to take one of three different types of actions and all three actions are listed here on your player board the first type of action that you can take is claiming a section of the cathedral so you can't actually build the cathedral without first claiming a section and so the way that this works is each player has six banners on their workshop here and you're going to take one of them and place it on the section of the cathedral that you are trying to claim and so when claiming these sections you have to start from the very bottom of the column each section can only be claimed by one player so say if i've claimed this section in a previous turn and naveen wants to claim a section then he can either claim one of the other three but at the bottom or that he can claim the one above me exactly but once you've claimed a section then only you are allowed to complete that section thematically as architects we're all vying for the approval of ivan the terrible so that we're that's why we're kind of competing to build these different sections once you've put your banner out then you're going to take the workshop tile that is associated with the card and you're going to place it in one of these six spaces on your workshop now at this point you have to make a decision you have to decide if you want to continue to use this tile as a benefit for when we do this action over here and if so then you have to pay whatever the cost associated with the space that you're going to place it in and so the relevance of the different spaces we will get to in a second but just know say for example i put it here on this green spot i have to pay the two rubles and i get to leave it face up but i also get to claim that benefit immediately so in this situation i would get one stone from the supply and then i would
put it in my workshop on that spot face up if i say i don't want to pay the money i don't really care about that benefit moving forward then i don't have to pay but i do have to still place this in one of the six workshop spots face down so now that spot is unavailable for the future right and so now that you've claimed this cathedral section you need resources right so that is the next type of action that we're going to explain is how to get more resources and you do that by moving the dice here on this board so the resource board over here is divided into eight different sections and each section is associated with one type of resource and these resources we uh randomized at the beginning of the game and so the way that this action works is the first thing you're going to do is you're going to select one of the five dice that are around the board so say for example i select this green die what i'm going to do next is i'm going to move the die clockwise around this circle the number of spaces as the number of pips showing so in this example it is a green die that's showing one pip i'm just going to move it over to the next section and then i get to take the associated resource of that section at the rate of whatever the resource is multiplied by how many dice are now in that section including the one that i just moved so in this specific example i would now get to take four rubles because the actual resource itself has two rubles on it multiplied by two dice four total yep so four total rubles i would take from the supply and rubles do not go on your workshop board this is only uh for hard materials yes if ever you run into a situation where it looks like this and this has a two on it uh i wouldn't
be able to move this blue die because the spot is full it would not actually bypass it you just wouldn't be able to move it the exception here though is if you're moving either the white die or the die of your player color board so each player has their own color i'm blue and the bean is red then you can actually pay one ruble per extra space to move the die further along in the circle right so in this example if i went to select the blue die to start my action i could pay one ruble to go three spaces instead of two landing myself in this section and so in addition to acquiring the associated resource there are two other actions that you can take when taking this action and so if you notice the board is also divided into four quadrants they're the seasons they're the different seasons exactly spring summer fall and winter and each quadrant is associated with one of these clergy members uh there are several of these types of cards in the game you choose one of each type of clergy member uh prior to starting the game and so if you look at the anatomy of these cards they're all very similar each card has two different types of actions you can take you can only choose one some of them give you a benefit that's one time immediately this person will allow you to either spend two of the same resource to take one resource of a different type or you can immediately spend one resource and one ruble in order to take one resource of a different type exactly so it's one or the other and some clergy cards give you benefits they can do an unlimited number of times this card allows you to exchange one resource for a ruble you're essentially selling your resources back for rubles or you can buy resources at the rate of
two rubles per resource and this you can do any number of times but you still have to choose one or the other when you're acquiring resources like we're mentioning you're going to place them here on your workshop space and your workshop can only hold a maximum number of 10 resources and that includes the banners that you have not placed out onto to the cathedral yet if you've met this limit you cannot overdraw and discard it is a hard limit yes so you must make sure that the resources that you're taking you're actually going to use so with that being said you don't you never have to take the full amount of resources you can choose to take less and the last thing that you can do when taking this action is you can utilize the workshop tiles that you acquired when claiming the cathedral sections so in our previous example say i had paid for this workshop tile and i put it here in the green dye spot because as a part of my action i moved the green dye then i can actually gain the benefit of whatever workshop tile i have in this green dye space in this example it's acquiring a stone from the supply and of course this is optional so if you don't have space on your workshop board it's not a problem you have to take it you may notice that the white dye has two spaces when you move the white dye you must choose between one or the other whichever one you want to gain the benefit of and then probably the most important part of taking this action is when you're done doing all three of those things you have to roll all the dice of the section that you landed in so in this example we landed here i take both dice and i roll them and i put them back so these die numbers are going to be continuously changing so you've reserved cathedral sections you've acquired resources
and now the third and final action type is actually delivering these resources to the cathedral sections to complete them and so with taking that third action that's action b over here you are allowed to deliver a maximum amount of three different materials what that means is you can have several sections reserved from previous turns because these actions don't have to be taken in order you can take them out of order and so if i have both of these cathedral sections reserved i can deliver my one wood here my one gold here you can do it piecemeal essentially exactly for the most part you're gonna have to do this because some of these uh some of these sections if you see down here require four materials but the max you can ever deliver in one turn is three exactly once you've delivered all the materials to a cathedral section then the materials go back to the supply you flip over the card and but before you do you gain the benefits so they typically award you rubles as well as recognition points top right hand corner here you get that benefit immediately and again recognition points are the small little numbers in between the big golden birds you may notice that each player also has these three types of wooden chips here in the middle of our player board these are considered decorations because each type of cathedral section can be decorated in somewhere and adorned adorned the bases at the bottom here are doors and so the doors can be decorated with your own player colored door just like that the middle sections can you can place windows in the middle sections and you can place a cross on the top domes the first rule here is
you can only decorate a cathedral section that has been completely built yes so all of these these kind of brown out plans cannot be decorated only once the cathedral section has been built can you actually deliver a decoration makes sense thematically yes each decoration item is associated with a specific type of resource so the doors require wood the windows require stone and the cross requires gold and so unlike cathedral sections if you're going to deliver decorations they cannot be piecemealed right because what you're going to do is you're going to discard the material required by the type of decoration you're putting out and i also want to note that you don't have to be the person who completed the cathedral section in order to decorate it yes you can decorate other people's sections exactly so in this example i see here that naveen has completed this dome up here i can still deliver my cross to the top of naveen's dome and so the way i would do that is i would discard the type of material that's required by it which in this example is gold because it's a cross and in addition i can discard jewels to in order to score points and so there are two different types of colored jewels there's a purple and green because you have that three material limit when taking this action the most you can ever deliver are two jewels along with the material needed for the actual decoration so gold and then two jewels exactly each jewel is going to get you one prestige point immediately and prestige points are the kind of points that you want to win the game which also means if you do that early early in the game then it's going to get you moving up on this track faster if you turn in a pair of one of
each color then you get three prestige points that's all denoted right here on our player board uh before we get into end game scoring i just want to make a quick note you also have two different types of anytime actions that you can take on your turn one of them is you can always go down a prestige point which is the big bird symbol in order to acquire two rubles and you can do that as many times as you want on your turn the other one is you can lose one prestige point in order to re-roll all the dice in one section the game ends once a player has completed their sixth cathedral basically all their banners have been placed out and all of those cathedral sections have actually been completed that person gets three prestige points and then everybody else gets one more turn each and the way that end game scoring works is actually quite interesting so first thing is each player gets one point for every five resources they have and that's any combination of materials and rubles yes because money isn't gonna get you anything at the end of the game outside of that so example being you have three rubles and two wood that's the total of five resources and so you get one point and then you score the cathedral this is where a majority of your points are going to come from each column of the cathedral is going to be scored separately and the way that that works is for each cathedral section that's been completed the column is going to be worth two points for each section and one point for each decoration so if we were to score this column right now this column would be worth two four five points total you would then look at how many points each player has actually contributed by themselves to that column and so for in this example blue which is me contributed two plus one three of the points of those five and the mean contributed to
and so this is total area control whoever contributed the most gets the full total amount of points of that column and these are siege points so in this case in this example monique would get five and then whoever contributed the second highest amount typically would get half that many points rounded down so then second place would get two points and if you were playing at higher player counts then there would be a third who would get half of that so a quarter of the the total points always rounded down and so you pretty much tally all the points like that for every column because we are playing a two-player game it's a little bit different whoever did not contribute the most gets a third of the points instead of half yeah so in this case monique would get the full five and then me only contributing two to that five would get a third of that five which would then be one point because it rounds down yes and if we were to tie then neither of us get any points right that's pretty much it you score for all four columns or all the columns in the cathedral and whoever has the most prestige points wins that is the entire game so we do want to mention that this does have a solo mode and this also has an advanced workshop variant where if you flip over the workshop all the workshop prices are three rubles each and the way that you acquire your decorations works a little bit differently you have to unlock them or something first we're not playing that way you're not playing that way we're going to play the the standard uh base version of the game so we're going to reset the board a little bit get cleaned up and then we're going to start our playthrough yeah okay so we have reset the board and we are ready to figure out who's going to go first we're going to do evens and odds okay okay i'll be uh evens i'll be honest okay one two three it's even all right
so that means that naveen starts with three rubles three rubles yep and i start with four okay so uh by the way in like three or four player games this is one of those three four four five yes so whoever's third gets only four rubles yeah yeah but there's no third player so yeah so it doesn't matter in this situation so i get three rubles and you get four i'm just keeping mine to my left right over here i don't know okay uh and so before we actually get started we we do want to kind of go over all of the clergy cards just so you have an idea as to what these cards can do sure so just in case you didn't watch the teach we're going to go over this card again this clergy card allows you to turn in two of the same resource in exchange for one resource of a different type and that's only one time benefit the other type of action if you don't want to do that is you can turn in one resource and one ruble for a resource of a different type just one this person over here allows you to just get one recognition point so right off the bat if you if you land in this quadrant over here you get to move up one recognition alternatively the bottom section of this card allows you to get two recognition points if you've completed at least uh one of each type of sections in the cathedral this card over here lets you essentially buy and sell resources you can either sell a resource for a ruble or buy a resource for two rubles this particular card can be done uh a limited amount of time so that's signified by that red on the side versus all these blue ones yeah it's the only one of all the four that can do that here and the last one allows you to spend a ruble in order to immediately
deliver a resource to one of your cathedral sections here or you can just acquire a ruble so it's a nice way to get some money if you really really need it sounds good all right so i think that's it so i think we're ready to begin studying with you all right me what would you like to do well okay the first type of action i'm gonna take is the uh the dye movement and collecting resources so let's see if you're following along uh red has two pips on it i'm gonna go one two end up here and because there is gold uh as the resource i collect and there's two dye in here i'm gonna collect two gold here we go then i'm gonna interact with this card over here uh i'm not going to do any delivering because i don't have any control anymore so it will take just one extra ruble one ruble all right now what time big thing that you cannot forget is you have to roll the die that were there very good three and two okay had naveen had a workshop tile in his red dye area then he'd be able to activate that as well right but it's a little bit early so back to i like your money just there yeah just casually on my board money does not take up one of these spaces so yes okay so i'm going to claim a cathedral section and i'm going to claim this one down here so i'm placing my banner and i'm taking this workshop tile which i am going to pay for i think i'm going to place it here in my blue dye spot so it's gonna cost me three uh rubles and so now whenever i move the my blue dye i can activate whatever spot the white diet is and get that resource as well because i paid for this i actually get to take the benefit
immediately which is one gold because that's where the white die is currently so the gold is going to go on my workshop board just like that and i believe that's it and so something that we didn't go over during the teach is say naveen we're now to claim this section of the cathedral and complete this section before i complete this one then actually lose recognition points depending on how many people above me do that exactly yeah so we're going to try not to do that back to you it's not as punishing as it sounds yes yeah all right back to me so uh i have a little fomo i'm gonna claim it at a spot so i'm gonna go ahead and take this one over here okay and i will take this wood and let's go ahead and put it in a cheapy spot i'm gonna put it over here with a yellow why not okay it's going to cost me two and you get a wood and i get a wood there you go even though wood is not part of what i claimed that's right that's okay okay i'm going to acquire resources and i'm going to move this red die so i'm going to move it two spaces one two and this section allows me to take rubles so it's four rubles because it's two rubles times the two dice here so one two three four oops i'm spilling and then that was a red die that i moved i don't have a workshop tile there but i can do this clergy card benefit if i'd like so i can either spend two of the same resources or spend one resource and a coin i don't think you're doing anything we're not gonna do that yeah because what she's claimed requires gold
so yeah we're not gonna doubt she's trying to get rid of it tap into that clergy card i'm going to end my turn by rolling these dice and be done there you go your turn well since you rolled a nice little three with this red i'm gonna take uh this i'm gonna go one two three and take two two bricks break yeah there you go i'll take it wow you have resources you have resources that's for sure oh yeah oh i'm going to interact with this guy right here i'm going to get one recognition i'm because i haven't completed any sections nice we almost forgot that i know and then now roll today four okay okay so for my turn i think i'm going to claim another section of the cathedral i don't know if this is terrible but i'm going to claim this top section and just try to have the monopoly of this little column here sure uh and so i can pay two rubles to put this in one of my workshop spots and huh i think i will i'm going to put it here on this white workshop spot right there i have to pay two rubles and that's going to get me a stone but not going to do with this stone quite yet but now i have it there's always that market where you can sell stuff so yeah all right so back to you okay back to me so uh seeing as i'm running out of space here i think i'm gonna claim another section no i'm not gonna do that i'm actually gonna move the die one more time so i'm gonna move this yellow die here one two three right over here and it's gonna get me two of those yep two stone two stone uh it's a little unfortunate because i did
use the yellow dye and i do get the benefit of uh brick i'm sorry not brick of wood so um what i'm gonna do is i'm actually not gonna take the max that i can take here i'm gonna take wood instead so you're you're taking one last stone one less stone here to take the wood the wood that i would get here for your uh workshop exactly so it's not like i drew beyond and discarding down i just rescinded my right of taking two i just only took one okay uh and then that is going to be that i'm going to interact with this guy and get one more recognition okay and now we roll today oh please five wow is that good for you nope so what were you looking for i have nothing to tell you it's a surprise so back to me i'm going to try to acquire more resources because i have so much space for them so i'm going to move this white tie i'll move it three spaces one two three and that is going to get me a one purple gem okay what i'm going to do with that jam i have no idea well you've claimed this spot that has a purple gem true uh and because i move the white die i get a stone because that is what um my workshop style gives me and so i'm now also going to interact with this clergy card which lets me turn in two of the same type of resource for one of a different type so i'm turning in both of these stone for a wood and that's it that's going to be the end of my turn i'm going to roll this eye to reset that section oh hey it is a three again hey hey hey all right back to you well
seeing as i have way too much stuff and i have everything with this i haven't i have all the things this needs i'm gonna take uh action b which is delivering all right so i'm going to deliver my two wood i think that's a brick i'm sorry brick and then my one stone so okay we're piecemealing two and one so the max i can deliver is three according to this chart i've done three so the last thing i need to deliver is gold to complete this off uh which i happen to have maybe i'll be doing that very nice we'll see that's it yeah okay so i'm going to move uh this blue die and acquire resources again but because i am blue that is my player color i'm going to spend a ruble to move it one extra space okay so instead of moving it one space i'm moving it two one two that gets me a green gem because i moved the blue die i actually i also get to activate uh the workshop tile associated which is the white dye so it's another purple gem thank you and i'm going to activate this card and i'm not going to deliver i have to pay a ruble to deliver pay ruble to deliver or just take a ruble i'm just going to take a ruble yeah i'm just going to build more wealth instead of spending it for no reason sure so and then now we end our turn by rolling the die wow keep doing that okay back to you okay i think i'm gonna claim uh another section i'm gonna claim this section right over here another floor section i do like this benefit here uh so i'm going to put this one i'll just put it where my green is because i only have two bucks so or two rubles so i can put it here here or here i'm just gonna put it over here
so anytime i use the green dye i will now get the benefit of what wherever the blue dye is correct so it's going to cost me all my money and you get a green gem i do get a green because that's where the blue dye is currently then you get to get the benefit immediately which is perfect because the green gem is exactly what i needed when i claimed better oh you are building i'm trying uh and that is that i think yep yep that's it so back to me well two-player game turns are fast they really are okay so i'm going to acquire more resources again okay i'm going to move this white die so i'm actually going to pay a ruble because it's a white die i can pay a ruble or i can pay as many rules as i want i'm gonna pay one ruble to move it one more space um so instead of here which is one two three you're gonna pay to make it go four yeah so one two three four okay and i get two wood times one die just two wood so i'm going to take that right here because i moved the white die i can take a stone but i'm going to choose not to okay right now and i'm going to activate this card though so this card allows me to sell some of the resources that i might not need currently and so with that knowledge i actually am going to take this stone so that i could sell it yeah so here we go does it that that symbol does not mean you have to sell the same type of resource correct it's a cell resource any number of resources you can sell for ruble each so i'm going to sell one of my purple gems and the stone that i just acquired that i decided i didn't need so that's two two rubles for those two
resources just like that okay i'm gonna move it that down and uh let me let me roll this you roll three uh two yep back to you okay okay i'm gonna go ahead and uh i'm gonna deliver so i have up to three to deliver so i'm gonna deliver that one gold here to complete this and we'll do some housekeeping in a second okay and then i'm gonna deliver two wood towards this one right here so that's getting closer so this is completed now yep so because it required two brick a stone and a gold which are all here we're going to discard all of the materials to the supply and then naveen is going to get his rewards which is four rubles and eight recognition points if you want to move yourself up so i'm going from four to twelve nice so i technically have two prestige points because i'm not at this category right here yeah the prestige points are a lot further away in the beginning and then as you get around the board then they they even out so here are your four rubles and now we're going to flip this over because it is a completed section of the cathedral look at you yeah all right done okay so i've been waiting i've been waiting for that moment because i'm going to deliver a decoration so i'm going to decorate this beautiful door that naveen just got on my door with your door with my my my one uh decorative door okay symbol here so in order to do that i have to discard a wood so i'm spending a wood and i can discard up to two gems to adorn this door so i'm going to spend this purple and green so these are the
three materials i'm using so my door goes there and because i spent those two separate colors i get three prestige points so you're gonna go one two three yes nice to meet you hi yeah because uh because of that decorating gives you prestige points as opposed to recognition and that's it nice that is my turn back to you all right well i want to claim this now that i have money so i'm going to go here and claim this section okay this is going to come to me and i'm going to go ahead and put this one over here so now the it's interesting the uh the whenever i take the blue dye i get the green when i take the green i get the blue so i'm going to put that there it's going to cost me two rubles
yeah that's two rubles and then i get what's at green which is two rubles oh what it paid for itself i just had to have the money to get it going yeah you wanted to just do the thing all right so now i have space for nine goods because i've cleared off some of these banners okay i need to i need to actually build i think you've been perusing it too much yeah okay i think i'm going to claim another section of the cathedral i know i'm not really building anything but uh just claiming the time is now okay so i'm gonna put this banner out up here and it's going to give me a workshop tile that is a yellow dye so hmm what i want to put the yellow dye here for no no solid reason you can't truly predict what's going to happen with the die true so it's going to cost me two rubles i spent it place that there and uh i get to take two stuns because that's what that's there yep not bad and so now if i were to complete this section before naveen completes his then he would lose one recognition point is that a big amount of points i claim that section more so i can get into that column for scoring at the end of the game i don't like it all right so uh i'm going to get some resources i'm going to move the green dye here i'm going to go one two so now i get up to four do you want all four uh yeah let's take it oh okay yep one two three and four there you go and then also because i moved the green dye i get the blue benefit which is a green gem nice so i'll take that for
myself and uh you get a recognition i do so for that the one i'm gonna end up losing i'll just put it there do you think you're gonna lose it i don't know we'll see maybe all right rolling bones all right bones get rolled here we go three and four perfect so perfect oh i think i just said that i don't really think that's gonna benefit me in any way gotcha um okay i'm gonna deliver uh resources because it's time that i actually start building so i'm gonna deliver these two wood so one two and oh my gosh we have one gold one and they both require gold so i guess i'll put it here sure so those are the three resources that i'm allowed so let's uncover your benefits that's it for me there we go thank you back to you all right okay i think i'm gonna deliver um i have a lot of stuff and i need i need to get moving so i'm gonna put these two here because these require two stone okay and then i'm gonna put one more stone right over here so uh here i'm shy of purple gem and here i'm shy the green gem that i have that's me all right so you delivered huh okay so i think i'm gonna take resources i'm going to move this white dye okay so it's gonna go one two uh i can take two green gems which i think i'll take both yeah yeah space thank you and because i move the white die i can take a stone because that is a workshop tile which i don't know if i
really want right now i do have space i guess i'll take it okay i might regret that but i have a lot of space so i guess it's not a big deal a ruble or you're going to pay one to deliver i'm going to take a ruble okay so let's take a ruble and we roll these we've got some big numbers here so let's see six goes one two three four five six and five goes just one chunk yeah so okay i'm gonna move the green die i'm gonna go one two three so i get two wood please okay uh because i move the green dye i get the benefit of what's that blue which is uh another green gem here lots of green gems uh and then i'm gonna interact with this card over there okay so i'm gonna interact with this card here and i'm gonna do the bottom which is gonna be to buy resources so i'm gonna pay two to buy a purple and you know i'm actually going to do it a second time i'm going to spend all my money on a second purple wow you're uh you're gonna you're jamming hard where are you needing that many gems well they can or don't ordain things they can uh or ordaining
so i think i'm going to deliver i knew it i'm going to deliver naveen will be punished by the tsar it's okay so i've been delivered here so it's two stone and a green gem so those three yes so you put the green gem over there and that completes this section getting me eight uh recognition points so no rubles but i do get eight recognition points so i better recognize it i think i think that's at 13 so i'm going to go to 21 and because i completed this section when there are unfinished sections below it naveen is going to lose one recognition point for every completed section that is above his so this example just one but say for example i had an uncompleted section here and davine completed all three of these sections i would lose three recognition points so that is how that that rule works and that's me i finished my my action so it's not actually uh super punishing it's just maybe a little bit annoying to have to lose those points right it is yeah yeah well okay so i'm gonna i'm gonna deliver since i'm maxed out here so i'm gonna deliver that one purple gem that i needed to do on the previous turn but i didn't have it so that's one and then over here that needs that one green wow two and then technically i have one more deliverance point but i i don't have anywhere to go so that's it but those are both gonna be completed yes naveen you are doing really well okay let's do this one first sure so it's two stone and a purple gem which we have here so there goes the purple gem and you're gonna get two rubles and four recognition so if you want to move yourself up so 12 to 16. yup here are your rubles
and we're going to flip this over and this is now a completed uh column of the cathedral uh it can still be decorated and that's where the the windows can go in yeah the window can still go there and also this one this requires two wood a stone and a green gem which we have here so there's a green gem i'm gonna put these in the supply you get seven recognition for this as well as 16 goes to 23 and three rubles three rubles so now i got some cash too yeah you do there you go i'll take it now we're going to flip this over very very good i gotta start all over it's a shame that you can't stop short no yeah that's correct that would be really really kind of helpful right now um okay i'm going to claim a section of the cathedral and um which section i think i'm going to claim this one okay so i'm going to go ahead and put open up my last spot here sure and claim this section right here and so this is going to get me a recognition point which is nice every time i move that die if i choose to pay for it which i think i would i should probably do that if you what you can only do it for the yellow right or the green i can do yellow or green okay so i think i will go what am i most likely to move next that's hard to say because it depends on what i do i'm going to spend two rubles and i'm going to place this workshop tile here on the green for the green die and so it's going to immediately get me a recognition point so if it's not apparent anytime you see that that cross the cross is a recognition point as
opposed to the like a bird sigil that is prestige points that's it and we're about uh a little bit over halfway through i think now i've completed three buildings yeah three sections yeah maybe completed three sections and we just need to complete a six total so another three for naveen in order to end the game so okay i'm gonna claim another section oh okay yeah i'm gonna climb the one right above monique over here oh okay maybe looking for uh i don't know yeah i'm gonna put this one i will take this and i'll put it right over here it's gonna cost me two bucks two rubles i'm gonna get a green honestly if you complete that section before me i deserve that because maybe i did it to you you shall see all right oh my god monique okay um i'm gonna acquire resources okay uh it's kind of hard to decide which tie to choose right now so i'm going to move my my very own blue dye okay and we're going to go one two three four five oh do i want to spend you know i only have one ruble or you can leave it at that yeah okay so i'm staying here it's gonna get me a recognition nice so we're gonna go there that is the recognition point that i'm going to lose for when naveen delivers that and because i move the blue dye i get to take the benefit of the white dye which is a green gem sure please thank you and do i want to sell any or buy it oh you have buys one yeah so you have to sell gosh i couldn't you could sell that green that you just earned for a dollar
for a ruble no i think i'm gonna hold on to it because it would be nice if i could sell it and then buy but i have to choose one of the others so it's it's not of any use to me so i'm going to end my turn and roll this die ah just five five is five all right back to you okay i'll take the blue die that you just rolled actually one two three four five okay it's gonna get me a purple wow you almost have so many resources and then uh and then i have the blue dye which gets me um whatever is that the green dye whatever is that the green dye see you guys i know yeah it's gonna happen which is technically two wood but i only have space for one so i'll take one there you go okay and then now i get to interact with this stuff over here so i can turn in any two for any two of the same resource for one source of a different type sure i'll turn in uh two of these for one brick all right there you go and roll the die uh yes where is it at there we go okay six six oh my god that means it puts you here because there's eight spots you can technically go minus two i do not want any more green gems yeah i'm sitting here with one stone and two green gems okay let's see one two don't forget you can always lose a prestige point which is that's right that would only in this case that's not bad it's not bad because it would only bring me
to one recognition point down when you take these uh these optional actions you can you spend you move your token down to the closest prestige point marker behind you and so in this example it's literally one recognition point behind me so that's case scenario the best time to do it you better hope you roll perfect i know but unfortunate thing i i would think that the best time to use this optional power is if you had several dies several dice in one section then you can like reroll all of them i'm not seeing that happening right now that's not the case uh what do i even need i need brick okay i need brakes hey that's why i had to do it this way ah okay i'm going to move this green dye sure okay so we're going to go one two three four five and it's going to get me four stones to four stone yeah i have space i'm gonna take them yeah one two three four and because i move the green die it's going to get me a recognition point so at least i'm moving up there sure and also the section that i'm in the quadrant that i'm in gets me an additional recognition point so at least i made it to the next prestige points section very nice and i believe that's it so i'm going to re-roll these two dice good luck hope it's not something that you need four okay i'll figure it out later all right okay so i'm gonna i'm gonna claim another section uh i'm gonna take from this little reservoir over here
that's her voice and then put it over here it's literally the only place i can interesting uh and so i'm gonna take this and with my last three rubles i'm gonna put it on top of my red over here and then that is gonna get me the goal thank you yeah there you go and the gold is gonna fill in right over here the very last spot okay that's my turn okay i'm a little worried about that uh setup setup that you have going on okay okay i'm going to move the green die so we're going to go one two three four okay it's gonna get me one gold and because it's a green dye i also get a recognition point yes just like that and then um i'm going to just take a ruble yes one one ruble yeah let's reroll this thing two two all right back to you now that you have a golden hand i'm gonna go ahead and uh and put the uh the cross on the top of this you're gonna decorate it i'm gonna decorate it so i have gold okay and i'm gonna take one of each type of gem so i got the green gem and the gold jet i'm sorry the uh the purple gem and then i'm gonna put this cross right over here cute okay so you get uh three two three sorry three prestige points different ones yep because it was two gems of different colors one two three very good yep okay uh i really need brick is it time to roll no okay it's not time to roll i'm gonna move this one two and that's going to get me at
least yeah some cash and will you be doing this right here um will you be doing this right here you can get one of your brick yes so i'm going to abundance stone i have a lot of i know i have a lot of stone yeah so i i got the two rubles uh sorry i moved the green die so i get a recognition point and i'm going to do this one which allows me to turn in two of the same resource for one oh actually know what i'm gonna take a gem a purple jab purple gem yeah you got it thank you yeah it makes sense that's it oh i'm gonna roll this now if i were to um complete this section here i actually don't lose any recognition points for not completing this section because you don't count your own yeah you don't penalize yourself yeah you don't balance yourself so i'm going to complete another section i'm going to complete this section right here it's going to be stone gold and green gem all right i think i'm officially in trouble so yeah that's this exactly oh green gem goes to you yep and so you're going to get two rubles and six recognition points so you go to 37 36 right there flip that over and now you have a completed base right there okay i think i'm going to deliver materials as well okay so i'm going to deliver these two my gold and purple gem completing that section yes and then i'm going to deliver this stone right there so we have at least that yeah and so that's the three that i could deliver so let's uh resolve this card right here
so one wood a gold and a purple gem yep you get eight recognition yep eight recognition points no rubles because it is a dome and typically the domes don't give you rubles so 27 plus eight is uh 35. so you're right there yeah nice that's it that's me so you just need to put out your last banner complete that and this and then the game is going to end yep oh my gosh uh what can i do that's good you're going to slaughter me i'm like doing the math oh my god i don't stand a chance i think i'm going to move the green die so it's six which is going to wrap all the way around here okay uh so it's gonna go one two three four five six to the gold you got the gold gold yep there you go and then um i have the green dye in use i get what's blue so probably that purple that'll work and then i get to interact with this so i can do a delivery you have to pay i do have to pay one ruble or i can gain a ruble um yeah you either pay the ruble to get that delivery or you gain a reason one spot to deliver is here which requires that one purple that i have uh but i can do it all in one swoop so i'll just gain arugula yeah i'll take a rubble i think it's like a an act of efficiency desperation yeah to activate that like or if you're like you're like in the margins where you know one delivery is going to be three and you need that fourth resource yeah you kind of do that yeah awesome that's me so go ahead and roll it four very good so that'll get you more
stone it will go one two three four i don't want any more stone yeah stone i've been plagued by stone stone plague oh my gosh okay you have something in mind this is gonna be ridiculous but enough is enough i really really need brick so i'm going to move this blue okay it's going to go one two three four five six and we're going to spend one two three four rubles wow to get it all the way over there wow i know i need it i need it and she can do this because she is the blue player yes so that's why she's able to move the blue dye correct i spent all my money to do that uh and now i'm going to reap my precious reward so you get four brick which i'm taking all of because i need all four so it's one two three four oh thank you my first time holding brick yeah that was good you got it okay uh and i'm assuming you're gonna interact well because i move the blue dye i get the white dyes benefit which is a green gem do i even want that is the question it could take up space yeah it's going to be valuable space but if you know you're offloading that brick you you created more space that's true let's take it let's take the gem and um so now you'll take the one yes the one recognition for that that card and now we will re-roll these let's see what we get probably the first time we're rolling the red dye ever 14 and it's 8-4 doesn't matter the order that they're in all right that's me i feel i feel a lot lighter yeah that's
that was good load off my chest all right i'll i'll take the green dye and go one two three four so do like four stone i'm gonna take two stone okay okay and then because i rolled the green dye i get what what is it where the blue is which is two bricks ah you're a stinker stinker and that's naveen exactly so you have constructed oh you're missing a dome had you constructed a dome then you would be able to take two recognition right but but no i'll just take the one recognition the one that's okay okay so go ahead and roll the dice yep uh where was that this one yeah six four okay so this can get you money if you take yellow well i'm just gonna i'm gonna deliver okay so i'm delivering two brick here one two and then with my third i'm gonna deliver the one brick there so this is gonna get me some rubles over here so because i completed this card we're gonna resolve it it's one wood two brick and one gold now can i advise that you deliver to the middle one over there because i have everything i need to deliver to the one above it to penalize you no that wouldn't be fair okay because you already you told me now i deserve the penalty it's not that big of a penalty i didn't think about that i'm gonna go with with my original action so all right let's let's do that and um i get four rubles
so one two and eight recognition yeah eight recognition so 36 is going to go to uh 44. four yeah there it is right there all right where are you gonna dock me too bad bad man i heard it all right that's me i'm gonna deliver i'm gonna deliver to that spot so here's a two brick okay and a purple two brick and a purple for this spot so go ahead and put the j oh sorry i don't know where it went right there and you are going to get seven recognition for completing this okay and because you completed your time wow that was a pretty dome yeah that's nice because you completed yours before i did i lose a recognition for that so there and then i get seven from uh 38 which is going to be 44 25 right over here i think that's yeah that's seven yeah jesus all right so if i construct one last one okay i'm going to claim a section of the cathedral which is the only section that i can claim right now and it's this one and i this is the reward is a ruble we're so late in the game i don't know how often i'll be able to use this so i'm actually not going to pay for it i'm going to flip it over and before i'm definitely not paying for rubles for that spot yeah so that's it so now i can actually try to do something in there well i think it's i have because you did that i have everything to i'm gonna claim this spot right over here okay yeah so and i'm going to do exactly what you did i'm not going to pay the four because i off i don't have four i don't want two brick i don't have four
oh i see what i mean so i wasn't listening yeah so that's there um and that is my turn do you have everything you need for that yeah are you about to end the game i could i have two turns left maybe no i'm definitely going to lose this game but i think i can try to complete these okay so what i'm going to do is i'm gonna deliver it's gonna be two stone here and that one last brick to this section here nice so completing this so there's my stone and two brick supply i get two rubles okay and five recognition so your 43 is going to go to 48. yes so that's my turn it goes to you and what are you going to do naveen well i'm gonna i'm gonna run it up so i'm gonna i'm gonna make this door very beautiful over here what yeah so what's what is it right here two four six so i might as well go make it seven and you still maintain two so i'm gonna make that door nice and pretty so okay well do i wanna do that cause then that cost me the wood and you're going to give me extra actions i would give you an extra action let's see oh i can do this i'm going to do this uh yes stone i'm going to put a window in there what i'm going to put this one right over here so even though she built it so it's going to cost me a stone and then it's going to be two of the different colored gems oh my gosh so that is three prestige points three for each points yes it's gonna go one two three yeah the prestige points are not as sweet as we get further and
further on the score track the decorations are definitely like an early game thing or to get you like a sneeze in that column especially at higher player accounts all right so you gave me the blessing of an extra turn yes you have two turns okay i know that naveen is probably going to end it this turn or his next turn which means i have two yeah this turn plus one more yeah because i spoiler i am gonna okay i'm gonna move this right ty okay we're gonna go one two three four five six okay stopping at the wood too bad that wasn't the five uh i am gonna take the two wood okay because every five resources is a point so two wood i move the white dye which gets me a stone which i'm going to take and because i am in this quadrant i get to talk to this clergy person and yeah i'm gonna buy i'm actually going to purchase uh two gold nice for four rubles so one two three four two gold and that's going to get me what are you working on over here too stuff too gold nice i'm working on something yeah yeah i see it do you i do i'm going to roll this for really no reason except for uh that's the rules yeah that's rule yeah okay okay i'm gonna deliver goods by using action b here all three there so we got a uh wood a brick and a gold nice that's that you're
ending the game big surprise there okay so two rubles oh my gosh i lose a point for this yeah there you go two rubles yeah and uh five recognition okay so what are my 50 so i'm going to go to 55 right over here and because naveen completed his section before i did i lose a recognition point right there okay so this is my final turn i'm going to deliver clearly so i'm going to deliver a gold right there it's my one and for my other two materials i'm actually going to put a cross on the top of my dome here so it's going to cost a gold and i'm also going to deliver a gem with it a jewel and so uh let's do this in order shall we okay so let's discard that and here's the gem so which one are you claiming to have done first i think in this case i don't know if it matters somebody out there shall we're going to be like no you're done the other way around but uh let's just do this first since i completed two uh so the two stone and the gold and it's going to get me two rubles and four recognition okay so you're gonna get one two three four here at 55. okay i'm sorry not 55.51 flip this over and now because i placed the decoration here and i had turned in one gem it's gonna get me one prestige point so it just goes up okay yeah so that's it nice because you ended the game you get three prestige points that's right yes i forgot about that one two oh three yeah that's a big deal yeah that is and i forgot about that now we're going to go into endgame scoring so first things first we are going to turn in our
resources all of it all of your resources and rubles yeah so i have a five rubles and one um stone so i have just one resource one point towards resources so that's that okay so i have one two three four five six seven eight nine oh you need my one stone to make it another one but no let me get you one i can't believe it yeah i didn't map that out i was just thinking about the end and you know i don't know if there was anything else you could have maybe i don't know okay i don't know what else okay so let's score the cathedral i'm gonna go from left to right yes okay so starting with uh this tower uh the sections are two points each and then the decorations are one so this is gonna be two four six seven eight eight points total of which naveen contributed two four five yep and i contributed to three so naveen is clearly the one who has the most here so you're gonna get the full eight points eight prestige points 23 all the way up to 31.
because we're playing a two-player game uh i only get a third of the points instead of a half rounding down running down so that would be two points so one two yes okay okay so that's that section this is my call and i i put uh two man this door should have gone here yeah too bad i know all right so two four or five which is five points five points total one two three four five so you're at 26 so right now the score is 31 prestige points to 26. yeah and we're looking at this now not looking good not looking good okay i didn't even complete my final section this r is going to be mad okay so for this column we have two for six total there are no decorations of which naveen contributed four so you get the whole six okay so 31 to 37. and that is a nice um multiplication multiple multiplier of three so i'm gonna get two points one two no rounding necessary and the actually this one's a little bit different because we have a decoration here yes so it's two four six seven of which naveen contributed two four five so you get the full seven okay so we have 37 that's going to go one two three four five six seven so it looks big but it's not yeah that's 44 right there yeah still it's still the the same one one point each put that face up there we go and how many did we say this was oh that was seven seven okay so i get two two points one two okay and there are tie breakers but clearly we are not anywhere close to a tie so that's it yes the final
scores are 44 me and then monique with 30. wow 14 points what a shame yeah what a shame i brought shame to my architect group i guess i even was not happy but no he was happy with me i was punished twice but i just want to say i got punished once well that was karma for for me starting the punishing that's true yeah well well done but that's it that is the red cathedral that is the end of the game naveen has won again you are on a street yeah three in a row technically yeah if you count spirit island which is a co-op it's true we did win that spoiler yeah sorry okay so let's talk about it so this is the number one thumb game on the essen btg preview list that came out in like october yeah and so if you're not familiar with what we're talking about every year there is a yearly convention called essen spiel that obviously didn't happen last year but it is the convention where a majority of the new releases for the entire year come out it's a big convention in germany and so the convention didn't happen but the list was still up and you can kind of thumb according to what you're most excited about yeah and this game was it was so what did you think about it well i also when i was thumbing through that entire list seeing the box art in the box cover immediately drew me in because i knew i was like this has to be a euro game whatever the heck it is so um the art and all that stuff really really drew me in i enjoy the game i think it's good it's solid mechanics yeah it was actually on your most anticipated
back when right around the time of essen we had released a video saying our most our top five most anticipated games and this was also uh one of those and it's the one that i also thumbed up so um i was glad to get a copy of it and to finally play it okay so let's start with theme you kind of touched upon it a little bit and what you're just discussing because uh you know theme is more than just the story it's also like the artwork and what kind of drew you in with the box art but what do you think about the theme um it's a euro again uh so it's collecting resources to fulfill orders um so you can kind of put that on anything i do think it's nice the way those cards are laid out and you kind of you know building up this cathedral and you know they kind of make it you know something but um i don't know too much about russian history so i don't you know i've been the terrible i should probably do some some research on him why he got the name terrible yeah that's true you know so you know i'm not sure exactly about that part of the theme but um saint basil's church it's a church a cathedral it's getting built so that's i mean that's my opinion it's euro game what do you think i actually i'm a little bit more intrigued by the theme than you are i think that the whole cathedral set up here is really interesting i like i really do like the artwork which is more components but um i think that building the cathedral and the way that you are delivering resources to those specific uh sections i think that's interesting i think that's a lot more thematic than a typical euro in the past i suppose the way that you collect resources on the board definitely not automatically totally not thematic the whole seasons yeah all four quadrants but
the way that the whole game i suppose ties in together with picking up the resources and then on the non-thematic board but delivering it to the cathedral yeah i think it's cool sure yeah in terms of the components the box is very small it is small yeah and that is one of the things that that when we first saw the game we were like wow that's awesome we are a fan of of like compact packages where you know you didn't waste any space everything was the right size that it needed to be right yeah i think that's like one of the the biggest uh it's one of the biggest things that i appreciate when when a publisher can can condense a quality game into a small box um just because shelf space is such a like a it's a hot commodity yeah and so uh in addition to the actual components the artwork is beautiful they're nice it's very nice even the the cathedral sections like these are really really pretty and there's a whole stack of these there's a little deck of them we're not using all of them so that that changes from game to game depending on the cathedral setup card that you use also dependent on player count but that's beautiful the the the board with the seasons it's so beautiful it's very nice to look at the production quality of this game is really nice i think they did a good job what about player camp so we've actually played this game because there's no um hidden knowledge in this game we were actually able to play this game at all player accounts just with people you know via facetime and just kind of the things that we've been doing and what are your thoughts on playercount uh
okay so i think it's best at four yeah it's better because um because of that competition for area control in the uh the basilica over there so two is okay it was it's good you know it's entertaining like you're still going around and your turns come so much faster so it's kind of exciting there but i do like it better at three and four because of the way the dice get changed so i think in this game in particular you got kind of stuck and bogged down where dice just weren't being changed out and i was busy saying okay i'm just gonna claim so then you're trying to take two dice action back to back but i went to go claim something right so it didn't change the state yeah if you know ronald is doing something and then norman is doing something and then that you know they're rolling the dice and changing it and now when it comes back to you you're like okay great things have changed yeah yeah so um i wish there was a little bit of something that you can you can do with with a two-player game uh but yeah i don't know yeah i completely agree with that the only changes in a two-player game are the scoring at the end where the second place for uh tower gets a third of the points instead of half and in the setup the setup with the actual cathedral right it's a smaller cathedral right but in terms of the mechanics it's it's a little bit harder to get the full experience of the game at two and the reason why is because you can clearly see who's gonna win like you're like two-thirds of the way there and you know there's just no way that it's scary control yeah and the air and the once you've completed and um claimed a cathedral section there's no going back from that like that's set there and so uh there
can be a little bit of a runaway leader issue in two players in two players specifically in two-player and i completely agree with with the board you know in higher player accounts you are counting on other people to change the the state of this board so that you can move the die that you need to move without kind of giving away what that is and without having to make special arrangements in your head yes so how i'm going to get that resource right if i don't roll appropriately there is always the option to spend down a prestige point in order to reroll some dice but nobody wants to spend your prestige points because they're so hard to earn yeah because you know prestige points victory points uh you're not going to want to spend it for the chance of maybe rolling that one in six shot that you have to get the exact number you need so yeah there's no guarantee yeah and during the game when you actually need to take that optional action your chances are you're somewhere in like the middle to earlier part of the scoring track and so spending prestige points rather than recognition points is a lot more painful it is you kind of have to earn your way back up yes so that's a little bit tough but in the higher player count uh games especially the four player game that is where the end game kind of area control cathedral scoring really shines it gets really exciting it gets really exciting because you always have a foot in the game you you can do these little strategies where i'm just going to put my one decoration in that column so now i have a little foot in that tower that's going to get me a quarter of the points of whatever you all work towards exactly yes right in a two-player game it's it's not like that if i'm gonna if i'm gonna put a decoration in that tower i'm getting you a point as much as i'm getting me a point so it's not as lucrative in that sense we talked about player account
so variability replayability what would you say yes so the game is variable and there's a difference between replayability and variability right so the game is variable in the sense that the cathedral sections there's a whole deck of cards and they each have different um configurations configurations of requirements of materials that are needed the workshop tiles uh there's a ton of those and we randomize them right you also randomize the resources on the player board and there are several of these clergy cards per type of person for each type of guild card actually i realize that the entire game i've been calling these clergy cards i think one person's from the clergy yeah there's actually only one clergy and everybody else is part of a guild so i apologize for that but there are several of each type of guild and so each time you play the game you're going to randomize these as well uh the boards themselves are double-sided the opposite side of the player board is the advanced side and it just plays a little bit differently so there are different options at play here there's also a solo mode so variability is good uh that doesn't always translate to replayability and in this case it might be that much that might be the case because the the what you're doing in the game is still pretty much going to be the same every time you're going to be getting resources in order to deliver them to this cathedral that is the game you're just resources cathedral over and over claim get the resource turn it in the the part that's that i find interesting i suppose is the this board i think this board is probably the most interesting part of manipulating the dice yeah the endgame scoring as well as like trying to figure out
try to be creative about getting the resources that i need in order to be efficient like you're trying to be efficient in this game you're also trying to uh manipulate the scoring track so that you get prestige points early so you're kind of going up quickly exactly but uh in terms of the actual gameplay and your experience with the strategy it's always going to be very similar so that means for me replayability is not as high sure yeah i i agree but that doesn't mean that you know this is a game that you have to play ten times in a row like it'd be nice to play it then you let it go you play something else and then you play it eventually down the road on that note replayability varies you know the meaning and the significance of replayability is going to vary depending on the player so for some people that might not matter but for other people it might be a huge deal because they only acquire five games in a year yeah right yeah there's there's definitely people that'll get a game and they want to play it like eight to ten times like back to back to back right so for that i i can see this not being that type of game maybe not maybe not that's just to us so kind of take it apply it to your lives as you will right and so in terms of mechanics the very first time i played this game and actually when i read through the rule book wow i thought that this was this is really interesting this is definitely one of the more interesting releases that came out because of the way that the the board works and because of the endgame scoring they you don't they don't actually mention in the rule book how the cathedral scores until the very very end yeah and so i'm like reading the entire rulebook and thinking okay so this is your standard like get resources it's
kind of cool how that kind of circular rondelle works and then you deliver them and then when i got to the very end when i was like oh that's how you score the cathedral that's when everything was like okay so that's the whole purpose yeah you are trying to uh you're trying to efficiently and strategically claim cathedral sections so that you can have the most net amount of points if you have the game right right so what are your thoughts on the individual mechanics of this game yeah i really enjoy the the dice the way that works um trying to trying to time it and try to get you know try to manipulate the dice so that you can get the most resources i like the fact that you're not pigeonholed if it says you must take four brick you're not forced to take before breaking back you know i'm taking three of them i want to leave this room for something else but you also have to be set on that decision you have to be set on that decision exactly yes uh so i i do like that um i i like the fact that each quadrant you do get to interact with that card that guild card i think that's really nice and i really really like the um these tokens the workshop tiles uh the fact that it then adds that extra layer of well i have these different options but ooh if i really move the green dye i can get something super sweet so yes uh that part of the game i think without this i'm not sure where i would be on this game i think this is a big part for me it's a big part huh yeah uh i think it's interesting that when you claim the workshop tiles you don't really you can see them all and you can see which ones you probably want but you don't truly have that much of a choice as to which sections to take because you have to build from the ground up yep and when you do take the workshop titles
you have to decide in that moment which color die you're going to assign them to yeah and you're like i don't know if i'm going to use yellow yeah but i'm going to put it out there it's not a significant choice in the moment but it might encourage you to use that dye color more often exactly right so i agree i think that part is really cool the way that the workshop tiles work in conjunction with taking the action that allows you to to take resources on the board just because you have three different things that you could potentially reap rewards from in that one action alone and in in that way that is how you become efficient yep exactly right instead of having to take one resource every time you take an action and then deliver like that is very inefficient you're you're not going to get anywhere fast you're doing that right so i think that that is is a really really cool part of the game i also just want to give kind of a mention about the score track because the very first time we played it we thought that oh that's that's an interesting dynamic i think it's always interesting when there's like a dual score track at play and this game definitely features that uh it rewards those who can decorate early because then you jump up on the prestige track which makes you go higher on the recognition points right away but it's not always easy to do so it's it's an interesting dynamic i'm curious to hear how other people who have played this game if you think about it yeah if you focus on okay i'm just gonna i'm just gonna decorate decorate then some then you're not getting your your banners out though you know and so yeah getting your banners is the clock especially in a two-player game it's like well if you're focusing on getting those gems i'm just gonna get banners out and then try to do the area control thing so there's a nice little teeter-totter there yeah and i think that was probably my problem i decorated twice early
because i was so focused getting the prestige points early that i was failing to realize that it's also a race like you definitely want to try to get as many of your banners out and completed before the end of the game yes because the game ends when one person completes all of theirs so it's definitely a race in a few players it's definitely a race and because they double score like you score those recognition points which doesn't seem like a whole lot in game but it's going to be a big factor for the end of the game if you can control that tower control right so anyway i thought that that was really really interesting um it's definitely an interesting and beautifully uh crafted game in my opinion uh what are your final thoughts okay final thoughts uh four player great game uh three player very good two player it's it's good um but overall a good game uh it's something that i think you know we'd have on the shelf and then every once in a while play it it's not something i'd be pulling out all the time i do agree i think that this game is mechanically sound i think the design designers did a very good job uh just figuring out the balance and the mechanics of the game um i think that for people who like maybe like area control not quite sure it's it feels like a unique game so i don't even know who specifically would love this game the most but for me i really really enjoyed the game the very first time i played it uh it was also at higher player accounts so maybe if that made a difference the more i play it at two i my enjoyment of it decreases slightly i also am not a huge fan of area control that makes me nervous um and so i do have concerns about the
longevity of this game this game is still going to go on our shelf and it's going to stay with us for a little bit longer because i really did enjoy it and i think that mechanics are solid yeah i can't wait to play it again four player yes i would definitely definitely recommend higher player accounts totally and so that is red cathedral that's it yeah thank you all so much for watching the video we hope you enjoyed it if you'd like to see more videos like this please consider subscribing thank you bye you