Reef Project - Learn While Playing
Games in This Video
1 game is featured in this video — it unlocks as you watch.
Transcript
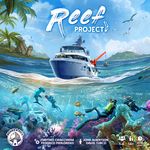
welcome to the Jong games tutorial for Reef project in this video I'll be teaching you the rules to the game as it's being played and I'll be showing the first part of a three-player game today now before we go into that I do want to ask that if you enjoy this video that you please click the like button for it down below as well as the Subscribe button for the channel in addition to that if you'd like to directly support the channel and get access to a ton of exclusive perks then please go to patreon.com jongetsgames some of those perks include my dozens of opinions episodes where I go in-depth about the hundreds of games that I played recently with things I like and don't like about them as well as my updated opinions you can also watch some of my videos early and advertisement free and you'll get access to an exclusive podcast feed where you can hear audio versions of all of my Vlogs including those opinions episodes I just mentioned now coming back to this game I do want to ask that a all you're watching this some part of it jumps out to you as particularly interesting then please comment about that down below all right let's jump into the game out here we have the game fully set up and ready to play for our three different players now before I start I would like to ask that you please turn on the on subtitles because I might make mistakes as I'm showing you the game and those will let me put Corrections on the screen where you should be able to see them and I will also put Corrections below this video in the top comment well let's start things off with a brief overview of the game in it each player is in command of a research vessel and we are embarking on a journey of reef conservation now this will require collaboration between a variety of scientists and researchers as we are going to be sailing around trying to learn more about the reefs and address the challenges that are facing them specifically one of the main things we
do in this game is sail our ship from one Island to another and then we have to pay energy to get there instead of paying energy to move we can put Reef Balls down and this means we can move for free across that and there is less energy costs for our opponents to travel across that same section thematically these Reef Balls that we put down are improving the reef because it gives more surface area for Coral to grow on as we try to improve the overall ecosystem once we MO move we will perform the various effects on the island that we landed on we also have the option of playing a mission card from our hand that may or may not match the island that we are at now another major part of conservation involves cleaning up pollution this happens once there's at least one Reef ball in all adjacent routes to a piece of pollution and then players will score points and the one with the most points from it gets this pollution tile on the back of these tiles there are a variety of benefits we also can choose to not use them and get victory points at the end of the game once these tion tiles are removed it reveals scoring icons and during final scoring these will give points to the player who has the most pieces adjacent to it and the player who has the second most now there is a wide variety of actions we can do in this game the simplest involve gaining resources which are tracked on our ship we do have a hard maximum until we manage to remove these Reef Balls from it where we can then place them on the board and obviously that increases our storage capacity for that specific type of resource in addition to this we are going to hire new crew this will cost money and the crew crew members can be placed into any of the empty spaces
although if you fill a row with the same color you will get four victory points for that and as you complete columns you can activate various crew members in it and there are many ways to activate the crew members that you have generally spending things to gain better benefits in addition to that we are going to be gaining Mission cards depending on our scientific progress at the beginning of the game we only have access to these two based off of our scientific marker but as we go further not only are we gaining more points for the end of the game but we get more options for taking these Mission cards and you can play one of these each time you move your boat to gain the various great benefits in addition to installing Reef Balls as well as hiring crew and getting missions we also have divers that are doing research at the reefs as we progress down this track we are going to gain these oxygen benefits and we're going to flip over more Reef tiles which will provide new actions that we can activate now there are a variety of ways to gain victory points in this game and during each player's turn they can either move and activate out here on the map or they can do a recharge action where they will gain bonuses for each of these icons they have reached on the victory Point track so the more points you get early the more powerful a recharge action will be for you which lets you increase your energy gain resources as well as various other benefits depending on how many victory points you have once we reach the 22 Victory Point spot players are going to gain an objective card which will give us a hidden goal for the end of the game and once a player has reached 45 or more points that will trigger the end of the game after that we will perform final scoring and the player with the most points will be the winner and that is just a highle
overview of what we're going to be talking about in this tutorial now I will explain how each of these things work in detail when we reach them as we play and on that note I think it's time to start playing the game today we are going to play as the pink player and we are also the start player that means we can now take the first turn of the game now as I mentioned in the overview on each turn we can either do a recharge action or we could do a travel action we'll talk about recharging in detail later because I think we want to travel now there are three main steps that we go through when we travel and the first of these is an optional deployment of a reef ball I do think we want to do that now the way this works is we take one of these from our deployment area as long as we have one there and then we deploy it onto any one of these routes that extend away from the island where our ship is each of these routes has energy cost icons on them and the cost to place a reef ball is the number of energy icons that currently shows up on that route I think we want to do this one here and since there are two energy icons that means we have to spend two of our energy as the first player we started with four energy so that brings us down to two and then we can place this Reef ball on top of any of these energy cost icons it doesn't matter which one we do now that icon is covered for the rest of the game which means if one of our opponents wanted to place a reef ball here it would only cost them one energy because there's only one showing now that is something they might do and I don't like helping them but Reef Balls are great for a variety of other reasons one of which is our mandatory ship movement after we've optionally placed a reef
ball we must choose one Island that is not the island that currently has our ship and that does not have an opponent's boat and then we travel to it that means we could choose this island way over here we don't have to go adjacent but the problem is we have to spend energy for every single icon that we cross over as we head to the icon the only exception for that is if you have at least one Reef ball on a route you don't pay anything for that specific section now currently we have two energy remaining which which means we obviously could not afford to go particularly far and I do think we want to go to this island we could go to that one as well because it would just cost two additional energy but I don't think I want to do that let's head over here so we sail our boat and we don't spend anything for this section because we have at least one Reef ball if either of our opponents sails across this they will have to spend one energy as long as that icon is there they of course could put a reef ball of their own on that spot making this free for everybody to go across for the rest of the game now at this point we have arrived at our Island and we can now perform actions as well as potentially Play One mission card from our hand during setup each player got two Mission cards and most of them are associated with a specific Island on the map you'll notice this is the green seahorse and that is where we are there is a reason for that there are some cards though that don't have a specific Island like this and these can be activated at any Island as long as you meet their criteria this one says we have to have eight energy which we certainly don't have we have three currently so that isn't happening right now now again you can play up to one Mission card per turn and I do think we
want to play this Mission card and we can because we are at the matching Island now as you can see this shows a red X on top of the island itself what that means is we can play this Mission card and do the actions on the bottom instead of doing the actions that are on the island if we played this Mission card instead then we would get to do everything on the island in addition to the actions that are printed down at the bottom I do think I want to play this Mission card which means we are not going to to be gaining these resources instead we are going to be hiring a crew member and increasing our scientific knowledge now whenever you have multiple actions that you could do you can perform them in any order and let's start with our scientific progress the way this works is simple we move our token one space forward for each of these icons showing so we go here and increasing our scientific progress is important for several reasons the first of these is as we progress down we're going to get access to more Mission cards whenever we perform an action to take a mission card you can only take cards from a section that your science marker has reached at the beginning of the game everyone has access to these two and in order to get access to this slot here we would need to move our scientist token two more times another very important thing to know is this science track breaks all ties in the game that could be at the end of the game when we're doing final scoring as well as other TI situations as we are playing the game if there is a tie on the track then the token that is furthest to the bottom is considered further for the purposes of breaking the tie and that's another reason why we want to move over here early now the other thing to mention out here is that at the end of the game we get points
equal to the number underneath our token which is great that essentially just banked us one point at the end of the game and whenever you see this starfish icon that does mean endgame victory points the final thing to mention are these Milestone tiles here when you advance from the three spot or the seven spot you have an option of going down and taking one of these milestones and then activating it or you can skip it and move forward if you go around as you can see you don't actually increase the number of points that you get but you do get beneficial effects from these Milestone tokens once you're at these spots you are allowed to move back up to the main track as you continue to move your scientist it just slowed you down a little bit to get that Milestone effect we're of course not that close to getting to these right now but it's something to keep in mind as we continue to play our turns so we finished moving our scientist one space over and the other action says we can hire one crew member the way this works is simple we can hire any of these five crew members that are showing by spending the money that is shown underneath them at the start of the game we have three money available and I think I want to spend two of it to hire this scientist here so we spend this to the bank we remove the scientist and then this immediately refills we slide these over and then remove the top one from here now we have to place this new crew member onto our ship as you can see there are nine available spots and there are three starting crew members we can never cover these up and there are three dominant colors with red blue and green now this
crew member we just hired is blue and that does mean we're incentivized to place in the blue row but we don't have to we could place in either of these but we must place on the leftmost empty spot in our chosen Row for now I do think we want to match the color and the reason for that is because if we ever match all colors in a row to this starting crew member we immediately get four victory points and that's definitely something I'd like to chase so we're going to play place this here and as soon as we slot that in we gain the benefit that we just covered this lets us move our diver once Bas on that track the diver track is at the bottom of the board so we can move one space forward and every time you move your diver forward you can optionally spend two identical resources to move one additional time but you can only do this once now we started the game with one of each of the main resources those being algae which helps us get energy shells which helps us make new Reef Balls and cameras which helps us get funding because we are sharing our progress with the world again in order to move an extra time on the diver track we have to spend two identical resources and we only have one of each so we don't have that option right now after moving our diver token forward if it was underneath a face down Reef tile we would flip it face up also after moving this diver forward if we reached a spot next to one of these oxygen tanks that that diver has not been next to yet then we immediately gain the benefit printed on it and then we flip the tile over and each subsequent diver will get the back side reward interestingly enough the backside rewards are better than the first side that is a reason to go slower on this track which makes
sense because going fast is also good at the end of the game the player who is furthest on this track gets a whopping 12 victory points so there are reasons to go fast and slow for now we went to this spot here we did not reveal a new reef tile and that means we are done with this diver turn so that means we're done with our actions now if you play a mission card you don't discard it instead you put it face up in front of you where you'll score one point for it at the end of the game and if at any moment you have a set of three different Mission colors in front of you you can flip those over and then immediately get four points flipped over Mission cards are still worth one point at the end of the game this was a green Mission and that means we are definitely incentivized to try and get a purple and orange Mission completed sooner rather than later to get those four victory points for now though it looks like we are done with our actions and that means our turn is over this means Play Moves clockwise down here to the orange player this means they can go and they of course can recharge or travel with their turn and they've decided to travel now they can optionally place a reef ball down at the start of their travel turn and they are going to do that specifically they're going to place this here there was only one energy on that route so they spend one energy to place it and that brings them down to four I do want to point out they started with one more energy as the second player and the third player started with even more energy than they did now they can move and they've decided to head here now they could go this way or or that way and I don't think anyone's surprised to see them go the way up top as they proceed over here it's free in fact it's free for everyone because there are no
energy icons now on that stretch over here though there is one so they do have to spend one energy bringing them down to three and then they've arrived at this island now they can play a mission card if they want but it looks like they're not going to instead they are going to go right into performing these actions they can do them in either order and they'll begin by advancing Their scientist which puts token here after that they get to do a higher crew action but before we see that I need to focus back over here to show that they have an asymmetric benefit that is associated with hiring crew at the beginning of the game each player put a sheet inside their board by doing this and then that indicated not only an asymmetric effect but also the variety of other effects that show up on that player area I also want to point out that there is an aside which is recommended to start the game with and a bside which changes the rules for the points that you get and when you get them there are also different effects here in the middle specifically asymmetric effects between the players whereas the as sides here are the same for each of the players now again the orange player has this asymmetry which says every time they hire crew they spend two less money doing so with that in mind they are simply going to hire this crew member for free because normally that would cost two and then these all slide down now they're going to place this crew member down and they want to go up here to match the color as soon as they slot that in they get this benefit and that says they can draw two Mission Cards
into their hand so they can look up here and their scientist token is in a position to just give them access to the first two cards they've decided to take this card here and as soon as you take a card from the market it refreshes having all of the cards slide down and a new one appears at the end now the orange player does get to draw another card and they can take this one because it is within their reach after that refresh so they will take it then these will slide down again and they will add these new Mission cards to their hand of cards remember you can only play One mission card per turn but there is no limit for the number of mission cards you can have in your hand at any point well that's finished the orange player actions but before we move on I want to briefly look back over here to the crew hiring area because there's one more option I haven't described just yet and that is whenever you hire crew instead in of taking a face up crew member like this you can take the leftmost crew member spend one money and flip that crew member over every crew member looks like this on the back with a bonus of one money and all of the colors when you place this onto your ship it matches whatever row it is in but there is a penalty associated with having these and that has to do with the benefit that you get each time you complete a column of your crew members specifically once a column of crew is filled in it does not matter what color they are you activate this bonus letting you choose one of those three crew members to activate and perform their actions if any of these is a multicolor tile like this then you are forced to choose that one instead of any of the others and gaining one money
isn't terrible but it's probably not as good as the other effect options that you have it is certainly a cheap way to get a color matching tile though if you're looking for those four points well oranges finished all their actions for that travel turn they did not end up playing a mission card and it looks like it's now time for yellow to go they've decided to travel and they are going to deploy a brief ball to start this turn and they want to put it here that will cost three energy which brings them down to three and then I don't think anyone is surprised to see them sail across that spending nothing because they have at least one Reef ball and then arriving at this island now they have decided to play a mission card and it does have a cross out that means they are not going to be performing the effects of the island instead they're going to perform the effects at the bottom of this card this first one is familiar that moves Their scientist once on the track so they go on top of the rest of us but then this other effect is new now that says they can place a reef ball from their deployment area onto the board spending no energy and they could place it onto any open spot on the board with that in mind they've decided to place this here that's finished their effects from this Mission so they can put it face up in front of them and now their asymmetric effect comes into play specifically that says each time they play a mission card they unlock a new reef ball this means they take the bottommost reef ball from any of their tracks and put it into their deployment area they've decided to go with this one so they can now hold a maximum of three camera resources all right it looks like
they are done with their turn which means it's time for us to go again we currently have two energy which is not a lot but I think it is enough for us to travel again this turn and of course we can optionally place a reef ball down as long as it doesn't cost more than two energy to place now there is a way to place Reef Balls for free and that is if you put it onto a route that already has at least one of yours so I could put a wreath ball here for free but then of course that would make this free for every player since all of these tokens would be covered you may be wondering why we want to do that and that is because as soon as every route that is surrounding a pollution token has at least one Reef ball we will score and one person will take the pollution specifically players will get one point for every Reef ball surrounding that as well as one point if your ship is next to that area and then the player who scored the most points gains that pollution token so if we wanted to get more points when this is taken we could put a reef ball there which means that's just another one applying to this area and this area if that one scores I think let's put this down and we're going to put it here instead that will cost us two energy but that means there are three out of the four sides occupied with these tokens and that puts us in a favorable position to potentially take this pollution token we of course have to spend two energy bringing us to zero and then let's move now I'd like to go here and we can get there for free because this cost nothing since we have at least one Reef ball and then that cost nothing because the orange player covered up the only Energy symbol that was there now once we're here we can activate it we don't have a mission card for this but that's fine the first action says we can draw a mission card
we can take either of these two options and part of me is tempted to take this one that's because it is an orange card and we've already played a green card and we need to play a purple card that requires us to have a bunch of energy so we could potentially take this and complete it getting three energy that might be enough to let us complete this one on the next turn and then have a set of three different colors to gain those four extra points that being said this clam island is not particularly close to us specifically it's here and we are over there I do want to point out that at the beginning of the game we randomly plac these islands down onto spots that match that color so these islands will be in different positions within regions each time you play the game the other option is we could just go for this one it's another green and if we went to the Horseshoe Island again we could get resources and then unlock another Reef ball from our board that allowing us to store more resources I think we should probably do that yeah we're going to take this card here and then the rest of these slide down now we can do the other action available to us and that lets us activate one crew member on our ship so let's focus back to our ship now we all have three starting crew members and these are all the same for players using the aside if you are playing with the bside then these do differ from one sheet to the next and of course we also hired another crew member so all four of these are options now now each of these shows an arrow and that means we have to spend the indicated resource to gain the indicated benefit I think let's do this activating the crew member we hired last turn that says we have to spend one shell and we had one shell so we can spend it moving down here and then the
effect says we can take one of the smallest pollution that's currently in the supply during setup we placed pollution out onto the board with small medium as well as large and then the rest of the pollution tiles went over here into the supply this is where we take from and again we have to take the smallest one available and there are a bunch of these small pollution tokens so we take this one here and we can peek at it but we don't show it to our opponents now we can activate up to one pollution tile each turn and if we do we flip it over and we gain the benefits on the top there is endgame points at the bottom though and if we do not activate this pollution tile before the end of the game then at that point we'll flip it over not gain the benefits on top and gain the points that are listed on the bottom so this is essentially two endgame points or we can get two energy and Advance once on the science track now this is of course face down in front of us we know what it is and this applies to our asymmetric benefit specifically that says every time we gain a pollution we gain another pollution from the supply that matches the same size we just gained a small so this activates letting us take another pollution token and that one oh it's worth two points at the end of the game or you can activate it and unlock one of your Reef Balls this asymmetry is clearly why we went for this crew member so early on in the game now we can also gain pollution by winning majorities around pollution tiles on the board which is one of the reasons I've been trying to place our Reef Balls in such a way as to make that happen well we did not play a mission card and our turn is done this means the orange player can go and they've decided to do a travel turn instead of a recharge turn they can
start by optionally placing a reef ball and they are going to they're going to put it here and that will cost two energy this brings them to one and then they are going to travel over to this island here when once they arrive they do want to play a mission card that matches up with it and this does not have an X that means they get to do what is on the island and they get to do the benefit on the bottom and they can do these in any order of their choice they've decided to go with the island options first and as you can see this matches up with that and what this says is they can either Advance Their scientist once on the track and then max out one of their resource tracks or they can move once on the diving track and then activate the reef tile above their diver the right-hand options are the ones they want to go with and they're going to start by moving their diver that puts the diver in the one spot and then before they activate the reef they want to get this benefit that lets them unlock one Reef ball from the resource tracks They want to go with this one removing it from the camera's track and then they activate this action that lets them perform all of the options on the reef tile above their diver when we look down here this is the reef tile above their diver so they can do all three of these options they can do them in any order and they'll start by moving their scientist once which brings them to the two-point spot then they will gain one resource of their choice they've decided to go with cameras I think that's the reason they unlocked that Reef ball earlier during this turn finally they can activate one crew member on their ship and they're going to go with the crew member they hired on their last turn now the effects of this crew member
says they can either gain two cameras or they can spend two cameras to gain four victory points immediately they currently have two cameras so the bottom option is what they're going to do this means they spend both cameras bringing them to zero and then they gain four victory points everyone starts at zero which means orange now goes up to four and moving on this Victory Point track not only helps you win the game the person with the most points does win but it also unlocks more of these recharge icons that you activate during a recharge turn orange has crossed one of these and I'll explain how that works when the first recharge turn happens and I imagine that'll be pretty soon well that's finished all their actions on the reef tile they activated as well as all the actions from their Island and all actions from the mission card they played this means their turn is coming to an end and they'll put their played Mission cards up like that so they can easily see that symbol well orange is done and that means yellow can go now and they've decided to travel for this turn they are going to place a reef ball out and they have three energy to spend and they're going to spend all of it they put this here as you can see that cost is three which means they are at zero and now for moving they're going to go to this island they can go here for free and and they're for free because of these Reef Balls they've placed down on the routes once they arrive they are going to reveal a mission they have it for that island and it is not crossed out so that means they get to do what the island says and the effect on the bottom that is an additional three energy so that bumps them back up to three energy and then their asymmetric
effect says that when they complete a mission they get to remove one of these Reef Balls and they're going to go with this one here they are just one away from completely clearing that column and as soon as you clear the column you gain the victory points that are listed along the top next up the island itself lets them gain up to five resources split between shells and cameras in any way they want in this case they can't actually take all five they're going to take three cameras and one shell and that last resource is unfortunately wasted well that's finished their actions so they are done which means it's time for us to go again now we currently have zero energy one of the main ways you get energy is by doing a recharge turn which again we have not seen just yet and I will get to soon but not right now the reason for that is because I am going to reveal this pollution token and gain the effects along the top remember that means we don't get the two points at the end of the game but at the top it says we get two energy and we can increase our science once two energy brings us back to two and advancing on the science track almost gets us to the place where we get access to more card options now I do want to point out again that you can only activate one pollution tile a turn so we canot do this one on this turn but we could do that at some point in the future future now let's do another travel action and we're going to start by spending energy to place another Reef ball down this can go either there or there because our boat is currently at this island and we're going to go here that will cost us one energy so we go back to one and then this area scores
the reason for that is because each of the routes around the outside has at least one Reef ball on it and the scoring happens immediately the way scoring works is simple each player gains one point for every Reef ball they have around that scoring area and they also get a point if their boat happens to be on the perimeter of that area as well Orange has one Reef ball so that means they'll get one point for this this brings them to five and then we invested a lot over here we have one two three Reef Balls plus our boat is there so we get four points that means we are past that icon as well that was definitely part of the plan once we've scored these points the player who got the most points for this gains this pollution token and if there is a tie then it is broken by the science track back in this case there is not a tie we got four and orange got one so we get this pollution token oh nice it's worth two points at the end of the game or we can spend it to gain five money of course this also activates our asymmetric effect again every time we get a pollution token we take a token of the same type from the supply so we get this and we can spend that one to do a crew hire action that costs two extra money so it is more expensive to hire that crew member but of course you can do this on a turn right before you need to activate crew and that is is a very flexible action for us of course we could not activate it and then use it for two points at the end of the game so we finished scoring this and I do want to point out that during endgame scoring every single region that had its pollution token removed is going to score again players are going to add up the number of their Reef Balls around that region and the player who has the most will gain two points for every
shark icon in the middle and the person with the second most gains one point for every shark icon in the middle so if we were to do endgame scoring right now we have three Reef Balls compared to the one of orange so we would get two points because there's one shark and orange would get one and it's worth noting the medium siiz pollution show two sharks and the large pollution shows three well our turn is far from over because all we've done is place a reef ball which instigated that scoring now we have to move and while we do have a mission to go to this island let's put it off a little bit and move here we don't have a mission for this island but we do get to advance our science once and we can hire one crew member advancing science does bring us to the next region so now when we gain Mission cards we can take any of these three we are also one scientific Advance away from optionally taking one of these milestones and gaining the benefits from it now I did mention we can hire a crew member as well we have one money currently so if we wanted we could spend a money to flip this one over for one of these multicolored interns on the back but I think I like the front let's spend this one money here bringing us to zero and then we will hire this green crew member then we'll slide all of these down and then add the crew member to our ship now we could go here in order to gain a science advancement right now but if we did that we would not get access to this four points at any point in the game because again we only get that if this is completely full of color matching crew members to this starting one I don't think we want to do that instead let's go here remember you have to go to the fist left spot on the row you choose
now this is going to cover up a mission card icon and a gain Reef Ball action gaining Reef ball means we can take one of these and I think we will gain this one to keep things even and then we can take a mission card all three of these are available to us and I almost took this one on our last turn let's go for it I like the idea of having this in our back pocket after that we refresh the card row and that's finished our actions now before we move on let's take a look at this crew member that we just hired that says when we activate this crew member we can activate any of our pollution discs and gain the victory points that are listed below it normally you get those points at the end of the game this lets you get those points in the middle of the game and getting points in the middle of the game is certainly good because it gives you access to more recharge actions which I will get to soon this also lets you get the benefit of that pollution token as well as the points whereas normally you just get the points or the benefit well we are one crew member away from completing this column and when we do that we'll be able to activate one of those crew members and we've got some good stuff over here already either way at this point our turn is done well this means orange now gets to go and for the first time in the game they've decided not to travel instead they are going to do a recharge turn now the way this works is we have to look to the scoring track and they are going to gain all benefits from these icons that they have reached or passed and they will gain them in order from the highest value on the track to the zero when we focus in that means orange gets this benefit first and that lets them activate one of their crew members they've decided to go with this one that lets them gain two cameras or spend the cameras for points and they have no cameras so they will gain two
and that finish the activation after that they continue to the very beginning and as you can see that gives them three energy and they have to discard the cheapest crew member from the supply and then refresh it three energy brings them up to four and then they discard this crew member which is actually quite good you activate them and you get two energy but in this case they are removed from the game and we slide these down to see a new crew member option well let's finish a quick turn for orange they've activated all of the effects they've reached or passed on the victory Point track this means yellow can go and if they recharge they would just get this benefit gaining three energy and then removing one crew member but it looks like they're not going to be recharging just yet they are going to travel and they do want to place a reef ball down and it has to go adjacent to where their boat currently is so that's here which would be free or on either of these which would cost three energy they've decided to go here that did cost them three energy which means they're once again at zero now they have to move and they have a ton of options to move to that are free they've essentially made a highway over here that means they could move from here all the way there for free because all of these don't cost anything due to their Reef Balls and then this is free because the orange player covered up that symbol that being said they are going to push a little bit further in remember the next time they travel out from here they could go all over the place for a reasonable price because of how spread out their Reef Balls are that did not cost them any energy because they have at least one Reef ball and then the action they will do lets them hire a crew member with a
discount of two money out of these options they've decided to go with the two Money crew M that means they can hire them for free then we will slide these down and I did say that they wanted a mission card so this is one way they can get it they're going to put this onto the green row at the bottom and that will let them draw a mission card and it lets them remove a reef ball from their supply area they're going to go with this one that goes into their deployment Zone and by doing that they have completely cleared this colum this means they immediately score those points in this case that's three three points is just enough so that when they recharge they'll get access to another effect I did say they get to take a mission card as well and they currently only have access to these two and they're fine with that they're going to take this one that's associated with The Octopus Green Island that's over here and it feels so far away but yellow can get there for free in the future again by following all of these over to there of course they can only go there if there is not a boat on that spot already it looks like that's probably the plan they're gunning for though then we have to refresh the card market and that's finished all of yellow's actions this means their turn is done and we can go and we have just one energy and I think we should probably recharge yeah let's go for that if I thought we could get to eight points before we recharge I might have waited that spot gets you an extra energy and two different resources but I don't think we can quite make it there with the one energy we currently have I suppose using pollution tokens we probably could have but let's go with the recharge now now the first thing that we get is activating one of our
crew members and we have five options available now if we activated this crew member it wouldn't cost us anything and we would flip over one of these then gain the benefits and the victory points they are all worth two points and this is not good for us right now we don't have any money but these are certainly not bad and yeah I think we should probably do that I like the idea of getting more pollution tokens to use this effect but that costs a clam and we don't have any now it is worth noting you can spend three money at any time as a free action to gain a resource of your choice but we have no money now we could gain money by activating this crew member spending One camera to get three money but I think instead let's activate this and then well we kind of need money so I think we will reveal this one now that gets us five money immediately and then because we used this crew member to do it we also get the victory points shown in this case that's two more points so we go from four up to six after that we gain three energy and we discard the cheapest crew member three energy brings us up to four and this crew member is gone well that's finished our turn and this means orange can go they are going to travel and they are going to place a reef ball down they have four energy to spend and they're going to place this here costing them two energy so they have two left and then this area scores before the orange player continues their turn again this happens when there's at least one Reef ball on every route around that area and I think orange probably did this because they could tell if they didn't then we could on our
next turn and we are obviously very motivated to do that if we took this medium pollution tile we'd get another one from the supply due to our asymmetry so they're trying to get in here first and now we can score points we are going to get one two points and orange will get one two three so we are up to this spot the next time we recharge we'll get two different resources and an extra energy and then orange is also on that spot orange got one more Point than we did so they have the majority and that means they can take this medium pollution token and keep it face down in front of them there are two sharks here so that means at the end of the game the player with the most Reef Balls around this will get 2 plus two or four points and second most will get 1 plus one or two points that's a decent ways off for now though well orange placed a reef Ball but they have not actually moved yet and they've decided to head to the green Lobster Island there's a few ways they could do that but they're going to go the way that costs them nothing they can travel along here for nothing because they have at least one Reef ball and they can travel across there for nothing because we covered up the only energy icon there once they arrive on this spot they do want to reveal a mission that means they get to do what is on the island as well as gain another mission card they're going to start by activating one of their crew members and they'll go with this one that says they can spend two cameras to get four points and they did have two cameras to spend this jumps them from 8 up to 12 this puts them three away from the next recharge effect that says you gain a mission card and you can take it from anywhere on the mission track not necessarily from where your science token is while we are talking about future recharge effects let's continue
to look forward at the Mark you get two money at the 25 Mark you can gain a reef ball into your deployment Zone at 21 you can advance once on the diver track at 37 you can advance once on the science track and at 41 you can activate the reef tile above your diver this is the last of the income effects because the moment anyone reaches 45 or more points the end of the game will be triggered once that happens you finish the round and then play one more round and then move into final scoring now I'll talk about final scoring a little bit later for now instead I'd like to talk about objectives let's focus back up here to the 22 Victory point mark and you can see there is a stack of cards that all say 22 in the top left corner now as soon as any player reaches this spot we immediately deal out objectives and the way this works is the player who has the least victory points in that moment it's going to take cards off the top equal to the player count plus two then they will look at these and keep one and then pass the remaining to the next player with victory points and we will continue doing that until everyone has one of these cards now you keep these hidden from your opponents for the rest of the game and you will score the card that you have when the game is over and they all give you various conditions this one right here gets you one point for every step up on the diver track you've gone this one here lets you rescore your science track that one lets you get points based off of the resources you have when the game is over so you can play towards these and again this happens at the 22 Mark and by that point you should probably have a decent idea of what you are particularly good at of course the player with the most points gets the least Choice from these and again you can only get one of these throughout the entire game all right
let's come back to the orange player's turn and they now gain two Mission cards one from the island and one from the mission card they played they can take either of these two and they'll go with this one with the orange octopus Island on it then these slide down and they take another one and they're going to go for the purple starfish Island these refresh again and orange is now done with their turn this means yellow can go and they have no energy now that doesn't mean they have to recharge they have a lot of places they could go without spending any energy at all and they've decided to do just that they are not recharging now they could place a reef ball down because remember if there's already a reef ball on that route the next one is free of course that makes it even cheaper for your opponents to move over it but it also gives you more victory points when the zones score and during final scoring for now though they've decided to hold off and when they move they are going to head all the way back to the starting Island using these spots which don't cost them any energy at the starting Island they can increase their science increase their diver and activate the reef above their diver they'll start with the science increase then they will move their diver and right now they could spend two identical resources to move their diver again they are going to do this they've got a ton of cameras and they figure this is a great way to spend them so they move forward here and again you can only do that extra once per diver move action the last effect on that island lets them activate the reef above their diver so they'll increase science again they will gain a resource of their
choice and they can activate a crew member of their choice science will bring them here the resource of their choice is going to be a camera because they can't take any more clams or algae and then when they activate one of these they are tempted to go here and spend an algae to get energy but instead they're going to go with this crew member that says they can spend three money which they just barely do have in order to increase their science again with this advancement they could go here but instead they've decided to go down there that means they get to look at all of these and then choose one to perform all effects on it immediately they're going to go with this one and the rest go back here and the one they've taken lets them move their diver again just like before they can spend two identical resources to move an extra time each time they do a diver move action and they're going to do that again they'll spend two cameras which lets them move twice now the moment they move here they flip this Reef tile over ooh that says you get two energy and you can activate one recharge effect at or before your Victory Point token of course that happens when you activate the reef action and your diver is underneath it now they are also the first player to reach this oxygen tank that means they get the effect which is one point and then this flips over and the rest of us will get three points when we go on there again this is a little bit of a detriment for rushing forward on this track but there's also a lot of points on this track at the end of the game and yellow decided they wanted to push that one point brings yellow to four and yellow is finally done with their turn now I do want to point out that if they had moved here in instead of down there they would still
have had to take a milestone but in this case they would take the top one and discard it without looking at it instead of going down here and looking at a token to then take well yellow is done and that means we can go we currently have four energy and we do have a mission to have eight energy that is the maximum amount of energy we would need four more to make that happen and we could recharge right now and gain that four another option is we could head to the Orange Shell Island and then get three energy although that island is quite expensive for us to get to it's super cheap for the yellow player though if we wanted to get there we could go here for free and then that would cost one energy this would be two energy and that would be two more so five energy which is more than we actually have to get here just to get three energy I don't think we want to do that right now getting eight energy to complete this Mission would be nice but the effect isn't amazing it just lets us draw another mission card that being said if we played this that'd be one of the three colors that we need to cash in a set to gain Four Points which helps us get access to more recharge effects I think Let's Travel on this turn now we could put a reef ball here that would cost one energy because that's the only icon showing and that would let us go here for no extra energy these effects are pretty good yeah let's do that we have two more Reef Balls in our deployment zone so I think that's fine we'll go here and that will spend one energy which brings us to three of course we could have just sailed through here and spent the energy instead of putting the reef ball down but by putting this here we are helping VI for
the majority to gain these points at the end of the game maybe that's a mistake but we're going through with it now we can continue moving we don't have to stop here but I think we will these are pretty good effects the left side would move us once on the science track and then we could max out one of our resources but that would just get us one or two resources right now the other side would let us move our diver and activate a reef tile yeah let's go for this now we don't have two of the same resource to get an extra diver advancement but we could spend three of our money to gain one resource of our choice so an algae or a camera to then have two I'm not sure if we want to spend three money on that right now though yeah let's not worry about that so we'll move forward once and then the reef icon on our Island lets us activate this Reef token let's take a shell first and then we can increase our science from that Reef token and I'm really tempted to go down here and pick up one of these Milestones I think let's do it if we continued forward we we would get access to more points by the end of the game but I'm just too curious to see what is in here the ones that are left say ooh three resources of our choice we could gain one Reef ball into our deployment zone or we could take one of the lowest pollution in the supply remember if we do this we get another one yeah I think this is clearly what we're going to go with so we reveal that and we take one of the smallest in the supply that is a small one and then our asymmetric effect gets us another one this first one says we could get money and Advance once on the science track and the second one says we could spend
one resource to advance once on the diver track nice so far I think we're doing a great job of utilizing our asymmetric effect well there's one more thing that we can do and that is activate one of our crew members and this is the reason I got a Shell let's just go crazy let's spend a shell activating this crew member to once again take one of the lowest pollution tiles that will be this one which lets us activate a crew member when we use it and then we get another one there's only one small one left in the supply ooh this one gives three energy that is nice we have so much pollution that we can use over here now once these are gone then our crew member will start getting us access to these mediums and if those are gone we'll get access to the larges so this is a bit of a long game that we are pushing towards all right we are done with our turn well it's time for orange to go and they are going to travel and they're going to use this medium pollution that they picked up on their last turn that gets gets them ooh three energy bringing them to five and three money they are forgoing four endgame victory points by doing this though then they are not going to place a reef ball down instead they're going to move pretty far and it's also going to be somewhat expensive but they decided to go for it they are going to go to this octopus Island over here now they can move here for free and then they spending two energy and then there spending two more energy so that is four energy total but they decided it was worth it to get over there now four energy drops them down to one and then they do want to complete a mission specifically this one it has to be at
the octopus Island and instead of activating the island they're going to gain two money and they can hire at a discount of two minus two more because of their asymmetric effect so a discount of four and they've got a pile of money that they aren't spending so they definitely want to find a way to spend this money to give them an advantage but it looks like none of these match up with that now they could take any of these for free with their minus four discount so realistic Bally they could just take the one that's best for them and so far they've only removed one Reef ball from their tracks They think this is going to be the right call oh this one's interesting that says when you activate this crew member you can remove one Reef ball from your deployment area to gain three victory points so orange can place this down and they could go into any of the rows but they figure they'll match the row for now that covered up a diver action which moves them here and then they've decided they do want to spend two resources that are the same to move one more time currently they have one algae and one shell so they're going to spend three of their large amount of money in order to gain a shell and then spend both of those to move one more time on the track this puts them here and this oxygen tank will get them three points orange is doing a great job of moving up this track quickly that brings them here giving them yet another recharge effect well let finish their actions and when they put this down you can see they have a set of one of each of the colors in the missions they've accomplished so that means they flip these over and then immediately gain four more points I'm trying to show a few ways to play this game and so far it
seems like orange is playing it quite well they jump all the way to 19 yellow is way at the back and we're pretty close to them that being said yellow has spent quite a bit of energy getting these Reef Balls out and these could turn into quite a bit of points and very powerful effects with these pollution tiles that they are already angling towards completing that could be a good strategy but also getting really high on this very quickly is also great for getting those recharge effects well orange is done with their turn which means yellow can go and they are going to recharge so they can first activate one of their crew members and they've decided to go with this starting crew member that says they can spend one algae to gain two energy after that the final recharge effect is at the zero that gets them three more energy and discards the cheapest crew tile which means it's now time for us to go and we are going to travel we have three energy available and let's spend two of it to place a reef ball here then we can move to this island and we could keep moving but I don't think I want to we of course have to spend that two energy and then we can activate this island we don't have a mission for it and we could either move our diver and do a reef action or we could hire a crew member and get a resource and I think I actually want to do the left side let's take a clam for the resource and then hire this crew member that's going to cost us three money so we spend our five and get two back and then I do think I want to put this up here in that matching row when we place this down we immediately get this effect letting us take two Mission cards
and of course this also immediately refills and the mission cards that we take can come from these three now we are currently at the purple manta ray Island but you can only play these Island missions before you start activating the island options so if we took this right now that's fine but we canot use it until a future turn where we come back to the island I think let's take this one that wants us to move to the green Lobster Island and then these refresh and two out of these three are the purple Manta the other one is the purple starfish which is unfortunately not particularly close to us even if we use our established Network as you can see it's way up there it does have a pretty great effect though when we focus in that says that you activate every one of your crew members that matches the color so this one would activate all of your red crew members those actions get stronger as the game goes on and it's worth noting you activate the workers of that color no matter where they are now we of course put this one up here and the moment we did that we have a complete column of workers this means we immediately activate one of these and remember if any of them was a face down intern we' be forced to go with that and get one money as you can tell by now one money isn't that great I'd much rather get one of these effects and this is why I got that Shell let's spend one in order to take one of the smallest pollution from the supply that will be this one it lets us gain a mission card this is nice we could use this before we activate an island which means we could get a mission card that matches that Island to then use that mission card
immediately or it's worth two points to us that's not bad and then unfortunately our asymmetric effect does not happen it specifically lets us take another pollution token of the same size if available and there are no more small tokens that's fine though the next time we do this we can take a medium token and then get a second one for our trouble I think overall I'm happy with how this went all right that's finished our turn which means orange can go and they are going to recharge they are one point away from getting two extra money but they're fine with this the first thing they do is gain One mission card from anywhere on the Mission Row they're going to go with this one they could have actually taken it anyway these refresh and then they gain two different resources and an energy so they have two energy and the two different resources will be an algae as well as a CL plan next up they can activate one crew member on their ship and they'll go with this one that will get them two cameras and then the final effect gets them three energy bringing them to five and also discards the lowest price crew member ah that one lets you discard a mission card to gain three points well orange is done and that means yellow can go and they're going to start by putting a reef ball here that does cost them three energy so they go down to two and it doesn't quite close anything in but it gets close this area needs just one more Reef ball to close and then score and this large area here needs one more Reef ball to do the same this has a medium
siiz pollution in there and when this happens it doesn't matter if yellow's in the lead or not they're going to get a bunch of points and I don't see a world where yellow does not win this pollution token when it is taken that's not going to happen right now though yellow does have to move and they're actually going to head over here they do have a mission for the green octopus Island so that means in addition to these effects they also get to activate a crew member they're going to start by gaining a science so they go from here back to that four and then they will activate this crew member that lets them spend a camera to get three money which means they have three money total and they have enough now to afford to hire a crew member now they actually have a lot of reef balls so they've decided to hire this crew member which lets them remove one from their deployment area to get three points their main asymmetry gets them more of these Reef Balls so they think they can afford this that does cost them to money and then we see another crew member so they have one money remaining and then they could put this crew member down they could break the color but they'll keep on going they'll go here and that gets them three energy bringing them back to five that also completed a mission which lets them remove one of these tokens and I do want to point out that each player started with one more token in one of these columns and that column is worth one extra Victory point now they are going to take this one they figure they may as well work towards that extra point and this will head to their deployment Zone this is complete and they have two purple and a green
they just need to gain and complete an orange mission in order to get those four points there all right they are done with their turn which means it would be time for us to go but I think this is a good moment for us to stop playing through the tutorial we've seen quite a bit happen we are super close to having those objectives dealt out and we have a lot of Reef Balls placed out onto the board many of these zones are quite close to being scored but not quite yet now the last thing I do want to talk before we finish the tutorial is how final scoring works again the game end is triggered once anyone hits 45 points then we finish the round and play one more round and then do final scoring which is shown over here the first thing everyone gets points for is their objective card they will have exactly one at this point they will reveal that card and then gain points depending on its condition after after that players get one point for every Mission card they have completed it does not matter if they are face up or face down next up players get points equal to the location Their scientist token is at on the track so if the game ended right now orange would get two yellow would get four and Wii would get three and as you can see this gets quite High all the way up to 16 it's actually worth noting only one player can go to the 16 spot every other player has to stop at the 13 after this we then score the diver track the player who is furthest to the right on the diver track will get 12 points second fist will get 10 and third ferst will get six points and remember ties are broken by the science track after that we get three points for every set of one different resource that we have in our supply after that's done we score for
the Sharks out on the board remember these are revealed when the pollution tokens are taken I do want to point out that in final scoring we actually remove our boat and put it onto our board so there will be no boats out here and then when we score these sharks we'll simply count up the number of Reef Balls adjacent to each of them the player with the most Reef Balls will get two points for every shark in that area and the second most will get one point per shark the final thing we score are pollution tiles that we haven't used right now we have 1 2 3 4 5 6 7 * 2 or 14 endgame points with these pollution tiles of course in reality we'd probably have less than that because we' probably want to use these pollution Tiles at various moments that is it for the aside scoring if you are playing with b-sides on all of the players ships then this is the moment where you would score points for having three crew members of the same color you do not score this in the middle of the game and you get three points for each of the matching rows instead of four points when you're playing on the aide after adding all of this up to our score the player with the most points is the winner and the tie is of course Broken by the science track well at this point I've covered just about all of the rules to the game and that means this tutorial is coming to a close I hope you enjoyed learning how to play reef project as always I'd like to thank everyone who's been supporting this channel including these producer level patreon supporters if you too would like to directly support the channel in the creation of future videos like this one then please go to Jong games.com Support also if you enjoyed this video please click the like button for it down below as well as the Subscribe button for the channel thanks for watching