Natera: New Beginning Solo Playthrough and Impressions, Tabletop Simulator
Games in This Video
1 game is featured in this video — it unlocks as you watch.
Transcript
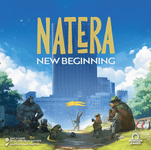
Hello everyone and welcome back to the board gaming doctor. My name is Phil and I'll be your board game doctor today. In this video, I'm going to play Nata New Beginning. This is a game by Horizon Games that released earlier this year after being on Kickstarter and I'm going to be playing this game on Tabletop Simulator using the solo mode that is included with this game. Now, this game, if you haven't heard of it, is kind of a a mixture of a few mechanisms that I really enjoy in games. It's got an element of worker placement. It's got some track advancement that is that functions similar to games like Dune Imperium. It's got the element of extending your rounds via, you know, taking as many actions as you can, similar to games like Lost Runes of Arnac. and it's got card play very similar to games like Ark Nova.
So, this game is fantastic and I can't wait to show you what this plays like, but I'm going to not go over all of the rules. I'll just kind of describe what I am doing uh and and describing what my my turns are going to be like. And hopefully that does convey some of the rules. There are excellent rules uh videos out there that you can learn from as well. Um I and I ask for your pardon for any rules goofs. If I find them as I am editing this, I will mention them in text form. Now uh just as a quick explanation too for the solo mode, just to give you an idea of how it plays, the rule book for the uh solo variant is very straightforward. It's only basically one page long. Uh so what you do is you decide your skill level. You take out as many robots as are required for that.
In this case, we're going to go for the veteran just to give ourselves a challenge here. And so I have five of these robots. Uh the robots will be able to claim three of the achievements that are on the board. And then you have a deck of cards, 14 cards each. Uh these will be played in the first half of the game and then in the second half. And just to give you an idea of what happens after you take a turn, you flip over a card if you have a robot still in your supply. And you place this card in the location and replace that location's worker placement spot with that card. You can see that the art can kind of match up with the background there. And so this alters the text in a slight form. We might see some differences later on, but essentially the two things that happen is that you place the robot there and the robot will prevent you in this this round, you know, this uh this fourth of the game uh from you being able to acquire or go to this location.
They act as one of the leaders. And in addition to that, the opposite is true where if they flip a card and you are already there, regardless if you have an explorer or a leader, they will always be able to place this card down and their robot as well. So the major change to this location, for example, is that in the next round when we do have access to this, we would have to be able to place or just sorry, discard a card from our hand in order to play a worker here. So that increases the difficulty to reach certain spots. Otherwise, the solo bot uh they as soon as they go to a certain location, for example, if they come here, they will increase their authority based on the color that I have chosen for them up one spot and they can reveal tier 2 and tier three locations as well.
But that aside from that, that's basically it. the target score that we have is to get higher than 65 points. Uh so we'll see if we can reach that. And then there are some additional rules to play against the bond in a co-op uh version of the game. We're not going to go into that at this time, but I'm going to shuffle this up and give you a quick explanation of what my faction is going to do. And then so I selected randomly the mole band. So the mole band, the way that they work is that they have four workers instead of three. And none of these are a leader token. They're all exploration tokens. And so we have a an advantage and disadvantage in that regard. If someone, meaning in this case, the robot does go to a location that we are already in, we will gain four food. If this was a multiplayer game, then the other player would get two food. But that is irrelevant to the robot in this case. The downside to the mole band as well as I interpret the rules is that at the uh in between the one of the four phases of the game as we progress from like spring to summer, I have to choose one authority track to move one space down of color of my choosing. And I think this only uh applies to one of my own authority track markers. So that is interesting to see
how that plays out. Uh I started off with these resources here. And and during the uh resource production phase, I will gain these resources back as well. And here is my asymmetric technology board that you can see there. And yeah, I'm going to draw my cards and we will get into turn one. I will start the game and let you in on what I'm thinking strategically to start this game. So, with the starting hand, what you do is you draw six of the basic green uh advancement cards or the exploration cards and then two of the advanced cards and you discard three of them. So, looking at what my opportunities are in this game.
So, I look at these achievements that we're trying to cla to to to claim here. For example, we need six icons of this compass put onto our tableau to account for this achievement. Uh, this one signifies completing an entire column of the tech tree that we have. This one having eight different tech tree locations filled on our board and so on. So I I find a lot of synergy with those three claims in particular with some of these cards here. This medical studies is a good one to have an opportunity to spend food, turn food into an advancement. And there are some other opportunities that we have here as well to gain food.
Uh going up the science track or sorry the doc track could help us uh with something else as well. Anyway, I really like a lot of these cards that interact with the tech tree. Like this one will really come in handy. Uh this computer science advanced one to really filling out our board here. And I do like this column in particular. This will help us gain food as well as progress up or at least in addition to progressing up have an opportunity to use these uh charges. I pardon if I forget what this [clears throat] resource is called, but these are used to um help our uh uh specialist cards work. I mean, here are the specialists out in this uh in this game so far.
So, I like some of these options. We'll look at these a little bit closer later, uh, because I think some of these will have a good benefit for us to be able to play some of the cards from our from our hand. So, yeah. So, I think I'm going to get rid of these three cards here and put them into the discard pile and start with these five and we will take our first turn. So, for my first turn of the game, what I'm considering are some of the cards that I can play out relatively quickly. So, first would be the medical studies and the serene beach cards. I do have enough of the uh arrow tokens. Let me let me get this uh these resources straight. Agility and power cells. That's what I was referring to earlier. So, I do have enough agility to be able to play both of these cards.
I'll just show you real quick. I start with uh 13 food, five stamina, and five agility. So, I would have enough to play these two cards with agility. I would need to save up some uh stamina to be able to play one some of these other cards, which I think I could do. Uh and then otherwise, I would have to gain intelligence, right? Yep. intelligence to perhaps play some of the other cards or wait for uh some conversions to be able to uh get some of the other cards out there. So, speaking of cards, I think the first action that I'm going to take in this game is going to come here to this district here. And the reason is is I want to draw two cards. One to have more options. I think having a lot of options in this game is really good. But in addition to that, there is the fact that if I did want to come to the central area here, I would need to discard cards to do so. And if the robot or and when the robot cards come out and start replacing and modifying these locations, I do need to be aware of the fact that I need to discard cards to go to those some of those places. Now, the other consideration that I have here, considering my uh technology track is I'm really liking the option of progressing up this track and utilizing specialists this game to
get gain some of the basic resources that I need. And if I were to go up this track though, I do need to decrease in the rural track at least twice as well as the military track. So I do want to at least come here a couple of times to get these resources as well as to um bump up on the track in order to go down on it as well. And keeping in mind that I do need to uh keep aware of my specialist ability that I do have to go down a track automatically when I rest in between the phases of the game. So, let's do this. Let's send our first worker out here to this district.
We'll go up one spot on the district district track as soon as I reach the second one. or if the robot reaches the second, that's when we would claim the leadership token here. And each leadership token has is worth points at the end of the game, as well as if you have it in your uh tableau during the rest phase in between rounds, then you do gain some extra resources there, too. So, that's nice. So, let's go ahead and grab two basic cards just to have some more playable options here. [snorts] And I did find So, this is a pretty nice crop crop rotation. Unfortunately, does require us to go down on the wheat track pretty quickly here. Uh, and the airdrop supply does have a compass icon that we could potentially use. So, I do like these cards. We'll keep them over here. And we have some options to work with. So, now let's move over to the robots first turn. I think robot is the official name. Yeah. So, the robots, uh, let's give this a good shuffle here. The first spot they're going to go to is the one that I was planning on going to next.
So, that's unfortunate. So, this gets locked into place here. Uh, we can't visit this location the rest of the, uh, round. And uh unfortunately uh that would have been nice to at least go up and to get some food. So we might need to go ahead and snag uh this one straight away just to be able to uh claim that spot before our opponent does. So that way we can progress up this track and um be in a good spot for that. So, we'll go ahead and grab two of the stamina uh resources and call that good. Going through things a little quickly here.
So, that's pretty nice. So, now we're going to replace uh this location here with this card. So, that is off limits. So, now I'm going to think about what I'm going to do next. So here is what I'm considering my computer science card. I do want to work up towards. However, I do have the additional requirement in addition to the resources, one of these resources needed is to be at level eight on the docks track. So that's why when I said earlier the serene beach would be sort of useful, uh this would help me go up that track a little bit faster. Now, when I'm thinking of how I should divvy up my resources this round, I think I'm going to focus on building out these three uh locations first or these three cards. This gives me that bump that would help me progress towards the dock requirement that I need for computer science. This one will help me advance at least one spot on the tech track to at least get started here. So that way I get some food at the in, you know, in between phases. And when I play my medical studies card, I can convert the food tokens that I have into the resources that I need to advance onto this spot, gaining that food back essentially, and then being able to use that on a specialist. Now,
it'd be really nice to have enough food, looking at the specialists a little bit closer to the sheep representatives. Not only is it worth three points with the costly 22 food, but I would be able to advance on the rule track as well as gain some hearts for additional card play. And this could potentially offset the decrease that I would need to do both in my technology track as well as with my mole powers. I really do like the Cape Dog Hunter and the gecko cleaner as well. Um, you know, and maybe, you know, there are so many things that we can do. The peacock would be great to be able to draw some cards. Uh, the elephant architect as well to play some settlements out for free. Uh, as an action, I would have to spend 10 of the orange uh resources uh supply resources to be able to place that out.
And you know, for example, being able to go here uh and gain seven food instead of just four uh when I take that spot, as well as if the robot comes back here, I would still gain three food, you know. So that, you know, having a supply or um a settlement right here would not be bad. Actually, I do have two workers left. And so what I'm thinking of doing Oh, yeah. in order to play out these cards that I want to get out. So, I I do have enough stamina to play these two out. I have seven. I can play these two for six stamina. And then if I get a little bit more agility, I can play the urban maps. So, that's why I'm thinking of sending my second to last mole here. This spot being still available, uh I would be able to pay two. Actually, let's take a look because I do have uh 13 food. I would need 14 to do medical studies. So maybe maybe that might not be the best spot for me now.
Although the advancement up this track is tempting. So h I think is there another way for me to gain some food? there would be coming here to uh this uh central forest area that would give me some opportunities there and that is the only spot for food and I was hoping to come here for well I guess I don't know what else I would be really in dire need of by going to that spot because none of the cards that I would be able to get from going here would you know allow me to uh I guess go going for some stamina would allow me to uh go up some of these tracks as well.
It would be nice to uh gain some other areas of production, resource production as well to play things out quicker. So, [snorts] tough choices. Now, I could also come out and grab one of these specialists first and utilize their actions immediately. This would give me two more agility that could uh potentially, I don't know, do something for me a little bit later. I don't know. I'm thinking of going really quickly into advancing up my technology track. And so I think what I need to do actually is ensure that I have enough food to do this action and hope for the best that they don't come here. The robot doesn't come here to take this spot up yet. So I'm going to come here to gain eight food. I do have to discard a card though. I've arranged them that I think I wouldn't mind [snorts] uh losing this one right here.
So let's just go ahead and discard that card. I will gain eight food. And let's go and see where the robot ends up taking. So, okay. So, they're going to come up to uh right here. So, up into the forest area. We weren't targeting that, so that is okay for me. Now, let's go ahead and take this spot now that we have some extra food to be able to convert and accomplish what we need to playing these cards a little bit later. So, I'm going to gain two more agility points and move up that dock track.
Moving right into the bots's turn. So, they're going to come up to this spot here to modify it. Fortunately, the bots's turns are pretty quick yet punishing and and increasingly more annoying as I am uh not allowed into some of these spaces. So, we have at least one more turn back and forth before they are done with their turns and we can uh continue on with the game. So, I can't forget to advance on the tracks that the bot has visited. So, they are in these three districts and not in this one. We're good to go.
Okay. So, back over to me. So, I've placed all of my uh tokens out. So, let's go ahead and get started with some card play. Let's start with uh Serene Beach. Uh, let's go ahead and pay the two agility. No, no, we're going to pay the um four stamina for this one. So, we automatically gain, let's just put that right there. we automatically gain a bump up the track here, thus claiming this ability as well or this uh this token. So, we will if we can continue to hold on to it, which we should because the yeah, both of these spots, well, the the bot could take this spot and move up. they wouldn't surpass us. And so we at least get a card at the end of this round.
So that has been played. We're good there. Fantastic. So let's see where the last location that is modified. That's going to be this power cell location here. Okay, lock that for good measure. and let's continue to convert some of these cards into the re uh the resources that we need. So, let's go ahead and just place these more production type uh cards over here. Spending two of the three stamina that we have to lock that into place. So, we have that. And then we're also going to uh play this one for six agility.
Good. So, this is an automatic card here that we're going to kind of just place here for the icon ability. Just lock that into place there. So, we do get a bump up this track as well, which is nice. So, this also gives us an opportunity to get some supplies the end of this round if we hold on to that and we get our first advancement up the tech track. So, we're going to go here. So, we secure that food. Now, if I turn So, I I do have 15. I have 19 food.
If I convert if I convert that food into a bump up here, I essentially get two more food and 15. I'd be uh one short of the sheep representative token. So maybe we're not going to go for that one quite yet, but maybe we could. Let's see. And these two would be off limits as well. We can only get one, I believe. And I'll I'll check after I uh grab this uh one of these these tokens if um they automatically resupply this market for us to to take a look at.
So, I think I'm going to go for the gecko cleaner as a specialist. So, let's go ahead and activate our medical studies. We'll do this kind of quickly. We will do the advancement here, forcing us to go down the Oh, yeah. I should have been up here. So, now I'm at zero since I was here before. So, now that I'm at zero, I gained 16 food. So, I I gained two food essentially as a net positive. [snorts] And then I'm going to spend uh 13, I believe. Yep. I'll spend 13 to acquire our gecko friend here. Just place him right here.
So, let's go ahead and get rid of these resources. And we automatically get to activate the gecko's ability, which is to gain a stamina and two agility. might be able to play another card. Then if we have four power cells, we could activate them again. So let's take a I'll take a look at the rule book to see if this automatically shuffled. Okay, so after a quick consultation with the rule book, this is um refilled automatically. So we do have the alligators here. This is actually pretty good. This allows us to get cards as well as move up that that track. Do we have enough? No, we are we're at eight. We will have enough soon.
Um, we do have enough agility to be able to play this card. Oh, however, oh, I need to look at the rule book again because we do meet this requirement where we need to based off the iconography be at a location in the rule area with a worker, which we are. But I'm already back down at zero for this. And so I wonder if I'm going to check the rule book to see if this means if we're at zero, we can just ignore it and pretend that we move down to zero again or something and then gain the benefit which is the um advancement of the tech tree again. So let me go check that real quick. So after looking at the rule book as well as looking at Board Gamegeeek, I couldn't really find an answer. And so if you do happen to see this and know what the correct answer is, then let me know in the comments. But I'm going to interpret this as if I was on, you know, at a certain level, I would move down one on the rule track. If I'm at zero, I stay at zero. So I'm going to go ahead and play this card because I can and just uh yeah, play it. I'm going to play it as if this were the case. So I'm going to play that here.
So, crop rotation is played and we're going to move up the track. Oh, and this is this is good. Uh, we're going Let me Here we go. So, we're going to go ahead and gain. Actually, before I do that, do I want to consider moving up some of these other tracks? I don't think so. I think I don't know. I could use intelligence to pay for certain cards, but I could also just focus on stamina and agility to be able to play four cards in the future. So, I don't know cuz some of these other cards like in two turns, right, or in three, if I just use this as passive income for intelligence, I wouldn't be able to play that anytime soon.
But if I were to activate this again, you know, I could gain a few extra stamina and agility, that could come in handy later. So, or save those power cells for like the alligator, which will help me to move up and gain some more cards, too. So, interesting decisions here to make. I don't I'm nowhere near having enough power supply to get a or supplies to be able to get um a settlement out onto the board. So, let's go a Yeah, I think I'm going to go although this allows me to build a settlement. Uh I like going up this track right now. So, I'm going to go ahead and gain four power cells here.
But I'm not going to activate it yet. So, I think I'm going to wait until I see what happens next in the game, like where the robot is going to go, what's available to me, uh, if I'm able to purchase the the alligator helper specialist card, and then I don't know, can just kind of go from there. So, I think that taps me out because I don't have enough food to uh, convert into anything, right? So, I can't do medical studies. I Yeah, I think that is it for me. So, we are going to go ahead and do our rest. So, uh we're going to go I think I forget what this means. I think it just means the player order changes. It's a nice cheat sheet in this uh in this booklet.
Doesn't really say. So anyway, I think I'm going to Yeah, I'll figure what what this is and in a moment I'll update you on that. But then I do my uh maintenance or production resource production phase gain and I also do gain some cards uh three cards, basic cards and one advanced as we move into the second phase of the game. So I'm going to go ahead and draw those. I'll do the maintenance as well. And for the bot, I just essentially take all the robots back and and we will seed the the board with more of these cards as we go along. So, I'm going to maintain all of that and I'll catch you after. So, I looked it up and this essentially just means take back all of your pieces, all of your workers, and bring them back. So, uh yeah. So, in the maintenance phase, I was able to collect a bunch of resources. A lot a lot of food here. 12 food in total. three stamina to agility as listed here. Um I was able to draw a card as well as from the cards that I get from the round. I ended up selecting two orange cards and then getting um three of the basic ones here. And so uh looking at some of the options that we have here, uh the automated irrigation is interesting. Allows me to gain some more food if I spend power cells.
Although I'm thinking of focusing on gathering specialists to be able to utilize them. So I think my power cells are going to be of more use doing that. The nuclear science one is interesting. I don't have many of the nuclear tags in play and so don't think I'm going to have much of a use of this card as of now. This literal campsite is interesting. build a settlement for free next to the settlement of another player. Uh, with this solo mode, I don't know how feasible this is, if the solo cards will be able to play out settlements. So, I might just have to build this for free and interpret that as, you know, being able to do that in the solo mode. and then the warehouse being able to gain supplies per token uh per worker in the city district, the the one with the um uh the stoplight. So yeah. Um oh, and the aquifer. I think I didn't have this card yet. I do like this card. I like being able to advance up a track and get get some supplies. I do have to be two spots ahead on the city track here. I did go down one spot just to be able to utilize my moles effect. I think I think this is in place and this is a requirement that I must go down a track that I'm at least one or more in.
So that's just the the way that I interpret that. Once again, let me know if I'm wrong in doing that. And so I maintain uh my status here in the docs. I do want to make sure I maintain this as high as possible so I can play my computer science card later on, which will be of great benefit, I think. And yeah, then continue to uh play out some cards here. So, yeah. So, I'm going to leave it there and I the rules state that I take the first turn again. And so, I will go ahead and start. But what I'm going to do for time purposes, and I've done this in playthroughs in the past, I'm going to provide you a recap at the end of this second phase, the summer phase here.
Um, just letting you know what I accomplished without going through all of my individual turns, just to save time and kind of give you an insight to what the board looks like uh near the end. And so I will be back at the end of phase two. Okay, so for phase two or the summer phase, uh, so my biggest focus here was to go up the dock track, I really want to get to at least eight in order to play my computer science and gain all of those research benefits. And so doing so, I prioritized uh, snatching up the alligator with my food. I was able to utilize him and uh, also play out my aquifer. And so I maintained my level two spot on the city track in order to play that. I was able to bump up a few times there as well as play out a few other cards. I played out the military maps, the warehouse card, and the uh automated irrigation. I had enough stamina left over to play those last two cards to at least uh gain some power or some supply tokens, those orange supply tokens to be able to place out a settlement and also to have the option to convert some power cells into food if necessary. the as an overall um insight to what the robot was doing this round. The three of the five placements were in the forest themselves. And so they did not advance
up the tracks very much this round. But uh so fortunately for that, I was able to maintain my authority in three of the four tracks. And so I will be gaining some extra resources there. So I'll be one short of building a settlement. I'll just need one more supply cube and uh I'll be able to gain some power supplies to activate the alligator again. Draw a card and we'll, you know, kind of go from there. So, for my mole ability, I'm probably uh going to go down to level one on the city track. I do maintain my authority there, so I that that'll be good. uh I won't risk losing any other authority uh benefits uh from from going into the next round. So yeah, my thoughts into the next round. I'm hopeful to get to at least level eight of the dock to be able to play that uh that card. I think if I'm going to be drawing cards as well, I'm going to focus on the orange advanced exploration cards just to be able to have a chance to claim the uh six orange card achievement. Uh I am pretty close to the compass achievement when I'm at three. So I'm halfway there and I do have at least three cards in my uh hand that could fulfill that requirement as well. So yeah, hopefully we can uh achieve at least three of
those. Maybe uh I mean I can only achieve three of them. So uh here's to hoping that I get to one or the other first. And yeah, let's see what happens in the next part of the game. So here in the third round, I actually realized that I forgot to draw a few cards to be able to play in this next round as a as a result from the uh uh passing of the phase. And so I'll draw those cards for the upcoming round just to make up for it. But in this round, the robot now has been placing their uh cards onto the board from the three four deck. And when they do so, you'll see a robot there.
And so for this round, since the robot is placed there, I can't go there anyway. But in the next round, I won't be able to take those actions at all. So they're permanently blocked to me. But despite that, uh I had a very productive round. I was able to uh do a few things that I've been wanting to do for a while now, which was first to progress up the um the dock or the coastal track all the way to the top. Uh I was able to do so thanks to the grace of um the uh technology track, right? And so I was able to first take advantage of the tier three action that I had revealed, which was to spend five food to basically play any uh specialist card that costs 18 or less. And so I was able to snag the Cape Dog Hunter, which gave me some agility and that last power supply in order to put out a settlement into the city. Uh which fortunately the robot did activate. So, I I drew an extra card there, which was nice. But being able to uh play out that uh specialist card uh gave me um enough, you know, being able to uh take that that coastal action to get to eight, play out my um
uh what was the card called? The uh uh computer science card. the one that I've been holding on to for a while, which allowed me to progress up and finish that column of my research track and get enough food as well to purchase the sheep representatives. And I was able to get enough power to activate that again. And so I was able to actually get up the um uh the track, the rural track, and be ahead of my robot opponent. I did lose out on the city track of course, but uh aside from that, they um yeah, they they didn't really make much of a difference in terms of how far they advanced up certain, you know, other tracks. And so that was pretty nice for me. Uh so I was able to in some play those really nice cards, the computer science card, the sheep representatives card, and activate the sheep representatives again. and I finally um you know did some conversions and and played out the research facility. Now I drew into the nuclearpowered shipping card which um is a pretty cheap card and one that I can afford to play uh because I am up the coastal track. Uh I don't have any radioactive cards [clears throat] other than this one. So it it'll only give me one resource. I had thought about doing uh that to be able to use those power cells
to gain some extra agility to be able to go up the research track and convert or sorry to get one more power cell to convert with my automated irrigation into seven food. But I was just a few sho food shy of being able to get my eighth research uh token onto the board. And so I will accomplish that in the next round. And hopefully I'll also be able to get a few extra. I think I should focus on using my power cells to progress up the research track and uh being able to uh gain some extra points from there as well to ensure uh that I pass my scoring threshold. So once again, I'll draw into those cards. I'll probably go down um one of these tracks, maybe the rural track to um mitigate that that mole ability.
And yeah, I'll take all that into account. And my goals are to maybe get two to three more um uh research uh done on my track, as well as play out a few more cards. Uh, I do need to claim at least one more. Uh, so I'll be able to do that with the research there. So, I'll just focus on that and hopefully [clears throat] I will have enough and I I'll I'll bring it back to the final scoring and and do a wrap-up there. So, I'll see you there. Okay. So, now we are done with the game and I've calculated my score just to show you what happened on the board. I realized during this phase that I forgot completely about the mole's other special ability, which is whenever someone else comes into the location that the mole's already in, I get for food. This happened twice in this uh particular phase and probably some more at least one or two times in the prior couple of phases. And so I should have had more food than I needed, but after some calculations, I don't think it would have affected my score that much.
Maybe an extra point or two. It it it might have changed as well because of the lack of cards that I drew a after the uh second phase here in between the second and third. So, a couple of asterisks here, but hopefully, you know, the point of this is just to kind of convey what this game looks like and how it plays and feels like. So, uh, so notably in this turn, my my main goal was to advance as much as possible on the authority tracks, and I and I I feel like I did a pretty good job on doing that. Uh, I did uh put down a couple of more research tokens here in order to get some some points, some 10 points here. And I was able to get and maintain the authority for three of the four locations. I was one uh authority away from being able to snag the rural location for an extra seven points, but unfortunately I wasn't able to convert uh like enough power cube or supply cubes to get to to that. You know, none of the specialists offer that ability as well, and none of the cards in my hand allow that as well. Um, I did, uh, you know, play a few extra cards here for, you know, a few points.
Uh, but otherwise, oh, and I should mention too that according to the solo mode, you can play um, as many claims as you can. You don't you're not limited to three like you are in the multiplayer game. So, I might have altered my my thoughts in what cards to play and perhaps have gotten, you know, another seven points from claiming this achievement here or even this one as well. But regardless, I added up my scores here and I was able to uh get to 73 and surpass the threshold that I needed with at the very least three claims. And that makes sense, too, because in the higher games, you do need to claim four or five and score more than 100 points in order to beat the master uh robot difficulty level. So, breaking down my scores, I had two settlements out on the board for a total of six. Three claims for 21 points. I had those 10 points from my research, uh 21 from the um advancement on the tracks here, five for my supporters, and 10 from my cards. So, if if my math is correct there, then that checks out as a victory. So, I did make a few mistakes and uh to my detriment. You know, I I there might have been uh some question as to the track advancement and D
advancement essentially with the moles and some of the other cards that I played whether or and even the research track whether I could have gone up or down based off of like not being able to uh descend a track by one point if I was already at zero. But regardless and you know and regardless of the uh detriments that I set to myself with not you know gaining enough food from from my mole's ability forgetting all about that forgetting the cards that I could have drawn the four cards that I could drawn that might have altered my strategy. Um I still had a really enjoyable time in this game. So, like I mentioned before, it's kind of a mix between uh the track advancement and altering uh like in in Dune Imperium when you advance on the uh the factions the the influence of of the different factions of of the world of Dune, you get to a point where if you are the leader in the track, you do gain an extra point in addition to the one that you did to get to a certain level.
And if someone else surpasses you, you lose that that uh advancement, right? Or that extra point. And so the tracks in this game, like normally I'm I I feel like tracks are very abstracted, but in this game, they felt very intertwined in in the sense of, you know, I felt the pressure to advance along these tracks because of the points that are awarded for having the the lead in these different tracks. But it also opens up the board more to different action selection spots, worker placement spots that you can go to. Like I loved this tier three uh spot where I could play a supporter card or a specialist card for a lot cheaper. And you can tell that there are uh a wide number of different worker placement spots for every region that can make every game emergently feel different, which is really awesome.
So you have that aspect. You have the arac aspect of squeezing out every single turn to uh you know maximize the amount of resources and cards that you play. Then you also have the hand management card uh placement uh iconography placement uh type of deal that you have in games like Terraforming Wars and Arc Nova. And so that aspect is really fun, you know, and throwing a Rosenberg spin into this, you know, you have these production type buildings, right, where you can convert resources on your turn and it's really satisfying. And it reminds me of Glass Road a lot to convert, you know, power cells into food and then food into research. So, you have those cascading uh engine building type of experiences here. A lot of one-off abilities. There are plenty of cards in the advanced exploration deck that allow, you know, they have more text on them and so they feel a little bit more like a Gricola where the cards are unique enough and not just, oh, you know, here's a couple of resources and and whatnot. And I feel like a lot of these cards are pretty, you know, thematically integrated for what they're trying to to do. Like the earthquake card here, exchange the positions of any two tokens, right? So, you know, that that's kind of like an earthquake, right? I don't know. It it just feels like there was a lot of care taken to match the ability of these cards to what
they are trying to depict based off of the name and artwork and title of the card. Right? So, you have a conglomeration of a bunch of these different mechanisms and experiences that I've had in other games, you know, with and so the rules are pretty intuitive to me. if you do have the background of some of those games that I mentioned and others as well, of course. But even so, I feel like this game is not terribly complex to learn and it plays pretty quick, especially with a solo mode. Uh, I felt like I was able to, you know, easily bust out this uh solo experience in about an hour to an hour and a half, which is, I think, pretty typical for this weight of a game. The solo bot is pretty easy to manage as well and makes the game interesting, not only with the the the different difficulties that you have, but also the tightness in all the worker placement spots that are shut off either um uh and randomly as well as uh temporarily during the first couple of rounds and then permanently near the end of the game. So, uh really really interesting. You know, I I feel like it's it's very tight. Uh it's very, you know, it's not you can't do everything that you want to do.
Resources are are pretty scarce sometimes. Um but at the end of it all, I feel like you are able to play a lot more cards to your tableau and do a lot more with the board state and and points than what originally perhaps meets the eye. especially in that first round thinking about all the things that you want to accomplish, you do and are able to accomplish those with some thought and some clever thinking and and options that you have in drawing cards and and whatnot. So, this game I think is a a masterfully done game. It's definitely one of my favorites. Uh I believe it was my third favorite from uh last year or sorry, uh from 2025.
really hoping that this game does get a another print run or another opportunity to purchase uh for a wider audience because I think this game is a great conglomeration of mechanisms and theme and experiences that are pretty tried and true and excellent in the board game hobby today as I see it. So those that is a playthrough, a solo playthrough and some of my thoughts at the end for Nera New Beginning. Let me know what you think about this game, if you've played it, if uh if this interests you, and of course any rules goofs that I might have made that I did not mention along the way. Um still relatively new to the uh playthrough experience. And so uh so I I do know feedback would be there and welcome, but but thank you regardless for watching this and hope you schedule an appointment with me real soon. Take care.