Zhanguo Review - Chairman of the Board
Games in This Video
1 game is featured in this video — it unlocks as you watch.
Transcript
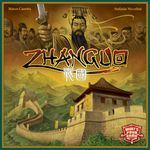
hi everyone today I'm taking a look at Zango which is a two to four player Euro strategy board game that was designed back in 2014. this one takes around two hours to play on average before I get started on my review of Zango I want to give a shout out to the show's sponsor keyienda dot Co dot UK who are my go to online retailer here in the UK and if you use my link in the show notes or the QR code then you can get five percent off your first order so I want to say that Zango is definitely an advanced strategy game there's a lot going on here so I'm probably gonna miss a thing or two but um I'll do what I can so the main board is going to look like this and in the bottom half or the bottom left hand side of the board here you have these endgame bonuses that you can potentially gain throughout the game so you're going to be playing through five rounds and of course the play with the most victory points at the end of those five rounds will be the winner in the top or left hand side of the board here you have a breakdown of the different actions you can take and you also have a space here where you can play these cards which is kind of one of the main mechanisms so these cards are going to be broken down into two bits of information the top half and the bottom half in the bottom half the only thing that's relevant is the number here and in the top half um is not relevant to this part of the game but it does relate to the engine building part of the game when it comes to your personal player board which we'll talk on shortly you have the main bulk of the board here which is where most of the area majority takes place where you'll be trying to put down these little Governors on the board here to create influence because at the end of the game whoever controls
these regions it's gonna get points you're gonna get nine points plus three points for every Governor you have in there and if there's a tie um you're going to basically divide those points up and you've also got these spots here where you can put these palaces down which can get you points throughout the game as well also scattered throughout the map you have these tiles which relate to these parts of the wall here where these walls can be erected to get you end game points and all these different tiles are variable and they're going to change basing on based on things you're going for so for example this will be for every kind of silver Cube I have on my board in the game I'll get two three or four points for depending on where I build a walls if I build it on this three part here I'll get the four times multiplier and but it's going to be more expensive to do that and in the top or sorry in the right hand side of the board here you have more endgame scoring criteria which is another thing that's kind of split in half here so you have the top half here all of which have a segment of a wall a pagoda and a governor the same applies to this part here and these are going to be objectives that you're aiming for throughout the game so for example if I manage to establish a pagoda in two or region two and Region Three you can see here that all the regions are are numbered um then I could put one of my discs here and if I'm the first to do so I'll get more points than the person who goes later however if at the end of the game say I ended up doing this bearing in mind that other people will be competing I'm going to be adding up at my point so this will be like four eight nine points and you're going to multiply them by the number of different categories you hit so like this it'll be
again four five six seven eight nine times three for 27 points because I mean all three of those categories and the same will apply to the bottom half here and there is some crossover between the two so you can see here that this one wants me to have a wall in this flower section as does the top objective so you can actually start working towards more objectives than one at the same time you're also going to have these worker tokens which will come into play later as well as three decks of cards which you're going to be using to take your actions with and you can see that each of these decks corresponds to a different range of numbers so this writing deck here is ranged from one to forty uh the money one is 41 to 80 and the law cards are 81 to 120. each person's personal setup is going to look like this where you're going to have your personal player board which is reversible on the reverse side you're going to have variable player Powers but I've just chose the basic version here and essentially this is divided up into the five regions so you can see here that this has the same writing style as the board here um and that's going to relate to that specific region now the top bottom kind of bar here where you can potentially put these black cubes on is going to represent the unrest you have in that region which can potentially cost you um taking certain actions so for example if my unrest reached this level I could no longer build palaces or these pagodas in region one and you're going to start with a bunch of these cubes depending on your player board here so I'm going to start with two of these red cubes in one of these silver cubes but you can acquire more and you're going to have a personal reserve of five
of each color no more no less so you are you know have a capacity there and you've got a little um a little summary here of the unrest you can potentially take as well as these currencies you can take which we'll touch on later um you've got your supply of the governors the pagodas and the walls and additionally each I'll start each round each player is going to get given six cards two of each types and you can also have a supply of the different currency types relating to those three types of cards so how does the game work and what are you going to do on your actual turn so basically each round is going to consist of all the players playing through each of their six cards I've only got five here because I've already set one up here so basically let's say that I've selected this card and I can use those cards in one of two ways the first of which is to tuck it under my player board under one of these segments here so you can see here I've tucked this card under section one now what this means is that from now on whenever I take the um take a cube action which I'll talk about later I'm going to get two points for so you're building a bit of an engine here and also if it's the first card I played in the column then I'm going to take one of the matching currency counters that look like so now these are important because if I have the most of these when it comes to the end of the round I'm going to have the option to trade them in to take these bonuses so I can take more resources I could take workers I could build free walls Etc but we'll touch on that more a bit later um so whenever I play the second or third card in a column not only am I
going to get two and then three currency tokens of the matching type which is great of course but I'm also going to have to start gaining the unrest which I talked about earlier we'll start maybe losing you the ability to do things now the second way I can play a card is to use it as an action so let's say I picked up this one here I'm going to play it and overlap the existing card on the stack here now this is where the numbers come into play so you can basically take one of these six actions when you play a card and the number is not relevant to the action you want to take however if you want to reap the benefits from the engine that you've built you're going to have to either go above or below that number depending on the action you want to take so let's say for example I played this eight card on top of this 52 card which of course is lower then I want to take this resource action here means that if I played a lower card than the one existing to it then not only do I get the resource or the bonus that I want so let's say I took a and let's say I took a white Cube and I put it on my player board like so um I will also get to trigger all of the cars that I've invested so you can see here that I built the um the cube card here which means I would also get two points and you can see that these two actions require you to play a lower card to get your engine building benefits but these three require you to play a higher card and the one in the middle here you can play anything and always get the full action so let's talk about what the actions actually do so the first one here allows you to take one of the three colors of Cubes which we've done already and place it on your player board this
one here allows you to take a worker for each of your cubes that you have in the bottom portion of your player board bearing in mind this is a free action to shift these down like so however it will end up costing another action to move them from there but let's say I have these two cubes here I took that worker action and then for every Cube I have in that segment you know to a maximum of two you can see I have a two capacity here I will take a worker from the supply and add it on to that segment but I can't take any more until those two are used up or you know I have a maximum of two now these are used for a bunch of the other actions and I should say whenever you um whenever you take this action you also raise your unrest so that's another way you can gain unrest um so that will correspond to the other actions here which will be things such as building on walls so when you build a wall you have to spend workers from different regions depending on the level of wall you want to build so if I want to build on a level one segment I just have to spend one worker if I want to spend two segments I have to spend two workers from two different regions on your player board and you know three three different regions on your player board so let's just say I wanted to you know build a wall um I've only got one segment with one worker in any way so we can only have a build up to you know level one I'll discard that one and I'll place my wall on any of these segments you know with the one bearing in mind that I probably want to tailor it towards the strategy I'm building to so let's just say you know I wanted to do one here like so which means that
I'll get a one point for every one of my segments with no unrest at the end of the game this little movement action here will allow me to shift my cubes around the board up to three times so this is a way that I can start moving them back up to the top here or I can move them like this now I can do any combination of that um up to three times so that's a nice way to shift things around which will again correspond to the other actions which are to place a governor or to build a pagoda so let's talk about the um the governor action first so when you take the governor action of course you want to be ideally playing a lower card to get the engine building benefits but what you're going to do is you're going to have a look at your player board and if you have all the three colors in one region you can discard them like so and then you can build one of your governors in that particular Zone like this and when you do it you're going to place them in these regions which will give you one of three bonuses you get four points you can take a new resource or a new you know a new person or you can start shifting more cubes around now just because there are three segments here it does not mean that you can't place anymore you just have to end up placing them outside of the region and the reason you want to do this is because you want to be getting the majorities which I think I touched on earlier you know nine points are having the majority plus three for every person you have their now additionally whenever you place one of these governors in a segment you are going to completely wipe out any unrest you have there and the final action we've not talked about yet is the palace action or the Pagoda action and when you do that you are
going to spend two workers from one region and one from another region as according to this image here so let's just say I had you know two workers in region two like this I have one worker in region one I'll discard those and wherever I had the two workers I'm going to build a pagoda so I had them in two that means I can claim one of these spots as my own now the reason you want to do this is because you will then get a point for every single card you have tucked behind your player board so you know ideally you want to be doing this when you have a bunch of cards here so this wouldn't be enough you know opportune time to do it because I only have one card but you can probably imagine once you have you know 10 to 15 cards tucked behind your board that's a lot of points available there additionally whenever you build a palace you have the option to claim one of these kind of um jumbo little currency current currency markers here which will help you you know gain the majority towards these bonuses because these count as three of that type so once everybody has exhausted their six cards you're going to go to the end of the raid end of the round sequence where you're going to have a look at this part of the board here and methodically you're going to go through all the different categories so starting with the writing one here you're going to have a look who's got the most writing tokens and whoever has the most it's going to get first refusal of the offering here so this one you know in round one would be take a resource cube of your type but maybe I don't want that and I'm holding on to my resources to maybe get a bonus later then you know let's say the person with the most refused it then it will go to
the person the second most and then the third most and so on and the same process would continue with the coin one and then with the lower one and as you can see here that these will give you again not only resources and but they will require you to put them in very specific locations they could also give you workers they can give you deployments of your governors they can let you build walls they can let you build pagodas and they'll search also all sorts of things also at the end of the game whoever's got the most of each type remaining in their supply will get these corresponding points and once you've taken the rewards each player is going to get given a new set of six cards um and of course at the end of the five rounds to play with the most Victor points will be the winner based on the points you've gone in game based on the points that you'll get from the majorities of each of the different segments here and based on the points you'll get from the wall multipliers as well as the bonuses you've got from the side column here which we've talked about so let's share some thoughts on Zango and you can probably tell they're from the rules overview the game isn't actually that complex in relation to the rules you're either going to play a card behind your player board increase your engine get a bit of currency and maybe get some unrest or you're going to take one of the six corresponding actions here however the Fallout of those decisions is massive and I cannot overstate how brain burnery this game can be and a lot of that is because of the tempo and pacing in which you want to do everything and because you are going to be at the mercy of other players playing
cards on here potentially messing with your players by playing a high or low number when you want to you know the reverse because of course whenever you take an action to get your maximum output you want to be getting the benefits you've invested in from your engine you know taking an action without those is certainly not going to be as you know fruitful um and not only that you want to be kind of pacing yourself on you know what how am I going to manage my hand of cards here which ones do I want to tuck which ones am I willing to forsake to take actions in the first place do I want to invest my engine first before taking a certain action how am I going to get the maximum output here and this is just a massive kind of um you know a puzzle in itself because you know if you've got plans of you know building a um Pagoda down maybe you want to get this tab played played first but you might want the corresponding number to do that so maybe do I want it for the number to give me more flexibility do I want it for the action do I want it for the engine building benefit and so on and not only that you know you might be adding to a column here that you've already got some cards there you're going to get some more unrest which means you can't build the Pagoda in the first place which means that you might want to build a governor first to clear that unrest so you can see here that the order in which you do things is Paramount to um doing well in this game and I have to say that I absolutely love the breadth of options you have here when gaining points you can really just ignore one part of the game and focus on something else like there's a ton of points to be had here if you manage to get in all three of the different categories but doing so is very difficult you know you are going to be pushed the wire to get them all done and you're probably going to have to really
focus on taking these end of round bonuses to get you know free walls and you know free people down and hopefully you can match them up with the uh with the objectives because you know if you're getting all three of these categories and you're multiplying it by three you know I've seen you know 30 40 points be had at the end of the game here which is a big swing and can definitely determine the winner alternatively you could really tailor your strategy towards the walls here because you know if you have a bunch of say you know sets of the three different types and you get that four times multiplier that's a lot of points to be had there or maybe you're going to focus on getting all four oh sorry all five of your silver cubes on your player board at the end of the game that's going to be five times four that's 20 points there for Gravity so you can see here there's a bunch of options you can be had here and you know I call it tailorable strategy and a lot of my favorite games have this where you know you could do what you want and you can almost like yeah Again Taylor what you're going to get points for maybe I'm gonna do uh really invest in one thing you know I'm gonna have a bunch of brown cards I'll go here but maybe I've got you know a decent amount of gray cubes left so I'll put the level two here but all of which you are constantly juggling things around your player board to spread your influence because it's not like you can just do what you want when you want and just jump straight into you know region four or just build in any wall that you want to because you're going to have to manage your resources by shuffling them around you're going to have to again spend time and valuable cards in order to push them back up to use them to get Governors down get passes down um and of course that applies to the workers as well but it's all about
building an engine that suits your needs and this engine building part of the game I think is magnificent there's so much you can do here and exploiting your engine is you know where the game really shines because you know if you do want to really focus on building walls and building passes you want to be trying to get as many of those kind of um you know building benefits as possible then maybe when I whenever I take a builder action I get to clear off my unrest you know maybe I'm going to get points maybe I'm gonna be able to shift cubes around as a passive action get new cubes down and again get currency which is going to get me those bonuses get me more points um again so many things you could do here and that's just kind of you know touching the uh tip of the iceberg really because there's so much you can do here like you know whenever I build a governor I can get a free worker which is a huge thing because it's going to completely let me bypass taking a whole action and I like that restriction of you know yeah you can build a great engine but doing so is going to come with a hindrance in terms of that unrest and unrest can relate to some of your endgame strategies but it can also block you from taking actions in the first place you know if I wanted to build up a great engine but I ended up getting so much unrest I can't actually use that engine it means I'm going to have to jump through a lot of Hoops just to clear that unrest off by placing a new governor that yeah it might be useful because I could want that for an engine objective and it's going to get me points potentially for the air and majorities yeah all these things go hand in hand in every kind of facet of the game synergizes with each other beautifully I think the idea of having these currency tokens as a finite resource is
genius because what it means is that when it comes to the end round um you know rewards here there's some quite interesting decisions and some interaction that comes into play because let's say I completely ran away with one of them I had eight of the tokens as in relation to my opponents two it means that yes I'm gonna get first refusal but the reward I'm gonna have to spend every single on one of my tokens and put them back into the supply ready to be fought over again um but maybe the reward isn't so great but it might not be great but even if I don't want it it means that my opponent will get it for a really good price so you've got to have to think about who's going to get the net gain there are you going to be in a position to be able to fight again and take that reward for the next time or you can just gonna hold them and hold them on to those really powerful rewards and speaking about the player interaction there is a big part of this game as you know you'd expect with a game with area majority in it of course you're competing for these regions and there is a finite space to get your pagodas down to get those big chunk of points from your you know the cards you've got tucked this competition for the End Game bonus or to end around bonuses the card play is a huge Factor when it comes to the other players and it's all about managing your hand because you know you might have something lined up you leave yourself with a low car there ready to be played and then all of a sudden somebody plays a card that's just lower than it and you can't play it anymore so again you are always going to be somewhere at the mercy of other players whether that's passively or deliberately um you know it's something you have to consider and it can be very frustrating at times but it is quite a nice little fun puzzle to try and manage
also there's going to be competition to get to the best wall spots if you're sharing a strategy with somebody else you know you've really invested in getting you know the same with the same pairs here um and you really want that three times multiplier um but somebody's got there before you then that's going to be something you're going to compete over and the same applies to the you know the multipliers here at the end of the game as well always going to be a race to get to those spots first so yeah almost every facet of this game has some degree of player interaction at the time investment I think is is on the money I mean it does take around two hours to play but you can probably tell there is a lot of meat on the bones here there's a lot of decisions to mull over so I certainly think that the you know the the kind of rewards you get from the time it takes is going to pay off you know maybe if you play this semi-regularly with the same group you can probably get it under two hours um and of course in a two-player game you're probably looking at about you know 75 to 90 minutes which is really good so yeah I've got no complaints at all again with this magnitude to play in two hours is about right for me I think the replayability for this game is fantastic because not only have you got a ton of variability when it comes to objectives you know all these are dual sided which are going to massively change how you approach the game the same applies to the objectives you're going here but also you know you're not going to see all the cards every single game meaning that you're going to see a different engine and you're going to have to work tactically with the cards you're distributed each round so that's going to be a big part there you've got the variable player boards where you flip them over and everyone everybody's got a unique ability that they can use All These Little Things
um add more replayability but I think above all that this is just one of those games that you're not going to be able to solve you cannot min max everything you're going to find yourself massively kind of mulling over your mistakes you're always going to be slightly improving on your previous performances and you're going to fall into all those pitfalls you know the first few times you play this one because you know again although I said this game isn't terribly complex in terms of its rules the nuances and the you know decision space and that brain burnery nature of the game is massive and you're going to find yourself you know wanting to improve every time you play the game also scales pretty well um yeah I suppose Aaron majority games aren't going to be as interesting with two but it is going to help it Move Along at a faster Pace um I think three pair is probably the sweet spot for me because you do have that wild card when it comes to competing um and it still moves along at a pretty good Tempo I'm also very happy with the production of the game you know these titles by Watcher game generally have the same aesthetic with these long boards and but I like the way they look here iconography is spot on you know the has a nice well laid out got a nice bunch of artwork on it and I think the artwork is generally decent um so yeah I'm very happy with the artwork and the graphic design but also the actual physical components are good you know there's good cardstock here with these linen finished cards the tiles are good quality I'm sure everything about it is good I've got no issues at all okay so let's share some final thoughts on Zango and wow is this game clever and maybe a little bit clever for its own good at times because it's going to put you under the pressure in managing this hand of cards as optimally as you can creating some very
paralyzing decisions and just mapping things out accordingly is you know where the game really shines but it's also going to hurt you if you are you know a sufferer of AP I suppose you can tell here this is certainly a gamer's game um and I don't even think my description could do this game Justice in terms of actually being head down in the game and trying to manage these cars personally because as I said the rules themselves aren't that bad it's just the actual Fallout of the decisions you're making are huge here there's tactical decisions you know reacting to the cards available here when is the right time to play it can I play this card now yes I might not get the most optimal benefit my from my engine and I might have wanted to throw a few more cards down here but I'm quickly running out of options and I want to be able to take the action that I want um and this cool pacing to this game as well you know you are trying to compete for these regions you want to get your passes down later in the game to hopefully get more points from your engine here but it does mean that these book spaces might be swallowed by the time you get there which can completely throw a spam in the works because you might have adjusted your player board to get those passes down there mean that you're gonna have to shift a whole bunch of tokens and um workers elsewhere which is going to take time and effort I love the diverse scoring in this game there's so much you can do so many plates were spinning and just you just spoke with options at all times however pulling it all off is difficult because I know I I'm not good at this game you know but I love that kind of conundrum of trying to do better on my previous turns and I think I could do that and the more I play this you really
have to utilize these currencies here especially later in the um you know in the game where you're getting these great rewards for having the majority of these tokens here um you know getting free workers down getting free walls down is brilliant because not only is it going to get you the points for doing the action but can also get you those huge multipliers from the end game scoring here which is a great part of the game and I love the way they cross over as well but yeah I love the Dual use of the cards I love the tempo um I love again the plethora of options the brainy battery nature of this game is just everything I I love in board games so this is easy going to break into my top 100 and that you know it even has potential to go to these you know the upper echelons of my favorite games that being said I do feel like I'd need to be in the right mood to play this because again it is going to test you you're going to need to be alert um and if you find yourself falling behind and you know not playing ultimately you are going to struggle but if you like that style of gameplay maybe not so not so bothered about you know theme or anything like that and you know more mechanically driven I suppose it doesn't really get much better than this because it is like clockwork the way everything falls into each other is just genius and it feels different to a lot of Euro games as well with the whole hand management thing it's just a delight to play um if you like engine building if you like a majority you like interlocking mechanisms and a ton of end game scoring and that tailorable scoring which I love and then this game takes a hell a lot of a lot of boxes so that is Zango an absolutely brilliant game now
unfortunately this game is very hard to get a hold of but if you find one out there in the wild I really encourage you pick one up because it is fantastic