Kwik & EZ Stormtroopers With Games Workshop Contrast Paints
Games in This Video
1 game is featured in this video — it unlocks as you watch.
Transcript
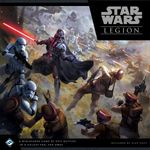
in this video I'm going to show you the quick and easy way to paint Star Wars Legion storm troopers with Games Workshop contrast paints so relatively recently I got into Star Wars Legion I bought a starter bought a bunch of add-on boxes and my plan is to completely build out an eight hundred point list and then start adding to that of Empire and then an eight hundred point list of rebels and then start adding on to that also buildings and all kinds of stuff like that the thing is if you're gonna build a decent list of Empire you know the bad guys as it were you're gonna need a lot of stormtroopers I mean like a lot of stormtroopers so the list that I've built is at least my initial one has four squads of just regular old stormtroopers so I was like alright that's gonna be a total of 28 guys I'm not gonna run all 28 of them in the list I don't run squads of full seven I mean I don't think you technically can within the rules you have to pick one of the two heavy weapons people that come in the box so the max you can run is six in many situations I'm running five but I want to have the flexibility not only to run six but potentially run either of the two heavy weapons even though one of them is not that great but the idea is I don't want to leave any storm trap stormtrooper unpainted and I want to get them done as quickly as possible because frankly stormtroopers are a little boring very black and white obviously if you've seen any of the movies you can get fancy with them if you want to and make um all kinds of different colors
but I wanted them to be normal but I did also want them to be a little grungy I didn't want them to be parade ready like they are when they're up on the Death Star I wanted them to be out on the ground doing stuff I just recently re-watched the new hope recently episode four and there's that scene with out in the desert and or like look sir droids and like those guys are a mess those stormtroopers are covered in something and it's not sand I don't know I think one of them fell into some poop and then the others tried to help him out I'm not sure it's it's weird so I'm not gonna go that far but I am going to keep them a little grungy and there's a super quick way to be able to do that and that's where the Games Workshop contrast comes in so the contrast paints came out early this summer and I've been using a bunch of them and trying them out actually I've used all of them at this point and I'm gonna make a video eventually that says this is what I think about them all specifically some are great some are not so great there's gonna put that out there as a spoiler but there are two colors that are absolutely perfect for our friends the stormtroopers and that is apothecary white and that is black Templar those two colors make going through your stormtroopers SuperDuper quick so first thing you do is you build yourself a stormtrooper and you get him you know built and you also texture the base now this is up to you but I'm a big fan of texturing the base before you start painting I made a video about it years ago pachow the big benefit is that once you start priming then you're already
covering up all the grit and the sand and you're putting more layers on it you're making it stay there a little bit better it's a good idea do you're basing texture before you start to paint the other thing is is that a lot of times you get done painting and then you're like oh great now I can start basing and then you never base because you've it's like he finished but now you have another finish line so if you put it at the beginning it just makes more sense and I'll talk a little bit more about basing at the end anyway you take your first guy here and you build them and you base them and then you get set and the next thing you do is you prime them now I'm gonna do a little bit of cooking show magic here I've got a squad already all done to each point and I'll be able to show you so here primed white and this guy is pointing in that direction or potentially that direction so what you do first with your primed white and once you've primed your models whether you use rattle-can or airbrush or a brush on let it sit always let primers sit at least 12 hours maybe more but definitely let it sit and then start doing your painting so first thing that we do is we take our apothecary white and we shake it real good now you might be able to see it here there's a bit of schmutz on the bottom this white stuff here versus the gray stuff that's the rest of it it's super important with the contrast paints that settle to make sure to completely shake them real good before you use them because if you don't they don't do their job as contrast
paints well some of the contrast colors don't seem to separate like this which is weird definitely the Apothecary white does that's a lot better so we take our apothecary white and we're just gonna start kind of almost literally slopping it on don't don't get all kinds of puddles and stuff like that you know but definitely get it in there and then when you see places where it starts to collect and get gross then you should definitely kind of stop that up if at any point you need to get some paint some of the contrast paint gone then the thing you need to do is just take your brush rub it on your piece of paper towel and then you use your brush almost kind of like an eraser to suck up the stuff that you don't need but it is certainly definitely one thick coat and get it pretty much everywhere you can not get it on the gun if you don't want to that's up to you but yeah top of the head on the hands everywhere there's only a few places where stormtroopers aren't white so you can still get it in those areas certainly but you're gonna want to make sure that you definitely get it into all the areas that need to be white and then we're gonna go back and fix it because he's gonna make your stormtrooper frankly look a little gray this is apothecary white but it is actually just a very light gray so he's gonna look a little yucky but the next step will fix that and this is the important part about how to paint stormtroopers in my mind with contrast paints get it in between the legs get in
all the different areas you need to get it in and it's literally that fast go over and look especially sometimes in the down in the bottoms of the legs like the stuff starts to run down and then you're gonna want to kind of soak that up a little bit so you can just suck up any kind of weird spots where it puddles and then you're done so this is what he looks like after he's done you can see he's got a definite gray thing going on he's a gray stormtrooper but we're gonna fix that and the way that we're gonna fix that here is we're going to use dry brushing now in the past I've done a video about dry brushing and I use makeup brushes cheap makeup brushes from the dollar store or Walmart or whatever this one's a pretty small one you can tell here this one's got a relatively small head I've got big ones and small ones and all kinds of stuff but these make your dry brushing amazing so what you do when you're gonna dry brush with this stuff is you find your white paint that you like I'm using the paint from Monument yeah I like this stuff a lot and what you're gonna need to do is you're gonna need to put it on like a little plastic pallet none of this process unless you get to basically once you get to the basing none of this requires a wet palette obviously nothing really requires a wet palette but it's really nice to use a wet palette but because we're basically using dry brushing and contrast paints wet palette is not important I would tell you to
probably not put contrast paint on a wet palette that's just me so what we'll do is we'll just put a glob of white there and then we'll take our kind of gray storm trooper and we're gonna dab just a little bit and then we're gonna come over here to our paper and we're gonna rub most of it off go in circles crosses rotate the the brush as you're doing it and get it nice and mostly gone and then you're just gonna start dry brushing now generally I'm dry brushing down the top of the head is super important so it's important to have that part definitely be highlighted in white but you're just going to back and forth probably not up mostly side to side but mostly down if you can and find the big flat areas so like the side of this thigh here you definitely want to try to get a bunch of white into the flat areas but that little edge right there next to like where that Ridge runs down the front of his thigh that's where the shadow aka the Apothecary white needs to be so you're just gonna keep doing this and kind of pulling it down and catching all of the shadow stuff you know trying to basically soak up again not soak up because it's already dry make sure you let this Apothecary white any of the contrast paints they always need to dry before you go to the next step and it can take some time
but you just basically go back and scrub back and forth a little bit here and there in certain areas other areas just draw down you can go back and forth side to side as well do what you like but get yourself a basically white but now with a little bit of gray in the recesses and stuff like that stormtrooper and if you want the feet to be dirtier because he's been slopping around in the mud and stuff like that don't do as much down there but that's pretty much it you get yourself a now less gray but more white but still a little gray stormtrooper so now this one is a dried dry brush because we don't want to start working on the dry brush without giving it a good amount of time to dry maybe ten minutes but so here's our guy who's all taken care of he's all been fixed up with the dry brush white on top of the gray treatment that he got with the Apothecary white which is really more of an apothecary gray but that would have been weird if they would have called it that and now it is time to paint the black parts and for the black parts we're gonna use the other contrast color that we're gonna be using in this situation and that's gonna be black Templar black Templar is also an amazing amazing in my opinion contrast paint and we're gonna use it on all of the parts that need to be black on the stormtrooper so stormtroopers obviously their gun needs to be black their hands the gloves are black but on the back of their gloves back here there's this weird little white piece of armor that we want to keep white so you need to be very careful about that any places where
you can see the under glove of their armor so like on this guy here that elbow right there that's something that you're gonna want to make sure you get a little bit of black into I don't do it on the knees unless actually on this guy here this unpainted one if he is like I painted his knees because he's got such a bent leg that you definitely see a lot of me but on this guy even though he's bending his knees a little bit I still don't paint the black in there when you're trying to get these guys done quickly it's all about efficiencies so but back here by the but you do see a good amount of the under under glove sort of outfit so the first thing we're gonna do is we're gonna get our brush a little bit of wet we're gonna dry it off and then we're gonna go right into this stuff here and we don't obviously dip our brush too far I'm doing just a little bit of you know not all the way and then what we do is we start working on the butt and the thing is is because this stuff flows so nicely because it's such a liquid thing it can really get in there and you don't have to paint it as much as you do with normal paints it will flow a little bit into crevices and things like that with capillary action now I will be perfectly honest with you I am having a hard time doing this at this day angle this is one of my kind of newer sort of painting techniques with the camera up here and all that kind of stuff but normally I'm super close and I'm usually wearing those magnifier things I did a video a while back so yeah this is this is kind of new ground
for me but you're gonna get in the butt area there some people will even paint like the the sole of the shoe or the boot whatever I guess that they carry or wear but if if if this guy's on his knee here right there's none painted guy I definitely paint that because it makes sense because you can see the entire sole of the shoe some of these models like this guy you can see the sole of the shoe right there so that guy too I generally paint the sole part but I don't usually paint the ridge part you know all the way around so in this situation I'm pretty much just gonna keep grabbing some paint here and just keep filling in those parts when it's time to paint the gun it's a pretty simple thing you can get the fingers in there you can get the whole thing I don't go through and dry brush afterwards on the gun to lighten lighten it up again I want it to be as dark as possible you could certainly but you don't have to again being very careful about this panel in the back of his back of his hand this little panel back here on the back of his hand is difficult I'm gonna have a hard time getting in there um let's see if I can get in there yeah as I'm getting older it's becoming more and more difficult to do this without my magnifying and keeping it close but we're gonna do it the other things that we definitely want to watch out for as well are the eyes so on these guys you've got the eyes and you might want to use a thinner brush in this I'm using a big brush but it's got a pretty good
tip let's see if we can't get in there get my head out of there but um you gotta get in there and because of the capillary action you can sort of get in there and fill it up and get in there and sort of fill up that area and if you do get some on the ridge we're gonna fix that in like the next step so it's okay they also have this headband across the top I am honestly not gonna even attempt doing that but this because I again can't completely see here super well without my magnifying glass and being real close and dumb-looking which is hard to show you folks but you basically go through and use the black Templar contrast color on all the black parts you can catch down there in between the legs if you want to some of the poses have more of a gap there than others you catch the but I generally don't do the back of the legs because you almost never see it and you just get all those parts together and then what you end up with is tada you get yourself a painted stormtrooper he's got all of the black parts black there's his gloves there's that elbow you've got a gap back there by the shoulder in this particular pose there's a whole lot of butt showing back here by this guy and that's pretty much about it actually I missed on this when I pre painted it I miss the back of his little foot here so we're gonna get in there and touch that up okay there's also a hair on him so what's the next step once you've got the black painted black and all the white painted white you want to go back now and do some highlighting and again in this situation what I'm going to do
with the highlighting is use the white that I used for dry brushing before I've still got it here on this bum palette in this situation you could use a wet palette if you wanted to because this might be almost a little dry it's not yet so that's good and you do want your highlights sometimes to be a little bit gummy or it depends on the person some people don't so what I do for highlight in the situation is I catch the tips of the knees right along here and then this knee this weird kind of bumpy knee that they have always on their right knee I always make sure to kind of highlight each of the kind of raised bits there there they're there and the Matney and then there's on each of the shoulders they have this kind of Ridge on their armor you can see it right there and I like to also highlight that and again what you're doing in this situation this is my recycled plastic pallet what usually you're doing is you're actually running it along the side and that's really important because what you do is you just sort of instead of trying to use the tip you're running the brush along the side to get that highlight and that helps to get that part that raised part to stand out from hopefully the Apothecary white kind of grayish stuff that should be right on each side of it if you did it right so we just catch
those and catch that now I also have a tendency to go through and do a little bit of a highlight right along what would be the nose if stormtroopers had noses would be right along here actually and I have a tendency also to take a little bit of white and catch it right along the bottom of these things right below their lenses especially if I got any black paint any of the contrast paint on that part then I can go back and clean it up it's real simple and then if I really sloppy this part up across here then I can also go through and there's throw a little bit of a highlight right along the front because you always want to have it seems like more light on their faces than you would on their non faces you know like if you you you light the model with paint and so when you have more light on the face and less in the back it just kind of draws the eye to the face and that kind of stuff so yeah you go just touch those parts up you can touch up more parts if you want to as far as like maybe the ridges along you know like this you know you could even do a little bit right there it depends you know sometimes you don't want to do highlights down underneath like the belt here is very bumpy underneath there you can see that belt well I wouldn't go through a highlight that area because it's kind of down in the shadow but then once that's done you paint up your base however you want to do it I like to do it like with a desert theme and you're done like
literally it's that many steps you build it you put your basing material on there your primal white you apothecary gray or pathi carry white everything let that dry dry brush white to bring up the white again paint the black parts black with black Templar then go in and touch up and do some highlights with some white paint the same stuff that you used in the dry brush and then finish your vases and that's literally it you've got yourself a finished you know stormtrooper and if you're smart you would be doing all seven at a time that are in the box so you're just doing like when you're done doing this step on that guy and then you go through all the seven guys by the time you get done with the last guy the first guy should hopefully be dry or at least pretty close depends on what you're doing the Apothecary white might take a bit longer to dry especially put it on extra heavy but that's pretty much all you got to do to get yourself a bunch of painted stormtroopers very quickly and so far I've done not including this squad four squads so that's 28 guys I've also gone through and painted their left shoulder a different colour to differentiate between the squads but you don't have to do that if you don't want to some people paint the bases you know different colors like the rim that kind of stuff this desert kind of basing that I did here this was a simple kind of a desert yellow color I think it was a Vallejo desert yellow color and then I threw down a sepia wash and then I went back in dry brushed a bit with the desert yellow and then I dry brushed a little bit more just in the highest areas with the bleach bone and then paint the rims and you're done so the contrast colors
from Games Workshop work spectacularly well on these stormtroopers I'm probably gonna be figuring out how to use them on rebels next because I'm painting a whole bunch of rebels soon probably not gonna be as many squads of like just straight rebels as I have just squads of straight stormtroopers but still there's a lot of good colors in the contrast range that will work well a lot of browns and things like that that work great for the rebels so get yourself some apothecary white and some black Templar and get yourself some white paint that you like for dry brushing and for highlights and figure out how you want to do your bases maybe you want to have on a spaceship maybe you want to have him in the jungle whatever you want to do get that stuff together crank through these guys really quickly because that the contrast colors can really really speed things up