Antiques - Official How to Play. Complete, Clear, Concise Board Game Tutorial
Games in This Video
1 game is featured in this video — it unlocks as you watch.
Transcript
Curate the most prestigious artwork for your gallery. But wait, you're not the only one with the same great idea. Compete with others in antiques.
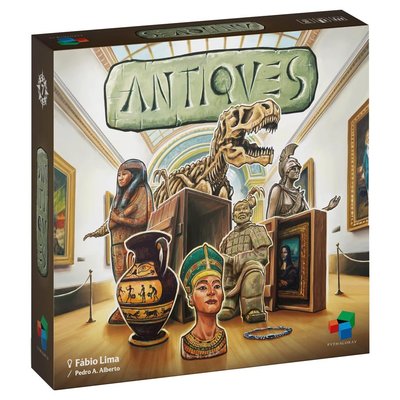
And today we'll be teaching you how to play Antiques game designed by Fabio Lima and published by Pythagoras.
And hi everyone, it's Stella
and Tarant. Welcome to Mean University.
And hey, if you enjoy this video after watching, like, subscribe, and comments. You know what to do. Right now, let's get to the classroom. In Antiques, players are curators in the fast-paced world of art and antiquities, trying to make their names internationally as the greatest curators. Players will fight to gain the best pieces from the sales halls. Use them to assemble the most popular collections and hope to display them in the best museums and galleries. Players will gain points for the collections they display and the private and public goals they meet while managing their art efficiently enough not to let too much sit dusty in their vaults. Whoever can score the most points from their curations will be the winner.
To set up the central area, you'll need these boards and shuffle decks. These are the museum board and museum cards. Collections board and collections cards, the auction board and auction cards. And note, this deck combines cards with five differently colored backs and the goal cards. Fill the museum and collections boards with cards of their types. Deal out three goal cards face up. These will be public goals, objectives which everyone can chase to gain points. And flip a single auction card face up like so. Prepare the art pieces. There are five standard types: paintings, bones, jewelry, artifacts, and ceramics, as well as relic boxes, which count as wild and can be substituted for any other type of art during the game.
Mix all pieces up in the bag and randomly add 16 of them to the auction board. Find the one and two point museum bonuses and make supplies above the second last and last museum cards respectively. Give everyone a playerboard and choose whether all players will use the symmetrical aside or the B sides which come with unique player powers. Deal each player two cards face down from the goals deck. Look at your cards and choose one to keep face down, returning the other to the bottom of the deck. Randomly choose a first player who takes this card. Neither the first nor second players gain any bonus resources. If there's a third player, they draw a random art piece from the bag and place it in warehouse 3. And if there's a fourth player, they also take another art piece and place it in warehouse 2.
You cannot gain the wild relic box as one of these starting bonuses. So if you draw one, return it and draw a replacement. You're now ready to play. Antiques is played in turns, starting from the first player and going clockwise round and round the table until the end of the game is reached. On your turn, you'll choose one of three possible actions to resolve, and each corresponds to a different one of the central boards. Your options are auction, collections, or museums. Your first option is auction, and this is how you gain art pieces from the auction board. Now, to be clear up front, this is only an auction in the thematic sense. your curator has gone to an auction and is using that as the location to purchase art. It does not play out like an auction within the game. That is, you're not going to be placing bids and other players can't come in on your turn to try to purchase the art that you want.
When it's your turn and you choose this option, you will have full uninterrupted access to the board to claim art pieces according to the rules. You resolve an auction turn in three steps. Choose art, store them in a warehouse, and resolve the warehouse bonus. First, you must choose art. And there are two ways to do this. The first is to choose a single row or column on the auction board. And you must take all art in that row or column with the exception that you can claim at most one relic box. So, for example, I could choose to take this column and I would take these four art pieces. Pieces don't get replenished. So, there may be empty spaces in the row or column you chose.
For example, the next player choosing the bottom row would gain these three pieces. If you choose a row or column with multiple relic boxes, you choose what to leave behind. So, if I chose this column, I would definitely gain this artifact. Before choosing which one relic box to take. Relic boxes are the only things you may leave behind. You must otherwise take everything from the row or column you chose. Your other option, if you don't like the rows or columns on offer, is to refill and take two. Start by refilling all empty spaces randomly from the bag. Then take any two pieces from the board, again limited to a maximum of one relic box.
If the bag is ever empty when refilling, then reshuffle all discarded art back into the bag. Step two of an auction turn is to store all of your new art in a single one of your warehouses. Choose warehouse one, two, or three, and place all the art there. You cannot split them. Each warehouse has a maximum capacity 6, 7 or 8. And if you exceed that capacity, then from among everything now in that warehouse, you must move any overflow to your vault. Your vault has unlimited capacity, but generally speaking, it's bad for your art to end up here. It represents inefficiencies. Art and artifacts that you've purchased but have no room to store or display.
As punishment for this inefficiency, you will lose points for art in your vault at game's end. Throughout the game of antiques, any time you're inefficient with your actions and your art, you'll probably end up with more art pieces in your vault. And so, be careful when you're getting art at auctions or taking some of your other actions. It's not about always getting the most stuff you can since it's only through getting the right things at the right times that you'll keep your vault empty. The final step of an auction turn is to activate the bonus action for whichever warehouse you chose to stash your new art in. Warehouse number one has no bonus action. So, if you choose it, your turn is over.
If you choose warehouse 2, then you can take one of these two options. The first is that you can free one art piece from your vault. Take it from the vault and choose any warehouse to put it in without activating its bonus. The other option is to gain one additional piece of art. Look at the faceown card below the auction board. This is the type of art you must take. Take one from the discard pile if available. And if there aren't any available, look through the bag and find the one that matches. Add your new art piece to any warehouse without resolving its ability and flip to reveal the next card in the deck.
Finally, if you placed your hall of auction art in warehouse 3, then you get to take an auction bonus action, which is to choose and resolve one of the three icons on the face up auction card. We need to learn some more before I can explain what all of these are. So, I'll come back to these effects later, but in each case, once you're done, flip the top card open to change the icons. Your second option is collections. And this is how you turn the art pieces in your warehouse into displayed collections from the collections board. You'll resolve this in three steps. First, choosing and emptying a warehouse. Secondly, assigning that art to the exhibition rooms and then moving unexhibited art to your vault.
The first step is to choose and empty a warehouse. You must take all the art out of your chosen warehouse and then move it step by step to the right of your board, dropping one art piece in each warehouse you cross. This does not include your vault. So, if I chose warehouse one, I simply take all of its art and move it off my board. However, if I chose warehouse 3, I would have to drop one of its art pieces in warehouse 2, one of its pieces in warehouse one, and then only what's left moves off my board. Let's suppose here I took all of this, dropped off the painting, dropped off one jewelry, and then these five will go into the temporary area called your assembly area.
Standard capacity limits apply. Here, I would have to put one overflow art into my vault. You'll now take the art from your assembly area and work out which of the collections cards you're going to assign each art piece to. You can choose up to as many of these collections cards as you want, and you can treat relic boxes as wild. Once you finished, collect any cards that you've completed and place them face up to the right of your playerboard. This area is called your exhibition rooms, and you can hold at most nine cards at a time in these rooms. Move all art that you spent to the discard pile. Move any art that you cleared from your warehouse, but could not put to a collection into your vault.
And finally, replenish empty spaces on the collections board from the top of the deck, reshuffling the discard pile if necessary. You can store collections in your exhibition rooms up to your limit of nine indefinitely if you wish, and they can be worth 0, 1, or three points each if they're still there at game's end. However, you'll often be able to gain more points by spending them on the third action, which is to loan and display your collections in museums and galleries. When you take this action, you may acquire any number of cards from this market by spending and discarding collections cards whose art icons match or exceed the museum's requirements.
So discarding these would give me exactly the icons I needed to claim the Porto Museum. While by choosing to overpay, I could spend these cards to claim the Amsterdam Museum. Museums will be worth their printed points and if you take one of the last two, also gain a ticket for its points. Within the action, you can also display in international galleries. This involves taking the top faceown card from the deck and always costs two of one artwork type and one of another. The only thing you can't do in this action is split a collection between different museums or galleries. This is enough collections to meet either of these museums with an overpayment, but cannot be used to claim both at once.
Discard any collections you spent from the right of your board and add any museums and galleries you've gained plus their tickets to the left. This action does not touch your art pieces or warehouses and never puts anything in your vault. To finish your turn, if there is still a card in the two-point slot, discard it and then slide all cards and replenish from the top of the deck. reshuffle this discard pile if the deck runs out. And so those are your three options, auction, collections, or museums. And you'll choose one and resolve it in full on your turn. Now, what we need to go back and discuss are the bonus actions available when you place in warehouse 3 after an auction.
With this or this action, you can take the collections or museums actions in full, as if that had been your choice for the turn. It's almost as if you take two turns in a row. First, the auction and then either the collections or museum. Instead, with the right hand sides of these actions, you may reserve one card from the appropriate market. Again, the collections or the museums. Pick the face up card from the relevant board, replenishing it, and store it below your player board. On a future collections or museum's action, you can fulfill the cards below your board, as well as the ones face up in the central area. You can have at most three total cards in reserve between the two types at any one time.
With this action, take the tile of your choice from the auction board. it cannot be a relic box and add it to the warehouse of your choice without activating the bonus. With this action, you get to draw three tiles from the bag. Look at them and then choose one to keep, putting it in any warehouse without activating the bonus and then add one to the auction board and discard the other. With this action, rearrange your warehouses. You can take everything out of your warehouses but not your vault and put them back in any configuration you want which respects the warehouse capacities. Finally, with this action, gain a new private goal. Goal cards are an important part of scoring. There is a single deck of goal cards, and if you'll recall, three were placed face up as public goals during setup, representing objectives which all players could chase to earn points. You also drew two and kept one private goal, providing a secret means by which only you may score.
This warehouse action lets you gain a new private goal. Draw two cards from the deck. Look at those and choose the one you wish to keep, adding it secretly to your hand and returning the other to the bottom of the deck. You may hold at most three private goals. And if you ever gain a fourth, choose any one among your four to discard down to three. The game end is triggered when any one player has at least as many museum cards as the trigger shown here. So, three museums in a four-player game, four in a three-player game, or five in a two-player game. For end game trigger purposes, a faceown international gallery only counts as half a museum.
So, this would not trigger the end in a four-player game, but this would continue playing until all players have had the same number of turns, and then play one more complete round. Now, tally up your final scores. Add up all the points on your museum and gallery cards, as well as any museum bonus tickets you claimed. Score for any points scoring collection cards you still have in your exhibition rooms. Lose two points for each art piece in your vault. All players score the three public goals. Some of these will give you points each time you meet a certain objective. here. For example, one point for each card still in your exhibition rooms or three points for each of your museums where the national flag contains the color black. While some are competitive objectives here, the player or players with the most ceramics, including collections, museums, and art pieces, would score five points. If it's tied, all tied players score the points.
Finally, reveal your private goals and score them in the same way. The only change being that for a majority type objective, if you aren't the one who holds the majority, then nobody scores the points. The player with the highest score wins. If tied, the tiebreers are in order. most museum cards, then most points from the three public goals, then fewest pieces in the vault, and finally fewest total pieces in the warehouse. If still tied, victory is shared.
Thanks for watching, and if you like this video, maybe you'd like to watch this next one. Have a great day. Bye.