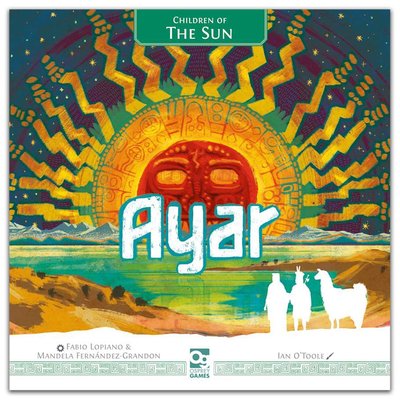
Ayar: Children of the Sun | Solo Board Game Tutorial and Playthrough (Review copy provided)
Games in This Video
1 game is featured in this video — it unlocks as you watch.
Transcript
Hello everybody. Welcome to Totally Table. My name is Shaggy and today I'm doing a full solo playthrough of Ayar, Children of the Sun. We will be retelling the origin myth of the Inca Empire in this interactive Euro game for one to four players. Now, I went ahead and I got everything set up for a solo game. You want to set up as if you were playing a two-player game. I'll be playing the purple pieces over here. And for the bot, we've simply flipped over one of the player boards. As you can see, their board is set up very different than ours. There are four player boards, and each one has a different difficulty on the back. This is difficulty level two out of four. I accidentally used the easy board for my player pieces, so we're going to have to go with level two. Now, that doesn't sound very hard, but I've been getting crushed by this guy. So, my goal today is not necessarily to win, but just not to be embarrassed. These are their five action tiles here. You just want to shuffle those up. And you want to place the four colored step markers minus this gold wild marker into the black bag.
Their golden wild marker can go back in the box. You won't be needing it. Other than that, everything is set up pretty normally. We've shuffled up the Ry tiles, and I think we should just jump on in and get started. Don't worry if you don't know how to play because I'm going to teach the rules as we go, just like I always do. Actually, there's one bit of setup we still need to do. This only happens at the very beginning of the game. We're going to get to take one of our markers here. They're referred to as Tambos in the game, and we get to place one of them on one of these four starting action locations. It's hard to know where to begin, but I'm just going to take this one right here. And there's basically four actions that we're going to be taking during the game, and they're right here. This is textiles or I believe it's called weaving. We have the boat action or reed bundling. We have farming there.
It's technically called terrace farming. And then we have pottery. In order to decide which action to take, we really want to pay attention to these rhyme tiles. I'll get into this a little bit more, but in this game, we're going to be scoring two different types of points. We're going to have sun points and moon points. These rhyme tiles are one of the main ways that we're going to score sun points. And those are very difficult to get. You want to get those sun points as early as possible. Now, these tiles trigger when our IR figures as they're moving down these lines once they cross this number here. So, for this tile, it's the eight. And that one over there is also for the eight for the purple and the brown. And then you can see these two tiles are for the 214s.
So they always kind of relate to two of the paths, but we want to really pay attention to the first two. So we have this one here, which will score for a pottery action, and that one there, which is going to score for the weaving action. So I think I'm going to go ahead and start with pottery. Now, again, this is kind of a first action as part of setup. And for this one, we only get a one power action. I'll explain how that works in a second, but it means that we can only take that bottommost pot. And pots go down here on our board. And then we just slide everything down and refill.
Now, our AI opponent's going to do the same thing. And they're actually going to do exactly what we did. They're going to look at both of those tiles and they want to pick one of those two actions. Since we took one of them, they're going to take the other one, weaving. Again, it's only a level one, which means they have to take a level one tile, that bottommost weaving tile. And then they just put it on their board here. They don't really care about the orientation or anything. When we put our weaving here, we're going to try to be making matches and things, but they don't have to worry about that. Okay, there we go. Now setup is completely done and we get to take our first action cuz we have the first player marker. On our turn, we're going to take one of our five step markers and we're going to place them here on one of these eight spots around our grid. I'm interested in doing a little bit of weaving. And so I think I probably want to do either the purple. Yeah, let's go with the purple.
So now I can place it in one of these locations. Let's go right here. These two arrows on that spot means that this colored IR is going to go that many spaces. In this case, two. So the purple IR goes from numbered space to numbered space. And now I must take a tombbo from that row. I can take any one that I want. I think I'll take that one. And then I can place it on one of the action spots behind that IR. In this case, I only have two options. I can go to the farming spot or I can go to the weaving spot. I'm going to choose the weaving spot. That means I take a weaving action and the power of that action is equal to the number of these power spots that are shown in the row that I chose or the column.
So right here we got two power spots. That means I have a two powered weaving action. We'll go up to those stacks of weaving tiles of those textiles. And you can see the bottom one costs one power. The second one is two, then three, then four. Unfortunately, you can only take from each stack once. So, I can't take two level one tiles. If I had three power, I could split up and do like a one and a two or a three. But in this case, I'm just going to take a two. And now I can place it on my board wherever I want. They just have to, you know, cover two of these squares. I'm going to go like that because what our goal is is to two things. To create full suns by puzzling these tiles together and also to complete columns for moon points.
Each action is going to work like that where depending on what you do, you're going to be scoring both sun and moon points. And you'll see how we score those here coming up very shortly. But there you go. That's my turn. I would now do some end of turn checks. First, I would check to see if I've completed a temple. And completing a temple means having one of these quadrants completely emptied. So, you can see that little temple tile there. If that was the case, then I would get to place one of my temples down over here on the temple track. I'll explain that when it happens, but I haven't done that yet. The next thing I would check for is if I had gained any personal bonuses, and that's what happens when you completely clear out either a full row or a full column. And you can see the bonuses are along the side there. And again, I'll explain those when it happens. The last thing we would check for is if any of the AR had reached a rhyme tile. If so, then we would score that tile. But that hasn't happened either. So that's it.
That's the end of my turn. We now go over to the AI. Their turn is relatively simple. You just draw the top tile from their shuffled action deck here. And then you draw a random step token.
There's one arrow. So, this colored IR is going to move one space, and then they're going to decide what action to take. Usually, that's very simple. All you need to do is go down their line and see what the next rhyme scoring is going to be. If we do that, we can see right there, and that is the symbol for weaving. And so, first and foremost, that's the action that they'd like to take. And it looks like one just opened up. So, they will get to take it. If that action wasn't available, then you continue on and go to the next rhyme scoring and then take that action. And you just keep doing that. And then if there still wasn't an option, then there's a few more things that you have to go through. But 95% of the time, you'll be able to choose their action just based on the rhymy tiles. So, how powerful is their action? Well, we look right here to see that the X means what round number it is. So, right now we're in round one.
and they have a plus one. So, it's going to be 1 plus one. Their power is two. And they're just going to do the same thing that we did. They're going to take a level two tile. Now, if they could, they want to take more tiles. So, like if they had three power, then they would take a one and a two. And if they had four power, then they'd take a one and a three. But you can't take two ones, so they're just going to take a two. And that's it. That's their action. It comes back to us. And we're just going to keep going back and forth like that until we've placed all of our step markers and they've played all of their tiles. Yeah, I think I'm going to take this step marker and put it right here. That's only going to move them one space, but that's fine because I want to take that pottery action.
Now, I could take any of these. I'm gonna grab this one and go here. Now, that's only going to be a level one one power pottery action. So, I have to take that bottom pot and then we're going to put it right there.
Now, the way pottery works is the more of them you have, the more sun points you're going to be getting. You can see the sun's on top. And again, I'll explain how you get sun points here in just a bit. But we're also trying to get sets of the same color of pots in order to get moon points. You can see a pair is worth four points. Having three of the same color is nine. And four or more is 16. So, my goal is to grab some of those purple pots that are out there right now. I'm hoping that the AI won't take them. The other reason I played there is because now I'm setting up a nice column here where if I play something here, I'll get three power and I really want to take a three power weaving action. So, that's my plan at the moment.
Okay, AI gets to go. draw a random color. So, the indigo gets to go three steps. The power is going to be just whatever the round number is. So, one power. And if you look around here, they want to do a pottery action, but there isn't one available. So, we're just going to continue on. Here's the next one that they go to, and that is the read bundling, or I'll probably just call it the ship action. There's actually two locations for that action. They'll always take the one closest to the IR.
And this one is simple. They have one power, so they get to move their ship one space. Now, they have their ship on their own little board here rather than on the main board where our ship is. When they get into these little areas, something will happen. But I'll show that off when it happens. Easy enough. Back to us. I should have placed the solo opponent's first temple right now. But don't worry, I'm going to catch this mistake in like 8 minutes and it won't affect the game. You know, a level three pottery action wouldn't be the worst thing in the world. Yeah, cuz the one two three that weaving action will not be available. So, I can't really get to a weaving action. The only weaving action that's available is right there. So, I could use my gold wild and move this one further on and then take that weaving action. Or I could just go pottery.
Yeah, I'm going to go like this. I'm just going to come right there and we'll move two. I'll take that one and I will do that pottery action. It'll be a two power. So there we go. We got our nice pair.
And now when we go to the end of turn check, we actually have something to check because we have created a temple. All four sides are open. So, we get to take one of our temples here. Pick any one that we want. Each one refers to one of the actions. And I kind of feel like I'm going pretty hard on pottery. Yeah. So, let's do our pottery temple. And you place it in the leftmost column of the active IR. That will score moon points for us later in the game. again. You'll you'll see that when it happens. But there we go. That's the end of my turn.
Moving two steps. One, two. Ah. And they want to do pottery. And that opened up a pottery spot. That's a shame. I was hoping to deny them pottery actions, but it looks like they got one. But it's only going to be a level one. I don't mind that too much cuz I didn't really want that pot anyway.
As you can see down here, they're going to score Sun and Moon points as they earn more and more pots. The bot doesn't earn Sun and Moon points exactly the same way that we do. It's slightly different. Okay, we're getting close to the end of the round here. We have two more. We have our wild and I have this great spot here I want to place somebody on to get three actions. And I was hoping to get a weaving action and get three power. Yeah, I think that's what we want to do. So, we're going to go right there. means this teal guy will get to move three spaces. I'll take this one.
And that is opening up that weaving spot. Three power. I'm actually going to take a level three. And I'm going to put it right there because you can see that will form a nice sun right there. Beautiful. That worked out great. Oops.
And then we know what this last one is. This is going to be the purple guy. Moving to wants to take a weaving action, but there isn't one available. So, we're going to continue down. And then it looks like right there a boat action. It looks like I forgot to place the solo opponent's white tambbo on the shipping action of the purple IR. But don't worry, this won't affect the game in any way. It's going to be two power. So, they're going to get to move their boat one, two, and now they've entered this little area. So, that means they're going to place out this hut onto the board. And the place where they're going to put it is where their boat is reached. It only reached that four location, four moons.
And that also shows the four moons. So, they're going to place it right there. If they had gotten one space further or even more, they would have placed it on the six moon location. And you can see that uncovers a sun for them. So, when we score, they might get sun points. And that's also going to give them moon points based on where their hut is. There's actually there's a couple of things I could do, isn't there? I have my wild. So, I can make this any color I want. And this is important because whichever one of these IR are furthest behind at the end of this round, they're going to come off the board and they're going to no longer go down their tracks. Okay. I feel like I want to go here.
I'm going to make this a green. So, the green is going to go two. One, two. I'll take this one. And I'm going to do pottery. Got a power of two. So, I'll take that two. And if you look on that pottery, it shows that symbol. That's a Verraocha symbol. That means we get one of these Verracha tiles. And we can place it on our board. And these are going to reward us with some special abilities. I'm going to place it here. Now, you can see on the side there, there are three marks. That means that I need three of these tokens in order to unlock this special ability. And what this one will let me do is anytime that I earn sun points, I will get an additional sun point. So, I still need two more in order to unlock that. As you can see, we reached this rhyme tile. So, we're going to score it. And we both get to do that. As it shows here, we're going to be getting sun points for our pottery. So, we're going to look down here and see how many sun points we have. And right now, we have one, two, three. We have pottery up to three suns.
That means we go here to our little sun dial and we add three to it. And then down here it says that if you have at least one son, then you get a llama token. We have that. So, we get to grab a llama token. Now, these llama tokens are going to help us get extra points at the end of the game. We really want to make sure we get as many of those as we possibly can. So, that's great. Now, here's the best part. The AI, they have no sun points. They just have this one pot. They need at least two pots in order to get any sun points. So, they get nothing and they also don't get the llama. Now, when we score this, we flip it over.
And so, now it's possible for, you know, this other guy to come here and score it again, but it's going to be a little bit more difficult to get llamas. There we go. I think that was a successful turn. Now, here the AI's bag is empty. and they still have one more tile. So, what we're going to do is we're going to take these and put them back into the bag.
Oh, and I just realized I made a mistake before we do this back here in round two. That right there, that means that the AI builds one of their temples. So, I'm glad we caught that when we did. It's not too late to fix that. I'm going to go back into the video and see exactly where that should have gone and fix that. So, just give me a second. Okay, I went back and checked. They had activated this IR. Now, they're going to pick the temple where they have the most moon points. So, at that moment, they hadn't done this yet. They had the most moon points right here in weaving. Right. Right now, they have four moon points there. So, we're going to take their weaving temple and we're going to put it right there.
Woo! Okay, disaster averted. Now, we can take their action. And we've put all of their step markers back in here. So you never know on this last action which one is going to get activated. Ooh, okay. Only moving one, but lots of power. One plus two, three power. They can't do weaving. They want to do weaving. They can't do weaving. Okay, it's going to be boat again. Once again, I forgot to place the solo opponent's white Tombbo on the shipping action. this time of the brown IR. We go one, two, three and they are activating this area.
That's the eight moon spot that goes right there. And if you look at that mark right there, that means that they're going to take a Verraucha token. It says that when they have to choose between two that they're going to pick the area with the lowest number on their highest valued adjacent island and those are known as islands. So still seems like both of those are even. So I'm not sure how to pick between them to be honest. But this one has lower value. So I'm going to take the rightmost one. I could be wrong about that. I'm not exactly sure how to pick between those two. Now, anytime that they take one of these tokens, instead they get a llama.
And there we go. That is the end of the day phase of the first round. We now go into the night phase where we actually get to score some of the stuff we've been doing. We can flip our handy dandy player aid over and it shows that the first thing that happens is one of the four IR are going to retire. And again, it's going to be the one that's on the lowest number. So here we have number eight, five, five, and five. So all of these are on five. This guy's safe. He's on eight. So how do we pick between the ties? Well, we go over here to the temple. These are the female IR and these are the male. And so we've set up these female randomly. And in this case, whichever one is lowest is going to be the one that retires. So that's going to be that purple guy.
Remove him from the board and put him over there. Now, whoever did the most farming, whoever farmed the most of these cubes, which are maze, whoever farmed the most, and you'll see that action here in a little bit, neither of us farmed, but whoever farmed the most would get this Vera coach token. Since neither of us farmed, nobody gets it. Now, we would score temples, but we only score the temples of the retired IR. So, she would go down going from temple to temple until she reaches her partner. We didn't have any temples there, so none of them scored. We now take our purple step marker, and we're going to score moon points for one of the four actions. Now, this is going to happen every single round. So, at this point, we don't necessarily want to score, you know, the one that's going to give us the most moon points. Maybe we do, but we may want to save that till later so we can score more moon points. I think I'm going to play that game. I don't think I'm going to be doing much sailing or read bundling. So, I'm going to put mine there and score no moon points. The AI also does this, but they're actually going to score whichever is giving them the most moon points. For the shipping, you score the moon points for like your
highest valued island right now. For them, that would be eight. For their weaving, it's just down here, however many of these tiles they have. And right now, they have four moon points. They have zero in pottery and then zero in farming. So, it looks like for them, it's also shipping.
and they get to immediately score those eight moon points. You can see we have two markers there, one for our sun and one for our moon. Now it's dawn and we get to score our sun points. And the way that works is we just look at our sun dial here. Right now it's on three for us. So we get three sun points.
And the cool thing is that doesn't reduce. That just keeps going up throughout the game. So essentially, we're going to be scoring those three points each round. That's why you want to get as many sun points as you can as early as you can because the earlier you get them, the more valuable they are. Now, for the bot, before they score their sun points, they actually get to take a bonus. So, they're basically going to look at which of their actions has the most sun points, and they're going to take that bonus. At the moment, they have one sun here in weaving, but they have two sons in the shipping, the reed bundling. I'm going to keep calling it shipping.
So, we cover that up. They get their two sons and now they score their dial, which will be two. Now, like I said earlier, we're going to be scoring whichever one of our markers is lowest at the end of the game. So, you want to try to keep your suns and your moons as even as possible. Very tricky because they score in very different ways. And from what I've seen so far, you really want to try to hit those sun points early. I was kind of hoping to do a little bit more than I did, but we'll see. I think we're going to have a lot of opportunity to score some points here in a second. Now, we need to do some final round cleanup here for the bot. We take their tile that has a number one at the bottom and we get rid of that.
And then we shuffle up the rest of their tiles. The remaining step markers go into the bag for us. We don't clean up our step markers. Instead, we stand them up.
They are now blocking these spaces until they move off of them. If anyone's played one of my favorite games, Conbon EV, then this will look a little bit familiar. We now need to pass the first player marker. And there we go. That's the end of the round. We're on to round two. And we're going to be playing four rounds. That's it. The AI is first. Oh no. This is their big movement one.
No. I was really hoping they wouldn't choose that guy. That's going to be one, two, three. Oh, shoot. Wants to do a pottery action. Man, that really screwed me up. That was going to be my move. It's a level two, though, cuz we're now in round two. That could have been worse.
We now get to score this Ry tile. I still have three sons for pottery. So that's going to bring us up to six. They have one. And as you can see here, in order to get a llama, you need to have at least three sons, which we did. So we get a llama.
And I'm not going to make this mistake again. Here we go. This is the temple. So, they're going to place another temple. They already placed their weaving one. So, for pottery, they have four moons. For the reed bundling, they have eight. So, they're going to do the reed bundling, and it's going to be on that same IR cuz that's the active one. That's not good. That's not good. Now that they've both done this, too, we can remove this. This can't be scored again. That's making pottery a little less interesting. Right now, the next pottery is up here. We have weaving. And then we have farming. And this guy's heading towards shipping. I'd really like this guy to be the next one to leave. So, I'm going to try not to move him very much at all.
And let's focus on really moving these two. One, two, three. Okay, I'm gonna do this. This ah, this might work. This might work. I'm going to move this person here. You then lay them down to show that they've been used. When they're stood up, they're available. When they're laying down, they're not. That's going to move two spaces. One, two. I'm going to take that. And we're going to go weaving. No, sorry. I'm going to go here. Not there. Here. I'm going to take the same That's the same two movement. I'm going to take that same house, but that's going to give me three power.
I'll take this for two. And then I'll take this for one.
Okay, that's it for me. Only moving one. Oh, but they're going to get the weaving. Oh
boy, they are just taking all of my moves. This is crazy. So obviously they want the weaving. It's going to be uh two plus two. They're going to have four. So like I said, they want to take more. So they're going to take a one and a three. Ah, that was annoying. I'm not sure if this is the right thing to do. I'm going to use my wild and go here. I'm going use them as the teal. So that's going to be three steps. This weaving four power going to take a three
like that. No, I think I'll just go ahead and go like that. And then I'll do a one just like that. So, in the end, that's one, two, three, four suns. But not just that, two completed rows. So, that's 10 moon points. I think that's good. Now, I've also completed this row and the reward is a llama. That's three llamas. Okay, what's next? Oh no, I I just saw what I did.
This is going to backfire. So, one space and we've reached this and that is farming of which I've done none. So that's what the AI is going to want to do. They do the closest one. They're going to do three farming. And so the way that works is for each power, you get to plant one of the maze. You just plant it right there. And that's unfortunate timing because boom, they have one sun.
That means they get a llama. I have zero. So, I get nothing. That was probably a mistake, but it could have hurt us worse. It's okay. I think I now want to take this guy. Move him there. That's going to be three movement.
I'll take that. And I'm gonna have two power. Just going to do a tiny bit of farming. Or am I? No, I'm going to go pottery. Only have two power, but now I have a set of three. That's nine points. Nine moon points, I should specify. And then we pass the rhyme. That is one for weaving. So look at this. One, two, three, four. Oh, now technically I should resolve this first. This is my bonus. And I also did a temple. So we have a lot to resolve here. First, let's do the temple. I freed up this temple space. So what temple do I want?
probably weaving. Now we resolve this. Unfortunately, I won't be getting anything because that is a um bonus. I would get a bonus sun scoring for my terrace farming of which I've done none. But this is another way in which you can score sun points or add sun points to your dial. And once you've resolved that, you just put this little token here to cover it up to show that you've resolved that. Okay. And now we get to uh resolve that tile. So we have four suns. That's going to get us to 10 on the dial. That's great. And we had at least one. So we get a llama. Just two for the AI.
Bringing them to six and a llama. Okay, I think that's all for me. Last action for the AI. And I really really hope that this is the right color. That is not the right color. Oh, the AI has not been cooperating. Moving to and they want to do some read bundling.
going to be 2 plus 1 3 that goes on the 12 location. Man, we're going to get owned on this reed bundling because we haven't done any of it. I've only been doing pottery and weaving. Well, luckily there is a shipping action way down here. So maybe I can do that, but it's not going to be very valuable. I think I'd rather do pottery. And I can get away with just one. So if I went here,
moves one. Then I take that. We'll go pottery. That's just one power. Now I have four suns and I have two sets of three. That's 18 moon points. All right. Well, that's what I did. I'm done. That's the end of the day phase. And I was hoping that this guy would go away, but unfortunately this is the furthest behind. The AI did the most farming, so they're going to get this, which turns into a llama. You then just throw all those away.
And now we're going to be scoring some moon points. So, this comes to this tile. We're getting six moon points plus the moon points of our pottery. two sets of three each. That's 18 plus six, 24 moon points. We then go here to my other temple. This is weaving. So, we fill these two columns. So, that's 10 plus that three on top. 13 more. 37.
And then those can be discarded. We now can put our step marker out here. And I'm going to be doing more pottery. Maybe doing more weaving. I'm not sure I'm going to be doing any more food. I think I'm going to take the hit again and just do food and not get anything. Save my two strong scores till the end so I can get them up a little bit more. Got to be weaving for the AI. That's going to be 12 points. Puts them up to 20. And now for sun, I have 10. That gets me to 13. Yep. And with this weaving two suns, that gets them to eight suns and 10. So, we're currently in the lead with 13 points to the AI's 10, but that's going to change here very soon.
We're going to stand up our guys now. Round two goes away and we shuffle.
We become first player. And now it's time for round three. I think at this point I got to go all in on pottery and weaving. I'm in too deep at this point. I can't stop now. So I have a plan. We're going to take this guy. Put him right there. That's two moves. One, two. Here. pottery. That's giving me four power. We'll go three and one. One thing I haven't mentioned is that for four power, you can just take the top tile from the stack and put it face down as a wild color. But here, look at this. We get a token. We really haven't gotten a lot of these, but I'm going to keep going here. Hopefully we can get that.
And then boom. Look at this. We're going to score suns for our weaving. One, two, three, four. And there we go. That's it. Moving
one wants to do read bundling. Has to go all the way back here. We're in round three plus two. So that's five. One, two, three, four, five. Goes through all three of these. So, this is a little confusing, but we're basically just going to look at the last spot in each of these two spaces and put them out. That's the 20. This goes on the 24. They also get this, which will be converted to a llama.
No, I forget. That's not how it works. It's the lowest one. So, it'll be that one. And then here, this one's going to go 28. And then they get that token, which will be a llama. Okay. So, they've maxed out that. That is not great. That's going to be bad news for us, especially since we haven't done any of it. And this one's about to score right there. Let's not worry about that yet. Instead, I want to go here. We'll make this wild. The teal. So, the teal's going to move three more spaces.
Gets to that spot. We're going to score pottery. I think I'm taking this one. Now, I could do pottery, but I've maxed out my sons on pottery. I think it would still be nice though. So yeah, let's go ahead and hit pottery again. That's going to be three power.
And we'll just go here and max it out. That's going to give us one of those tokens. And now that we have three tokens on here, we can flip this to show that it's activated. So now anytime we gain suns, we get an extra sun. And to be clear, that's when we're adding suns to our dial here. Excellent. I think that's it. Oh no, now we score this tile. So yes indeed, we have six suns in our pottery. So that gets us up to 20 on the dial. and we get a plus one. So, we're actually going to 21. Our sundial is looking real good.
And we had at least two. So, that's a llama here. Look at that. Just one sun. The AI is languishing at nine suns on their dial. In previous games, I've always languished behind with my sun points. And so, in this game, I was trying to purposely push my sun points as much as I could. Feel like I've succeeded in doing that at least. Don't know if it's going to equate into a win, but let's see.
Oh, wow. Moving three more. That should flip. And really, both of these can be taken away. Now, what's coming up next? Weaving. So, they're going to do that. Round three. So, that's going to be three power
gets a one and a two. And now I'm going to try to make it so this IR does not reach that scoring. It's going to be 50/50, right? Because the AI is going to draw one of these two out of the bag. But if I make them just move one and then they draw the teal, that will never score and then they'll be off the board. So that's the game we're playing. That means this one's got to go up there. Moving one.
I guess I'll take that. And what action do I want to take? Probably weaving because we're coming up to weaving scoring. It's going to be a three power. I'll just go here and get a two and a one. I could do something silly like this and make another sun or I could just sort of fill in for the moon points. But I'm probably going to score my pottery and not my weaving. So I think I have a few more turns.
Yeah, maybe I'll do something like that. Yeah. Okay, we'll do that. All right, moment of truth. Oh, I forgot to I always forget to do this. Looks like their pottery and their farming are completely equal. So, in that case, they're going to do the top one. So, they'll do farming. And it's going to go right there. Prime spot. Oof.
But it would sure help if they chose the teal. Got to shuffle it up real good because there's just two of them in there. Come on, Teal. Yes. Woo. That worked. So Teal's going two.
Wow. Getting all the way to the weaving spot. I'm glad I did that. So they want to do weaving. And there's one right here. It's going to be three four strength. So they do a one and a three. Wow, they have five some points just like I do.
So those five sons get them to 14. I also have five sons. One, two, three, four, five. And then I get an extra one. So I actually get six. That gets me to 27.
There we go. That's the end of the round. Night phase time. This one comes off. And now, oh, no one did farming. And now this is going to really hurt. So, the bot is getting moon points for their weaving. They're all the way down here. 28 moon points. All the way to 48. And now they're getting moon points for their uh read bundling. You basically score your highest island, your most valuable island, and for them it's way up there. 28 points. That gets them all the way to 76.
I knew that was going to be painful. Oh, and then I'm totally forgetting they get these extra ones up here, too. So, that's nine more. Wow. Okay, they're killing us with the moon points, but it doesn't matter unless their sun can catch up. So, that's what we're banking on. Now, it's time for me to score. And we're gonna do pottery. And look at this. I've got two sets of four. That's 16* 2. That's 32. 33. 34 because these single ones are worth one. So that's 34 moon points.
That gets me to 71. Once again, both of their pottery and their farming is tied. So, they're going to do the farming. They do the one that's on top. That's just four moon points. So, we closed the gap pretty well there. And now here comes the exciting one for sun. I have 27.
That gets me all the way to 40. for their bonus. They get to add one sun. That means they're at 15 25. So there we go. Investing in these sun points is working at the moment. Time for the final round. And it's going to be a quick one. Just two actions.
We don't even need to put that in the bag. We know what they're going to be moving and they get to go first. Okay. Bam. Three moves.
It's going to be a four power. And now deciding what action they're going to take is a little bit tricky. We're done with the rhyme tiles. We do have that one at the very end which is printed on the board. I'll explain that one if we get to it. But because we can't rely on the rhymes to tell us what action the AI is going to do, we have to go down this sort of checklist. And basically they're going to select the action of their topmost unscored personal bonus. In this case, they just have the one and that is pottery. So that would be right there. It's a four power action and they're always going to try to take more pottery.
And they get that token which is a llama. They definitely have a lot of llamas, so that's a little scary. And there we go. Their last temple goes out. It's now our turn. I'm going to move this guy to right here. So, that's going to be two.
I want to do weaving. going to be four power. I'm going to go three and one. Put that there. Put that there. And that's another sun.
Bam. Not only that, but we filled up to the 28 moon point. That's great cuz we're going to get to score that at the end of the round. I'm now noticing that there's more buildings for the white player than there should be. I must have forgotten to place some at some point during the game. Sorry about that. I'll I'll make a note of that when I go through and edit. But either way, here's the last action. Moving to reaching the center. They still want to do a pottery action there. It's going to be a five.
They don't care about making matches or creating sets or anything. They're just trying to get as much pottery as possible. And now that they've reached the end of the path, we get to activate that Ry tile that's printed on the board. Once again, we both get to do this. And essentially what that's saying is that we can activate any two actions and score suns. So for me obviously that's pottery and weaving and I have six suns in pottery and one two three four five six in weaving. So that's 12 plus I get an additional one for that bonus. So that's 13 alto together. That gets me all the way to 40 suns.
You can also see for each of the activities that had six or more sons, you get a llama. And both of mine did, so I get two llamas. They're pretty much in the same boat, I believe. Oh, no, not quite. They have six here and only five here. Yeah. So, they're only getting 11 and one llama. They're at 26 sun on their dial. And ah, look what I forgot to do. I keep forgetting stuff here. I should have gained that bonus when it emptied on my last turn. That's me scoring suns for my pottery, which is another six plus one.
I'm really at 47. And I'm killing it on the sun points. I've never had this many sun points before. I think for my last action, I'm just going to go here. Now, they can't move anymore. That's fine. They just stay there. I can still take an action. It's got to be weaving. Once again, that is four action points. And we're just going to go like this. And we have completely filled it up. Incredible. And look at this. Uncovered the llama spot. Oh. Oh. First temple. This does not matter whatsoever, but we'll put it out. That'll give us one point. Now I get a llama.
Should have also covered that up. And we cleared out that one. So, we'll get one of those tokens. I'm going to place it right here on my board. That only needs one. So, it activates immediately and it just gives me another llama. Rolling in llamas. And that's it. That is all of our actions done. We go to our final night phase. Comes off the board. Once again, this is a light farming game. No one gets that. And here we go. They're about to get some more moon points. Farming just four.
They got up to 20 for their pottery. And then also that six and that three. So nine more. We can place out that 100 point marker there just to show they're at 122 moon points. And then here I just get the one that's on top.
But this will be a good scoring moon points for my weaving 36. That's great. It's going to get me to 108.
And they're going to get 20 more for their pottery. And now for Suns, I'm at 47. That gets me all the way to 87. They get their final bonus. So this is for pottery. They have one, two, three sons. That gets them to 29. It's going to be 54. Now, that's the end, but there's one more thing we have to do. We now get to score our llamas. And this is a little tricky. There's a conversion over there on the board, and it's also here on my uh play raid, but we get to divide these llamas up into sun and into moon, right? We could do that however we want.
And of course, our goal is to get everything as close as possible. At this point, I think I pretty much just need my sun to go as far as it can. So, let's count how many llamas we have. One, two, three, four, five, six, seven, eight, nine. Nine llamas. That's going to give me 25 sun points. 25 sun points would take me to 112, which actually overshoots my moon points. So, if I go one less, that's 24, but I'll get one moon. That's still not quite right. So, let's try it like this.
Seven suns, that's 22. That gets me to 109. And then it would be three moon points. And I think that's the best I can do. I think 109 is the best I can do.
So there we go. We did a remarkable job of getting those as close as possible. The sun is behind at 109. That's my final score. Now, our solo opponent over here, they get a few more points for their llamas. And it's clear they just need to dump everything into their sun.
They have eight llamas, so that's going to be 30 points. And it's not going to be enough. That's going to get them to 84. So, you can see they did a very bad job getting way too many moon points and not enough sun points. Getting sun points early was the key. And this is my first victory against this level two uh AI. So, that's fantastic. Hopefully, I didn't make too many mistakes there. I obviously I forgot to place a couple of these, so I hope that didn't change things. But either way, that should give you a pretty good idea of how it plays. I think that's going to do it for me. I'd like to thank all of the financial supporters of Totally Tabled, including the totally radical Dr. Casey, Hextra, Mitch Fischer, John Kohler, Scott Meyers, and Jays Satderwite, as well as the totally bodacious Poppy. If you're interested in becoming a member, you can join on YouTube or my Patreon at www.patreon.com/tolettabled.
You'll gain access to my new exclusive podcast, Table Talk, as well as unboxing videos and whatever extra stuff I come up with. As always, thank you so much for watching and goodbye.