The Lord of the Rings: Fate of the Fellowship | Playthrough
Games in This Video
1 game is featured in this video — it unlocks as you watch.
Transcript
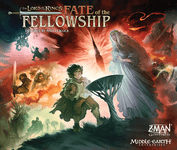
Hello everyone and welcome to meet me at the table. This is Colin and today I have a treat for you. We are going to do a playthrough of Lord of the Rings Fate of the Fellowship. This is based upon the Pandemic series, but I will tell you this is the most unique Pandemic I have seen and I am so excited to play this with you. This game is one of the most anticipated games of 2025 for me simply for the fact that it's a Lord of the Rings theme and it brings in the pandemic system. So, I was hoping it wouldn't be too complicated yet also really thematic. It does the second one really well. The first one, it is certainly more complex than your regular Pandemic. You'll see as we play. I will say if you're starting Pandemic with maybe your kids or some light gamers, do not start here. This is definitely a more strategic and much more complex pandemic series, but if you love Lord of the Rings, it's going to be hard not to love this game. There are some other great videos out for this game already, including OneTop. Jason did a playthrough, and of course, Rodney has a how-to. I'll put links in the in the description below for both of those. But without further ado, let's just jump in, do our setup, start our playthrough, turn on those cling on subtitles in case I make any errors and miss them in editing. Let's go dunk the ring, shall we? In this game, the only way you will lose is if your hope goes to zero. At the start of the game, you set it at six. We also have our threat tracker
here. We start at two, and this can go all the way up to five, depending upon your difficulty. Next, you'll need to seed the board with different troop types. We have the Naz Ghoul as well. Then we have the Eye of Sauron that's out. You actually can look at the board and it will show you how many of these different types of troops and where the Nazoul will start on the board. I'm not going to walk through all of that for you. You can just look at the rule book. We do have one bit of randomization for your setup and that is discarding the top nine cards of the shadow deck. So, we shuffled this up, discarded all nine, ignored everything on here except for this location, and we've placed one additional shadow troop in those locations. So, we have nine of those here. We also have two cards, the wheels of Saramon and the Drums of War. We're going to place all of that into our discard pile. Every time we have the skies darken card show up, we'll take all these cards from our discard pile, shuffle them up, and put them back on to our shadow stack. There are four different troop types in the fate of the fellowship. We have dwarves that are gray. We have elves that are green. We have roherum that are brown. And then we have the Gondorians that are blue. We'll seed some them out on the board. But the way to make sure that you have the appropriate amount out on the board is you should have a set of five here in the reserve for each set. After setting up the board, we need to choose our objective cards. We have one that we always have to play with. That is the destroy the one ring. and then you can randomly choose the remaining. There are
a total of 22 other objective cards. I randomly grabbed three of them. I didn't want to do the starting ones. There's been more than enough videos on that. I would like to show you some different ones. So, we have Arwin as one of our goals. Arwin unfurls the banner. So, this means we have to use as one of our characters Arwin. We can complete this uh if Arwin spends an action and a friendship in Minister when all the following are true. At least one Gondor troop, Roherum troop, elven troop, and dwarven troop are present and minister is a haven. When we complete this, we gain one hope. We also have secure the crossing of the Anduin. This one has use Phamir, so we have to have Phamir as one of our characters. And then we placed one additional shadow troop in Oscillith. Our goal with this one is Phamir has to do a capture action in Oscillith. and he can do that either with three valor or two resistance and one stealth. We complete this if Oscillith is a haven, but there's a potential that haven could be destroyed and we'd still lose the three hope. I'll explain how all of that works as we play. Our final one is Sheilob's Lair.
So, this requires us to play with Gollum. So, we have to play with Gollum. And then the player that has Frodo cannot also have Gollum. So, that's important to note. I am going to be playing as a twoplayer game here, not as a solo game. So, I'm controlling two different hands, but each player will control two different characters. This is one of the reasons why I feel like this is a more complex version of Pandemic. We can complete Sheilob's lair if Sam spends an action in Minor to roll three of the battle dice while Gollum is present. Oh, this is cool. We are going to lose hope unless we roll that symbol. And then we also lose one hope for each of the resistance the Gollum player possesses. Sam may ignore one of the battle dice for each Valor that he spends and prevent the loss of one hope for each fellowship he spends. And then when it's completed, if Froto did not lose any hope from this, he may do one additional action this turn. I am not thinking that's going to happen. We're probably going to lose some hope.
Hopefully, we don't roll this one where we lose three hope. This is um a killer of the game sometimes when you have one of these I think harder missions. The final quest that you will always have in your game is destroy the one ring. This has to be the final quest that you play. We have to use Froto and Sam. They are one character in the game. Uh but they're considered both Froto and Sam. All other objectives must be completed before completing this one. As an action, Froto has to spend five resistance at Mount Doom and then survive a final search roll. adding one dice for each missing hope. As our hope tracker goes up and down, we'll look to see at what our hope is at. And then we'll have to roll additional uh search dice depending on how far down we are on that track. If we can complete this and not lose all hope, Sauron is defeated and we win the game. Due to the four objective cards that we chose, these are the four characters we have to play.
Froto and Sam, Arwin, Gollum, and Pham. Since I'm playing as two individual players, these two are going to be controlled by my left hand, so to speak, and the right hand will be Gollum and Phamir. Each character will have their own mele and they have their own starting space. So, Froto and Sam will start in the Shire. And then they have some special abilities. So, we have Elron's support. Once per turn, when Froto prepares, which is an action, if he's at a haven in the region named on that card, he can also gain a friendship token from the supply. He also has Sam's aid. Whenever a search is rolled, you can actually spend friendship to ignore the same number of the negative losing hope results. We finally have put on the ring. Before a search is rolled, you may ignore all of the shadow enemies present. If you do lose one hope and shift the eye to Froto's region, as you can imagine from the story, Froto and Sam are going to have a harder time traveling than anybody else. So, when Froto travels or takes part in a travel, the current player must either spend one stealth or you have to roll a search for Froto's destination. I'll show you how all of that works as we play. Arwin is our second character for our left side.
We have even star. When Arwin musters in an elf location, you do not need to spend fellowship or I should say friendship to be able to do that. She has the send aid ability. when she prepares if a character is in the region named on the card, you can actually move an elven troop from her location to that character's location. Finally, she has the give council ability. Once on your turn, when Arwin uses the fellowship at a haven, the card you give or take does not need to match her region. She's really good at giving out cards. You can ignore the solo ability because I'm not playing a solo game here. Just so you can see, here is Froto and Sam at the Shire and Arwin is right up here in Rivendell. Next, we have Gollum. Gollum has the guide ability. If Gollum is present, when a search is rolled, roll three or fewer dice. Now, this can still result in rolling seven dice cuz you'll determine how many dice you need to roll to a maximum of seven. Let's say I had to roll 10. You reduce it by three to seven. Well, guess what? You're still rolling seven. He also is a slinker.
Once per turn, he can take any one of the cards that have stealth from the player discard pile. He's also cunning, so he can prepare even if he's not in a haven. When he prepares, he may move one of the shadow enemies present to an adjacent location, and you don't have to worry about rolling for a battle. I almost forgot to read you the unique ability for Gollum. Gollum cannot muster, attack, or capture, or bring friendly troops along with him when he travels. And he also has the they tricks us. When Gollum, Frodo or friendly troops enter or are added to a location, lose one hope if all three are present there. So essentially, you don't want Gollum and Froto together and have them move into a location with a troop or add a troop to that location because then Gollum thinks he is being tricked and you lose hope. So you've got to be careful if you have him guiding Sam and Froto. But I'm still hoping that I can make that work because he is going to help us with those searches. Finally, we have Phamir, one of my favorite characters of the books. When Phamir does the travel action with at least one friendly troop, you may do a bonus attack action in his destination. If you do, you can change one of the dice to just taking out an enemy for each of the stealth that you spend. He's also stealthy. So when Fairman Phamir does the travel action across a special path, which I'll show you in a second, he spends one fewer symbols and he has the wisdom of the Eldar once per turn, he can draw a resistance card from the
player discard pile if Phamir is in a haven and in the region named on that card. And because of that ability, I am realizing it makes way more sense to have Phamir and Froto and Sam be one character or one player and Gollum and Arwin to be one character. So, I'm going to swap these around. I think that's going to make a little bit more sense. This is because Phamir has the ability to get resistance cards from the discard pile and Froto needs five of those in order to dunk the ring. So, they can kind of work together that way. Gollum will start way up here in Amoria and Phamir is right here in Minister with two of his units and right next to him is Ogillith with that one enemy we had to spawn due to that specific objective.
Our final part of setup is building the player deck. Now we have 48 player cards right here all with different regions on them. We are going to shuffle in a certain amount of events based upon the amount of characters we're playing. Or I should say players, not characters. We're playing with two players. That means four characters. So that means we get six of these. So I'm going to randomly grab six of these events and shuffle them into this deck. We've now shuffled our six events into our player deck. Now each of our individual players gets to draw cards based upon our player count. Because we're playing with two players, that's four cards each to different players. We've drawn our four cards for each of our players. We actually have two events right now in the Gollum Arwin hand. We have Tom Bombadil, which lets us either gain a hope or roll up to three dice from a single roll. And we have the red arrow.
Move up to three friendly troops in the same haven to one different haven. Then optionally roll a battle there and shift the eye over to that location. Oh, that's kind of cool. Now that we have our cards in hand, we need to finish our setup of the player deck. We have to determine our difficulty. I'm going to play on the standard difficulty. So that means there will be five skies darkens cards. I'm going to shuffle these up cuz each one of these is actually slightly unique because of step number three. So I'm going to shuffle them up and place five out on the table. After randomly choosing those Sky Darkens cards, I'm going to take the rest of the player deck and evenly distribute them between these different stacks. And then within each stack, I'm going to shuffle these cards and then place them one on top of the other. If ever a stack has more cards in it than another stack, you just want to make sure your stacks that have more cards are placed on top of the deck. So you have more time at the beginning of the game between those sky darkens cards and less time later. Once you've shuffled up each stack and placed them on top of one another, you should have your player deck right here, ready to go. The final part of setup is to grab your bad door dice tower. Look at this thing. Oh my gosh. You're going to be rolling down your dice here crying at the results because generally rolling dice is not great in this game except for when you decide to initiate battles.
But all of these are all about losing hope and you don't want to lose hope. Let's now walk through the order of play. I'll show you the different actions and we can just jump into our playthrough. On the top right of the board, we have our order of play. When it's your turn, you get to do four + one actions. Sounds kind of interesting, right? Well, you're going to choose one character that can do four actions and your other character can do one action. You can do the one action first and then the four action second or conversely, but you can't intersperse the actions between your two characters. So, you'll have to choose one that's kind of your main character and one is your side character. After you do that, you'll draw two cards from our player deck and then draw shadow cards equal to our threat level. Our threat level is two. Remember, our hand limit is seven at all times. Here we have the list of the different actions that you can take throughout the game. You can travel, so you can move to adjacent locations, and you can move on any type of line that's on the board. You don't have to worry if you're going against an arrow. That's all used for the shadow troops, but those lines still connect locations that you can move through. You can also move characters and troops with you while you move. So, that's quite different from pandemic. If you do move Froto and Sam though, you have to discard a stealth token or you have to deal with a search.
Uh, next you have a fellowship. If your character is in the same location as another character, you can give or take one card from that player, but that card you give or take must match your region. So, you have regions on here. For example, Enidwith. If we were in Enidwith, I could give this card. We can prepare. Now, this is only at a haven. And I'll show you what a haven is in a second. We can discard a card to take a token that matches that symbol. You can't trade tokens, but that's a great way to get cards out of your hand because there's not as many ways to use cards and you don't want to waste those symbols. Next, we have the muster ability. At the specific locations that have the symbols for the different troops, you can discard one friendship to add one troop that matches that specific color. Next, we have attacking.
If you're at a location where you have troops and there are shadow troops, you can shift the eye so you get the eye to focus on you instead of potentially Frodo or something else to your specific region. Then you roll battle dice. You can roll one to three depending upon the amount of troops you have in there and resolve them. Finally, we have the capture ability and that's what we have to do with Phamir. So, if you're in a shadow stronghold with at least one of your troops uh and any of the four allied troops and none of the shadow troops, you can spend three valor to turn it into a haven. Then shift the eye focus to your region. And the big thing is gain two hope. That's going to be the main way we can get hope back. Sadly, one of the main ways we can lose hope is if one of our havens gets taken over by these shadow enemies and it turns into a stronghold. We lose three hope. So, we only get two if we capture one, but we lose three if we lose one of our havens.
I do feel like I've certainly talked enough. We'll just start our playthrough and we will continue to learn as we play. To determine who the first player is, we look at our cards and we find the lowest number on that card. That happens to be Phamir and Froto and Sam. They have a three here. And this is all fun little flavor text or information about the Lord of the Rings universe. So, there were three elven rings forged by Kell Kellbimbbor. Uh, so that means that that character set is going to be the first player. Before we have Froto, Sam, and Phamir activate, I wanted to show you what a haven looks like. It's got this yellow background. Those are havens. So, if they're taken over by shadow enemies, we lose three hope. The red locations like this is considered a stronghold, and that's what we can actually capture and turn into a haven like this. and that would gain us two hope. To start our turn, I think we're going to choose Froto and Sam to take our single action and then we will have Phamir do four actions. Lucky for us, the Shire is considered a haven. You can see that. So, we are going to discard a card from our hand and then we'll gain a token of the same type. It would be awesome if we had a card that matched the region that we're in, but we are in Ariador and I don't have any Ariador cards. Instead, I'm just going to discard this Nenwith to gain one of the resistance tokens. You can have as many tokens as you want. And don't forget that tokens cannot be traded. So, we have one resistance token. That's all
Froto and Sam are going to do. Let's move over to Phamir. Phamir is currently in Gondor. We have two units with us, but I want to have more than that. So, our first action, we are going to discard a friendship card. And that means we can muster. There are five more Gondorans sitting in the supply, so we can bring one out into Minister. That was action one. Action two, Oscillith looks ripe for the taking. This seems just like the the the story, right? We're going to try and take this back. You can see there's all these lines that are connecting. Doesn't matter which one we use. We can move over here for action two and bring our units with. Then action three, we are going to do an attack action. Now, we have three units. The shadow character only has one. There is one good thing about us doing this attack right away. We're going to pull this eye of Sauron over here. Whoops. To the Ailion region. That's important because I don't want that where Froto is because there's a lot of shadow cards that state, hey, if that eye is in the region where Froto and Sam are, you have to perform a search action. And searches compare Naz Ghoul and shadow enemies.
There's no enemies right now in area door, but there are two Naz Ghoul there. I don't want to deal with that. So, for our third action, we are going to do an attack. And now we have to decide, do we want to roll three dice? And this is a tough choice because the more dice we roll, there's more chances for my units to get killed. But if I only roll, let's say, one dice, and I don't roll one of these dark red symbols that you can see on here, then we don't actually kill that shadow unit. Uh, let's just look at these different sides of the dice quick. This side of the dieice states that we would lose one friendly troop unless we're fighting in a haven. Well, we're not fighting in a haven, so we just lose a troop. On this one, we just remove one enemy. On this side, we'd lose one of each. And on this one, if there's a Nazoul in that region, which right now there isn't, but if there is, we lose two friendly troops. You do not want to see this side of the die. Now, I need to remember Phamir has that ambush ability.
We just did a travel action, so we actually can do a free bonus attack action. So, I've only done two actions. I will get to do two more after this. And I think I'm just going to roll one die then. We'll drop our one die down and we have losing one of our troops and one of the shadow troops. I think I'm okay with that. If I didn't like that, I could spend one resistance to roll one die and I could do that over and over again. And any character that's in that same region could do that. So, if we were both together with two different characters, we could both be spending that resource or the resistance for rerolls. I also can spend a valor to just remove one of these shadow enemies, but I don't need to do that. I want the valor actually to be able to turn Ogillith into a haven. This will mean we'll remove one of each of the units.
And now Oscillith is free. That's great. With our two remaining actions, I think we're going to move with our troops. One, two. So, we can pick up a third one along the way. Now, we have three troops with us. Now, remember his ability. He's stealthy. Do you see this path here that has a resistance symbol in order to move between this? This is considered a special path and you have to discard one resistance. He can spend one less resistance or I should say one less symbol. So, he actually can move through that for free, no problem, because he's stealthy. So, we've done four actions with Phamir plus the one from Frooto and Sam. That ends our turn. We'll then draw our next two cards and we have Merkwood, which has the Valor symbol. So, that means we have three in our hand. We just need to get over to Oscilith. And our next one is Dale, which is a friendship symbol. At the end of our turn, we are going to draw shadow cards. It's two because of our threat rate. We're going to draw this first one and place it in the resolve section. We're then going to look at the back side of the next card.
We can see it has a flag. That means we're going to activate the top section. If it had the banner, we'd activate the lower section. That is so cool. So, we can see from the top section, we have enemies are going to move from Dunland to the gray havens. And they're going to follow this path. We need to find this path on the board. And we can see it's this purplish path that's going through here. And basically trace our line from the Grey Havens back to Dunland, which is here. And we can see there are only enemies in Dunland. So they're going to move forward one space right to here. If there were any friendly troops there, we would then have a battle where we couldn't stop it. We'd have to do that battle. And that battle would not move the eye of Sauron because Sauron doesn't care what his troops are doing. He only cares what the heroes are doing. So with his troops, let's say we had to have a fight there, it would not move the eye of Sauron. When troops move, that is when you have to be careful of your havens. If those troops had moved into one of these two havens and there weren't any troops there to protect it, then they would turn it into a stronghold and we lose three hope. That was our first card draw. Let's do the second one. Oh, this will be a banner.
So, we're going to place out a new shadow uh enemy in the near Harad location. And then we need to move two Naz Ghoul closer to Frodo. We select from those closest to him outside his region. If tied, we get to choose. If we look at the board, these two Nazoul are already in his region. This one is one away, so it has to also move into the region. Now, there's three Naz Ghoul chasing him. The next one, the next closest, I think, is here in the Misty Mountains. It'll move to Well, we can choose because it can go either way. We're going to choose Rudar. We're going to place that Naz Ghoul here. That will complete the draw shadow card step. It is now Gollum and Arwin's activation. I think we're going to have Arwin be the one that takes the four actions this round and we're going to do two actions right away and muster twice. She does not have to spend a friendship in order to do that. That's due to her even star ability. It's just great to have extra troops. So, that was two actions. She's then going to move twice and we're going to move one and two. Yeah, I think that's what we're going to do. and we're going to bring these troops with. What we need to do is to get four different types of troops with Arwin and get her all the way over to Minister. It's a bit of a ways. My goal is to grab this dwarf up here so we have two of the different types. And then we just need the Roherum and the Gondorian for Gollum's single activation. I would love for him to just start moving towards Froto and Sam, but
we need a friendship and we don't have one. He can actually do a prepare action even when he's not in a haven. So, we are going to discard this card and get ourselves one stealth token. That completes our four plus one actions. So, we will draw two cards. We get all of the events. Lemus. The current player may do two more actions with one of their characters during the do action step. Wow. So, that could even be the one that normally gets one. They could have three. I do like that. And then we have a Mordor stealth card. We'll then draw our shadow cards. It's still only two. This one is the banner. Oh, and I think I forgot to place an enemy in new her or near Harat. I did. So, I will do that as well as place one in Umbar. And then we have to move two Naz Ghoul closer to Frodo. Lucky for us, we can place both of them here. So, there's three and three. Lots of shadow enemies.
And then the two closest Naz Ghoul will be this one moving here and this one's going to move into the same region. So you can see now how a search works is if we don't spend a stealth when we move, we have to roll dice equal to the amount of shadow enemies in our location as well as Nazoul in the region. So it would be four anywhere over here. It'd be seven in Tharbad. Yeah, this is not looking good. We'll flip our second shadow card. Wow, it's another banner. So this is Ner and shift the eye to Froto's region. If it was already there, we'd have to roll for a search, which would have been four dice. So that's why it's really important we keep that eye preoccupied. Ner is deep into Mordor and it seems Sauron realized Phamir was just distracting him. So he focuses his eye back onto the Shia Baggins.
That will end Arwin and Gollum's turn. We'll move back to Froto, Sam, and Phamir. Once again, I think we're going to have Phamir do four actions and Froto and Sam only do one. We're going to have Phamir move with his troops. One, two. We are now in Oscillith. I could attack if I had something there, but I don't. But I do have the ability of creating a haven. That's because I can discard three Valor cards. Normally, you can't make a haven anywhere, but this is specific to our quest. We'll be able to increase our hope to eight. And we'll place a haven in this location. Now, there are some incentives to build havens in certain locations because there are certain locations where shadow enemies spawn. And if that place where they normally spawn, there's a haven there, they will no longer spawn in that location. Oscillith is not that way.
They don't normally spawn there. The other thing that happens whenever you build a haven is you shift the eye back to that area. So, we had Sauron distracted for a little bit. He went back to where Froto and Sam were, and then we did something even worse, and we made a haven right in Oscillith. Oo, that's driving him insane. So, his focus is back here. When we completed this objective, we can add one Gondor troop to Oscillith. Don't mind if I do. That means we have four troops there. I love it. We've completed three actions with Phamir. Our fourth action, we're going to move back into Minister, bringing two of our units. We're going to leave two here in Oscillith to protect it. Last thing we want is for that sanctuary to get or haven to get destroyed and turned into a stronghold. Ferto and Sam are going to continue to prepare in the Shire, discarding Dale and gaining one friendship token as we prepare. So now we have one friendship and we have one resistance. This does mean we have no cards in hand, which is interesting. Oh, we're going to get another resistance.
That's a Mordor card. And our second one is going to be Areador, and that is a stealth card. That is actually amazing. That can finally help Froto and Sam move. Something that I'd like to call out which I really appreciate, they have a resolve area now in this game. So as you flip cards, you resolve them and you know how many you flipped. So as we get to three or four cards, we'll flip them all and then we'll know how many are here and then we move them to the discard pile. I really like that. Oh, this is a banner movement. So we have near Harod moving towards Arabore. Wow. All the way to the top. I personally feel one of the coolest parts about this game is the troop movement, but sometimes it's hard to figure out. So we're going here to here to here and I think it comes over to here which means do go or dur these are going to move here back to here back to here back to here boom and then to here and then to here and then to new harad. So these are going to move up. We still don't have any battles and we don't have any of our havens. You can see this one has two away from being able to get to our haven and there's three shadow enemies there.
We'll flip our second card. This will be a banner. Another one in Ner. And we have shift the eye of Froto's region yet again. Good thing we moved it. Something I haven't specifically called out. If ever we do not have any shadow units to place on the board, we lose one hope for the difference. If ever we need to draw cards from the deck and the player deck is empty, we lose hope for the difference. That's why hope is the main way you lose this game. We will once again place the eye back in area. Okay, it is now Arwin and Gollum's activation. And still we don't have friendship on this side. Because of that, once again, I think Arwin will do the four actions. This time she's going to move one into the same space as Sam and Froto. We are in a haven. Normally, we have to share cards that match the region that we're in. But we have the give council. Once on your turn, when Arwin uses the fellowship action at a haven, the card you give does not need to match her region. Well, we do not want resistance cards. And you know who does? Sam and Froto. So, we're going to give that to Sam and Frootto for action two. Action three, we're going to move these guys up with all of these troops. And then action four, we're going to come down into the Grey Havens.
Slowly moving ourselves. And now we do have both dwarven troop and some elven troops with us. Gollum, who so desperately wants to join Sam and Ferto because he can feel that ring, can't do it. So, he's just going to discard Mordor to prepare it for another stealth token. So, two stealth tokens over here. Those are our four plus one actions. We'll flip our next two player cards. We have an Enidwith card. And we have a friendship card, the Misty Mountains. That is awesome. You know, our hand consists of three events and two cards. That's it. I think it's safe to say the skies darkens is going to be showing up real soon. Okay, we have now a doul gold move to Minister. Do Goldor is here.
Minister is here following the yellow. So nothing nothing. Yes. So they're going to move to here and nothing. Interesting. So they were starting to move up towards was it Arabore? But now they've got pulled down trying to come to Minister. We've got shadow troops trying to take down Oscillith and Minister on either side. We'll flip our second shadow card. This one will also be movement Eisenard to the Grey Havens. They're looking at the purple track. Interesting. So, look at this really long purple track here that goes to here, then to here, then to here, then to here, to here, to here. Nothing. Nothing. Nothing. It's just Eisenard. They're moving over to the fords of Eisen. And they're one away from Helms Deep. So, these are probably some of the Urukai, not the orcs. Interesting. All right, those are our two cards. Let's now move back to Froto, Sam, and Phamir.
Are you ready to take a little bit of a chance? I think I'm going to. This is going to be fun. So, we are currently in Ariador. We're going to do the four actions with Froto and Sam this time. And we're going to start by preparing this card. Now, it says Areador on it. And if we read this once per turn, when Froto prepares, if he's at a haven in the region named on the card, which we are, we will also gain one of the friendship tokens. So, I just gained a friendship and a stealth token. For action two, then we are going to move into the gray havens with Sam and Froto. Now, we have to either decide to use that stealth or we can roll for a search. There are four Nazoulool here, so that means I would roll four dice. There's no shadow enemies here. I could use that stealth token, but I'm kind of thinking I want to keep that. We're at eight total hope. I think I'm gonna take the chance because we are at a haven.
Because we're at a haven, this symbol on the die, which looks like this, has no effect. So, let's give it a shot. We're going to roll four of these. This is certainly risky, but let's give it a shot anyways. We would lose two hope. Now, I could spend resistance to roll, but I think I can take the two hope hit. We'll go from 8 to six total hope. For our third action, we are going to do another travel action. We're going to go down this path, but I need to spend two friendship. I just so happen to have two friendship tokens. So, I can use those two to be able to have Sam and Froto move all the way down to Doll Amroth. And we are going to have Arwin come with and she's going to bring uh one of the dwarves and two of the elves, leaving two elves here to protect the gray havens. Remember, she needs to have all four at Minister. That's why I wanted to do that. Now, I'm not going to spend a stealth, so I would need to do a search in Gundor. If we look at Gondor, this region has no Naz Ghoul in it. And there are no shadow enemies in here either.
So, we do not have to roll a stealth check. We just snuck by the eye. And that means we still have one more action left. Why would we not keep going? We're going to have Sam and Froto move to here. We're going to have Arwin come with. She's going to bring uh one. No, I don't know. Yeah, we'll do one of these and one of these and one of these to here. And now she is even closer. She just needs a Roherum to get to Minister. We now can do the one action with Phamir. He is going to prepare, discarding this Gunor card, which means he can pick that up again next turn if we would like to prepare. And now we have two resistance tokens. We're going to want five of those. So, I have two resistance and one stealth. The only card I have left in my hand is this Mordor card. Great turn, though. We certainly moved Froto a ton. This does mean Gollum needs to get his butt over to us because we need to have our encounter at Chillob's Lair. Oh my gosh, where is this guy Rises card? I mean, I'm just worried we're going to have back to backs here. Okay, there it is.
That's our first one. So, now we need to follow this just like an outbreak in pandemic. The shadow grows. increase the threat rate by one. We'll move this up one space. It's still at a two. The next time we move it up, it'll be a three. We then have I see you. If the eye is in Froto's region, lose two hope it's not. Otherwise, move it to his region. So, I'm going to move it to Gondor. Then, under cover of darkness, add three of the shadow troops to Darwinian. That unfortunately is way up here. And that could be a problem for Arabbor uh because that could be there within two steps, two or three, and take out Arabore and cause us to lose three hope. Finally, we have the danger intensifies. And this is that pandemic thing where we're going to take all the cards in our discard pile, which is huge, including those two that we started in the discard pile at the beginning of the game, shuffle them up, and place them on top of our total shadow stack. Once we've completed that, we need to draw our two shadow cards. So, our first one, we have Ombar going towards Helm's Deep. Helm's Deep is here. We're following this purplish blue line. So, here, here to here, to here. And then where does it go? It goes this way. Uh, yeah. See, this is where it's so hard to read these. Does it go around? I think it goes to here. Let's see. Yeah. And it comes up. So, these are the only ones that are going to move. They're going to move to Peligrier. Gross. Keeping the havens safe is so important in this game. Oh, we have the drums of war. Add
one shadow troop to every shadow stronghold in Mordor. You know what this means? In this one round, we just added six more shadow troops we have in the supply. 3 6 9 12. Only 12 shadow troops. We've got to be careful of that. We'll now move back to Arwin and Gollum's activation. For this activation, we're going to have Arwin take the four actions. And we're going to be a little bit crazy. There's an eye here in Gondor, but you know what's not here is any Nazoulool. So, we can continue doing our movement and not have to worry about stealth. We're going to give bring Sam and Froto with us. We're not going to move into Palgree. We're actually going to be moving around going the long way over to Mordor. It might seem crazy, but I think this is going to be worth it. So, we're going to move them one to here. We're going to bring all three of these. Oh, I missed that. I need stealth here. Do I do have stealth. I have stealth in my hand. This will still totally work. We'll discard Enidwith for a stealth so that we can move across this bringing Sam and Froto. Whenever you pay that cost, it's not for every character. It's just as long as you pay it, you can move everybody with you over it. And we should be doing stealth checks when we're doing this. But there are no shadow enemies and there are no Nazoul in the regions. Rohan is completely empty. They still think we're an area door. So, that was action one.
Action two. Action three, we're going to bring him back. Uh oh, no. No. We're going to leave Froto here because I don't want him in the same location as this eye. We're not going to initiate a combat. And I was worried about a search potentially happening. Well, if we have a search, it's not going to be a problem. Oh, but we could lose two hope. Yeah, I'm going to leave him over here in Rohan. And now we have all four of the units that we need to move here for action three. And then action four, we're coming into here into ministerith. And we have all four of the different units that we need. But we've run out of actions except for lucky for us, we have lemus bread. The current player may do two more actions with one of their characters during the do action step. We're going to do that with Arwin. One of those two actions. We're going to complete our second objective already.
We have to discard one friendship in Minister when all the following are true. We have a Gondor, a Roherum, an elven, and a dwarven troop. And it's still a haven. So, we will discard this Misty Mountains card. And that means we will gain one hope. And our second of four objectives are complete. We'll push this up to a seven. We have one single action remaining. I think we're going to have her move to Oscillith. And we're going to bring Fair with and he's going to bring all of these all four the four that decided to join forces. They're going to follow with. So that means we have three Gondoran, one elf, one Roherum, and we have one dwarf. Okay, now we get one action with Gollum. Gollum is simply going to move here to the Gladen Fields. He's going to start trying to come down and meet up with Sam and Froto. And then we have to find a way to not have them go to locations where we have friendly units. It feels absolutely great to have two objectives done. We have the Rohan Valor card and our next card will be Merkwood. I don't want a resistance card. So, we're going to have to try and give that away. We're still only drawing two shadow cards. So, we are going to be spawning in Non. And we have Shift the Eye to Froto's region.
Of course, that'll be Rohan. He is not already there. So there isn't a search, so we're good. Ner has so many orcs in it, it's kind of ridiculous. The Eye of Sauron will now move to the Rohan region. Our second card will be a banner. So we have Rune to Minister going on the yellow path. Minister is here. Rune is different than Ner. Look at Rune. It has so many enemies, too. So we're going to follow the yellow path. It's hard to see, but there's a yellow path to here, then to here. Then these are going to move. And then does it go up? No, it just goes over to here and pulls all of these. So, so far we have avoided having any of our havens destroyed, but these are certainly marching in. Okay, now it is Phamir and Froto and Sam's activation. This might seem a little bit wasteful, but we're going to start with Phamir this time.
He's going to move one into here. Then action two, he's going to pick up Gundor, the uh resistant Gundor card from the discard pile. Then action three, you know what? Actually, I'm just going to hold on to it. That was action two. Then what we can do is action three, move back to here, and action four, we can move into here with some troops and get a free attack. We're going to do all four of these. We're going to leave those two there. Oh, you know what? Yeah. Yeah. We're just going to do it. We're going to do all four of them. So, it's four against three. We're going to roll three dice. Let's Let's do this. Don't forget the first thing that happens is the eye will come and focus on Ailion yet again. Getting out of Rohan. We'll drop down our three dice. And okay, we have this one, which does nothing. We're not in a haven, so this would cause us to lose one of our units.
And then this would let us take out one of these shadow units. Now, because I have my ambush ability, I could spend this symbol, this stealth here to turn one of those in and take out another shadow unit. And, you know, I kind of want that stealth, but I think it's I think it's worth it. We're going to discard this stealth token to turn this one into a hit. So, that means we took out two of the shadow units, and none of ours are lost. Sam and Froto can take one action. Let's have them move to the Druidan forest. I think we'd have to do a search here because we're not spending a stealth, but there are no Nazul and Gondor and there's no shadow enemies here. Now, Minister has some units in it, which means we can't have Gollum join us there. So, I might have to just get them into Mordor on their own and have Gollum join them cuz it's going to be hard to make sure that doesn't happen. We'll draw our two player cards.
And yeah, I was thinking we were going to get the skies darken again relatively quickly. Our other one is a Gondor card and it's a valor card. We'll start by increasing the threat rate by one. And then we have to move the eye of Sauron into Froto's region. Then we'll be placing out three of the shadow enemies in Mount Doom. That's crazy. And then danger intensifies. So, we'll take this small set of cards and shuffle them on top of our deck. The eye will be moved to the Gundor region and now we will be drawing three cards around. This will mean three out of the four cards that we had in the discard pile are going to be resolved. Okay, we have Rune and move two Naz Ghoul closer to Frodo. Rune is way up here, thank goodness. And this is where it gets a little bit interesting.
This Nazoul is certainly the closest to Gondor. But now if we move up to Ariador, it is two regions away or Moria or Mordor. One, two is also two away. So we could bring one of these in. But that's the way we're going. But I kind of want to get rid of the Nazol in Mordor, but I think I'm going to do one of these ones moving into Edinu. It is certainly getting to the point where I wish we had Gollum here with Froto and Sam. Okay, this one we're moving Umbar to Helm's Deep. That will be this purple track. So, no enemies, none, none, none, none. But these ones are going to move over to here. And there's none in Umbar. Our third card draw will be another movement. No, it won't. It'll be the Drums of War. Three more shadow enemies out. This is where I'd love to place out a haven in one of these three. So, when we draw that, it's not as terrible.
That'll end Froto, Sam, and Phamir's turn. We're back to Arwin and Gollum. And Gollum needs to get moving. Gollum is going to start his movement down. We're going to give him four actions. One, two, and then three, and then four. He's okay in that spot because Froto and Sam aren't there. But if Froto and Sam were in this same location when he moved into here, we would have had to lose one hope because of the hat tricks us. Uh, so we're okay there. I've got to figure out how to combine them together without having any troops in their location. Then Arwin has one activation. She's in a haven. It would probably be helpful if I showed where she is. I think she's just going to discard Rohan to prepare that card. So that will give us one Valor token. We have two stealth and one Valor. We currently have a Merkwood resistance card in our hand and we don't want that. We want to give that to Froto and Sam as soon as we can. Okay, we got a Mordor card that can go into our hand.
And our second one will be another resistance card, an Ailion card. Hey, we're in Athelion, so we should be able to give that no problem. We didn't take out any shadow enemies, unfortunately. So, we'll flip. We have a banner. Ner to Helm's Deep. Helm's Deep is here. Ner is over there. Purple track. Nothing. Nothing. Nothing. Nothing. Purple track to here. These enemies are going to come and lay siege to Ogillith. These are then going to come to be ready to support them and then the Ner ones will come over here. Oh boy. So, we are going to have a battle. Now, whenever the shadow player initiates combat, we will roll three dice here. Don't forget this combat does not move the eye. We'll roll them up. Okay, we each lose one for both of those. And there are no Naz Ghoul in Athelion. So it's two and or one and one each. And you know what? If we take that result, we're going to lose a three hope because that sanctuary is going to be gone. So we're going to discard this Merkwood card so we can reroll one of those. We're going to take this one and roll it. Come on. Oh, perfect. So this one we'd lose a troop if it wasn't a haven, but it is a haven. So we'll lose one of the shadow and one of ours. And that's it. This is where things are going to get a little bit dicey, though.
We only have one unit remaining. I feel like it may be as good a time as any to use our red arrow here. Move up to three friendly troops to the same haven to one different haven and we can have a battle there. We're going to We're going to grab these two units from Minister and have them join Arwin. And then we are going to do a battle here. And that's going to pull the eye to Ailion. And we are going to roll uh we can do one to three. I'm going to just roll one dice. I don't want to lose a ton. This is more just to help protect us. We'll drop that single die down. Yes, we took out one of their troops. We also have some valor that we could use to get rid of that final shadow enemy, but I don't think I want to do that. I've got two. If I get one more, I could do another haven, which is really the only way I can pump up my hope. So, I'm going to leave those in my hand. All right, that was still only the first card. So, we got two more to resolve. We'll flip that second card.
Okay, this is a banner. We have near Harad. Move to Naz Ghoul closer to Froto as well. We'll place that shadow enemy here. Another Naz Ghoul will come into Gundor and another one from Ariador will move adjacent. Now, if we have a search, it's going to be two Naz Ghoul in Gondor. Our third and final card. Okay, it's going to be the bottom two. Umbar, deploy three Nazoul from Mordor to wherever the eye is. That is the first time we're seeing this action. Umbar will gain a unit and then three of these Nazoul are going to come into Athelion. That is not good at all. And Athelion is a tiny region. There's not a lot of space for these. I do love that they gave the stands to the Naz Ghoul so that there isn't too much on the board. There still is a lot, but I can see most of these different uh arrows, but it is somewhat challenging to see. I will admit. Okay, that was three cards. That was Arwin and Gollum. It is now back to Phamir and Froto and Sam for our first action with Froto and Sam. We are going to have them move one into Minister.
Unfortunately, there are now two Naz Ghoul here. I could because I do have this one stealth card in hand. Discard it so I don't have to roll. But I feel like because we're moving into a haven, I'm going to take my chances. I'm going to roll just two dice. We'll drop these two dice down. Okay, this one means we do not lose hope because we're in a haven, but this one we will. We'll move ourselves from seven to six hope. Our next two actions with Froto and Sam, we're going to discard both of these cards for two more resistance. We have one more action. Do I want to try and move one more space? That's right where the eye is. I don't think so. I don't think I want to do that yet. So, instead, I'm going to prepare one more thing. Discarding this one to give ourselves one stealth. So now we have one stealth and four resistance tokens.
Phamir gets one action. And what I think we're actually going to do is we're just going to move back into Ocil and we're going to bring two of our units into there. We're going to leave two here. Gollum can come with. Right. He there's nothing saying he can't come with. He just can't bring units when he moves. So that's fine. And he's not in the same location as Froto and and Sam. So we're okay. Uh, and then because we did that move, we get a free battle action. And we're going to roll one dice. See if we can take out that one shadow enemy still in our stronghold. And I don't know why I keep calling it a stronghold. That is actually a haven. And that's a great roll. We'll just take out that shadow enemy. There are so many shadow enemies on the board. We do really need to do some cleaning up. We'll now draw two cards. We have Ailion. That is a friendship card. And that's Ailion.
That's right where we're at. So, we could give that to anybody. And we have another stealth card. We'll flip over our first shadow card. And we have Eisenard to Riendell. No one is up there. This is actually a little bit scary because we follow the green lines. These ones are going to move over here. Yeah, they are now one away from the Shire and we don't have anybody over there. And the ones not in Eisenard but in the fords of Eisen are going to move up to Dunland. This could very well be our downfall if there's too much movement over there. Okay, we have Dol Gulur a spawning and then move to Nazgoul closer to Frodo. We'll place that one shadow troop here and then this one's going to move in. No. Yeah, he he is in Gondor and another one from Athelion will move into Gondor. Our third card and final one, thank goodness. Okay, we have near Harad to Arabore. Arabore is way up here following these green arrows. I believe it goes down then over here. So, dull gold. It'll move to here. Then it comes along. It is going to move to here. All of these enemies are going to move to this spot. Then this one's going to move to here. From this green, where does it go? Does it go? Yeah, it goes to here.
And then this green comes down to this one. We're going to have another battle here. What an epic battle in Oscillith. And it's near Harod. So, these are going to move to here. And then this one will move here. So, we do have a combat here. Rolling only two dice. We'll drop the two dice down. Okay, we would be taking out both of theirs and only one of ours. We will take that. Phamir continues to valiantly protect Osgillith. Two of these and one of the Gondorians. We'll now move over to Arwin and Gollum's turn. Gollum is going to be the first to activate. He's going to move from Osgillith. He doesn't want to be there. and Froto or I should say Phamir is going to let him go. He's going to run himself down over what is this location? Can't even see it. It is south Athelion with all of these shadow enemies. That was action one. Now, to get through here, we would need to spend two stealth. I'm thinking of actually waiting. And from here on, I'm thinking of trying to get Sam and Froto together with Gollum so we can use their benefits together. Then we only have to spend the two stealth one time as well. So that means Arwin's going to be the other character that's going to take four actions. Her first action, she is in Athelion in the same location as Phamir.
Action one, give Atheon over to him. That is another resistance. If I can turn that into a token, I have my five resistance that I need as tokens. That is awesome. Okay, that was action one. Action two, I think we're going to maybe pull just a couple of these enemies. Let's see. Two, three, and fight over there to get the eye out. Yes. So, we're going to move two, three over to Emmen wheel. We're just going to take two of these troops. We're going to leave. And you know what? We're going to bring one of the dwarves just cuz I want to. And we're going to leave these two here to protect Oscillith. And then action four, we're going to attack there. Bringing the eye over to Roanian. We're just trying to get Sauron's eye out of the way. Okay, so we're going to lose one troop and we'll take out one of the shadow troops. We'll remove one of each.
I'll do the Gondoran and one of the shadow enemies. We'll complete their activation by drawing two cards. They have a Rohan stealth card. Stealth is great. We just don't want resistance. Oh yes, that is our third Valor now. So, we can create another haven if we wanted. But before any of that fun stuff happens, three more shadow cards. Okay, this one will be plus one in Eisenard. And then it says, "Shift the eye to Froto's region." Oh my gosh, if it had been there, it would have been a search. Eisenard is right here. And then we have the eye going back to Gondor with all of these Naz Ghoul. Second card we will flip. This is going to be movement Dunland to the Grey Havens. That is not good. While we're all focused on Mordor, this must be Saramon getting us back because all of these are going to move into the Shire. These are going to move here and the Shire becomes a stronghold.
And we just lost three hope. We'll go from six. 1 2 3 down to three. Then before we draw our next one, Tom Bombadel is going to come and help us. We're going to gain a hope just so that way we don't lose. We're back up to four. Our third and final card. Okay, we're going to spawn an Eisenard and then deploy three Naz Ghoul from Mordor. Well, there's only one there. So, one will go into Gondor and then two others will come from the regions that have the most Naz Ghoul. We'll place that shadow troop here in Eisenard. The one in Mordor will come into Gondor. And then we need two more. There's two and two. So, we can do one more from here and one more from here. Look at Gondor. We need to get out of here so bad. And we should be able to do that during our turn. Was that three cards? Yes, it was. Okay. So, now it's Frodo and uh Eric uh sorry, Phamir.
Froto and Phamir and Sam. And without a doubt, Froto and Sam are going to move one into Ailion. We are out of Gundor, but there's still one of these Naz Ghoul here. I have the stealth in my hand, but I don't I got to use it in Mordor, so I think I'm going to roll. This will be just one die, and we're in a haven, so that does nothing. Froto and Sam will be our four action character. We're going to discard a Theion. And Ailion matches the location that we're at. So we have Elron support. That means we will get a resistance token which will be our fifth one. And we get a friendship token because of that. So it's action two. Action three. Then we are going to move into South Ailion. Phamir bids us farewell and wishes us luck. I am going to discard my stealth token. By doing that, I do not have to uh roll for any sort of search because we've snuck by.
We have one more action. I have Oh, you know what? If I had kept that stealth token, if I rolled for that search, I then could sneak into Minis Morgal because I'd have two. It's worth it. So, I'm going to take this back. I'm going to take this back. I have my uh one stealth here. I am going to roll for this. Now, I'd have to roll normally 1 2 3 4 5 six total, but Gollum is present when a search is rolled. So, I roll three less. So, 1 2 3 4 5 six. I'm only rolling three dice. Oh boy, that's still a lot. Do I want to do that? Three dice. Yeah, I'm going to do it. I'm going to do it. Let's do it. We're not at a haven, so this definitely could hurt. Okay, we're just going to lose two hope. This means we're going from four down to two hope. Two hope you guys. Oh boy. I do believe Sam and Froto have one remaining action. They were here. Action one was to move here. Then they prepared for action two. Action three, they moved here. Action four, they are going to move with Gollum into this location into Minis Morgal. We have to discard two stealth to do it. One, two. And then we would have to do a search, but there's no enemies in that location. And there are no Naz Ghoul here in Mordor, so we don't need to worry about a search. And now we're only two spaces away from Mount Doom. We're also in the correct location to complete Sheilob's Lair next
turn. I love it. It is Phamir's activation. He I think the only thing he can do is prepare. I don't want him moving. I'd love for him to be able to recruit, but that's not a location that he can muster. So, I think we're just going to discard this Gundor Valor card and get a Valor token. That's the only thing we're going to be able to do. And we can do that cuz we are in a haven. Let's now draw our two cards. I am just having so much fun. This is insane. Okay, we got the Misty Mountains. That is another stealth card. We need stealth like nobody's business. Our next one, we have Merkwood. That's friendship. Unfortunately, we have to draw three more of these cards. So we do have adding one into Dunland and move to Naz Ghoul closer to Froto. So they're going to start coming into Mordor. Dunland is right up here. And if we look at the board, look at all of these in Gondor.
This one will move into Mordor. Uh this one will move into Ailion. And I believe it's Gondor. I always like to say Gondor, but it's Gondor. That's my motan accent. Our second card flip. Okay, it's going to be another one of these. We have Rune. Deploy three Nazul Mordor uh Nazgoul from Mordor to the eye. Awesome. The eye is in Gondor. And of course by Gondor I mean Gondor. Run is way up here. And then we place this one into Gondor. This one here and this one. All nine are in Gondor right now. Ready to take us down. And we're not there. Our third and final card. Okay, this is a banner. Oh, we don't Oh, this is the first time we're seeing this. The wheels of Saramont. Choose one of the following. Break oath. Remove any two friendly troops from the board or doubt.
A single player must discard a total of two player cards and/or symbol tokens. Despair lose one hope. What do we want to do? I hate to say it, but Doll Amroth doesn't seem to be in much danger. We're going to lose the two units there, but we're exposing another one of our havens. That will end Froto, Sam, and Phamir's activation. We'll now move to Arwin and Gollum. And here's the thing. Gollum cannot move. We need to complete that objective before we can dunk the ring. So, I am most certainly going to have him prepare for the one action, discarding this Rohan card for another stealth token. We have three stealth and one Valor token. Now, it's up to Arwin to distract those Naz Ghoul and maybe take out some of these shadow enemies along the way. This might seem kind of crazy, but the first thing we're going to do is attack. Here we have one dwarven unit, a dwarf and an elf. What can they do together? Maybe take out a shadow unit, but the big thing is pull the eye to Roani. From there, we drop one of these and we take out the shadow enemy. One shadow and that dwarf is still alive. From there, we will move action two to the brown lands and action three to Dull Gulder bringing that dwarf with us. Action four, we have to have one troop with us and none of these shadow enemies. We have no shadow enemies. three of this valor. We are going to create a haven here. And this will increase our hope by two because guess what? We just conquered dull gold.
Yes, that pushes up our hope from two to four. That will sadly complete our turn. We'll draw two cards. We have a Roanian card and we have Oh no, did not want that card at all. Uh it is what it is. We're going to have to deal with it when we're dealing with Gollum next turn. What an absolutely fantastic game. I'm having so much fun. Okay, Dunland. And then shift the eye over to Mordor. Dunland is right here. And the eye moves to Mordor. Our next card that we have is Dull Gulur and move to Nazgoul closer to Frodo. Guess what? We just made D Gold a sanctuary. No enemies will spawn there, but two of these Nazoul will move to Athelion. They hear some rumblings.
There's somebody crawling through Menace Morgal. What is that? Our third card that we have. Oh, it'll be Ner and Shift the Eye of Froto's region. It's already there. We would have to do a search, but there are no enemies in our location and no Nazoulool there. Plus, we have Gollum, which reduces the total amount of dice we roll by three. So, no search and we need to worry about just adding one to Nerd. We'll place that one shadow enemy here. Just so you know, in the supply, I have seven left. That's it. I'm running out of time. Okay, let's start with Frodo and Sam. This time, we are going to resolve our pen ultimate quest, the Sheilobes Lair. We have to spend an action in Minism Morgal and roll three dice. Now, if we roll the symbol with our character or our troop with a boxer on it, we lose one hope. If it's one that has each of the troops, we lose two hope. If it's one with the uh Nazoulool, we lose three hope. If it's one with the enemy, we have no effect.
Also, we have to lose one hope for each of the resistance cards the Gollum player possesses while they have this Rohan card. I don't think there's a way that I can get that from them. So, we're going to no matter what lose one hope, but we can ignore one die for each Valor that we spend. And we can also prevent one loss of hope for each friendship we have. We have three friendship and one valor. Maybe that will be enough. Let's see. This is a little bit stressful. Let's see what we roll. Okay, both all of that is losing two hope. So 2 4 six total hope plus we have one that we're guaranteed to lose. So we're definitely losing at this point. We can't deal with that. So I am going to spend this one valor to get rid of one of these dice. So now I'm losing four hope. I have a total of three fellowship or friendship.
I'm going to discard all three of this friendship. So, I only lose one hope from that die roll. And then, of course, we have to lose another hope because uh he has one resistance card. That means we go from four back down to two hope. If we had not lost any hope from that roll, we would have gained an extra action. We definitely lost some hope. So, we will only have three actions remaining for him or we just would have four for Phamir. But I do think I'm going to have Would I want Froto and Sam to go next? I think I do. Or you know what? Actually, maybe not. I think I'm going to have them stay there. Let's do something with Phamir. Phamir is going to spend two actions right away, grabbing this Athelion resistance card from the discard pile for action one.
Action two, he's going to discard it to give ourselves yet another resistance token. 2 4 5 6. We now have six. Remember, we can use those for rerolls. So having some extras when we're at Mount Doom could be amazing. For our third action, then we are going to move to South Athelion with our two Gondorian uh characters and get a free attack. We're just doing that to get the eye out of Mordor. And we're only going to roll one die. I believe in my Gondorian. I believe in them. Yes, that takes out just a single shadow unit. There's one, two, three, four. There was five there. So now there's four remaining. Our final action, we're going to run back to Oscillith. We're doing these little uh gorilla attacks and then run back. The orcs are like, "What the heck's going on?" All right, that will end our activation. I have a feeling a sky darkens card is coming soon. We'll draw two more cards. We have another resistance card. That's actually great cuz right now the only thing that we need to do to win and another resistance card is to have Froto dunk the ring. All the other objectives are done. So yeah, our next turn maybe we really focus on getting Frodo there. My my problem is my hope is only at two and the only way I can increase that is by creating another haven and I do not have enough valor. I don't have any valor uh with our two our two players here. No valor at all. We'll flip our shadow cards. We have dull gold over to Helm's Deep. We're following this green line and I actually think we are lucky that does not activate any of the troops. Our second flip will be with
a banner. We have Moria and move to Nazgoul. That is a huge bummer because these two Naz Ghoul and Athelion will move into Mordor and that's going to increase the cost of that search at Mount Doom. Our third card will be another spawning Ner and deploy three of the Naz Ghoul either from Mordor or somewhere else to the eye. No way this might work. We'll place that one there. These two are going to go to Ailion and we'll bring a third from here. They're all in a That's why it's so important you have the eye, not where Frodo is. Okay, that was three. We're going to have Gollum activate next. And I've got a plan. I think we're just going to give this a shot. Gollum is going to move with Frodo for action one over here to Unun. When we do that, we would need to roll two search dice, but we get to reduce that by three because Gollum is there. Then action two, we're going to move to Mount Doom.
Oh, at Mount Doom, there are no enemies there. So, action three, why don't we just try and dunk the ring? And oh, wait, it has to be Froto that dunks the ring. So, we can't do that, which is fine. Instead, what we'll do for action uh cuz action one, action two, then action three, we will discard this to give us a resistance. Now, the resistance can be helpful. We can use that to roll as well. And then action four, cuz we have one more action. Why not? We'll discard this Roanian card. And we also have one friendship. Arwin has one action, but I don't want her to move out of dull Gulder. I need that unit there. So, I'm just going to have her stand there. She can't really do anything else. So, we're just going to draw two cards. We have Haradwaith. And our second one. Don't be Yes. Oh, Eagles. Move one character to any location. If Froto has moved this way and moved the seven closest Nazol directly into his region and shift the eye to his region, then we'll search.
Uh, thank goodness I'm not going to use that. We already are at Mount Doom. Can we survive these three cards? Okay, we have Umbar to Helm's Deep. We will start over here and go backwards around here. Uh, which means only this one moves up to Pellegrer and this one moves to here. We're okay with that. Second card, we have another movement. Morad and Minister. Minister is here. We go backwards then to here. Then to here. So this one will have a combat. Then we do go up. So this one will move down. Then here. Nothing here. And these ones are going to move to here. So we do have one combat in North Athelion. Can the Roherum and the elves work together? Well, they each will lose one. Uh I'll have a Roherum lost. I'll leave the elf there just because I want to. Our third and final card. Okay, we have movement.
We have dull gold to minister. This is also on the yellow track. So, yellow, yellow, yellow, and it is going to move to here. And then it's going to go to here and here. So, we do have one more combat in North Athelion. One elf versus one shadow enemy. Well, drop down that die. And oh yeah, there are most certainly Naz Ghoul there. So, that poor elf is gone. And none of the shadow enemies are defeated. We now have the final activation. Froto is currently in Mordor with no Naz Ghoul. We have kept the Naz Ghoul away. We are going to spend one, two, three, four, and five total resistance. We still have three resistance in our hand. And then Gollum has one that he can use for a roll. We now just need to complete a search, adding one for however much hope we're missing. We're at two. We should be at eight. So that means we have to roll six dice. And if we lose two hope, we lose the game. I'm realizing this isn't great odds, but let's just try. We'll roll them up. Okay, that's one hope. Uh that Well, that would mean we wouldn't lose so far. And we'll drop this one. That still means we didn't lose. That would mean we lose. So, we're going to need to reroll this one. I'm going to put it here. Uh this one. We'll need to roll that one or we'll lose because we're only at two. And this one. Okay. All three of these. What those are are Naz Ghoul will return to Mordor. That's
fine. We don't have any in our space now. So, I only need to have both of these roll either those symbols or a blank. I have enough to roll. Let's just see if this works. So, I'll spend one from Gollum. Go will roll it out. That will work. And then we have one here from Froto. Come on. That's it. That's it. We lose one hope. With one hope, we're down to one. But we just dunked the ring. And that, my friends, is Lord of the Rings: Fate of the Fellowship. This by far is one of my favorite games of 2025 so far. At least as a oneoff game. Every time I've played it so far. I haven't played it a ton, but each time it's been tense, fun, tight. The Naz Ghoul moving around, keeping the eye off of Froto, trying to move Froto around.
It is kind of unusual. You can move Froto. so far over here. But, you know, that's what they decided to do. I'm sure there's a reason. Uh, so being able to sneak through this, I think, really helped us. And having Gollum come over and help us. So, we actually I should have rolled three less search dice. Oh, well, I should have because Gollum was in that location. And uh, he's a guide. Yeah, it says if he's present when a search is rolled, rolled three fewer. So, I should have only rolled three dice instead of six. Well, that's okay. I rolled six and we still survived. That was so cool. I do want to call out because we really didn't see the symbol much. If Nazgle are present, recall one to Mordor, so that's what would have happened. But we had no Nasgol in our location uh in Mordor at all. So that was actually just a blank for us. Hopefully this helps you determine if this game is for you. Do let me know if I made any errors so I can put up cling on subtitles. Let me know what you thought. I feel like it's quite thematic. I know some people don't love that you always have to play with dunking the ring as one of the quests, which really means you always have to play with Sam and Froto. I don't mind that because if I'm playing this version of Pandemic, I want the Lord of the Rings experience. And that is the Lord of the Rings experience is dunking the ring. And then the other quests, I mean, just having 19 or 22, I think it said 22 other quests. And there's tons of other characters. You've got Gandalf, you've got Aowen, you've got Amer, you've got Legolos, you've got Mariam Pippen, you've got uh Glorendel, you have Gimly.
So, there's lots of different varieties. And you have So, the specific quest I randomly chose ended up being ones that were specific to characters. You also have ones that are not specific to characters. So, then you have more randomness of which characters you pick. As always, I want to give a huge shout out to our patrons and subscribers. It's because of you that Baron and I do what we do on this channel. And if you're excited to see what Baron and I have coming next, then I need you to meet me at the table. I'll see you in a couple weeks. Your master went to set me up against your enemies.