How to Play: Alchemists + The King's Golem
Games in This Video
2 games are featured in this video — they unlock as you watch.

Transcript
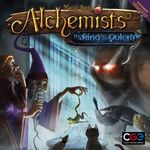
Viewer discretion is advised. Hey everyone, welcome back to another Howler Play and this time we are going to be doing Alchemist and it's new expansion, The King's Golem. Now, this is going to be a little bit different. Um, I'm going to start obviously not doing the first person cam cuz apparently that made everyone sick. Uh, but because one, this game uses an app, so I'm going to have to, you know, teach you how to, you know, play the game while also using the app. And then also, um, because it's also a deduction game, I'm going to also have to teach, you know, how to do the deduction part. I I think I'm pretty pretty good at that. So, uh, first we're going to jump into the setup and I'll make sure to mark the differences of what's set up between the new expansion and just the base game.
Okay, so this is the board all set up with uh, select uh, options and variants from the expansion. Now, I'm using three out of the four variants from the expansion. The only one that's not here is the and the Golem encyclopedia. Um, the rules say that you have to play with this to play with the Golem expansion. This is a separate board right here. Uh, I don't believe that's the case, um, cuz I played with the Golem and it was just fine. So, this is the board set up with with everything. And one by one, I'm pretty much just going to say where you have to do the set it up. So, the game comes with these uh, little trays. Um, I separate the trays out with gold and just set it right right here on the tower area.
And then all of the symbols, uh, the blue, green, red, and white symbols, I put them all in there and I set them on this tree. One of the first things that you'll probably do is you will get these uh, uh, ingredients. You will shuffle these and then place five ingredients down here on this track. If you can see, there are spots for them to go there. Then, uh, just another easier one is these are favor cards. You will shuffle those and if you are playing just the base game, you will only place uh, you will place them there. And then now, uh, if you just play the base game, there are these, you know, uh, basically items that you can buy at at the shop.
In the base game, you will take all of the level ones, there's level one, twos, and threes. You will shuffle uh, all the level ones and choose three of them and place them right here on the spot. With the expansion comes a new tile, basically a fourth spot for you to place, but it's it costs one less gold, but you need a favor of the king. That's what the uh, the royal seal, the purple is. That's what that is. And you will place that over this spot with the uh, the Chinese guy. You'll place that over over that and then just randomly place a level one there. Also, way over here, there we go. Right over here, these are the level twos and then level threes and that is open knowledge. So, after a conference, which I'll explain later, uh, the level ones go away from off the board and the level twos will come down. So, you will actually uh, you can plan ahead for that.
Um, and like I said, with the base game, you only have three uh, level one, twos, and threes. In the expansion, you have an extra one that will go right on that new tile. Next, also from the uh, the base game and even with the expansion, right up here at the top, that's basically like the conference tile, I guess. Not not really, but like uh, the the theory tile is it's a separate board and you will take uh, there we go. You will take the matching grants. These right here are grants. You will take those and you will place them. There's like a little faint symbol that you just place those on. Those will always go go there. You will take one of your flasks and place it on the 10. This is a victory point marker and that corresponds to a a lot of stuff. And then, uh, if you're playing with the Golem expansion, you'll add the Golem.
And then, let's see. Let's see what else is there. Also, if you are playing with the Golem expansion, you will have this whole separate side board right here with the Golem, the new area with the shopkeeper, and then the the library. You will place it over somewhere near probably to the side. This would make some more sense. And then, you you will take these king tiles and basically on them for the number of players, so I've I've set it up as a four-player game. Uh, you will remove anything that has four. If it was a three-player game, you would remove the ones with three and four and just that's that's pretty much that. You take these, shuffle them, and I kind of place them down there, just easier spot. And then you'll flip over the first one and that will tell you how many royal seals there are whenever you go to that to try and animate the Golem.
Uh, also, also, right over here is the basically the turn order track. This everyone will decide what time it is to wake up. Base game, it is just this. It is just this little little area there, but in the expansion, it came with these busy days tiles. So, this is for rounds one and two, three and four, and five and six. Um, and then you'll basically flip over the first one for rounds one and you'll just place it over that and it kind of makes it a little bit different than just the base game. So, if you are playing with the with the busy days variant, you will you will have those at your disposal. Also, way over there are the basically the uh, I don't know, the cauldron area. That's that's a board that the each player will have. If you're playing the base game, everyone starts out with three ingredients and two gold. But, but there is a variant as well that comes with these cards and you deal four out to each player and they choose two. So, this is a very of different way of starting um, starting the game. So, if you choose two, you would start out with one gold, one ingredient, and one more reputation. So, if I started with these two, I would start with one gold, one ingredient, and two extra reputation,
and two favors. So, deal four out to each person and that is that is one of the variants. But, the base game is just two gold and three ingredients. If you're playing with the apprentice variant, which is really the only time I've ever played. Last thing you're going to have to set up is basically the uh, the the adventurers that are showing up. Each uh, round there will be a new adventure except for rounds three and rounds, um, one one, two, three, four, five, and round six. So, you will shuffle These are the adventurers right here. And then these are the new conference tiles or uh, yeah, pretty much conference tiles for uh, each individual round. So, on rounds three and round six, there will not be any adventurers to buy from. So, shuffle the adventurers, place them like with one adventurer, then the conference. And the reason why one is because the first round you actually can't sell to an adventurer, so I just place one because no point putting one on and then discarding him.
And then you put two in between the first conference and the second conference. And then at very last round, you can have one more to buy to sell to trying to get some gold. And you will place those right here on this area. Oops. Oopsie. And then, All right, that's how you set up Alchemist. And now, uh, I feel like it'd be a good time to kind of go through my teaching of, you know, the deduction for both just the base game and for the Golem because it'll kind of make more sense on some of the ingredients, not ingredients, some of yeah, and I'm going to be the one teaching you. Uh, some of the actions uh, in this game. It would make a little bit more sense if you kind of already knew how to run with the the the the deduction um, mats. So, that's what we're going to be going through now. Okay, so I know I have the app all set up here. The app is pretty much self-explanatory um, and I'll explain a little bit more of the app as I go through the individual actions. But first, I wanted to teach you how to use these deduction um, papers.
Uh, the point of the game is to figure out the alchemical symbols of each each ingredient and you have a bunch of different ingredients that, you know, make a little bit more sense with your little uh player area. But, essentially, let me just go ahead and grab my little areas I can tell you what's what. Everything's kind of color-coded. So, unfortunately, this is not color blind friendly, but the purple are mushrooms, the green are these things. I don't know what those are. The brown is toad, the uh yellow is crow's foot, yeah, or raven's foot. Blue is flower. Uh this lighter brown is mandrake, red is scorpion, and black is feather. So, that's probably crow's feather and then raven's foot.
So, if you're playing with just the base game, this is the one you will be using. Uh nothing extra um on it. But, if you're playing with the expansion, you will be using this one. Now, the only difference between the two is that you have this extra golem um thing underneath it and you kind of have a sun and moon uh symbols on the side and then kind of a way to deduct. But, to teach you the base game, I'm going to just be using this one. It's way way simpler as I'm stepping all over my camera. Okay. Now, this may seem a lot more confusing than it is, and the reason why I'm teaching you this now instead of after all of the I teach you all of the actions you can do is because some of the actions, you know, rely heavily on this. So, whenever you were doing any action, how you're going to figure out what the alchemicals are, you are going to be scanning these ingredients, and that's what the app is for. I have set up to where you can just do it uh you select them by hand instead because it's just easier to teach that way. So, whenever you gather ingredients and you'll start with some ingredients and stuff like that, you will um scan them as one of your actions. Whenever you go to test on the student or drink a potion, which is basically test on yourself.
So, let's just say you have scorpion and the that that green thing. Okay? So, that by itself, yeah, a lot of noise. Those two ingredients produce a minus red, which is actually poison, and there's actually some effects to that in game because I tested on myself. But, so now you know for a fact because everything has its particular um symbol on here and its particular combination of So, for example, like every game, the red the scorpion could be, you know, a minus green, a positive red, and a minus blue. But, you know in this game that a scorpion and the green thing produce a minus red. So, you can know for sure the green thing cannot be a positive uh positive red. So, you can you can literally just mark all that out. That that is how you deduct. So, you basically already find out half of it.
And same for the uh the scorpion. There we go. So, like whenever we're looking at this, because you used green, the the the whatever root, the root and the scorpion and they came with a minus minus red, you can for sure say that they cannot be positive red. And that's how you pretty much figure figure that out for everything. So, let's drink another one. Let's do toad and flower. Toad and flower are positive red. So, whenever you go on here, you can mark out all of the negative negative reds because they cannot possibly have a uh negative red in it whenever those two um produced a positive red.
Now, yeah, yeah, that's right. You got to be careful whenever you're marking stuff out because you'll lose if you incorrectly mark them. So, now, since toad and uh flower produced a positive red, you can go on on here and be like, "Okay. So, now I know half of it." Okay. Well, that doesn't really help a lot whenever you still have four others to choose from. So, now that's what the point of the game is. You start doing more and more different combinations. So, let's just do toad and mushroom. Toad and mushroom is a positive blue. So, on toad, right here, you would mark out all negative blues. So, that's a negative blue right there. There's a negative blue right there. So, now there are two two options for toad.
Right here and right here. And you can also do that for uh what did I do? Mushroom. Mushroom was purple. So, now, mushroom you can mark out all negative negative blues. And so, you're starting to you start to learn a little bit more about every ingredient as you go. I do want to say, though, you will never find out all of them for sure just by, you know, testing. You you don't have you don't have the time to figure out all of them, but there's deduction and and other ways you can figure it out, and that just comes with a little bit more experience. But, let's see if we can figure out Okay. So, with toad and I believe that was mandrake. Yeah, toad and mandrake. That came out a positive green. So, out of the two options we have for toad, right, if that'll focus, that one's a negative green, and there's a positive down here. So, because of, you know, process of elimination, we know that toad cannot have a negative green. So, we have now figured out that toad is toad's alchemical symbol for this game are all positives.
And you do that for all of them. And also, what did I do? Mandrake. Mandrake was uh this one. So, you would just mark out all the negatives because mandrake cannot possibly have a negative green. So, you just kind of found out a little bit a little bit more. So, in just four Let me Let me zoom out a little bit a little bit. And like four or five different uh testings, you have figured out the toad is all positive. Now, that make more sense of why you're trying to figure it out. But, and then you mark out a whole bunch of other stuff with uh with the rest of the testing. You basically find out two things for two ingredients, but if you really you have to narrow it down, you have to focus on one, maybe two, and you you you can find maybe three in the entire game. Um but that is how you figure out the alchemical symbols in the base game.
Okay. Now, I'm going to teach you how to use the golem expansion. Uh now, bear with me. This is going to be a lot of um a lot of back and forth on this because it's just going to just to figure just to get the the combinations uh with just doing it by hand instead of playing the game. Um it's just it's just how this works. So, what comes with the the golem expansion is you can now visit the library, and the library will tell you what like the uh the solar or lunar uh aspects of these ingredients are. It's basically a quicker way of knocking out um half of the ingredients. So, just for um you know, just for, you know, teaching's sake, I'll just be going to the library and figuring out a whole bunch of them.
Just bear in mind you don't have all the time in the world with this game to do this. So, you can't figure out all of them. But, I am going to teach you how to uh also figure out the golem expansion because uh uh for me, it was a little it was a little bit difficult. So, so, whenever you visit the library, you actually get a get annoying music like that. Um you you are given a plethora of options. You're given four ingredients at random of what you want to try and figure out what what it is. So, if we'll just do scorpion. Okay. So, you select it and you hit confirm. This tells you that scorpion is solar. So, you know for a fact through uh deduction or process of elimination or common sense, you know, and it's right here down on the side. So, there are, you know, the solar and lunar. You know for a fact that scorpion, which is the red, cannot possibly be lunar because this is telling you that it is solar.
And see how how quickly that just basically knocks out half of them. And so, uh let's see. I'm just going to do it for a lot of them. So, that is mushroom. Mushroom is lunar. So, you know that it can't possibly be solar. And let's just do a few more. We'll do toad. Toad is solar. So, it can't possibly be lunar. And then uh we'll do uh let's we'll do flower. Flower is also solar. This is just a quicker way to knock out um a bunch of them without actually testing on yourself. Now, whenever you go to uh visit the golem the visit the or the yeah, the research golem space, you'll go on the app, click research golem, and test golem.
And you basically choose one of the eight ingredients uh to see how it's going to react. And the golem will react either by steam coming out of his ears or lava coming out of his chest. Something like that. Uh you know when you reanimate you when you know you animate him whenever his eyes light up. So, since I did four of these, let's just do the scorpion. Okay? Now, this tells me that the yep yep that scorpion activates only his chest. So, you can kind of mark mark it like this. Let me Let me show that up. Down at the bottom, this will tell you, "Hey, it marks scorpion activates his his chest." Yay!
Yay! So, I kind of did I kind of do a check mark. And we'll do Let's see. Test golem. And we'll do We'll do all the four. So, this right here, this means that that nothing works with flower. Flower does not work on the golem. And then we're going to go back and we'll do We'll do toad. Toad gets steam coming out of his ears. So, okay, that's good. That's good. Now, this chest. And then the other one was mushroom. Okay, so that was nothing. Now, what you do with this information kind of figuring out how to reanimate the golem or animate the golem is a little bit different than the rest of them. So, what I'm going to do is I'm going to go through all of them just to get all the just to get perfect information, which you won't have in this game.
Um but just for teaching's sake. So, this tells you that that this thing I wish I knew what that was. Activates both his his ears and his chest. Okay? All right. So far, so good. We'll do crow's foot. That also does the same thing. Now, you might be thinking, "Oh, well, those are the And basically there are two ingredients out of all eight that activate the golem." So, you might be thinking, "Oh, well, you know, the the green thing in the the raven's claw raven's foot is what it is." That's not the case. Um and and I'll tell you why. So, let me just get all Let me just get perfect information. So, I got mandrake. Mandrake activates his chest.
Not his ears. And then last one would be the All right. So, what this tells you is basically whenever you're trying to animate the golem, it goes off of the size of the the uh the the three different colors, you know, red, green, and blue. If that makes any sense, because if you can tell right on here, they're like they're different sizes. So, like a big green and then little red and little blue. So, that that that does matter. So, let's see. Let's see if I can just do enough to figure out I'm going to do toad. Uh toad has a positive um blue.
Uh actually I think if I was doing this right. Oh, yeah, yeah. So, toad was all positives. All right. If I'm not mistaken. I could I could just go to the final round. You know, I am going to do that. Just go to show answers and do the game. Just to just to figure out what all of these are just so I can teach you guys. Don't ever do this during the game because that's uh that's cheating. And you'll be punched in the hoo-ha. So, I just basically circle all these. Uh so, toad was all positives like like I knew. And then scorpion is a minus minus positive. And then let's see. Crow was all negatives. Flower was minus positive minus. Minus positive minus. And each one of these None of them can match. So, if you ever the way to, you know, deduct and and figure out what's what is if you're ever stuck between two ingredients and you're like, "Oh, well, you know, there's no way that, you know, scorpion could be all positives cuz I know that toad is all positives. So, that means you can just mark out everything else because you know that toad is all positives. So, that's just that's just a one way to actually do it.
And then the claw is minus positive positive. Where is that? Minus positive positive. And then positive minus minus. Positive minus minus two. Is that all of them? Everything except the mandrake. That is positive positive minus. Okay. All right, so that's everything. This is this is I'm not going to show what the golem is cuz I want to prove that I actually know. Okay. So, I figured out, you know, because I'm awesome at this game, what every ingredient's alchemical symbol is. And what that like I said what that means is the different positives and minuses of each color. Now, to animate the golem, you basically would disregard the ones that gave you nothing.
Like for for the ingredients. So, in this one you would dis you would disregard No, no, no. Yeah, disregard the the feather and you would disregard the mushroom. That's just an easier way of doing it. Okay. Okay. So, whenever you're trying to figure out the different combinations of of the golem, like what activates what, you will look at basically what activated his ears. Like what I do is I look at the uh um like the ones that just that don't have both. I just look at the ones that have one. So, toad, for example, only activated his ears. I hope this is all making sense. They only activated his ears. And you know that toad is all positives. This is actually pretty good.
All positives. And um but you're not looking at the symbol, you're looking at the size. So, in for toad, they are all big. So, a big green, a big red, and a big blue. They That means you know for 100% certainty that the ears cannot react to a minus or a minus a a small blue, a small green, and a small red. You know that because the ears reacted to all bigs. Now, you're going to get things that are going to contradict you, but um but that's that's just going to happen. Um so, you know for a fact, "Hey, toad was all positives. They were all bigs. And the ears reacted whenever I gave him a toad. So, that means it cannot possibly be uh any any smalls." And so, you just kind of do that. You kind of look at, "Okay, well, what else um Oh, did I mark that out? Oops, I didn't mean to mark that one out because um the ears reacted. So, um so, ignore that. Ignore that line.
So, you also have you know, um clarification that the the feather reacted and those are all bigs as well. So, that just kind of confirms that. Now, if you were to look at the chest, let's see. The chest reacted to a big red. So, that means you know the chest cannot possibly react to a small red. Therefore, you know that the minus reds uh are not what to use to activate Oops. Activate the golem. And then they also uh activated to a small a small green and a small blue. Therefore, you know for a fact the chest cannot reactivate reactivate cannot activate to a big green and a big blue. Yay! And then you just kind of go through that. So, this is pretty much the same size as that one. And now this is where you start looking at the ones that activated to both. So, if I was looking at the ears, I would know that, "Okay, the ears reacted to a small green, a small red, and a big blue. Therefore, but I know that um it cannot be a a small green, a small blue, and a small red. So, okay, well, they activated to a small red. Therefore, it cannot possibly react to a big red.
And it activated to a small green. Therefore, cannot possibly be a small or a big green. So, now we know for 100% certainty that the ears react to a big blue. I really hope this is all making sense because it's it's making sense to me. All right. So, now we know that the ears react to a big blue. Okay, well, what about the chest? Well, you can pretty much do the same thing. Okay, well, the the chest also reacted to a small green, a small red, and a big blue. So, the chest cannot react to a small blue because it reacted to a big blue. But also earlier, we found out that the chest reacted to a small a small blue. So, it can't react to a big blue. So, it kind of contra it contradicts and cuts both those out. All right. Well, it it it act Yeah, reacted to a small red. Therefore, we know it cannot react to a big red. And through process of elimination, we know that it is the ears react to a big um a big uh um a big blue and a small green. Okay.
Okay. Now, whenever you figure that out, you basically follow this arrow down and you now know that the golem reacts to alchemical symbols that are a positive blue and a negative green and the same size. So, now what you do with that to to actually animate the golem, you look for two the two ingredients that have both these symbols. So, there's a big uh a big blue a big positive blue and a minus green. So, hmm. Well, which one has those? Well, Scorpion has a positive blue and a uh negative green. So, it's Scorpion.
Can you still see all that? Yeah, let me kind of kind of zoom in a little bit more. All right. So, Scorpion has that and also there is it it and crow's foot. Cuz crow's foot has that negative green and the positive blue as does Scorpion. So, whenever you go to animate the golem, you go to research golem and animate golem and then you would scan the two ingredients. Actually, no, I don't think you scan. I think the king provides you with the ingredients. So, Scorpion and crow's foot because crow's foot has both of these symbols that we figured out through process of elimination. There's the minus green and the positive blue and then uh for Scorpion, there's a minus green and a positive blue. So, you would get pick those two ingredients and hit confirm and it's going to go through this animation that you can't fast forward.
Move that over so you guys can see. I really hope I'm right because that's going to be embarrassing. Yay! Yay, I'm right and that's that's what's going to happen whenever you figure it out. Uh just check marks. Now, he's alive um and you get a lot of points that way. So, that's how you animate the golem. That's I mean a very simplified and quicker version. You're never going to have that perfect information, but um it is possible. I've I have done it. So, uh that is how you basically play this game. That's the golem expansion. Um that's just a different way of of uh um you know, playing this game. The base game is literally just this pad. No golem, no sun and moon, just act uh activating and scanning ingredients and then uh testing them and figuring out you're literally just figuring out the alchemical symbols. So, I hope that helped and uh yeah, so now we're just going to go on to the actions. Woo!
Okay. So, now I we're going to go through the actions and now it'll make a lot more sense. What you are going to have to do and and by half, I mean you have to do it. You can play this game without an app. It is awful unless you have a friend who does not mind just sitting there and telling you guys what the the what the ingredients are. Um and on the rulebook, I don't have the rulebook out. You there's actually a QR scanner, but literally you can just go on any iOS Android Play Store um and download the app. It will look like a flask. And so, you will have the app at your disposal. So, what I'm going to do is I'm going to um whenever you download the app, you'll have to you'll click start new game and then it'll tell you if you have the expansions. I'm going to click on the expansion just cuz it's easier to teach uh cuz it just adds the extra spots.
Now, what I'm going to do is I'm going to go through basically a basic turn uh and explain each uh each spot and how you will will place place your cubes. Obviously, I'm going to be doing it for just one person. There's no point in having every player up, but this is for a four-player game. And then uh yeah. Yeah, I hope I hope this is uh working. So, let's just go on to how you uh start your turn. Okay. So, right over here is kind of the time of day turn order track. That's basically thematically, it's what time you want to wake up and there's actually uh a thematic reasoning for each one of these spots. Basically, if you want to go first uh and guarantee you're going first, you have to pay a gold. This is thematically that you didn't even have time to make yourself breakfast and you bought some food on the way out. The rest of it is as early as you get up, which is from top to bottom, you go out and forge some ingredients or if you woke up later, you had some time to do some favors for the townsfolk. It's really awesome. I mean, it's it's a CGE game. So, the person who has the starting player token will take his one of his flasks and place it uh on on this track. Uh the very bottom one if you can see that is if you get paralyzed uh from testing on yourself, that just means you're you're definitely going last. Um
so, you decide how early you want to get up and everyone will do this. So, we'll just make it easy and go here. Yeah. Uh once everyone has done that, they will get the ingredients um or they'll get the items listed there. So, I would get one ingredient, which is the stupid green thing, and then one one favor. If it says a if it says pay immediately, um tr- trust me, that's that's what it says, you piece of [ __ ] There we go. Pay immediately. Uh you you have to do that. Pay immediately. Draw three ingredients and discard two. So, yay! So, what it's going to be So, I get three ingredients and then I have to discard two. So, this is kind of how you figure out Oh, well, what do I need to, you know, deduct and and figure out for the ingredients and unfortunately, I got a variety. But, I hate the green thing.
I want to know what those two are. And you just discard them. Um so, everyone will do that. Then throughout the game, you will have certain action cubes. If you played any CGE games, this will be familiar to you. But, on the very first round, based on number of players in a four-player game, you only have three action cubes. The rest of the game, you will have five, but the first round, you only have three. Now, in the first round, you only have a certain number of actions available to you. The actions So, the actions for the base game are forge for ingredients, uh visit the wise old alchemist who turns ingredients into gold cuz he's like the only one who's figured out, sell to the townsfolk, uh if with the expansion, it's uh test and animate the golem, uh test. There we go. This is literally test and animate the golem.
Uh go to the shop. That's same that's one for the expansion. Um this is the base game. Test for or uh buy an buy an item. This is visit the library, also expansion. This is uh debunk a theory. This is publish a theory. This is test on the eager uh intern and this is test on yourself. So, those are all the actions that are available to you. Now, in the first round, you are only limited to a certain number of actions. You can go get some ingredients. You can transmute an ingredient so you can get some gold. You can buy an artifact. And then you can test on uh a student and test on yourself. Those are the only actions that are available to you in the first round. That's why I don't place um the extra uh adventurer on because he get they get they go away. So, it's it doesn't make any sense if you can't even go there.
So, depend on how early you wake up, which is, you know, uh dedicated or um uh yep yep by the people on on this track, the people who actually are lower on the track will place their cubes first. And they will place them on uh the cubes uh down on uh or the the the spaces on each individual uh uh space. Now, there are a few that There we go. Here are pretty much all your examples. This means it's you it's just going to take one cube per action. Um so, like if I wanted to get two ingredients, I would place them like that and it would basically go for turn order top down to bottom on one row and then goes back up to the top and goes down. So, it's not like uh left to right. It's it's uh top to bottom.
This one means uh it to go here once, it is it takes one action. But, if I want to go there again, it takes two actions and it and it goes top to bottom as well. So, that's that. And then uh the other the other one is that to go there even once, it takes two actions. So, those are the different types of of cube placements. So, whenever the person who uh is lowest on the turn order track way over there, uh places their cubes. They will place them on the bottom because like I said, it goes top to bottom. So, whoever woke up earlier will get to see what everyone's doing uh before uh they decide what they want to do. And that's just kind of like the risk of hey, you know, I I want extra stuff. I want three ingredients, so I'm going to go last.
So, if I could see that um everyone is actually going to go get ingredients, I can be like, "Haha, I'm going to screw you over and get and I was there first and now I get what I want." And you And you have knowledge of what's available. You can also go and buy stuff um before people. You can publish theories and stuff, test on the student. Now, testing on the student and testing on yourself is super important on turn order because because well, actually just testing on a student really. Because when you test on a student if you ever produce a negative uh a negative symbol, that means that the student died or he's now, you know, insane or he's paralyzed. So, you have to get a new student and that student heard about the other student and is like uh yeah, I might you're going to have to pay me. So, whenever you go to test on a student you have to uh you know, do do the app. You it actually forward the bunker theory, sell a potion, test on a student, drink a potion, visit the library and research the golem. That is all through the app. So, yay.
Um So, that's what testing on the student does. And now now uh that was turn order. So, now I'll kind of go through all of the actions. All right. So, the first action that is available is gathering ingredients. So, based on the number of cubes that you have there, you get to choose an ingredient. There's two ways you can get ingredients. One, uh you basically take your your cube off and you can pick any one of these available or you can draw blind from the top of the deck. Um so, if you're going last and there's like all these ingredients are gone cuz people gather them and you don't want the crow, you can just draw from the top and oh hey and hopefully get something better than what you don't need. Uh I don't believe there's a hand limit, but anytime you go to use ingredients they get discarded anyway.
So, that is gathering ingredients. The next action available to you based on uh number of cubes there is transmuting an ingredient. So, remember to do to go here. Once this costs one action cube, to go there a second time costs two. What that means is you take one of your ingredients that you have in your hand and you basically discard it to get a gold. So, if I did that twice, you would discard two ingredients to get two gold. Yay. Uh and that's literally that that action. The next one is actually the first one that is going to be using the app. So, on the second round you will know uh what the adventure is. This is like the rogue. He wants a Oh man, what were these? He wants a poison, a stamina, and uh wisdom. I I think it is is kind of what it is. So, he's available. Now, what you will do on on this uh action based on the number of cubes you have is you will choose Okay, you're going to It's like all right, this I takes two actions to go there.
And if you know how to make an ingredient um you will be like, "Okay, I promise him a positive green." So, you kind of choose based off the two actions. You're like you you what you're promising him. Then, you will uh decide There were There were four options you can give him. Uh the highest one is okay for he'll he'll pay four gold. You are promising him exactly what he wants. You are promising him a positive green. The next one under that is you're promising him positive You're You're promising him the the symbol. Like, "Hey, I hey it it may not be green. May not be exactly, but it's positive, you know."
The uh second one is something neutral. Uh throughout the game you can find out, "Hey, these basically these ingredients cancel each other out." You can give him for two gold um a negative or a a uh neutral potion. And for one gold is this is something in a bottle. So, here's something. Hope you enjoy it. And he'll pay one gold. Um and also based off your reputation um if your reputation is bad and then the red, you cannot uh you cannot promise him. Um Oh no no no no, no. That's If you give him a neutral potion or something in the bottle, you lose a reputation cuz he hates you now. So, oh man, if I uh maybe I'll get lucky. So, whenever you go to sell to him, you will click the sell potion.
Um and then this is you will choose what you are giving him. So, since I promised him uh since I promised him a positive green, let's see. Let's see if I can just get lucky. Mushroom and mandrake. All right. All right. Hey, yeah. Uh all right. So, what this means is that I gave him a positive. It wasn't green, but it was positive. And so, I would gather my three gold. And so, what you do with your two cubes here um to go on that spot, you will choose what you're giving him and then what you're promising him. Um So, so that is is is that. So, since I didn't know what I was giving him, I chose that.
I was right. That's what the check green check mark means and I would get my three gold. Yay. Now, that is also a spot that if there are more there are multiple people there you can offer them discounts. And so, every If there are multiple people, you all secretly choose from these cards on that have your color on the back what type of discount you're giving him. And so, let's say it's me and someone else. And we're like trying to offer these discounts and I wanted to go first, I'm offering him a minus three gold discount. Now, you can't do this for anything other than you're promising him exactly what he wants. Now, whoever has by by the card that they choose, whoever has the most smiley faces, how happy he is, they're going to get to go first.
So, um So, yeah. So, if I wanted to still try and get some gold, but I could promise him exactly what he wants and I give him this one, that means if I get to go first, I'm not going to get the four gold, I'm going to get two gold cuz I offered him a two dollar or two gold discount. So, that is selling to an adventurer. The first action available um from the expansion Lisa I'm showing you is uh testing and animating the golem. Now, this also uses uh the app. So, whenever you go to do that, you will basically you can do this twice. Um so, you can and you have to have the ingredient. So, if I went to went went here and these Oh [ __ ] [ __ ] [ __ ] me. Uh these are king seals and they basically allow you to um you have to have them to go to the library and you have to have them to buy the special uh ingredient when or a special item at the shop. So, you will go and click on the research golem.
And in this case I'm just testing the golem and I just want to know what the green thing does. And so, as as I explained earlier, this tells me that it animates or he his ears and his chest react to that. So, that is um animating the golem. And you have to get rid of the You have to have the ingredient to do so. So, if I had the green one, it would then get discarded. Now, since I've tested on him, over way over here on the There we go. On the golem you know, golem board, you before you can even try to animate him, you have to test on him at least twice. So, since I just tested on him, I would move my own little flask up one. And then if I did it again, I would go up and now I can try to animate him. So, that's uh that's how that works and I've already explained what you need to do to animate the golem. To animate the golem, you actually still have to go to this spot.
So, also at the beginning of each round there are these king's tokens. So, these will tell you how many seals will be there. So, it's kind of more enticing to go here um because there may not be as many as many seals. So, since I went there, since I was the first one, I would get a seal. So, if you're going last, they may be maybe out. And then if you try to animate the golem, then you would actually uh and you failed, you would lose two reputation cuz the king's like, "You [ __ ] suck." So, that is the golem space. The next space is uh buying an item. Uh I don't remember exactly what buying an artifact, sorry. Same thing.
With the expansion with the king's golem expansion, you have this spot over here. Without it, you would just have this spot right there as I've said before. So, these uh give you, you know, special benefits for having them and also some of them are worth uh victory points at the end of the game. If you're playing with the expansion, you have this board. That means, "Hey, this item, this discount card, funny enough, is on discount. It It's It's minus It's You're buying it kind of under the table, so it's not as expensive. Instead of costing three, it costs two, but you need to have one of the King's Seals to get it. And also it tells you up here this is These are victory points, so that's worth one victory point at the end of the game. Um so there are There will always be three options, and this is how much gold they are worth and how much victory points at the end. So uh the Robe of Respect, whenever you gain reputation points you gain one more. So yay. Uh so stuff like that. So you can go there and pay the gold to get those. And also after each conference uh the level twos will come out and the level threes, so you always know maybe what to save up for or what what you want. So that is buying an artifact. The next action is uh going and visiting the library. That one you have to have one of the King's Seals to do so, but that is also one that will use the app. So whenever you go there, you will And once again it's it's just it's one action each, so you can go there twice.
You click visit the library on the app. And it does the music. It will give you four random ingredients um and you can't just go out until you get what you want. You have to pick one of these. I want to know what toad does, and you click confirm. Tells you that solar, which through the deduction that I explained earlier um you can mark out all lunars. So if you go there twice you would X out and go back in, and then click the ingredient you want, then click confirm, and then it tells you exactly what you want. But for each of those you have to have uh like if you went there twice you have to have two seals to discard. So that is visiting the library. The next action is technically debunking a theory, but I feel like it would make a lot more sense if I explain how to, you know, publish a theory and what that means um before I go. So I'm basically This is debunk a theory with the old sad man, and this is publishing a theory with the fat happy man. So on this board that you may have seen right here are theories. Uh the point of this game is to figure out the alchemical symbol for uh each of the ingredients, and then uh gain grants and and renown, and everyone loves you. So whenever you go to the publish a theory uh space, which is this one, you have these uh tokens right here with these with these uh seals on them.
There are a bunch of different types. Let me just set them up real quick. Um so you have Let me just go down here real quick. Uh ones that you can't [ __ ] see because of the glare because uh God hates me. So you have five different types, but you have you know, multiple ones. So you have one that is gold, that's going to be five points if you are correct. You have one that is silver, which is three points if you are correct. And then you have these three um question marks for each. Hey, hey, stop it camera. There we go. For the different colors. Whenever you go to publish a theory, you basically will choose one of these, and then you will also choose these symbols right here.
What these mean is that's that's your theory. So you will choose one of them. Let's just say earlier I knew what toad was. I will choose okay the positive all positives, and then way up here on the track you will take the the corresponding alchemical token and then place it on the ingredient that you're publishing a theory for. Hey, I feel like I know what toad is. So there's these question marks you will place the alchemical symbol token right where the ingredient that you're proving is. So for toad um so that's where you would place it. And then you would take one of those five tokens that I just showed you earlier with your your symbol on it and then you will place it face down. So since I knew for 100% certainty that toad was all positives I would I'd take my gold and and place it there. And you would place it face down.
Now, that to publish a theory it's going to cost you a gold because they're not just going to do it for you for free, but you will also gain a reputation for doing so. Also um now let's say I didn't know. Let's say I knew it was positive red and positive blue, but I wasn't quite sure about green. So I you could do this. You could take your five and hope that you're right. Or since you're not positive about green, you can take the question mark green and place it there. Each spot for each ingredient can only hold one of your colors, so you can't have like all your fives on one spot because that's how I'm triple sure that I'm correct. So uh since I'm not sure about green, I could you would put your question mark green there because if someone goes to debunk you and they're like, "Hey, I'm proving you wrong on green." You're not going to lose any points or reputation because you're like, "Hey, I wasn't I wasn't sure." So I'll explain a little bit more with um debunking a theory. So uh that's how you publish a theory. Also on the publish a a theory spot if you go to you can also endorse a theory, which means you pay a gold. So let's say I have two gold.
You pay a gold and then you give a gold to the person that you're endorsing. So if there was another person here and they're like, "Oh, I know that Seth is right on the on the toad." Then they would also take one of their seals of their color and place it under there, and they would pay me the gold. So that is that spot. Now that's publishing a theory. Also, let me just these right here, these tokens in the middle are grants. So uh they're worth points at the end of the game, and we'll just do this one. So this one right here shows toad, the the feather, and the flower. If you publish a theory, whether you're right or wrong, which you won't find out until the end of the game anyway, unless someone debunks you uh if you publish two out of the three theories, you'll get that grant before anyone else, which will also give you two gold and then the the two victory points at the end of the game.
Then you'll take that and you'll flip it face down and you'll place it on your board where grants go. And this means that now to get another grant you have to have um theories in all three. So this one right here, this if you already had a grant, you would need to have one for flower, mandrake, and the green thing before you can get this one. So that is how those grants work. Now for debunking a theory, that actually uses the app. So if I were someone else I would uh go on the app and I would go to debunk a theory. So if So this obviously you would take a picture of the the ingredients. Or no, I actually think you choose. I can't remember. But either or, since you choose the ingredient that you're debunking and you're choosing the color of uh of what you think is wrong. So if I was someone else, I would choose toad and green because I'm like, "Oh, I don't really know about that green." And I would hit confirm.
So that would mean that's get that tells you what uh green is. And that it's a minus. So because earlier someone said, in this case I said, that toad was all positives well, the app says said that it was a negative green. So that would mean that that person is wrong. So that would go away, and because uh and then uh later on um this would actually get flipped. The eh There we go. Um it's not going to focus because it hates me. But since uh that would get flipped, these can actually get discarded, which is why you want to be careful with your fives. Um so this will get flipped and it's like, "Hey, hey, I I said I wasn't sure." So I wouldn't lose any points cuz of this.
You lose points if if uh you know, you were right um or if you thought you were right, but you were actually wrong. And then down here on the debunk a theory spot the person who debunked it would get two reputation because they're like, "Hey, I'm smarter than that person." And then they would also get to immediately publish their own theory for that ingredient. So if they knew what toad was, they could you know, publish it themselves. So that is debunking a theory and publishing a theory. The next two actions that I'm going to explain uh I'm just kind of kind of do hand in hand because they're pretty much the same thing. Whenever uh the one on the left with the student is testing on the student, and the other one with the old man is testing on yourself. Um whenever you go to do any of those, those require the app. And so uh whenever I Let me kind of zoom out a little bit. So if I were to test on the student going to take one action, one action each. Um you would click test on the student and then choose your two ingredients or normally you would scan them. So I'll just do these two at random.
And that just tells me it's a neutral. Now, if you ever do a negative uh if I can get one There we go. Um if you ever do a negative on your first turn, any remaining people would have to pay a gold to do so uh to have to test on him because he's now very nervous of doing so. Even if you went again, like if I went up here and remember goes top to bottom, if I went here to test on him when he came back to me, I would have to pay him a gold. If you can't, you basically just remove your cube. Um And and that's that. Then there is testing on yourself. And that can have repercussions. So, whenever you go to test on yourself, you click drink potion, and then whatever ones you had earlier.
Yay, that's a it's good. But if you ever produce a negative, if I can now produce a negative. There we go. If I uh produce a negative, there are three uh bad things. If you produce a negative blue, that means you went insane and uh the rules say you were doing naked cartwheels, so you lose a reputation. If you produce a negative green, that means you're paralyzed, uh which means you're going to be going last in turn order. And if you produce a negative red, that means you were poisoned and you actually lose an action cube for uh the next round which or the next day. Um And so, uh whenever any of those happen, they can't happen like in a row. So, you can't get like double poisoned or something like that. So, that is testing on a student and uh testing on yourself.
One of the last things, over time, uh so this is the adventure earlier, he'll go away um eventually and then you'll have kind of a conference almost. Uh And if you're playing with the expansion, you'll have two of these tiles. If not, you'll only have this one. So, this basically tells you if you have given anything to the golem, which I kind of really didn't explain. Just like publishing a theory, you also have tokens based on, you know, the prog progress for the golem. Um and they are these tokens right here with the symbols on it and the sizes of the you know, the the colors. So, in a conference, you would have one of these with the expansion which tells you, "Hey, if you have any any any at all, uh you get a reputation and then also a favor." So, yay. And this is for the uh apprentice.
On the other side is if you have one, you only get a favor. This is master variant and if you don't have any, you lose reputation. So, I think it's more fun playing the apprentice. Then you have another one that corresponds to the the theories that you've published. If you have one, then you gain a reputation. If you don't have any, you lose one. Um so, that is the first conference you would have. Then over time, you know, these adventures would go away and you'll have another one. This one is uh it's it's a little bit a little bit different because based on the number of theories you have for the golem, can remember this one's for the golem, is if you have the most, not the most there, but like if you have one for his ears, uh cuz up at the top he has one for ears and his uh chest. If you have one for each, they are worth one point. If you have two, they're worth half. So, if you have two there, uh if you have more theories there, there it's actually worse for you. So, whoever has the most uh the total uh than everyone else will get two reputation. Whoever has the least loses two. And if you have activated the golem, first of all, you get points just for activating him, but also if you get it by this point, you get three reputation. I think you get five if you activate him just in general. And then if you've done it by this, then you get three extra ones.
And then for the apprentice variant for publishing theories, if you have three published theories, you get a reputation. And then if you have two, you lose one, one, you lose two, and none, you lose three. Um and this is the master variant. If you need to have four to gain a reputation. Then then at the very end of the game, the last round, you will have this tile right here. And those conferences and all that, those actually get placed over in this empty spot. Let me move the gold. That empty spot right there, so you know, "Hey, after this a conference is happening." So, that's where those go. But the very last round is going to be this this uh contest right here. Um And then yeah, one's for a four-player, the other one's for two or three-player.
So, very last round, you will go on the app and up at the top, you will click final round. Um because now that's an exhibit. You can exhibit your potion. So, you will take that and you will place it right over there, right above uh you can no longer test on your on yourself. Um Yeah, I think that's how that works. No, it's not. You just can't test at all. Hm. Cuz the the tile will match up with the board. So, that's where it goes. Um And as an action, as any of your actions, you can go there and these these are basically three individual actions. You can go there. And these are ways to get reputations. So, if you know how to make something on your turn, whenever it comes here, you will go like, "Oh, I know how to make, you know, a positive red. I know how to make a positive green and I know how to make a negative blue."
Then whenever it's your turn, you will click the exhibit potion and then you're like, "Hey, well, I'm trying to make a um positive red. I only remember." And then you will get the ingredients. I mean, I I wasn't correct because I don't know, but uh since I was wrong, you would actually lose a reputation. But if you're right, you gain a reputation. And if you're the first person to make both types, like, "Hey, a positive red and a and a negative red." You would actually um gain double reputation as well cuz you're like, "I know everything about red." And that is the final action of the final round. Um Then what you will do at the end of the game for final game scoring, um you will count up. I'll actually have to look this one up just to make sure. Final game scoring, you will uh all the reputation points that you've gathered, which basically is you moving around this track and stuff like that. Um Uh that'll be there. And then for any ingredients or any artifacts that you bought, you will count up those.
Um gold, for every three gold you have, that's worth one point. If you have any favor cards in your hand, you can exchange those for two gold pieces. So, if I had two favor cards, I can exchange these for four gold pieces. So, that's one point. Um And then the grants that you have, so those are worth victory points as well. Those right there. Um And then uh the basically it's called the big revelation on how um of of the grants that you got. So, if you were correct on uh any of your grants, you would basically calculate that based on the seals that you put there. So, if I put, you know, my gold five on the one that was correct, I would gain gain uh five points. But if you're wrong, if you're wrong about that, let's say I was like, "I know toad was all positives."
But I had this there. Well, that's wrong and you actually would lose four points for that. Um And if it's an unstarred one, like like the like the question marks, if you were incorrect about that, like you're like, "I wasn't sure about blue." But blue was actually correct um and and green was wrong, you would lose four points as well. Um but if you're properly hedged on one, like uh like if that was blue and blue um and and blue was wrong, then you don't lose any points for that. So, that is final scoring with the uh the base game. But there's also final scoring with the golem um as well. If you have activated the golem by the uh end of the game, then for every correct token, let's say it was, you know, big blue for the ears and little green for the uh for the chest, for every correct token there, that's four victory points. So, that'd be eight points total if you were correct on both of those. Um If you have two tokens there, uh then you get two victory points. Um and if you have uh two tokens there with no correct icon, you lose six victory points.
Um and if you have one token there and you're wrong, you lose eight victory points. Then if you have successfully activated the golem uh during the game, that's like I said five points. So, that's initially what if you're correct on both of those, that's eight. That's 16 points that you get if you activate the golem and you're correct on both. So, then whoever is highest on this track, yay, I got all the way up to 50. I'm amazing. Whoever's highest on the reputation track is the winner. Oh man. All right, and that that is it, everyone. That is how you play Alchemist and uh the King's Golem expansion. I hope I hope I did a good job uh teaching you how to play. This one was probably the most difficult how to play I've done yet. Um maybe a few things I didn't explain was you there's this little token here that kind of keeps track of, you know, what's worth points at the end of the game. I didn't really show the cauldron area cuz to teach the game it was easier not to just try and stuff, but this is the little cauldron area. You kind of build it. Your rule book tells you any ingredients that you scan and you figure out their symbol like oh, I know that mushroom and and crow is a negative green. You basically find the token and place it.
Uh you you just slot it in there and then you also have this little board right here that you will place cuz everyone everything is open knowledge of what you have created. So, if I made a negative green, then uh I basically take that and place it on this board. It's so they know I know how to make negative green, but they don't know what what makes it. Um and then the game uses your your camera. It does a pretty good job scanning, uh but there's a little cauldron here that you place the the cards, you know, uh up up on the top. So, you just kind of slide those in. So, they kind of fit right there and you you can scan those with the camera. Um it works just fine. You just kind of have pretty good lighting. Um but yeah, that that is that is how you play Alchemist and the King's King's Golem expansion. That that was wow. I hope I hope that worked. Um if I made any mistakes, I don't think I did. I feel like I played this well enough. If I made any mistakes, just make sure to uh let me know in the comments below and all love it and like it so people can see it. Um but other than that, I hope this was useful to you. Hope you want to play the game um and and have fun doing so. Uh but other than that, like, comment, share, and subscribe and have a wonderful whatever time of day it is for you.
Hey everyone, thank you for watching and I hope that you enjoyed the video. If you want to help out the channel, I have my Patreon link right there. If you want to make some suggestions on board games you like to see us run through, I have my board game geek list right there. And if you want to just, you know, like the Facebook page, I have my Facebook link right there. Have a wonderful whatever time of day it is for you.