Undaunted: Normandy - How To Play
Games in This Video
1 game is featured in this video — it unlocks as you watch.
Transcript
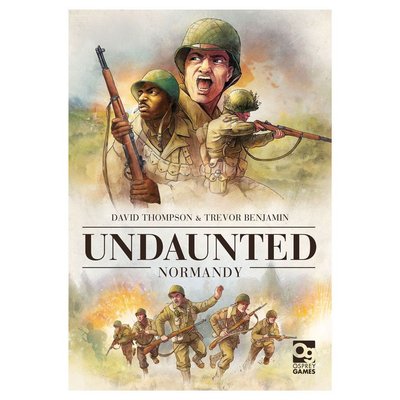
hi and welcome to watch it played my name is Rodney Smith and in this video we're going to learn the two-player game undaunted Normandie designed by trevor benjamin and david thompson and published by Osprey games who helped sponsor this video the Allies have landed on the beaches of Normandy and are starting to gain a foothold but the German forces are pushing back here you'll have to maneuver your troops and also press the attack at the right time to tip the scales in your favor so join me at the table and let's learn how to play to set up choose one of the 12 included scenarios and you could pick any one of them but they recommend playing them in order so we'll start with the first scenario called larae the game comes with a variety of double-sided tiles each with a number here and then either an a4 one side or a b4 the other the scenario will list the ones that you need under an image of how they should be laid out find all of those tiles returning the rest to the box and then arrange them according to the picture it'll look like this when you're done the game also comes with objective markers and you'll place these on the tiles as indicated by the scenario and when you're finished any left over objective tokens you can just return to the box each army has a variety of cards representing the potential units that will make up their force in a particular scenario and also combat counters that will match several of those units now to help distinguish the armies the u.s. players components
will be green and the German players components will be this bluish gray the players will now choose a side taking all of the cards indicated by the included table that comes with this scenario this will list all of the possible troops in the game box but you only take the ones with a letter in the column beside them and only one copy of each card per letter that you see for example the u.s. player would take one platoon sergeant but not a platoon guide they would take five riflemen a and five rifleman B but no rifleman C separate the cards so that type of unit has its own face-up deck in front of you on your side of the table it will look like this for the u.s. player and you'll also find the combat counters that match the cards that make up your forces now not every card will have a matching combat counter and that's fine but you will notice that some units have letter designations like rifleman a and Scout a so make sure that you find the tokens that specifically match those letters like this one rifleman a scout a the rifleman see token for example I'm just gonna leave in the box there are a variety of other tokens included in the game as well and you won't need every token but each player should keep the ones in their color nearby for use as needed these for example are the double-sided control and spawn markers and you'll check the scenario and then place any of them as shown in the indicated spaces with the appropriate side face-up along with any of the combat counters that begin the
game on the board now it's time for the players to create their decks using this table from each of the piles that you created earlier take a copy of any card that shows a D beside it in this case that means we collect one of each type of unit that we set aside along with to fog of war cards you'll then shuffle these together to form a deck that you'll place facedown nearby it's also a good idea to double check that you only have as many cards left over in your face up piles as the number of s letters found on the table for example we should have four of each type of rifleman two of each type of scout and eight of the fog of wars all of these face of piles are known as your Supply and their contents are public information for both players at the beginning of the game one of the players will start with the initiative as shown here so in this case it's the US player and they will take this initiative token putting it face-up in front of them with their colors showing the game also comes with four 10-sided dice which you should keep within reach of the players and that's the setup in undaunted Normandy players be trying to move into strategic positions win firefights and deploy new troops to be victorious for their side of the battle each scenario will provide conditions for victory for each player as here and in this one you want to be the first player to control five objective points and we'll learn how to do that a little bit later first though let's learn about the basics of game play which takes place over a series of rounds broken into three phases each
starting with the draw cards phase here both players draw four cards from their deck and if you would ever need to draw a card but your deck is empty either now or at a point in the game shuffle your discard pile into a new deck and then keep drawing as many cards as you are owed that ends the first phase and now it's time for the determine initiative phase where both players will select one card from their hand and then reveal them simultaneously the player who chose the card with the highest initiative value which is shown here in this upper corner they will take this marker and then flip it to their side in the case of a tie the player who currently has the token just keeps it either way both players would then discard their chosen card now it's the player turns phase where starting with the player who has the initiative they will play cards from their hand one at a time until either they choose to stop or if they have no cards left most cards you play will represent a token either on or off of the map and these will contain a variety of actions listed at the bottom for example this Scout can either scout attack recon or conceal and when you play a card from your hand you'll choose one of the listed actions to resolve and after that action has been resolved you can play another card and resolve one of its actions and so forth with that understood let's now go through each of the actions and see how they work if you're using a scout action it will have
a value in this case a two this means you can move the counter on the board with the same name and letter as shown on the card up to two spaces each move will let you go from the tile that you are on to an adjacent one that shares some portion of its edge now Scouts are special because they add one of your control tokens to any tile they enter that doesn't already have one and these control tokens are double-sided and this action places them with the scouted side face for each token that you place this way also take a fog of war card from your supply and add it to your discard pile if you would ever need to take more fog of war currents than are available just take as many as are available and ignore any others in other words you can still take this Scout action even if this pile is depleted you start the game with a couple of fog of war cards in your deck and as we know when the deck runs out you'll then shuffle your discard pile into your deck meaning then they'll be even more fog of war cards here and basically these are bad because you cannot play them during your turn you can see here I have one of them in my hand and it's one less thing I can do because I'm holding it though they can be used during your initiative phase and they have a value of one for that purpose some units you can play for their recon action and this will allow you to choose a fog of war card in your hand and remove it from the game you then draw a new card from your deck which can then be played as normal
during the same turn a move action allows you to move the matching counter this number of spaces so one in this case but the spaces you move into must have already been scouted or be under the control of your side which would look like this this is why scouting is so important because you can't use a move action to enter a space unless one of these tokens is already on that tile the other important reason for scouting is because to win you'll often need to control areas of the board with this control action now remember of course you can only perform one action on each card that you play but I use this card again to show you how this action works now you can perform this control action as long as the counter of the unit card that you played is in a space with no enemy units and there's one of your control tokens there with its scouted side face-up you then flip it over to the control side to indicate that your forces now control this tile if an opponent's control tile also happened to be there at this time showing its control side you would now flip it to its scouted side in other words only one army can control each I'll at a time if you play a card for its conceal action it lets you take a fog of war card from your opponent's supply and then put it into their discard pile I want to show you the inspire action next but first need to point out something special about this card it has stars at the bottom this and
others like it are known as command cards and they do not have matching tokens that you'll be moving around on the board instead you can think of them as being nearby calling out commands to the soldiers in the field when you take this inspire action the value beside it allows you to take that many cards from those you already played this turn and put them back into your hand which means you'll then be able to play them again this turn basically they're being inspired to act twice and if the action specifies a squad letter like a B or C then the cards you take back must specifically be from that squad here we have the command action this will always show a value which is how many cards you can then draw from your deck and add to your hand giving you more options to play during that turn with this bolster action you'll be shown a value which allows you to take that many cards from your supply and add them to your discard pile now if the action also specifies a lettered squad like this one does then only cards from that letter can be taken aside from the combat actions which we'll talk about at the end those are all of the actions that you'll encounter in this first scenario the rest of the actions which we'll discuss now you'll find in the later scenarios the guide action lets you move any of your combat counters up to the values shown as long as they move on to tiles that have already been scouted or are controlled by your side and this restriction applies even if you move a scout with
this action with the stock action move the unit up to the number of tiles shown but those tiles do not need to be scouted or controlled this target action is used by the mortar team and it allows you to place this target marker on a tile three or more tiles away from their counter now if the marker is already on a tile when you use this action then you can to a new one however if the mortar counter itself is ever moved for any reason take the target back from the board there are three types of combat actions in the game attack suppress and blast and they all follow the same steps though in the first scenario you'll only find units with the attack option to perform any of the combat actions first choose a target for attacks or suppressions you can pick any enemy counter on the board but for blast attack actions which are performed by a mortar team you need to first have the target token on the board then all of the combat counters on the tile with the target marker are considered targeted by the blast even your own units now no matter which type of combat is performed you'll then resolve the following steps which for a blast attack are done individually for each target for this example let's say the riflemen are attacking these Scouts and with our target picked you now check the defense total for that targeted unit which is the value of its base defense printed
here plus the cover value printed on the targets tile plus the range of the attack which is the number of tiles the target is from the attacker so in this case the defense would be five plus two plus one two more for a total of nine if a target is being attacked by a blast action instead you do not include the range in the defense so if these Scouts are being attacked by a mortar team their defense would be five plus two or seven some tiles have a 3-1 listed on them and these are Hills if the counter on a hill tile is attacked by another counter that is also on a hill or if the attack is a blast action then the cover bonus is the one otherwise if they're being attacked from any other location the cover bonus is a three now you roll a number of attack dice equal to the value printed by the combat action so in this case one died or if we were attacking with these machine gunners we'd roll two dice or if we were using their suppress action we total of four let's say we were using the machine-gunners to attack if any of the results rolled show a number equal to or greater than the targets defense the attack is successful the actual number of successes doesn't matter also if you roll a zero the attack also succeeds no matter how high the defense is which means in any situation a hit is always possible
now if the attack had failed nothing else happens but if it is a success check to see what kind of combat you performed if it was a suppressed attack then you flip the targeted combat counter to it's suppressed aside if it was already suppressed then nothing happens if the successful combat action was an attack or blast then you have inflicted casualties your opponent must now find a card matching the attack counters unit and remove it from the game it must come from their hand if they're holding one but if not then it must come from their discard pile if there's none there either and they must search their deck and take it from there reshuffling after now if none of those options work they instead remove the counter from the board I should mention you can always check the cards from your side that have been removed from the game but not those of your opponent now as you can see due to casualties sometimes a counter may not be on the board and then any time you play a card that names one of those tokens you take it and immediately place it onto a tile showing a matching spawn token in this scenario we only have ones labeled all so all Allied forces will spawn here and all German forces will spawn here but in other scenarios you might have some that specify letters or other categories in those cases only units that satisfy those requirements will be able to spawn in those locations we also saw that in combat a unit can
become suppressed showing this side and this means it will not be able to perform any actions on its card instead by playing one of its cards you forego using any of its actions and just flip its counter face up with that we now know all the possible actions you'll find listed on a card but instead any courage you play can also be used to perform a hunkered down action when doing this you simply return that card to your supply and just be careful not to remove all cards with the bolster action because if they're all gone then you'll have no way to bring out new units now the reason you would do this it's just so you can change the configuration of your deck perhaps you want to do less scouting and more controlling in that case you might want to remove some of the scouts from your deck and add in some more riflemen once the player with the initiative has finished playing and resolving all of the cards from their hand that they can or wish to for example I have a couple of fog of war cards here and I can't play these well once they're done then any cards that they played and any in their hand are then sent to their discard pile in other words you can't save any cards from round to round now it's their opponent's turn and they'll resolve their turn in the same way and when they're finished a new round begins to help you remember the steps that we went over in this video you'll find all of them summarized here at the back of the rule book along with reminders of how all the different actions work the game continues until one side has completed the conditions for victory as outlined by the scenario and as soon as
this happens the game ends immediately you do not finish the round now one way of winning as shown here is to capture a certain number of objective points when you control a tile you possess the number of objective points as indicated by these tokens here so controlling this tile would provide you with two points well this one provides only one however you don't need to have any of your units in those locations they can leave and go somewhere else or be taken off as casualties but as long as your control marker remains there then you control these objective points some scenarios will let you win by pinning as we can see here with the German objective in the second scenario and this will happen if your opponent has no rifleman combat counters on the board now if both sides are pinned but neither of them have one which might happen if a mortar attack kills several riflemen at once the game ends and the player with the most objective points wins in the case of a tie the player with the initiative marker wins in very rare cases it may be that it is impossible to win a scenario by scoring objectives and if this happens the game is resolved following the beyond all hope rules but this is so rare it would be best for you to just check these rules when they occur or if you like you can pause the video here and read them for yourself as we wrap up I should mention that although you can play each scenario as its own game you can also use the included rules to play some or all of them as an ongoing campaign as explained here which I'll leave for you to
discover on your own otherwise that's how you play undaunted Normandie if you have any questions about anything you saw here feel free to put them in the comments below and I'll gladly answer them as soon as I get a chance you'll also find forums for discussion pictures other videos and lots more over on the game's page at BoardGameGeek and I'll put a link to that in the description below and if you found this video helpful please consider giving it a like subscribing and clicking that little bell icon so you get notifications anytime we post a new video but until next time thanks for watching you