1811: Albuera First Look & Overview | Napoleonic Wargame Board Game | Tactical Workshop
Transcript
hi everybody I'm Zilla Blitz and welcome today we're going to do an overview of 1811 alera second edition designed by Frederic Del Sanchez and published by tactical Workshop this game is potentially coming to crowdfunding in early 2025 and we'll be looking at a final production copy of the game in this video we'll explore the history behind the battle take a look at all the components and talk a little bit about some of the gameplay features now the Battle of AUA fought in May of 1811 was a significant and bloody battle in the peninsula War which was the French French Empire's attempt to conquer the Iberian Peninsula in the early 19th century the battle was fought near the village of alera which is south of bados Spain and the impetus for the battle was a French attempt to relieve their besieged forces trapped in bados Coalition British Spanish and Portuguese forces fought to foil this attempt initially the French gained momentum by outflanking and trying to divide the Coalition forces with French Cavalry inflicting heavy casualties on British infantry however Fierce resistance from Spanish troops and the arrival of British reinforcements halted the French Advance finally a decisive British Counterattack ultimately forced the French to retreat after a brutal daylong engagement the battle was among the bloodiest of the war with both sides suffering roughly 6,000 casualties the French relief forces uh withdrew 2 Days Later their attempt at gaining a strategic Advantage from this battle ultimately failing let's jump in now and take a look at the game so we've got
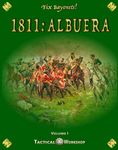
1811 alera laid out here in front of us we've got some counters to look at cards some player AIDS and then a rule book as well as a battle booklet and then the maps underneath we'll get to all that momentarily but before we do let's do a quick overview of this game now one thing to note this says second edition on the box right in the middle this will replace a 2020 Edition and if you have the original Edition or you're wondering what's different quite a bit uh we've got new event cards newly designed counters a redesigned map a new series uh rule book with uh improvements and changes to the rules things like facing Cavalry and melee uh a bunch of other rule changes and improvements you also want to note that this is listed as fix bayonets volume one and we can see down here with the documentation we've got a series Edition rule book and then to the right of that the battle rule book we'll take a look at both of those momentarily but uh based on what's on the company's website if this uh publication does well the thinking would be to create more volumes following this same series of covering Napoleonic combat so before we talk a little bit about the mechanics let's do a brief uh broad overview of gameplay it's listed as a one to two player game the the there is no soliter option however it would be soliter friendly uh but there isn't a bot or anything to control one of the other sides and gameplay length is listed as 2 to eight hours there are four scenarios in the game two of them are shorter that I would categorize as those two-hour scenarios and then there are two uh full daylength uh options to choose from in terms of scenarios those would be your
longer 8 Hour game starting early in the day and ending late at night um and each turn represents about 15 minutes the historical length of this scenario of this battle was a full day and that's what this covers as well unit scale at there's a step system I believe the maximum for an in infantry unit is four steps and each step represents about 200 infantry soldiers and about 150 Cavalry the scope of the battle historically was about 23,000 troops for the French and about 35,000 troops for the British and Spanish and Portuguese Allied Coalition that was here now with any Napoleonic game the question is what type of system is here and how complex is it Napoleonic combat of course uh Infamous for its formations and the variety of tactics and command structure and this by all means is a full-fledged Napoleonic combat system um we'll talk in depth a little bit about the complexity in a bit but here are some of the things that are modeled uh command and control there's an activation system which I think is going to be very friendly for soliter games leaders of course are modeled there are unit checks that you're going to be passing like morale checks and things there are reaction zones as opposed to zones of control and those zones will vary based on the unit type status and formation there are of course formations in the game and facing is involved as well chain of command is very detailed in how it's modeled in this it's a very interesting element of Napoleonic combat and this game has a chain of command it
has Aid de comps that are going to be passing on orders and then each uh or structure is going to be act to kind of take objective markers within the game cohesion is a huge Factor as well and basically in the longer scenarios you're trying to break down the cohesion of the enemy basically trying to get them to break uh environment and weather is modeled as well there is opportunity fire and then the big four things in terms of combat types that you would expect to see in Napoleonic combat charges assaults melee and fire combat so yes this is a full-fledged meaty tactical combat system for Napoleonic Warfare everything is here we'll talk about that a little bit more as we look at the r rule book and go forward and let's start with that let's jump in and take a look at the documentation there are two documents the the series rule book so the idea I think behind this is that this fixed bayonets system rulebook would carry over to subsequent and future modules and future games in the in the series whereas this 1811 alua rule book but a battle book really can contain your scenarios in any specific rules or information you need to know to execute this game in the series very nice I always really like to see a series rule book because that means you learn it once and when you learn it once you can play a number of games with it let's start by looking at this fixed bayonet series rule book here which is uh fairly Hefty um 56 Pages including the back cover we've got some unit descriptions there then we have some uh definitions of terms which is very handy as you're reading through the rule book 16 sections of rules altogether fairly text
Heavy uh there are a lot of good uh examples in here and articulation of rules but this is a complex and Meaty system as we can see both by the volume of rules and then the just the amount of detail that's included here I think sometimes looking at stacking rules is a good way to get an overview of a complexity of a system here and we can see that you know game often times has two units or two steps or something like that or four steps but we've got a number of detailed items included in the stacking section here generalities stacking order is important stacking limits stacking restrictions with exceptions a protection limit a formation limit artillery and mix stack stacking violations and then stacking the uh training experience modifier tem checks here so you know we've got a little about two pages or so on stacking so you know this is a hefty system that's going to really dig into Napoleonic combat for someone who wants a good simulation based system that's going to cover all of the different variables and elements of Napoleonic conflict I would give this a 6 and A2 or a seven out of 10 on the complexity scale the Box uh rates it a medium to high and I feel like that's kind of that number represents that and to reiterate I think the vision behind this that this is a series rule book so that you know once you learn these rules you'll be able to apply it to a number of games in the system interestingly enough despite the Hefty series rule book The Battle book here is actually only 16 pages and it's uh quite uh light
in terms of individual battle rules with most of it this is historical background information um some terrain rules a listing and detailing of the opposing forces that were involved in the battles then we've got some special rules here but this is very light it's only a quarter of a page and then we dig right into the scenarios there are four scenarios two learning scenarios the first one here Gerard's initial assault is infantry and artillery only then we've got a a short Cavalry action I believe both of these are five turns so about an hour and 15 minutes of real time and this one involves only Cavalry so these are designed as learning scenarios then the two Hefty full day scenarios are the historical scenario that follows the historical order of battle and then over here we have a whatif scenario that gives you a little bit of flexibility and in terms of timing and placement of units to create some a variant on that historical scenario one of the things I did note here this is the uh setup I find this really hard to see I was trying to I figure out where units would go I might need to explode this with the phone it'd be nice to see this a little bit larger somewhere as I found this really hard to kind of tell which unit was which on this um that's one of my very few comments or kind of kind of wonderings about the game is could I actually use that to to detail the setup or so but other than that I got some more Historical Notes in here this looks really good I love the historical emphasis and the uniforms to the degree that it was possible the design notes mentioned they really tried to get the uniforms accurate to represent uh history although there are some places where there probably are some you have to make some educated guesses as to what it was like and then an entire list of
reference this feels like a very uh heavily referenced and researched game let's take a look at the counters now there are five sheets uh over 600 counters in the game of three different types so the unit counters are 3/4 in by 3/4 in and then there's uh markers that are used to designate various statuses of the units in the game and those are all half in by half inch then there are also formations so here we can see a column formation this is 38 of an inch by 3/4 of an inch so thinner more vertical counters and then a line formation over here and each of these sheets basically carries on that same type of uh element where we've got the units on the bottom status markers here and then some of the formation markers in the top right of the three various sizes all of the counter sheets are double-sided we can see the backside here now of some of these British counters there is a step system in the game and the units for example these two units are identical this is step four you'd flip it over to get step three here's step two and then back on the back side here is step one and then after that the unit would be would be gone so you've got a number of uh steps that are represented so a unit can C be kind of categorized by more than one counter in the game now let's jump in and take a closer look at one of the Infantry units to talk a little bit again to give an idea of some of the elements of gameplay so if we look at this uh British infantry unit here we can see basically five numbers of importance here and along the left- hand side the top left we've designated that is the step of the unit the middle number on the Le hand side is the
Skirmish value if it's infantry if it is Cavalry it's a recall value and if it's artillery it's going to be range in this middle left here so sometimes the figure can represent a different value the different element of gameplay depending on what type of unit it is the bottom left is the general combat value of the unit and the top one on the right here of the two is your training experience multiplier modifier which is basically represents kind of the experience of the unit that's fighting and then down on the bottom right we've got movement factors and we can look through more of the counters they all basically kind of have that similar type of system if we look at the French units we can see some leaders on the leth hand side if we pick one of these leaders here these numbers represent different things so strategy rating for the middle left for the leader the bottom left is the command radius then the training experience modifier the same as for uh battle units in the middle right and then at the bottom we have movement factors so some similarity of units there too but a lot of detail again to this system we can see some charge markers up here more formation markers as we go through we start to jump in now to the Portuguese unit some more British units here a really nice pallet of colorful counters to play the game with and more French units here and then down and we get some Spanish units as we go to the bottom again the the Allied Coalition was Portuguese Spanish and British all the defensive forces of the day here looking mainly at some Spanish units as we go through here really magnificent counter set very very colorful uh lots of
different details and elements of gameplay uh exhibited in these counters it is a going to be a very spectacularly beautiful game to play once you get the units out on the map let's take a look at the player AIDS now we've got three orders of battle so this shows the Spanish units here what's really neat to all of kind of giving the different organizations and formations and we can see the color bands here these are important for command and control as that's going to dictate the whole order system system and how units can uh kind of stay within their unit formation and adhere to command this is neat on the back side for each of the significant leaders on a side we've got dramus Persona which has the counter then some historical information and if there's kind of a a portrait of that character available that's included as well really nice touch often times the historical information for a game is you know buried in the rule book so you don't really look at it when you're playing it's kind of nice to have it on the back side of the the order of battle so I can imagine as you're playing you've got a couple of minutes you're checking it out and kind of reading some of the history of the characters uh likewise the French order of battle does the same thing so we have the unit structure the order structure command structure with the top leaders up here and then again historical information on the leaders likewise the Anglo Portuguese Army does the same thing unit structure then the back some historical information on the leaders at the Battle really nice touch this player Aid you'll want to keep out beside the map to track for example this is going to be the French cohesion Spanish cohesion you're tracking a number of variables in the game game this is your turn record the weather designation is up here we can see 15 minutes for each turn so you're going to use this for your turn record track the
special events cards we'll take a look at those momentarily and then you use the leader cards that are in the game to kind of keep track of the activation system we've got some boxes over here for routed units and then up here the reserve order and then the fatigue track so a lot of variables again in this game this is a robust system of Napoleonic conflict and this is the play that you Ed to track all those variables lastly we have two uh player Aid charts these are identical for one for each player so again looking at the the detail in the combat here fire value modifiers table there's a good amount of these fire combat procedure melee combat table melee special Legends and we look on the backside here more information on the uh this is that training experience modifier uh value modifi stacking limits as explained here weather in time of day effects unit game effects summary and yes we should talk about the sequence of play there is a a rally phase where sides to side with initiatives going to go first to try to rally units then an operations phase where players are going to play your leader cards and based on their initiative value that leader is either going to go first and then the next leader will go second but you can also attempt to interrupt that order so there's a rather elaborate system for initiative and how leaders are going to attack basically you're going to be working through a stack of your leaders as you go through this operations phase then out of playay phase is a subsequent phase I believe for subordinate leaders I'm not quite sure on this one yet assault phase happens after all of this operations phase and then a cleanup phase and you go on to the next turn so both players active during a turn
alternating activations throughout this operations phase let's take a look at our cards in our game there are two different types the bottom left here we have some event cards most of the cards are leader cards and they're over 50 cards in all in the game and these again are going to be the cards that players are playing to generate the activations in the order in which the units are going to act execute their orders uh some leaders have special characteristics we can see the thought bubbles here that give them special behaviors as they are activated down here we can see the event cards so here play this card after rolling on the leader casualty table treat the role as scratch or bruise no effect it was but a spent ball so a lot of different elements to kind of interact G play again this is a a very detailed and thought through and robust system evident in this game before we jump in and take a look at the map and all its I would be remiss to not mention that we have two 10-sided dice for executing combat in various game functions lastly our map I really like the artistic style behind this map I'm not quite sure I've seen one similar to it but the shading makes it clear which way is higher and lower it's a little abstract and artistic but I think it's going to work really well especially up here in the hills for delineating the various uh height advantages that units might have we've got the village of ala over here now these are fully mounted Maps uh solid sturdy mounted Maps here 29 in x 44 in wide as we look at this entire Battlefield to get an idea of the
footprint historically each hex represents about 120 M from side to side and if you measure them they're just over an inch an inch and 11/16 of an inch here so nice big hexes to drop our 3/4 inch counters in we've got some Woods over here on the right Woods down on the bottom left some roads this River plays a quite an element a tactical element in the battle as well and of course again the vage of alera right in the middle here um really nice design I think this is going to be easy to parse as you play it's really clear for example what the terrain is on each unit on each hex not going to have any qualifications there we can see North going up here towards the uh the right as we look at the map here but yeah I just I I really like the look of this one I think this is a really uh unique artistic execution on the map and again my understanding is this is completely uh redesigned for this second edition so there we have it the revitalized 1811 alera second edition volume one in the potential fixed bayonets series all of this from tactical Workshop I will put a link down in the description if you want to be notified as to when this campaign goes live or if you'd like to be kept up to date of the information on there there is a link to a page provided by the publisher that has uh the ability to follow that page and get updates as the game is progressing through its crowdfunding and development thanks so much for watching Everybody I'd be happy to answer any questions you might have um have a great day