Ragusa Tutorial & Playthrough - JonGetsGames
Games in This Video
1 game is featured in this video — it unlocks as you watch.
Transcript
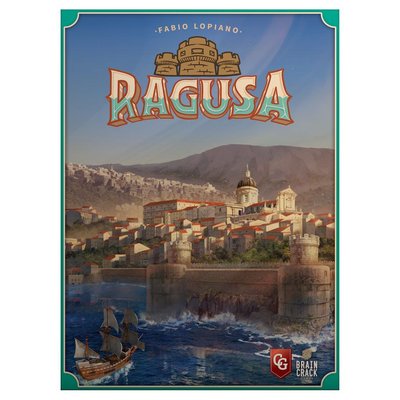
welcome to the jungin schemes tutorial and playthrough for Ragusa in this video I will be showing you how to play the game while we are actually playing it and if you'd like to watch the rest of the playthrough you can do so by clicking that link down below in the description or the I up there in the top corner now before we move on I would like to ask that you please turn on the Klingon subtitles because I might make mistakes while we are playing and that gives me the ability to put corrections directly on the screen now let's talk about Ragusa a little bit more the way this game works is each player is gonna take a series of seemingly small turns where they take one little house and they put it out onto an empty spot on the board now and that's gonna occupy that spot for the rest of the game and that house will give the player resources and it might give them special actions now the catch to this game is whenever they do actions in the city of Ragusa they will also activate all of the previously placed houses on those actions that means if you go there multiple times and then you might get multiple activations and if you get in there early you might hit up to 6 activations of that action so this game is really about racing to get to the spots that you want to to get as many actions as you can while everybody else is trying to do the same thing now I'll explain how that works and the other details to the game while we're actually playing it but before we jump in I would like to ask that if you enjoy this video you please click the like button for it down below as well as a subscribe button for the channel also if you would like to directly support the channel and the creation of future videos like this one then please go to junkets games.com slash support you'll find a bunch of ways that you can support the channel over there and there are some pretty cool perks that go along with some of them including voting on some of the videos that I film each month alright without further ado let's jump into the game now here we have the game fully
setup and ready to play for three different players we will be playing the game from the perspective of the purple player right up here and we will be the starting player so let's go ahead and take the first turn of the game now the structure of a turn is quite simple all we have to do is take one of our available houses and we can put it down onto an empty housing location somewhere on the map now you'll notice that every one of these housing locations is at an intersection point between three different hexagons and for our first turn I think we should go right here once we put that house down we can activate all three of the adjacent areas and in this case we will simply gain the resources that indicated this is one wood this is one stone and this is one silver ore now that we have gained access to these resources we can show that by putting these tracking cards down into our playing area for instance we can take this one for stone and we can put the one facing towards our playing board likewise we could do the same for silver and you'll notice the back side goes all the way up to eight if we were to have access to that much of the resources now we can put these right over here and it's worth noting that these are not individual resources that we can sell this is access to one value worth of wood and that will be an ongoing thing that we have for the rest of the game at this point we have finished our turn but before we move on I'd like to talk about the restrictions that come into play with where we can put our houses down now we put it right up here for our first turn and it is adjacent to three different resource gathering areas and these are called rural areas there is another type of area called urban and those are down here with the cities on them and they are behind a potential wall that might get built out as we play the game now whenever you put a house down you have to have access to an applicable material
for the type of areas they are adjacent to we have to have wood for these rural areas and we have to have stone for the urban areas now when we put the house down we have to check the number of houses that we have in that specific X and of course whenever we put a house down it is joining up with three different hexagons so we are in a rural area which means wood is what we need and we can first check over here and see that we have one house in this hexagon so we need to have access to one wood well we're good because when we put this house down we immediately got access to this wood as well as all of these other resources luckily you get access to these before you check for this requirement which means you actually have to place next to a wood for your first placement in this game now we are obviously good right here so we can now move up to here and we have one house in this area which means we again need to have access to one wood now we already have that wood for the spot down here but as I said we have ongoing access to one for all of these different things so we don't need three wood for this we instead have one wood which makes this fine one wood which makes this fine and one would itch makes this fine because again we have one house around each one of these hexagons now this will make more sense as we continue to play through the game and the same rules applying down here when you are adjacent to these urban areas you just have to have a stone instead of wood to make those happen with our turn now complete we can now move clockwise to the next player and that means the orange player can take this house and put it down onto a spot on the board after considering their options they want to put this down right over here and again once they put this down we have to check that they meet the requirements the moment they go here they one would and they now have one house in this rural hexagon and that wood will
satisfy that and one house in this rural hexagon so they're fine with that but then down here you'll notice that there is an ocean with a fish spot now you never actually have to meet any requirements before these fishing locations they are not rural or urban for the purposes of this game and they are a resource that players can gain just like the grape sight here and would now fish is slightly different than the rest of them because if you look down here you can spend the fish resources to get other ones when we focus in a little more you'll notice that you can spend it to fish to go up once on the wood olive or grape it trackers or you could spend three fish to go up once on the stone or a four fish to go up once on the silver or now fish is the only resource that can ever go down in this game and this is an action that could be done at any point whether it is currently your turn or somebody else's so they can now come over to their area and to track the resources they have access to they can put in their fish card with a one at facing towards their player area right there the wood will go down here and then lastly the grape will go up here now if you take a closer look at these cards you'll notice that for the wood one there is an extra icon and it helps you know exactly what this helps you pay for this says that one wood lets you have one house within a given hexagon in the rural area and if we look at the stone one it has a similar type of iconography to help us out orange has completed their turn so now blue can take of their first turn of the game and they've decided they liked the look of our first turn so they're gonna place right over here and gain access to one wood one stone and one silver ore and again this wood will allow them the ability to put this down because they now have one house in each of these three hexagons
just like the rest of us they can track these on their playing area and they've now finished out their turn so we can go clockwise to the next player which is going to be us so let's take our second turn of the game so let's come back up here and we can take our second house and at this point you may notice that we have 12 of these houses and we have now taken two of these now we are going to keep playing this game until everybody has placed all 12 of their houses out and then we will go into final scoring and I'll explain how that works soon for now let's go ahead and place this house out and I think we should put it right down here now remember we have access to one wood and one stone and that stone is gonna allow us the ability to place here because we have one house on this ring and one house on that they are both urban so that one stone satisfies both of these and our would obviously satisfies this up here now let's start with this we know how this works already we have now gained access to one grape and we can show that by putting this tracker up on the board let's now come back to the board and I'm sure you've noticed that these urban areas have different actions than just taking resources like these rural ones do now let's come down here and activate these silversmith first and the way this works is we can count up the number of houses that we have around the silversmith and we can multiply that by the amount of silver or that we currently have access to and we will end up getting that amount of silver bars so we have one house around the silversmith and we have access to one at silver or so we can multiply one at times one and to generate one silver bar commodity then we can track that by pushing this up once on this board and commodities are things that we can gain and lose as we're playing the game and as you can see we can hold a maximum of twelve now
there are three different commodities this is silver bars next up we have olive oil and lastly we have barrels of wine when we come back to the city of Ragusa you'll notice that you can make wine in the same way as the silver bars right over here and the olive oil is similar over there so we now understand how three of these at different spots work and the next thing we need to do is evaluate the Maison now this is pretty simple we're just gonna take one of these wall tokens and we can put it down into any empty wall spot around the city in this case I think we want to put it right down here because as soon as we put this down we will generate one point for the wall and we will generate one point for every adjacent house of our color next to that wall piece and every Tower of our color next to that wall piece now I'll talk about these towers pretty soon here but by putting this down we have now generated one plus one or two victory points for ourselves and we can track that rent up here at the top of the board alright we've now finished all three of our actions but before we move on I'd like to talk about this little green arrow hanging out underneath the silversmith and the mason in fact if we look out to the rest of the city that shows up on all of the perimeter spots now what this means is after the current house is evaluated with its actions then every other house in a clockwise order will get to do the action on that specific spot so that means if this blue house had been right here then after we did a Mason action then the blue player would get to do a Mason action on our turn it also means if in the future have this right over here then we could put this down and then do another Mason action before the blue player would do another one now that's gonna apply for all of these around the outside the
central to have this little red marker here to show that there is no copying for these and obviously there is no copying on opponents turns for all of these rural spots out here now as things get more crowded we will start giving each other more and more actions and obviously one reason we went here is because we want to get to the silversmith first so that as more people go to the silversmith including ourselves we can generate more and more silver when it's not even our turn this also applies before the mason to try and build more of these walls because obviously putting these walls out will get us victory points all right orange can now take you there turn and you'll notice they have access to one wood but currently no stone this means they can not put this down adjacent to any of these urban spots although technically there is one slight way they could do it they could put it right over here and to generate to fish and immediately as a free action turn in three fish to get one stone to make this happen but that is definitely not the turn that orange wants to do right now instead they're gonna put this down right up here and it is adjacent to two three different rural areas and it's the first orange house for all three of those hexagons which means they're one wood will cover the requirement for all three after they put this down they now gain access to one and silver or one stone and their second grapes so they can add these trackers right here and then turn in their grape tracker to the two spots okay blue can have taken their next turn and they currently have access to one wood and one stone after considering their options blue wants to put this down right over here and that will first of all give them a grape resource and a olive resource which they can track on their player board let's now come back to the board and the blue planner can do
the first architect action of the game the way this works is they can take one of their tower pieces and put it down onto any one of these perimeter spots as long as there is not already a tower on that location now that means they could cover up a house like their own they could go onto an empty spot or they could cover up one of their opponents places and there is really no penalty or bonus depending on either of these options now the blue player decides they want to put in their tower right over here and there are a couple of reasons for that the first of these has to do with the Mason because every time you put a wall down you get one point for the wall and one point for every adjacent tower and a house of your color so the blue player I set this up to at least three points when they put a wall here in the future and it could potentially be more if they end up putting a house underneath here or another tower on top of this house now the other thing that they are considering it has to do with the endgame while scoring now there is this perimeter right here and when the game is over each player will find the longest segment of contiguous wall that does not have a full break of their opponent's colored pieces in it now they will get one point for each wall segment and one point for each tower and house in that area and in order to clarify this I'm gonna set up a little example let's go ahead and pretend like the game ended with this very small amount of walls houses and towers now if we were to score ourselves we are gonna find the longest section of wall that has our towers or our houses until we hit a spot where there is opponents towers and houses there now you'll notice that we have a house here and a house there and here there is an orange house and a blue tower that means our scoring chunk will get ended right here so we will score one point for every wall every house and
every Tower of our color within our longest stretch so we will get one point for this wall one point for this house another point for this wall and we can keep going over here now if there is a gap where there is no house and there is no tower then that does not stop the scoring so we keep going to here and finally here and all the way over to the spot this is finally where our combo would end so we would get one two three four five six points total if this was our endgame wall score now for the orange player you'll notice they have a tower here and a house down here and they would get one two three four for the walls five for this tower and six for this house that was where they would end because they can jump over this just fine since it's empty and this tower it gives them access to go all the way over here until the combo is broken because our house is here and there is obviously no orange Tower now over here you'll notice there is a gap in the wall and that's really gonna hurt the blue player right here because they would get one two three four points for this section here but with that gap in the wall that also breaks the combo so they do not get to jump over and score either of these so the blue player would unfortunately only get that four points and I hope this helps clarify how the endgame wall scoring works so let's come back up here and the blue player has now finished out their architect action and by putting this tower here they're just growing their lengths of potential scoring when the game gets over of course they are assuming that the wall will get fill into all these spots but that's obviously something they're gonna try to make happen now you can see this green arrow means that if anyone else also had a house on this area including the blue player then those other houses would activate in clockwise order but right now the blue house is by itself so that
is gonna finish out the blue players turn it's now come back to us and we can take our third a turn of the game when we come back out to the map there are a few good options but I think the best spot for us is gonna be right over here the reason for that is because we can activate the winery and we currently have one grapes that means we will make one wine but we know that the orange player currently has access to two grapes that means they are quite incentivized to come over here and to make wine themselves and if we get in here first then we will make wine again when they end up coming over here now another reason we want to go here is because this is gonna give us access to olives now I haven't mentioned it explicitly but you are not allowed to place down next to any of these urban areas that you cannot actually activate that means if we wanted to go right down over here and we actually do and I'll explain why soon we can't because we currently make 0 olives so we can't go 0 times 1 or 0 olive oil so that means in order to place over here we have to go over here first to generate 1 olives so that we can go over there on a future turn now let's go ahead and get that all of resource first which we can track up at the top of our board and then the next thing we can do is activate the winery now technically we can activate these three different actions in any order that we choose but the only ones that actually matter in the city according to player order are the architect the Mason the market and the wharf so there is never a situation where you will do two different actions that matter based off of the ordering of the houses so we can start with a winery and that's going to be one house times the one grape that we have access to so that's gonna make one barrel of wine we could track that here on our player
board the last thing we have to do is the architect action and that's gonna put this tower down somewhere and part of me wants to put it right here that means we would have locked in the ability to bridge over the spot with some walls to get some endgame scoring but I also like the idea of just putting it right over there so that when we do a Mason scoring we can put a wall right here and it definitely started continuing out this chain that we've already started here also we would get an extra point for having in this tower so yeah we'll go with that one and now that we finished out our architect action the Claire can take one as well after considering there are options they want to put it right down over here and it appears they're hoping to continue out a chain of wall in the western parts of the city of course they have to start putting some walls down but that's something that they're probably gonna get to relatively soon the blue player is now done with the architect action and there are no more houses around this area so we have now finished out our action and the orange player can take their turn they've decided to put a house down onto this location so it looks like us getting in here to the winery before them was a good call now they have access to one stone and one wood and if this location is next to two different urban areas where this is the first orange house so that one stone is going to cover it the first thing that they could do is gather one more fish and they'll do that by simply rotating in their tracking card next up they're gonna activate the winery and they currently have access to two grapes and they have one house so that means they will make two barrels of wine they can track that on their board and then since the winery has this green circle we can move clockwise and that means we can now activate on the winery we still have access to just one grapes and we have
one house at the winery so that's one times one which makes one more barrel of wine for us this means we are at two just like the orange player and now the orange player can activate the wharf now the way this works is each house in order is to sell one of their commodities and they will get victory points equal to the current commodity value at the moment orange only has wine so they're gonna sell one of those with their single house and we can then look up to these three tracks at the top of the board to see the commodity value now wine is tracked right up here and it is currently worth two points and that means orange will get two points for doing this Wharf action now the value of these will move once people start doing the market action and I'll be explaining how that one works pretty soon when we come back to the city you can tell that there are no other houses around the wharf so the orange player's turn is now done and a blue can now go and they've decided to place in their house right here on the Mason underneath the tower that we already built now the first thing they will get is access to one more grape and one more olive resource which means they have access to two for both of these now and then they can do a Mason action where they're gonna take one wall piece and they're certainly going to add it right over here so again they get one point for the wall and one point for every Tower and a house of their color so that is a three-point wall placement which will bring them up to three points total and then we can move clockwise and we also get to do a Mason action and I figure we'll put a wall piece right over here so that is also going to be worth three points to us so we're now add five points total and with that the blue player's turn is done that means we can now take our next turn and I think it's
time to put this right over here and to talk about some more of these urban buildings now as soon as we go down onto the spot the first thing we should do is the oil press we know how this works already we have one house in that area and we have access to one olives so we will make one bottle of olive oil which we can track right on our board and we now have at least one of all three types of commodities let's come back to the map and now discuss the cathedral location this is the only one of the urban locations that is not in action and instead what happens is at the end of the game every house around the cathedral will allow that player the ability to score points for one full set of the three different commodities for the commodities current value now that means if we had two houses here and we ended the game with three silver to wine and three olive oil we could score two of each of those three and the excess silver and olive oil would not be scored now again we would get points for the current market value for those commodities so this is a really good way to get extra points for the commodities that we don't find a way to liquidate through other means as we play the game it's now time to talk about the market action and for every house and clockwise order around this spot the players will be able to sell to one ship out at the port so let's focus down here at the bottom part of the board and there are five different ships that we can trade with now the cost it's a trade each ship is listed down in the lower left portion of each ship so this one would cost one all Avoyelles one costs wine this costs silver and then these two cost two of the applicable commodity in this case olive oil and the wine now some of these ships have an extra cost you can see this one right here it says plus one set of
silver so in order to trade with this ship we would need two bottles of olive oil and one silver bar when it comes to paying this cost we have to remove them from our board but when we trade with these ships we immediately get points equal to the number of stars in the top left portion so obviously this is a really nice ship to trade with but it's too costly for us right now because even though we have the silver we only have one bottle of olive oil now at the moment we have some of the other reasons of course we do have one set of silver bars and because of that I think we should go after this ship here you'll notice that costs that one set and it's worth three victory points as opposed to the two points of some of these others so let's go ahead and to spend that silver bar and take the ship as well as three victory points which is gonna bump us up to eight points total we of course have to spend these silver bars to make this happen and then the next thing we have to do is look down here and you'll notice there is a red arrow effect for the silver bars that means that the commodity value for silver bars has just gone down one because we just sold some to that trader we can show that by moving this tracker down once and it went from two to two so it's gonna be a couple more bumps until then actually affects the overall victory point scores you get when you sell these over at the wharf the next thing we have to do is slide all of the remaining ships over and this does happen after every single one of the market actions so if somebody else had a house out here these would all slide before that person got to trade now after we've slid these over we can take the next ship from the stack and before we flip it over we have to increase the commodity value of the type of commodity on the back of that ship so in this case we will bump the barrels of wine by two because of the two green
arrows and if we look to the future we can tell that the silver bars are going to go up in a value once that ship gets added to the row so let's slide its commodity value up by two and it is just one bump away from making the barrels of wine worth three points when sold at the wharf the last thing we have to do is flip this card over and you'll notice this one is worth four points and it has an extra barrel of wine cost when you want to trade with that ship at this point we have finished down our market action and there are no other houses on this spot so that means no one else is going to do these actions but before we move on I'd like to talk about this little card that's been hanging out in our player area you may have noticed it looking like this and this is a bonus card and this is the last way that we can get bonus points at the end of the game remember we will get points for the wall and for the cathedral but then every one of these cards will give us points based off of a condition now we drew three of these ant pics from one of them at the start of the game and this one says that we will get two points for every different type of good that we have traded with throughout the game up to a maximum of 12 points every single one of these bonus cards that maxes out at 12 points and you'll notice that the ship card that we just picked up has this icon in the middle now these are textile and there are only three of this card in the entire deck of ships so that's part of the reason we wanted to pick this one up while we could now some of these are even more rare for instance this one there are only two of that in the deck but when it comes to these other types there are five of those so we are obviously trying to hunt out ships that give us lots of points but we also want a variety of different icons on the cards because that's gonna feed into this end game objective so we can finish
out our turn by adding these into our area and obviously we want to keep these face down so our opponents don't know what we're going after but for the purposes of this video I'll leave it face up so it's easy to remember what our goals are it's now time for the orange players fourth turn of the game but before we go into that I'd like to discuss the last two urban areas that have not been covered yet now this one is the rector's palace and it has that red slash mark which means the other houses around it will not copy along when new houses come down to activate this area now the way this works is pretty simple the players will simply take this deck of bonus cards they will draw two of them and pick one and two discard the other so this is the only way you can get more bonus cards into your area as you're playing to try and get more points for doing the variety of things that you're already trying to do the other spot I'd like to discuss is the fishmonger and for every house around the fishmonger when it gets activated the players will get one point for every two fish resources they have and this means that players cannot put a house down next to the fishmonger unless they have at least two fish at this point I have now taught you most of the rules to the game and that's gonna bring the tutorial for Ragusa to a close if you would like to watch the rest of the playthrough you can do so by clicking the link down below in the description or by clicking the I up in the top right corner and I hope you've enjoyed learning how to play as always I'd like to thank everyone who's been supporting this channel including all of these producers level patreon backers if you two would like to directly support the channel and the creation of videos like this one then please go to junkets Gamescom slash support to see a variety of ways with which you can do that also if you enjoyed this video please click the like button down below as well as the subscribe button for the channel thanks for watching