Frosthaven Digital - First look
Games in This Video
2 games are featured in this video — they unlock as you watch.

Transcript
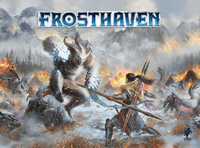
Hi, my name is Paul Groen and welcome to a first look at Frost Haven Digital. In this video, I'm going to be showing you the start of the campaign of Frost Haven Digital. The game is currently in early access and I believe will be out later on this year. The developers of the game have kindly sent me a code for the game. I'm playing it on my PC through Steam and I'm not going to be giving you a full tutorial on how to play Frost Haven. In fact, I've already done that. I've done a how to play video for the actual board game. Today, we're just going to be looking at the digital version and seeing what it is. Now, I don't know everything about this digital version, so there may be things that happen in this video which I'm not 100% sure about. But what we're going to do is we are going to jump in and we're going to start the campaign and we are going to create a new campaign. And we've got three options. We have a tutorial. So, if you don't know how to play Frost Haven, you can either go and watch my other video or you can go through this and it will teach you how to play the game. We have a Road to Frost Haven, which is a prequel, which I'm I'm not going to look at today, but I will look at that at some point in the future. And we also have the main campaign. That's what we're going to play today. So, let's just get these out the way. There we go. Now, you need two to four characters. Let's call it Paul's party. Paul's mad party. And you've got, first of all, you've got different options on how you play the game. Now, standard for me, it says monsters and hazards will be one level lower. I don't think that's standard. I think standard
for me is what it classes as veteran, which is no modifiers. That's what I'm going to be playing on today. But if you if you want a slightly easier game, you can play on standard. If you want to play on story mode, it's super easy and you're just there really for the story. But some people might like that. And if you're a hardcore player, you want to play on hard, brutal, or even unfair, which is very, very dangerous. Now, one question that I don't know, and if you do know the answer to this, please let me know. Although, I'll probably find out by asking on their Discord server after this, is can you change the difficulty after the campaign has started? Because personally, my experience with the predecessor for this game, Gloom Haven, is once we were about 15 20 scenarios into the campaign, we started to find it was a little bit too easy and we had to up the difficulty of the physical board game mid campaign in order for it to contain uh to still be a challenge for us. So, yeah, I don't know if we can do that with this, but I'm going to start on veteran difficulty at least. So, what I was mentioning is that you need two to four characters to play this game. You cannot play this game true solo. You have to have at least two characters. You can play it solo, which is what I'm going to do today, but you have to play two characters at least.
You could play more if you wanted to. There are six characters to choose from at the start of the campaign, but as you play through the game and you unlock various other characters, I think there's about 17 or 18 in the end. And if you don't know the Frost Haven Gloom Haven system, one thing that sets it apart from other games is that your character is not your character forever. Your character will come into the game with a personal quest and once your character has completed that personal quest, that's it. That character must retire. You cannot carry on playing it. A lot of people didn't like that, but once you get used to it, it actually does work quite well because by retiring the character, you get to unlock new cool and extra stuff, including new characters. So, we're going to click on new character. These are the six characters we have. We have the banner spear. We have the bone shaper. We have the drifter. Sorry, the death walker.
No, that's the drifter. There's the drifter. There's the death walker. Then we have the blink blade. And at the bottom, we have the geminate. Now over on the right hand side, you can see some statistics. How much health you've got, what type of character it is, the complexity level, which I would recommend not playing the blink blade or the Geminate unless you know the game quite well. And then you've got some affinities, some traits, and everything else. And you can also find out all sorts of information about the ability cards if you know the game. You can look up their biography, which is a little bit of backstory towards them, etc., etc. So, we're going to today play two character party. We're going to play the Drifter, and we're going to call him Drifty. Drifty the Drifter.
Okay. And here's the personal quest. So, we've been given two personal quests, and we choose one of these, and this is it. We will never have another personal quest. And once we've done it, that's it. That character must retire. So, we can have the Easter outpost, investigate the mysteries of an abandoned Easter outpost, or the study of plants, collect five different types of herbs through loot. I'm going to go with that one. And then we get 30 gold to spend in the shop. Now, one thing, again, this is still early access. I haven't finished this game yet, but one thing that the board game does is it recommends which equipment you should start with at the start. This isn't giving me that. It's giving me the 30 gold, I think. Yep, 30 gold over here. But it's kind of leaving it up to me as to which items I want to buy. So, I'm going to take a amulet of life. Quite like that. Yeah, let's buy that. And we'll buy some leather armor as well. There you go. 30 gold has been spent. Now, we're going to have a second character. And we're going to play the bone shaper. Yep. Going to play the bone shaper. It's bit more complexity than the other ones, but we'll call Mrs.
Bony. Mrs. Bony the bone shaper. Right. Personal quest. Well, we've got the Easter outpost because the drifter didn't want it. And we've also got build not destroy. Experience the construction of 12 different buildings or buildings upgrades. Well, thematically, I quite like the idea of the Easter outpost. Investigate the mysteries of an abandoned Easter outpost. Now, you're not going to be able to complete this personal quest at the start. In fact, from my experience with the game, with the physical board game, you're going to be playing this character for quite a while. It might take you, I don't know, 10, 15 scenarios before you get to retire the character. It really depends. You know, we might find in scenario three or four an Eastern Outpost. And if we go and investigate it, that's it. That's that character done. But yeah, normally it does take you quite a few scenarios with a character before you actually achieve their personal quest.
Right. Items. What are we going to take? Let's take some uh we're not going to Are we going to be doing much melee attacks with this character? I don't think we are. I think we're going to take a heater shield and some leather armor. Yeah, let's take that. Right, that's it. We could have two other characters if we wanted, but we're going to start. So, the start of the campaign is always this scenario, which is called a town in flames. And we're going to have a little bit of narrative soon, which is going to give us an introduction to the campaign. But essentially, at the start of each scenario, each character gets three battle goals. You choose one of those battle goals to keep. And if you manage to succeed in the scenario, and you do the battle goal, you're going to get an extra perk for your character. So, the drifter has got pacifist. Kill three or fewer enemies. Well, we might be able to do that because it's a short scenario.
Bully, kill an enemy that has two or more negative conditions. I don't think with these characters we're going to be able to put many negative conditions on enemies. So, I'm not going to do that one. And never have your health drop below half your maximum health value. I'm going to go for pacifist. So, the aim is that we're going to try and kill three or fewer enemies with that particular character. In terms of the bone shaper, we've got sluggard. Perform a long rest while at maximum health after you have already suffered damage. Perform a long rest while at maximum health after you've all right. In other words, you can't do it on the first round. Insomniac, suffer damage from an attack in the same round that you long rest. Or ritualist, kill an enemy while three or more elements are strong or waning. Okay, I'm going to do the um let's try let's try the insomniac. This is quite a difficult one, I think, to do. And now it's beginning the quest.
The sounds greet you first. muffled metallic pangs, a voice howling. It's difficult to make anything out with the wind rushing past your ears. But you'd know that tune anywhere. There's a fight up ahead. But a fight means people. And if there are people, then the town must be close. You hear more. A scream, the crash of steel against stone, a deep earthy growl. You're running now. Your legs are wasted from the hike. Your shoulders ache from your gear, but the sounds are close now, and up ahead, you see the gauzy orange light blooming in the air. With one last push, you round the final bend in the trail, and you see it. Frost Haven engulfed in flame.
Great petals of fire burst from windows and crawl over roofs. People stream from the town's ruined gate, their faces bent in panic. A moment later, you see the object of their terror. A massive creature with two legs and two hulking arms covered entirely in thick white fur. Three gnled horns crowning its head.
Alo traders,
cries an elderly porter beside you.
We're doomed. They're stronger THAN ANYTHING ELSE ALIVE. WE'VE COME ALL THIS way for nothing.
As if to prove the point, the orgox you've been watching catches a fleeing outposter with one hand and hurls him backward as if he weighed nothing. 10 days you've been hiking. 10 days and this is what you find. You breathe out a thick plume of foggy air and hoist your weapon high. Time to get to work.
ALO RAIDERS, we're doomed.
Right. So each scenario has a particular goal. And you can see over on the right hand side that our goal for this scenario is to kill all enemies. We have the enemies on the board. Let's just have a bit of a scroll around. So, the game is divided into a series of rooms or the scenarios divided into a series of rooms. This is one room as we can see here built up of hex's and we have some enemies that you can see by their health bars. We've got three of them. We got an Algot guard here, an Algox priest, and an Algox archer. But most scenarios contain two or three rooms. And if we look around here, we can see that there's another room here. Now, this room is not populated yet because we haven't opened the door. So, if we move on to the door space, that will open the door and all of the enemies will be revealed. Now, you got to be very careful in this game about opening doors because what's going to happen is the monsters will activate on the same round that they are placed on the board. So, you don't want to just go rushing around opening the doors really quickly because then you'll get overwhelmed by enemies.
But again, I'm not going to give a full tutorial on how to play the game, but in summary, it's a card management game. Each character has a hand of cards. There's no deck of cards in this game. It's a hand of cards. These are the cards for the drifter. And you can see that each card is divided into a top half and a bottom half. And what's going to happen is in each round of the game, you will choose two cards and they are the two cards that you will play. The first card that you choose, the number on that card will be the initiative value, lowest to highest. That determines the order in which the characters act. But then when it's your turn, you will do the top half of one of the cards and the bottom half of the other card. Doesn't matter which one was your first one. You can choose the top action of the first one you played or the second one or whichever, but you do one top half and one bottom half. The cards will allow you to move around the board and attack the enemies basically, but there's all sorts of other things going on as well. So, the drifter, let's have a look at the drifter. So, it's giving me the choice of starting on these spaces here. And I think we want to get into the action as early as we can. So, we're actually going to place ourselves here. Or do we want to do that?
Because my plan for the Drifter, the Drifter is really good at setting up these cards with active bonuses that on their own they're quite weak. But if they play these cards, then once these cards are in play, they get all sorts of extra bonuses. And the thing with the Drifter is that they have ways of making these cards last longer. So, we're actually going to have a setup round. We're not going to rush in and we're going to attack. So, actually, I think I might just stay here because there's an archer over here. And if we go forward, the archer might be in range to shoot us. So, the two cards that I'm going to choose to play, I'm just going to scroll down and have a look, is I think this one first, Crushing Weight. And my plan is to play the top part of that card, which basically sets me up that the next six melee attacks that I make, I get plus two on them. But as I say, the Drifter has a way of keeping that card around for longer. So that's definitely one of the cards that I'm going to play. I'm going to select it now, but I might change my mind in a minute of which one I play first. So that's going to be the top half. For the bottom half, we could say this one. On the next six sources of damage, I gain a shield. So that's going to protect me from taking damage. So that's what we're going to do. We're going to play those two cards.
Now, has to be noted that if you look on those cards, certainly on the top half of Crushing Weight, you'll notice there's a red X in the corner and on the bottom half of Unbreakable, there's a red X in the corner. That means that once those cards are played and once they've run out of time, they are lost. They are gone. Normally, if a card doesn't have an X on it, it's discarded. And what happens in this game is once you've run out of cards, you can rest and you can get the cards back from your discard pile. But if it's got the red X on it, it's lost. That means it's gone. So, they're the two cards that I'm going to play for the Drifter. Now, the Bone Shaper is all about summoning skeletons. So, she's got a number of cards in her deck, like this one, Life Death, that will summon a skeleton, but she uses her own life force in order to summon the skeleton. So, you can see there that she's actually going to take two damage for summoning that enemy. She's only got six health at level one, so you got to be very, very careful about how much she she does summon. But my plan is to basically get some skeletons out on the board and then they can start going in and doing some attacks as well. So life and death will summon a skeleton. What have I got on the bottom? So all of the summons appear to be on the bottom.
Although there is this one as well, this wraith. Actually, I might summon a wraith first because the advantage of the wraith over the skeleton is the skeleton as a melee character. It rushes in, might get killed quickly. The wraith has got a range of three. You can see that just on the right hand side. Can I move my mouse over it? No, I can't. I'll point to it. It's there. So yeah, ranger three, which means the wraith can stay back and not actually get involved in the fight. So I think we're going to do that. We're going to summon some angry spirits. But what we're going to do is a bottom half. Well, we could move. We got a healing card now. That angry spirits does not take up any of my life force. So I'm not going to take any damage for doing that. Uh so we don't need to do that. We don't need to do that. And that's an attack of one. That's not going to be much good. Transfer of essence. That's quite nice. So that will strengthen an ally, one of my allies, not me, within range three. It will strengthen them. And it will also poison another ally, sorry, another enemy within range three. So, we're going to do that. And we're actually going to do that one first. So, we're going to do that one first and then that one. So, my initiative value is 62. Once you have locked in your two cards with each of your characters, you click end selection. And then what happens is the enemies each get a card. Now, they draw cards from their own particular decks.
So, archers have a deck for for archer cards. The priests have a deck for priest cards. And it's those cards that determine what the enemies do on their turn. You can also see the initiative value first. And a big important part of this game is making sure that you look at what the enemies are going to do before you decide what you're going to do. You have to have chosen your two cards first, but what you actually do with those cards, you can now decide when it's your turn after you've seen what the enemies are all going to do. Now, this scenario has special rules, which is why we have these guards. So, these city guards, it's our um sort of a side objective is to protect as many of these guards as we can. They sit there, they're not going to attack whatsoever. They have a permanent thing that they're going to cower defensively.
Uh, and that's what they're always going to do. But they are there's one of them on this particular room, I think. Let's just get rid of these. Yes, here. There's one of them there. And we're going to get bonuses at the end of this scenario based on how many of those guards are still alive. So, what's the archer done? Well, we can see what the archer did. Well, let's look at what the guard is doing. The guard is moving in and it's attacking me. Okay. So, we we'll come on to what the archer did in a minute. Um, but the guard Oh, no. We can see here. So, the archer set a trap. It moved one. It attacked two within range five. But because I decided to hold hold back. Yeah, it had a range five attack and there was nobody within range five. So, it didn't actually attack. And then it created a trap. So, it's created a trap on the board. Now, that trap will go off no matter who lands on that space.
Either me or them. They will avoid the trap though. But certain characters can push and pull characters around. Anyway, the guard has moved three and is attacking three. So, its base attack is three. Do I want to use my leather armor? Yes, I do. So, it's got disadvantage. It draws two cards. It got a zero. Okay. And do I want to use the heater shield? Yes, I do. So, I only take two damage. Now, whenever you take damage in this game, you can either take it as damage or you can lose one card from hand or two from your discard pile to prevent all of the damage. I'm just going to take that as two damage. You don't want to be losing cards too early in this game because that is really going to have an impact as you play through the game. Right now, it is the bone shapers go. So, you can see here the bone shaper has already taken two damage. So, she can summon her angry spirits. Every time you summon it, goes on an adjacent hex.
And we've got the transfer of essence that we can do as well. Oh, except I've already messed this up, haven't I? Yeah, I've already messed this up. After saying to you that you do the top half of one and the bottom half of another, I've forgotten that. And I was thinking, oh, I'd do that and then I'd do that. So, what I've done is I've messed this up. I now have a choice because every top half of a card can be used as attack two and every bottom half of a card can be used as move two. So, I've messed it up in terms of I thought I was going to do that and that. Can't do that. But which one of those do I want to do? Do I do want do I want to do the transfer of essence or do I want to do the angry spirits? And then the bottom half of each card could just be a move too. Or I could play this for this. The next enemy that kills one of your summons suffers two damage.
That's actually quite nice as well. This one is heal five an ally within three and take two damage. So, there's no point me doing that. I think what I'm going to do is we are going to have a bit of a change and we are going to use this to move to. And we're going to move to there. Okay. Is it going to let me move? Yep. We move to there. And then we're going to summon the angry spirits. Um, so where are we going to summon them? Let's summon them here. Right in the middle. They might not last long. How much health have they got? One health. Okay, one health. But they do have two shields, so it's a little risky. It's a little risky. Maybe I'll put them here.
Okay. Yeah, one health with two shields. And they're flying as well. Right, that's it. That's my turn done. So now we have the Drifter. So the Drifter was planning to do two lots of setup, a bottom and a top. Do we want to change that? No. Let's do that. So, we're going to play this on myself. Yeah. So, that card is now active. The next six sources of damage that I take from attacks targeting me, I get a shield. And on my next six melee attacks, I get plus two. Great. We're all set up. That is it. Round one is done. We now go to round two. We choose two more cards. And you can see here, these are the two cards that are active for the drifter. So now when I play attack one, it's actually attack three, but melee attacks can only be used at range one. So I think we need to be moving in and hitting it. Now, we do have a nice card here, bloodletting.
It's three attack, and if you kill something, you regain the use of one of your active bonuses. We probably won't because even with the plus two, that's five. So, we could potentially kill it, but we'd want to go after the bone shaper goes. So, let's let's do that. Let's do We're going to do We're going to need to move in, aren't we? Oh, let's Oh. Uh, okay. Move three. Yeah, we only need to move two. That's move two and heal two. But we're not we're not wounded yet. Okay, so let Let's go with the bloodletting. And we're going to go on 65, which means we're probably going to be going after the guard. So, that means we would have probably taken damage.
So, I'm I am going to choose that one. So, this is interesting. Normally, you want to go early in this game to get the um to get the jump on the enemies and hit them before they hit you. But, I don't think I'm going to be able to kill this one. We'll see. Let's have a look at what the bone shaper is going to do. So, just before the bone shaper goes, the um the spirit is going to go, the wraith is going to go, and it's going to attack. It's going to attack one at range three. So, that's not going to do very much. And it might even go for the archer. Do we want to summon another skeleton? Do we need some healing? No, I don't think we do. Don't think we want to do that. Curse. Give one of your things adjacent to the Titan. No.
Yeah, let let's summon another skeleton. So again, we'll go afterwards. We'll summon a skeleton. So that's the top half of a card. So I need the bottom half of a card. And if we've got a healing, which we do because we're going to take two damage when we summon the skeleton. Oh, grants one of your allies attack five. Oh, but it's a lost card. Might save that for now. Okay. Yeah, I'm gonna play uh where is it? That one. Okay. Now, do we want to do 30 and then 71? Yes. So, I'm going to do 30 first and then 71. So, my initiative is 30. Right. Round two is done. Now, if you're playing this multiplayer, you're not allowed to discuss specifics between the two characters. You're allowed to only talk in loose terms. You can't say exactly when you're going or exactly how much damage you're doing. You can say where you're aiming to move to on the map and what you're trying to hit. But yeah, so the guard, now this is interesting. The guard is going on initiative 15, but it's not attacking.
It's actually putting its shields up and it's doing retaliate, which means if you attack it from an adjacent space, it's going to hit you back. That means we might now have a complete change of plan because I'm I maybe I don't want to attack it. The archer is going on initiative 16 and he's moving and it's going to do an attack at range four. Okay. And then the priest is going on 74, moving and attacking at range three. Okay. Let's see what happens. So, the guard puts it shields up and it's ready to retaliate. So, I I don't want to hit that this turn. The archer is shooting my spirit, my wraith, and it did no damage because it's got two shields. Okay. The wraith attacked the guard. Um, if you're thinking that the animations are quite quick, that's cuz I've got the animation speed set to high. You can configure it. Right. It's my go. So, we are going to summon a skeleton and we're going to summon it.
Let's summon it here. Okay. And I take the two damage. And then I'm going to use this. So, I heal one. And if an enemy had died this round, I would heal an extra one. That is my turn over. Right, the city guard cows defensively and now now we have the drifter. So, we were going to move in and hit this, but I'm now thinking of not doing that, but I've only got two movement.
So, this is this is a difficult one. It's got it shields up, so if I do hit it, it's going to take one less damage. And if I do hit it, I'm going to take two back on the retaliation. But my other option is just moving and actually not attacking it. That seems quite weak. I think I'm going to take it a little bit of a risk. So, we are going to move to And I do get to heal two, but I haven't taken any damage at this point. And then we are going to hit it. So it's actually three, but plus two because of my active bonus, minus one because of the shield. So I'm I'm hitting it for four, but I'm going to take two back.
And the random card I get from me deck is a minus one. So I did it I did three to it and I took two back. I'm going to take that two. But then I'm going to use my amulet of life to heal one. Okay, so not a great turn. If you look at the drifter's card, you will notice that the crushing weight now only has five uses left rather than six. That's cuz the active bonuses that I've mentioned. Right now, the priest, who is the priest attacking? The priest is attacking the guard. No damage because it's got some shields. Excellent. Right, round three. So, this only has four health left. If I can go early and I can attack it, I might kill it before it gets to attack me. So, that's what I'm thinking of doing and I'm thinking of going really early, using this, the bottom half of that card to heal the bone shaper and then using maybe just the top of one of the cards as attack two. Oh, attack two and regain the use of one of your active bonuses.
Perfect. Let's do that. Right now, the bone shaper. So, the bone shaper is going to get healed by the drifter. Do we want to summon another skeleton to get them on the board? I mean, why not? Why not indeed? So, that would be life in death. Yeah. Let's summon another skeleton. What we going to do on the bottom half? Grant one of your summons loot one. Okay, we don't want to be looting yet. Your summons do not trigger retaliation. That's quite good. Dark Tidings is move four. Move three. Move two. And grant one of your summons. Move two. H. I'm not sure any of these are actually any good for me. I mean, we do want to move in at some point. So,
yeah, let's just choose that one. Okay. And I'm deliberately going on 91 so that I'm hopefully going after everybody else. Do I want to do that? Do I want to go early? No, I think I'm going to go early. So, we'll do the 26 first, then the 91. Okay. Right. The guard, unfortunately, is going on initiative 15, and he's doing an attack of three with poison. Ah, and he's not moving. So, if I wasn't next to him, he wouldn't have hit me. That's nasty. Oh, no. The Drifter's going first. The Drifter's on 14. Take that, you initiative 15 person. So, yeah, we're going to do it. We're going to hit him for four. He's got four health. We'll see what happens. I basically need to make sure that I don't draw a negative number on my card. I got a plus one. Gone. So, every monster in this game drops a bag of loot. Now, in Gloom Haven, it used to just be gold.
But in Frost Haven, you're actually gathering resources like herbs and scraps of metal and scraps of wood and leather and things like that, and you will use those to take them back to town to help rebuild the buildings, construct items, etc., etc. You'll see that near the end of this video. But I don't get that straight away. I actually have to loot it by playing a loot card or ending my turn on that particular hex. So, I'm going to regain one of those active bonuses. So, it's gone from four to five. Excellent. And then we are going to heal two at range three. And we're going to heal the bone shaper. Right. Drifter's turn is over. What's the priest doing? Nothing. What's the wraith doing? Okay, the wraith is just pinging away. The skeleton rushes in.
Has a bit of an attack. That's all right. We're probably going to die. And then the bone shaper. So, actually, what we're going to do is we're going to move first. Yeah, let's move first. Let's move here. This is difficult terrain. So, difficult terrain costs two movement points to move onto. So, we'll move on to there. And then we are going to summon the skeleton here. And we're going to take two damage again. So, we're down to three health. But that's nice. We got three uh three summons out already. So, the archer is having to step back because otherwise it's got disadvantage. But unfortunately, I spoke too soon. If we did have three summons out, skeleton is dead, right? Next round. So, we're choosing two cards now. The drifter's down here. We're probably not going to be able to loot this because we need to be getting in. Um, do we have a big movement card? We do. I mean, that's great. That's move four and then attack three at range three, but it's a lost card. I think it's a little bit too early for a lost card.
I mean, we do have our own ranged attack. We got a few. We got draining arrows can attack two things within range two. And deadly shot attacks one thing within range four, but it does put poison on. Let's do that. And we're going to move with that. Okay. And then the bone shaper. We need to heal. We really need to heal. So, this card is heal x plus one, where x is the number of your summons. We have two summons, so that will heal me for three. I think we're going to do that. And then grant one of your summons loot one. Do we want to do that yet? No. Do we want to do that? No. Do we want to do that? Oh, I'm not sure cuz we've got another summons here.
No, we we we got too many summons on the board at the moment. Or have we? Maybe not. Although that means we do go early. Okay, we'll do that. So, we're playing the top half of Flow of the Black River. What are we playing as the bottom half? I'd play that, but that's a lost card. And sometimes you just don't want to do anything. Sometimes you just want the top half of a card. Grant one of your summons loot one. Move four. Grant an ally attack five. I think we might just play that one. Okay, so the archer is doing a basic attack and the priest is moving and attacking, right? Okay, so the wraith goes first.
Yep. Another little ping on the archer. We're getting there. Skeleton attacks the priest, does a damage, and then it's the bone shaper. So, we are going to be healing for three. Yeah. And then we could just use this as move two rather than granting my summons loot one because that's that's no use whatsoever. So yeah, we'll just use that as move two. Actually, I might move down here. Yeah, I might move down here and try and get this loot because the more loot you collect, the better in this game. Let's do that. Normally, you don't want to be going in the opposite direction to where the door is, but in this case, I'm going to I think scenario one is a is an easier scenario to get you into the game, he says, having lost his second one.
Right. So, we are going to move to to here and we're going to regain one of my active bonuses, which is that one. And then we are going to do a deadly shot. So, it's range four and we're going to shoot. Now, I was thinking of shooting the archer, but this attack is going to put poison on. And this priest has got shields. So, I think it might be better to put the poison on the shield. Uh to put the poison on the priest. Let's do it. Oh, I managed to sneak through for a damage as well. So, one damage and poisoned, which means every future attack on them gets plus one, right? Then it's the priest. Is he going to kill that skeleton? Are we going to go Oh, no. Just just right. Next round.
Round five. So, we want to try and go in and kill this quickly before it does anything. And okay, that's interesting. That range two attack. I don't want that. That's what we want. Yeah. So, I'm actually going to play the 23 first so that I go early and then we're going to play that. Right. Great. Bone Shaper. Now, we are starting to run out of cards in our hand. As you can see, you can rest to get your discarded cards back. But every time you rest, you lose one of these discarded cards. So, for the most efficient play, you want to play all of your cards and then rest. But you can actually rest at any time. So, for example, if there was one of these cards that I really needed right now, I could rest and get them back. And there's two types of rest, long rest and short rest. Again, I'm not going to go into too many details.
B Shaper was going to move to here. Is there anything we want to do? Grant three of your summons. Attack with curse. Well, kind of only have one summons left. Let's do that. Let's summon a return servant. and we'll play that for move two. There you go. Okay, let's look at what the enemies are doing. Oh, that's nasty. We need to kill that first, right? Thankfully, the drifter is going first. So, we are going to move three. And if you are adjacent to exactly one enemy, I am regain the use of one of my bonuses. So, I will uh yeah, if you are adjacent to exactly one enemy, regain the use of one of your Okay, it's not letting me do it. I think it's not letting me do it because both of them are at six. So, you can't have more than six. And then we're going to attack. Now, it's attack of one, but plus two because of that ongoing bonus.
And after I've done it, I get to loot one. So, I get to loot everything within one, but cross fingers. Yes. Nice. So, there's loot on that space and there's loot on my space, which I would have picked up at the end of my turn anyway. And here we go. We have found some hide and some gold. Great. That That's a good turn. Positive turn, right? The skeleton goes in, attacks. So, even with the minus one, I still managed to do a damage. And then the bone shaper is going to summon a skeleton, which is going to go here.
Yep. We're going to take the two damage, and we're going to move to onto this loot. Yeah, looting in Gloom Haven Frost Haven has always been a bit of a controversial topic because a lot of people just want to play these games and kill the monsters and get the loot. But in Gloom Haven and Frost Haven, you actively have to do something about collecting the loot. It doesn't just automatically pick itself up at the end. If the scenario ends, any loot still on the board, you don't get it. Right, things are looking good. I now need to be thinking about opening that door. We're on round six because the longer this goes on, the more and more cards you're losing. But you kind of want to be in the best state before the door gets opened. I've got two cards left. I am probably just going to play these two cards for movement and I might be able to get an attack in. Although it's probably too far away. So, I'm just going to play those two cards and see what happens. And also, we're going to just play these two cards and see what happens.
Right. So, the Algox is going first and he's draining strength. He's attacking that skeleton, isn't he? Yes. Is that skeleton gone? No. But the skeleton was disarmed, so he doesn't get to attack it back. We do have, however, another skeleton. Oh, which can't find a way in. Yeah. So, this skeleton, it can't actually find a path through because we've got the guard here, the alg priest here, the skeleton here. We got an obstacle here. There you go. Obstacles. See, character's going to enter the obstacle hex unless you're flying. So, actually, this skeleton can't move. So, alternatively, and this is a a rules change that was made in Gloom Haven, which came through to Frost Haven, is if your summons can't actually move, then you can choose to have it move towards you if you want to. I'm not going to do that. I don't want it to move towards me. And then I'm going to say move to to here.
And I'm going to Oh, now grant three of your summons attack with curse. But it's a lost card, so I I don't want to do that. I'm just gonna say I'm gonna use the top half to attack, but I'm not actually going to attack. And that's my turnover. Right. Then it's the drifter. Now, the drifter has two movement, but there's a trap in the way. So, I don't want to go over that trap because I'll take three damage. Yeah. So, I think Oh, this is going to be a this is going to be a pretty terrible turn, actually. Do we want to bother even moving two? Because I could put this up on your next six that enemy attacks within two targeting you. I'm going to put that up. It's another ongoing card. And we're going to put that in play. So the next six times that an enemy within rage attacks me, I hit them back. And then we're going to use that for the top half. We're not going to attack, but we are going to regain the use of that card.
There you go. Drifter's turn is over. So we go into round seven. Both of my characters have no cards in hand, which means I've got two choices now. I can either do a short rest, which doesn't take any amount of time. I will lose one of my cards at random from my discard pile, and then I'll get the rest of them back. Or instead, I could do a long rest. Now, a long rest uses your entire turn. So, you skip your turn. You go on initiative 99, but you choose which card you lose. You recover two health. And all of my items that I've used, like my leather armor, my heater shield, my amulet of life, they're all going to come back. So, I'm tempted to do a long rest. I really am. And I'm going to do it. Now, the Bone Shaper also has no cards. And doesn't the Bone Shaper have a battle goal that if I suffer damage from an attack in the same round that I long rest?
Yeah, that's probably not going to happen. But we're going to long rest as well. So, the Algox Priest goes. Who is it going to attack? Is it going to attack the skeleton? No, it's attacking the guard. Oh, he's took one damage. Nice. Oh, he's got retaliate. Okay, we might not even need to kill that. And then the skeleton attacks. Oh, awesome. Good old skeleton, right, and then the other skeleton. Again, we we don't want it to move. Bone Shaper's turn. We're going to heal two. Which card do we want to lose? I'm going to lose this one. Okay, I heal two and I get my items back. Nice. Then the drifter perform a long rest. Which card do we want to lose? And this decision is normally really important as well.
Um I think I'm going to lose that one. Okay, we heal. We get our items back. We're done. Round eight. Okay, so all of the enemies are currently gone. You'll notice here um that our objective is kill all enemies. And you can see from the bar, you can work out how many enemies are in the next room. Also, we need just need to check the drifter's battle goal was to kill three or fewer enemies, and the drifter has already killed two enemies. So, this is one of the interesting things in the game. You might think, "Ah, I I don't want to kill anybody else." But sometimes you just you just have to. If you really try and go for the battle goal, you might not succeed in the scenario. and succeeding in the scenario is the main thing of the game. So, we're going to have to move. The door is all the way over here. So, it's going to take us a while to get there. We've got this, which is move four.
Do we have We got that, which is move four. I mean, that'll get us one, two, three, four. Sort of gets us there. It's going to take us a while before we get there. So, all of our summons are going to be sitting around not really doing very much. Now, we could put this on. H. No. No. I think we're just going to do that. We're just going to move forward. But are we putting any Are we doing anything on top? Have we got any loot? There's loot there. I don't think we're going to get to that, are we? Do we need any healing? We don't need any healing. We don't need any of this. Okay. I think we're going to be in the situation where we're just not playing anything on the top. So, let's put that one on. Right. And the bone shaper. game. We just want to be moving in cuz the summons can't go in and open the doors. We need to get there. I need to move quickly.
Okay, move three. Bit of healing. Move four. Where would that get us? One, two, three, four. Ah, that would get us to opening the door. But do we want to open the door when the enemies will then attack us? Probably not. So, I think I want to move three. Let's move three. And can we summon another skeleton? We can. Let's do it. Is there anywhere for the skeleton to go? There isn't. Okay. So, maybe we don't want to do that. Maybe we don't.
Gosh. We've got a healing, but we don't. Oh, no. We can cuz we're going to No. What we going to do? I don't want to waste the top half of a card, but I'm not sure there is anything we can do. I mean, we could strengthen an ally. Let's Let's do that. Okay, so skeleton is going first. It's not doing anything. Second skeleton not doing anything. Right, bone shaper. We're moving three. Oh, I forgot about the difficult terrain. Oh, rats. Now, one thing that's nice about this game is although there isn't an undo feature, if I was really really like this was a critical moment in the campaign, in the game or whatever, I could say, I tell you what, scrap this. If I exit out of the game or I just restart the action round, which I think you can, restart round, I get to choose cards again. Some people might view that as a little bit of a cheat, but don't worry, I'm not going to do it today. But you can do that. You can restart the round and go, "Yeah, I'd forgotten about that." As it is, I'm just moving three because what I could have done is I could I could have summoned the skeleton there. So, we're just going to move three and then we're going to do the transfer of essence and we are going to put strengthen on. Now, the strengthen is only going to last for one round.
So, me putting strengthen on the drifter, it's going to disappear at the end of the drifter's round. So, we'll just put it on my own skeleton. Why not? See what happens. And we don't have anything to poison. So, we're not going to poison anything. Right. Bone Shaper's turn is done. Drifter is going to move forward. Oh, he's the bone shaper on the space that we would have gone on. Stupid bone shaper getting in the way. So, I guess we're just going to We could move four. Yeah, if we had a jump, we could jump over the obstacle, but we don't. Okay. So, we're just going to move for we're not going to attack. And I don't think we can regain the use of one of our bonuses. Well, that's a bit I think we were just too far away when we killed the enemies from the door. So, we're kind of losing turns here. It's not a problem because this is a a short scenario. It's only two rooms, but in bigger scenarios, you don't want to be losing time.
Right. Next round. Drifter. I think we need to choose what the bone shaper is going to do first because although the drifter one, two, three, it's four to the door. I don't think the drifter's got a movement four card left. We've just used it. Oh, no, we do. Maybe it's time. Maybe it is time. You know what I said about these lost cards in that you don't want to use them too early. There is a time and a place for them. So, the bottom half of violent inheritance is move four, which would get us to the door. that would open the door and the monsters in the room would appear. We don't have any movement left afterwards because it's move four. But if we did have extra movement, we could then carry on moving after the draw had been opened. However, it does allow us to then do us an attack at range three.
And we've got to take a gamble as to whether we think any any enemies are going to appear here. If they don't, they all appear here. It's a wasted card. I think I'm going to risk it. So, we're going to do that. We're going to move four and attack three at range three. And we're going to do it on initiative 70, I think. But what we're going to do is the top half. Let's do that. Let's do an attack of one targeting three things within range two. That's quite good, isn't it? I mean, let's try it. But let's switch them around. Let's do that on 23. So on initiative 23, we're going to move onto the door and then attack things and and see what happens. Is that going to work or do we put that on? Let's put that on.
Oh, that's even better, right? Cuz that is shield one and retaliate one. So that means I'll go to the door. I'll shoot something. If there's any guards in there, they'll come to me. They'll hit me and they'll take damage back. Right. Maybe we're taking a we taking a gamble. We don't know what's in the room. I suspect it's going to be more guard and archers and priests. In fact, we knew that because when the scenario was created right at the start, it told me what type of enemies are in this scenario. So, we do kind of know that, right? Getting a bit too excited now. So, the bone shaper, we know that the drifter is going on 14 and we know that what the drifter is doing. Again, if we were playing this multiplayer, we wouldn't know this precise information. So, there is a big advantage to me soloing it on the computer. If you're playing this multiplayer, the drifter would probably be saying something like, "Look, I'm going to go early and I'm gonna move and I'm going to open the door." They're allowed to say that. So, the drifter would be like, "Oh, okay.
Well, you're going to go there and do that." And the drifter can say, "I will be ending my movement on the door, which means your skeletons might struggle to get in." I think I just want to move two. We don't need to heal. Don't want to do that just yet. one attack at range five with poison. Yeah, let's do that. And let's do let's just do that as two movement. Right, let's see what happens. So, drifter's going first and we are doing this lost card and we're moving four. Have I counted it right? I have. So, we're going to move and open the door. You run inside the gate and the breadth of destruction becomes quickly apparent.
The town has been sacked. Smoke burns your eyes. What structures still stand are bright with fire and the rest smolder. Their frames like black torched skeletons. And all about the wreckage howl the orox celebrating their victory in an unrecognizable language. Okay. Right. So, what have we got? Oh, how many? Five. We do have two more guards that we need to protect. We got some loot. So, we've got an archer. We've got a guard. We've got a priest. We got a guard. And we've got another guard. Wow. Three guards. Okay. But we can see what they're doing. Move four.
Sorry. Move to attack four. So, that is going to get to attack me. That's not going to get to attack me. So only this one is going to be able to attack me in melee. The archer's got range three, so it's going to move to there and it's going to shoot me. But we now have this attack three at range three. Well, that's the only one I can go for. So let's go for that. What have we drawn? Minus one. Two damage. It's a start. We don't want to heal. And then we are going to put this up. So we now have one shield for the whole of the rest of the round. And I've got retaliate one against anything that attacks me in melee. And then it's the priest. So what's the priest doing?
Going for the guard. Any damage? Nope. These priests have got they're in a defensive position, so they've got extra armor. Right. Do I want to use my leather armor? Yes, I do. Okay. So I've taken three damage. I've got this unbreakable. The next six sources of damage. Yep, let's take that. It's two damage. And again, anytime you take damage in this game, you can lose a card from hand or two from the discard pile to ignore all of that damage. I don't want to do that right now. I just want to take the two damage. Skeletons move. Bone shaper. Oh, the he's Oh, stupid skeleton. He's moved onto there. I needed to go there. Okay.
No. Move to here right now. Do I have Yes, I can. I can hit it. So, let's hit the archer. It's only one, but it does have poison. Oh, that's an elite one. Okay, there we go. City guards are cowering. And now the guards. So, this guard rushes in. It's going to hit me. It's going to take a lot back in retaliation. Ouch. It's hit me for five. Okay. Well, that that goes down to four. Do I want to take the four or do I want to lose a card? At this stage, I'm going to take the four. That was quite nasty. Right, round 10. So, everything's changed for the Drifter. We need some healing. Do we have healing? I'm sure we have healing.
Yes, we've got move two, heal two. Can we move too? Yes, we can. Okay, but we're going to get hit a lot. That's a really good card as well. Right, I think we're going to go early. We're going to do that. We're going to fire some draining arrows around and we're going to muddle all of these three. And then the bone shaper. We want to go after the drifter because otherwise the skeleton's not going to be able to get in. Oh, no. It can. It can move too. Okay. Uh ah fell remedy heals an ally within range three. Oh, so we could actually go before and then do that. That kind of works.
Okay, let's do that. So, we're doing that and that. Yeah, we're doing that and that. Okay. Oh, is the archer going first? Oh, the archer's going first. So, it's going to shoot me right now. This is interesting. So, I'm almost dead, but I know who's going to go when, and I know I'm about to get healed. So, I am going to take the two damage. Skeleton goes in and attacks. Oh, that's dead. Nice. Right, bone shaper. So, we are going to do this and we're going to heal an ally within range three for two.
Yeah, cuz that's only heal self. I'm pretty sure that's self. Yeah. So, we're going to heal. Oh, right. Now, what I haven't mentioned is elements. There are six elements in the game. And you can see here, earth element was created and is currently still active. It's waning, but it's active. And I didn't realize this, but if I consume that earth element, I give two extra healing. It's perfect. Let's heal four. Love it when a plan comes together, right? And then we're going to move two. So, I'm going to move onto there, which means I'm going to collect that at the end of my turn. And I'm going to choose one of my summons, which is going to be um this one.
Maybe. Yeah, this one. No, not that one. This one. We're going to get that to move to or one. Right, that's good. What we got? We got two gold, right? Okay. And if you don't succeed in the scenario, you still keep any gold. Any gold or experience points that you've earned, you still keep them. You have to replay the scenario, but you do still get some benefits from playing it. Right. So, we're going to do this. We're going to move two and heal two. And we're going to move. Oh, do we want to get the loot or do we want to go somewhere else? I'm sorely tempted by the loot, but I think somebody else is going to get the loot. And the reason why I might not want to go adjacent to this character is I'm about to do a ranged attack and ranged attacks at adjacency get negative modifiers.
So I think we're just going to go here. Yeah. And we've healed two. That's looking really good. And we've got the amulet of life to heal another one. Perfect. Okay. Right. And then we're going to do draining arrows. Oh, it's only range two. Oh, rats. My bad. I should have gone there because then I could have attacked both of them. Again, that's a play mistake. So, we've got one draining arrow. That's all we've got. And it's a null, so it didn't do any damage anyway. But I do still muddle it, which is good. Right, the guard is going for the for the guard. Delta damage.
Right, that guard is going to go for the skeleton. So, the skeleton's dead. That's a shame. That's a That's They always go for the nearest one. And if it's tied, it's whoever went first in the round. And because that skeleton went before me, that means the skeleton took the attack instead of me. Right. Next round. This is going to be an important round. I think we need to do some serious damage to these. And I think it might be time for some bloodletting. I am going late, unfortunately. Okay. And then the bone shaper who's doing all right in terms of health. Got two cards left. Shall we? Yeah. Move and summon some more skeletons. Okay. The archer setting a trap. We need to be careful about where that trap is.
So shooting me. Six damage. Seriously. Okay. Down to five. Am I going to take that five or do I want to lose a card? What's the guard doing? I'm going to take the five damage. Ah, I I thought about losing a card, right? Skeleton still can't attack. Okay, bone shaper. We're moving four. Now, where are we going to move to? Are we going to move to here and summon a skeleton here? Because the trap's here. I need to look at what the drifter is going to do. The drifter is just going to move to and attack. So, actually, we don't want to be getting that much in the way.
I'm thinking we'll go around the back. Yes. So, we'll go around the back and we will summon a skeleton here. Okay. And we take the two damage from summoning the skeleton. So, we do need to pick up this loot. at some point.
And yeah, we do want to protect these um guards if we can. Who's he going for? Oh, he's going for the skeleton, of course. Right. So, now it's the drifter. So, we're going to move in and we're going to go here right in the thick of it. And we're going to do an attack of three. And we're going to do it on this one for a couple of reasons. It's poisoned and it's an elite one. So, it's actually a tougher monster. Now, if we're lucky Oh, no. This is attack six. Yes. Attack three plus my two for my active bonus plus the one for the poison. This might kill it. Yes.
Awesome stuff. Right. That's a big advantage. And then bloodletting. I do recover one of my active bonuses. I don't think I'm going to need all of those. So, I'm going to take unbreakable. We're going to we're going to regain that bonus. Right. That's huge. Round 12. So, this is the point where we might have to short rest because previously when we were out of cards, we weren't there was no enemies on the board. So, we were safe to do a long rest. We just lost a round. But this time, if I do a long rest now, this is going to get to activate before that. Or I could do a short rest. If I do a short rest, it's almost instantaneous and I do get to take my turn. I think this is the point in the game where a short rest is actually going to be the best thing for me to do. I think so.
Short rest. Yes. I lose a random card. That's the card it's chosen. If I'm not happy with that, I can take one damage to lose a different card, a different random card instead. Am I okay with that? Yes. Right. And then I get to choose my cards and take my turn. So, we want We're next to it. So, we want to hit it. And we've got that. I think it's time. Yeah, I think it's time for vile assault. And then we just want to move. Oh, we could hit it. We've got a bottom attack. Oh, let's do that. That's awesome. Right, the bone shaper. So, I don't know where this skeleton's going to go. Um, but the bone shaper wants to go around and get all of this loot. Um, I tell you what, is the bone shaper going to do a long attack? Uh, a long rest. Yeah, bone shaper will do a long rest.
Okay. Right. So, the drifter's first. We're going to do vile assault, which is two separate attacks. First one is going to be four with poison, right? And then the second one is going to be two plus one for the poison plus two for my bonus is five. Right, that's killed it. So, I was going to do a a bottom attack here, but I'm not going to. I'm actually just going to use that to move now. Then, where are we going to move to? There's two loot here. Let's go here. Okay. What do we get? Is it a chicken? Nope. Lumber and metal. Okay.
Right. We've got one priest and one guard left. We need to be quick because these guards are taking a bit of damage. Oh, right. Okay. Bone Shaper's doing a long rest. Which card do we want to lose? Don't want to lose the full movement at this stage. I think I'm going to lose that one. Right, next round. So, the Drifter. We could just be using the Drifter now cuz the enemies are here and here. They're miles away. We do have a ranged attack though, don't we? Draining arrows. Deadly shot.
That's it. Deadly shot is range four. And that's the same as the four movement. Okay. I think what I'm going to do is I'm just going to move and pick up the loot. Yeah, that's what we're going to do. So, I'll save that. I'm just going to do that and that. Right. The bone shaper. I mean, we want to try and play cards that get us experience points as well because the more experience points you get, the better. You need 45 experience points to get from level one to level two. So, again, that's slow going. It normally takes you about three, maybe four scenarios to get from level one to level two.
But yeah, let's um let's go in with some movement and some attack. If we can move three, we have a move three, don't we? Yeah. So, move three, summon another skeleton. Great. Right. So, we decided what we were doing with the drifter, and it was just move to onto here, pick up some loot, and then activate that.
Okay, Drifter's turn is over. He picks up the loot, gets two gold, right, please don't kill it. Okay, so we are moving three. Pick up some more loot. And then we're going to summon skelly bobs. Gain another XP. Take the two damage. End turn. Pick up some loot. Got some metal. Right. Is the guard going to kill the guard? No, he misses. Excellent. Right. Oh, and he hits him back. Yeah, cuz he's got to retaliate. So, he's almost dead. Right. If we can get in, which I think we can, we're going to move in and do a deadly shot and the bone shaper. This might be it.
Um, so if we do want to pick up that other loot, let's go with that. And so that's heal five, an ally within range three. So interesting, we could heal the guards, but I'm kind of hoping we don't need to. I'm going to try that and see what happens. I've never used that before. Oh, the guard is going early. Rats and he's attacking three with poison. Oh, this might be it. No. And then he retaliates back. Excellent.
Right. Okay. I think we're done. Yeah, because all we've got is this priest and we should be able to get rid of that priest. So, I'm going to move three and we're just going to move to here. Okay. And then we're going to do a deadly shot. It's only one. So, this is not going to it's not going to kill it, but no, but he's put poison on it. That's the main thing, right? Drifter's turn is over. Oh, the priest heals himself and gets rid of the poison. Brilliant. The skeletons go rushing in. Right. So, I was going to grant an ally attack five, but actually nothing's next to it now. So, we're not going to do that. We're just going to use that for two movement. Uh, and that grants all the Yeah. No, no, that's no good at all. So, we'll use that for four movement.
Okay. Right. And we can grant one of my summons move their normal amount and attack for their normal amount. But I don't think any of them are going to get in. Is that an obstacle? I think that's an obstacle. Yeah, the difficult terrain. An obstacle, right? Actually, it's going to be quite difficult to get around here. So, let's let's do it. Let's grant one of my summons to movement and move it to there. It's not going to be able to attack, but it is going to next turn be able to move in and attack more metal. This is awesome. Right, round 15. Is this going to be the last round? We will see. The Drifter, are we short resting or long resting? I think we're short resting.
Yeah. So, we lose a card. Is that the card I'm happy about losing? Sure. Okay. And which two cards do I want to play? Well, We just want to be shooting it at range because I think the skeleton's going to move in. Yeah. So, we're not actually going to be able to get to it with melee. Some of the characters have the ability to destroy obstacles. I don't. So, I think we're just going to be playing deadly shot and maybe a healing card. Yeah. Okay. Right. And the bone shaper. Are we just going to go around and pick up some loot and do some healing? I mean, I tell you what we could do. We could potentially heal this guard here.
Yeah, let's do that. Okay, but the priest is going on 23. That's fine. The drifter's first, so we're going to do a deadly shot and shoot it again. It's only one and it's got shield, so it might not be anything. Okay, it's one with poison. And then do we want to heal something or just move two? I'll just move two. I might move on to here so that I'm ready for if the skeleton falls. That moves to there. That moves to there and attacks. Got the double. Five damage. Dead. So the game's going to end at the end of this round. This is our last opportunity to get loot. And there is some loot here. So let's get some loot. So I'm going to move to myself to here.
Okay. Now, also I grant one of my summons move to I don't believe that summons can pick up loot. No, it's not letting me. Oh, no, it is. It's letting me move on there. I don't think summons can pick up loot. Um, are we going to do that? No. End the turn. Pick up the loot on my space. Six gold. Wow. And yeah, it didn't pick up the loot. That's it. That is the first scenario over success. We didn't achieve either of the characters battle goals because the drifter killed more than three or more things and Mrs. Bony didn't do that. So, we've gained some XP, which is nice. We gained 13 and 13. Some of which was from playing cards, some of which was from completing the scenario. But that is the end of the introductory scenario for Frost Haven. And now we're going to get to go to the town and I will briefly show you how the outpost phase works.
You lower your weapon and breathe as the remaining Olgs retreat, scurrying from frost haven like giant white mice. They'll be back. You're certain of it. But for now, you can rest. You wipe the soot from your face and take stock. Frost Haven is almost exactly what you imagined. A knot of gray stone and timber surrounded by sharpened palisade walls. A place where mere survival is an everyday concern and where only the desperate could feel at home. Thankfully though, the town's people are tough. They're already on their feet, dowsing fires and picking through rubble. In fact, one of those towns people is marching right for you. A sharpfeatured human woman with a fighter's muscular build, closecropped hair, and dark skin approaches and offers a gauntleted hand in greeting.
The sea be praised,
she says, crushing your fingers with enthusiasm.
We wouldn't have held that much longer without you.
You nod and ask what happened. Oh, just life up north is all. I'm Sura, mayor of this fort. Now that my predecessor and his left tenant have fallen. As for the Orox, they've been at us all winter. Took them months to break through, but they finally did. Probably killed a dozen or so of my men. Would have done worse if you hadn't shown up. You explain who you are, that you've been sent from White Oak. At the mention of the capital, her face scrunches up in displeasure.
It's about time they sent someone to help fix this mess they made,
she says, then tries to lighten her mood.
I don't mean to be ungrateful. I'm overjoyed to be still among the living. But a lot more people would be alive if your employees, the merchants guild, never stuck their noses in our business. I've spent my whole life here on what was once a fishing village living and letting live with the Olgo until last summer. That is when the merchants guild sent some garrisons and bureaucratic types up here to see how Frost Haven could be of more use to the empire. One of their expeditions proceeded to muck about in an Olgo's burial site. And the next thing we know, righteously angry Algo are attacking us. The Instains immediately hightailed it out of here. Leaving just a handful of soldiers behind to keep us safe.
Sappa clenches her gauntlet tighter and tighter as she tells the story, but now releases her grip.
I've had to learn a lot of things in the last year. The hard truth is that the Algox refused to be reasoned with. And the only way to stay alive and keep this place I call home is to win the fight, regardless of who started it. Her face softens and she clasps your shoulder hard.
There's not many of you, but I take what I can get, especially now that a garrison's been thinned. As it happens, I have an idea.
She turns and gestures to the town's smoldering walls.
We took a beating in that fight, so if we're going to survive much longer, we'll have to do more than just sit around and wait for the next attack. She sizes you up carefully.
I've already sent a scout to track the orgox back home to the mountains. Drop your gear at any long house that's still standing and rest up. As soon as you're ready, I want you to get over there and find a way to slow these attacks.
The bunks in the remaining long houses are all occupied by the injured, but you find a dry stretch of floor to lay your heads on your packs. You doubt you can sleep after the horror that greeted you in this little outpost. But before you know it, a young Valrath man is nudging you awake.
Wake up.
Sather's scout has returned with his report. He tracked the attackers to the foothills of the Copper Mountains where they entered a cave at the base of Snowcorn Mountain. Interestingly, a smaller band split from the main group before they reached the cave and hiked around to the mountains deadly eastern face. The scout didn't see where they went, but he suspects a secret entrance to the Olgo's stronghold. One last thing, the Valrath says as you wipe the final dregs of sleep from your eyes. Another group is moving towards Snow Scorn. They were all gawks, no doubt, but they're dressed differently than the ones who attacked us. They carried long sticks and had some wild animals with them. I don't know if they're going to attack the mountain or reinforce it, but either way, you'd better get there quick.
Okay, it's a lot of narrative, but it's nicely written, and the voiceover's really nice as well. So, Town in Flames has been completed. We've gained five, whatever that is. I can't remember. And we've unlocked two quests. So now we actually have a choice of where we go next. Alg scouting or Algox offensive. This is the world map. And you can see here that we have Algensive. Uh oh, I don't know what it's doing there. Oh, it's gone into
an incoming merchant ship tipped the town fisherman off to a dense school of large fish about an hour's row up the bay. Captain Olmstead asked you to accompany and provide protection to the fishing expedition. The merchants were right. After an afternoon in the calm water, the boat was full of enough fish to last the town half of winter, which is why you're so dismayed when an Abale pops his head out of the water. Per the treaty of Deep Bay. These are our fish. Fin them over and leave immediately.
He glares at you with black unblinking eyes. You try to explain you've never heard of this treaty, but he cuts you off.
Your disrespect for those already here and ignorance of our ways is no excuse. Give me the fish or face the consequences. We have a choice. And I think every after every scenario when you are in Frost Haven, you get one of these outpost events. And the event that you get depends on whether it's summer or winter. I think we start in winter. Not sure. So plenty of enemies already. It's not worth making more. Or there's no treaty. This aail is full of chum and just wants a free lunch. Uh I think we're going to play it safe. We're going to we're going to choose this one.
Even if this treaty is nonsense, it's not worth the risk. You order the fisherman to dump the fish overboard. They grumble but comply. With a splash, you watch lunch slowly sink into the depths.
Okay, so we've lost one of those things, but we didn't get into a fight or anything else, right? This is Frost Haven. So, what's going to happen is over the course of the campaign, we are going to be building new buildings and we are going to be upgrading our existing buildings. Full buildings that we have at the start of the game are the craftsman, the workshop, the alchemist, and the barracks. And there's all sorts of things that you can do here, but yes, you're going to be building new ones, upgrading them, and that's going to unlock new items and everything else. So, the craftsman, we can visit the craftsman, we can upgrade the craftsman if we want because we have enough wood, lumber, and and hide. But you can visit the craftsman, and at the craftsman, you can basically craft items. So, certain items, you need blueprints, and you can craft all sorts of items. Select an item to craft. We can craft the spy glass, which is going to cost one metal. That's what the craftsman does. We're going to come out of that because I just want to have a look at the workshop. This is what you use to build various new items for transportation. If you want to build a boat or snowshoes or anything like that, the alchemist is what you can use to make potions. So, you don't know what potions are in this game. You have to mix random ingredients together and you'll see what you get.
And then there's the barracks where you can basically spend money and various things to train your soldiers because what's going to happen over a few times during the campaign is the city is going to the the outpost is going to get attacked and the more barracks you've built, the more guards that you've recruited and you can build up the walls as well. You can rebuild the gate, for example, that cost 10 gold and four lumber. And yeah, if you get attacked, certain buildings will get destroyed, which means you have to rebuild them, etc., etc. So, yeah, there's a few things that we can build. There's the boat there, but we haven't got enough lumber for that. You can see at the top how much of these resources the characters have because it's the characters themselves that have the resources. And um yeah, right, there's all here's all the stuff. So, we got four soldiers, prosperity, ah, morale.
That was it. That was that thing that we got. We got four morale. That's not too bad. We got some inspiration as well because we're playing with fewer than four players. And oh, it's summer. It's week one of summer. So, I think what we're going to do just to show this off very quickly is we're going to go to the uh craftsman and we're going to upgrade the craftsman. So, I want to see how this works. So, to upgrade it, we need two lumber, two metal, and one hide. And we can actually donate that from the characters. So Drifty McDrifterson, he's got uh he's got one lumber, I believe. Yeah. And Mrs. Bony, she's got one lumber. Metal. Yeah. Well, we we'll give one each. Oh, no. He's doesn't have any. She's got the metal. Oh, why is it not letting us do two?
Oh, no. So, I've already done one. And then the hides. Uh, yeah, we'll donate the hides. Right. There we go. So, we've donated everything that we need. Hopefully, we close that and we click build. The building is under construction. Okay. Right. So, it's under construction. We haven't constructed it just yet. Um, what else have we got here? Building upgrade is available. New building can be constructed. Oh, these are all the new buildings that can be constructed. Mining camp, we don't have enough for that. Hunting lodge, we don't have enough for that. Logging camp, don't have enough for that. Shabby wall, we don't have enough for that. So yeah, that that's pretty much it. We could train one of the guards. Capacity four. I think we we're already at four. So yeah, it's not letting us train anybody.
So I think that's it. It starts off fairly small, but as you unlock more buildings, you will get to do more stuff. So once we're ready, we can edit the party. We can add more characters. You can change characters. You can retire characters. You can bring new ones in. But at some point we go to the world map and this is where we've got oh we've got three available quests. So we have a strong foundation. So that's follow the acers into the snowfields north of Frost Haven. Yeah. Tells you what we're going to find. Or we've got Olgots scouting or we've got offensive. And that's an introduction to Frost Haven. So as I mentioned this is a game which is currently in early access. You can buy it. It's on Steam right now, but it's early access at the time I'm recording this video. Is it playable?
Absolutely playable. They are continuing to add more content to it, finish the campaign, fix any bugs, all sorts of things like that, and hopefully they'll have it out later this year. Now, this video, although the developers of the game kindly gave me a key for the game, this video has not been paid for in any way. So, I've produced this video with the help of my Patre campaign. So, a big thank you to all of my Patreon supporters for funding the channel. And if you like the content that I create and you want to support me and see more content, you can do so at patreon.com/gamingrulesules. Full disclosure here, although I have a good relationship with Safalair Games, who create the Gloom Haven and Frost Haven games, um, yeah, because this is not a paid video, basically. I really like the game. It's a lot of fun. It's playing really nicely on my computer. I have a new computer that's arrived downstairs, and it'll play even more nicely on that. So, uh, yeah, I'm going to be playing more of this. I don't know how many more public streams I'll do, but I will definitely be doing some additional bonus playthroughs for my Patreon supporters. But for now, thank you very much for watching. Take care and I'll see you next time. Bye-bye.