3D Print Upgrades - Camp Grizzly, Got Five, Lords of Waterdeep, Wandering Towers, Just One and MORE!
Games in This Video
7 games are featured in this video — they unlock as you watch.



Transcript
Hey everybody, it's Joey Evans, and I'm back on another 3D printing video. Now, here's what's pretty cool. This time I've got a lot of different things I've printed, inserts, even some upgrades. And at the end, I've got this tip that somebody emailed and told me about that I just love. I have to share that with you. I'll do that at the end. It's kind of a teaser, right? But anyway, you're going to love that. So, but first off, I like to talk about some non-board game things that I've been printing because it's always fun. I like to see that in the comments, too. One thing non-board game is I 3D printed I'd never printed anything big, so I thought I'd try that. I I 3D printed this alien. My daughter and I called him the guardian of the game room. So, he's actually he's about 3 ft. We printed him in different and several pieces, and it was my very first large project. It came together great. I actually used glow-in-the-dark filament for the eyes, which I don't usually run through the AMS. They say not to do that, but this time I did. Oops. But I don't I'm not going to do that a lot.
But it's really neat. I want to print his kind of buddy soon to go next to him. But it's pretty cool. He had some seams when I put them together that I know I could probably put some stuff on there and make those disappear, but honestly, you can't you can't see them from a distance. So, I also to assemble this guy, everyone says to use JB Weld for you that haven't like assembled something larger like this. One thing they recommend is JB Weld because I guess it holds a bit stronger. And I used that, but the problem is it doesn't cure as fast. So, my wife and I were sitting there holding things together, and you've got to hold it together for a very long time. So, I ended up using a combination of JB Weld and super glue. I don't know. It seems to have worked because then the super glue kind of gets that that quicker adhesion like in a minute or two, but the JB Weld hopefully as it cures overnight and things will have kind of add strength to it that sometimes superglue can be a bit fragile. So anyway, I've been printing that. Then something else I did, another project recently, is I've been printing a lot of the OpenLock 2.0 dungeon stuff.
Um we changed our game table. We took our game table and in the middle we installed a TV. So there's a TV in there and then so we can use it for RPGs, D&D, things like that. We have other games we actually use it for as well, but um the biggest thing is RPGs. And we put glass on top of it and around this TV is going to be kind of an OpenLock dungeon. I've used this OpenLock stuff before for well RPGs, but also different I've used these files for different kind of dungeon crawls and things and they really really work well. So I if you want me to to do a video on that OpenLock system, I can definitely do that. But this is the idea later. It's going to look something like this. This is a kind of a render of what we're going for.
But right now they've been printed and my wife and daughter are going to start dry brushing and painting them and it's going to look really cool with like LED lights around there. It's going to be really nice. So those two things I have been printing. So again, um let me know if you want to see more about that. Also I've been printing some miniatures with my FDM printer to see everyone says you can do minis. I mentioned this last episode or last video and I have printed with a 0.2 nozzle, 0.4 and to see. So I might do a video comparing those and seeing if if it's quite there because I got rid of my resin printer and I'm using minis. So anyway, I'll do a video on that. But now let's start this off. Again, submissions. Here's the thing. This is a community. Email me some of the things you've printed at joey@dicetower.com.
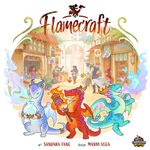
Again, that's a weird way to say that. joey@dicetower.com. And again, because I'm printing the stuff that I have my personal collection. There's a lot of games that I love but don't own or are in the library and I don't really print stuff for the library copies. So if you are printing something for your games at home, feel free to email those to me and I'll show them here on the channel because I like people like to see what else is out there. So, let's take a look at some of those. Um first off, we've got from Tom Moore. He printed resource tokens for Flamecraft. Um I've actually got the upgraded resource tokens. Um I think I bought another copy that actually had those in there, but this is a great option if you don't, if you have the retail version. These look fantastic. This is great if you don't want or need the resource tokens, you can make them yourself. They've got the gems, you've got the anvils, meat, the toast, the leaves, and the potions. All of these are great even if you want to use them in other in other games as well. Those are really resources that can be used elsewhere. They do use AMS and if but you don't necessarily have to use it.
Again, I think this can do a layer change as you go up. All right, then these are on printables. The link for everything, of course, is down in the description. So, take a look down there. Now, then Catan on the Road. Uh this is from Brian. The Catan on the Road is a game I have not played. I I know Tom, I think this is one that Tom loves it. This is a travel case for this, which just makes sense. This looks fantastic. This travel case was printed using AMS. It also latches close, which I love. This looks really good. So, this is a game I want to try and this makes it a travel case, which honestly it makes a lot of sense. So, all right, so those are a couple of things you sent in, keep sending those up and I do get the emails and I put them on, so I'm going to show different ones each time.
Oh, okay, now let's get to what I have printed. First off, this is a very simple one. I printed this a while back, but I forgot it in my last video. So sorry. This is an insert for Got Five. Got Five is one of my favorite games out there. It's a very cool deduction game. This one it's a very simple insert. I love the fact that on top there's kind of this kind of like a tray that holds all of them. And this I love because the tokens are easy to grab for it from here. They all set right in there. It's very easy to pull this out. Then you've got a place for your player screens, then all the holders and everything, the markers, everything has their their place in this. Again, this is a insert that's not needed, but for me it just adds I can I don't know, just really makes it easier to come out. And I love that tray. One thing is these pieces in the tray, it's not uber tight. There's no lid lift on this, which is great. I love there's no lid lift. But the 10 the pieces can tend to flip over, so you may have to spend some time kind of flipping those backs not tight enough where they don't flip. But anyway, this is very easy to put together and then put away.
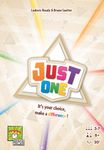
All right, this is a very quick insert for Just One. This is something I printed as I was looking for other things to print because it's such a quick insert. And this is a game that doesn't necessarily need one, but if you got the time, doesn't take much film it, it's nice. All the pins are going to fit right here. You got extra spot cuz some people have like they use pencils for extra players, things like that, so I like that they included that. And then you've got your different boards. They fit right in here just like this. And your different different cards, you can add more cards later, which I'm sure they will have. Slide it right on top.
And instructions go here. And that's it. That's a very quick quick simple print for Just One. Okay, Wandering Towers is the game I love, and I found this insert. Problem is I had to print different towers than the ones I had to fit in here. And the reason why is this is made for some particular towers, and I'll actually I'll link to those in the description as well. But you'll notice that really they have to fit perfectly into this. These towers, let me get to focus on this, are nice. My other ones were painted. I'm sure my wife will eventually paint these too, but these are made to where the AMS means you don't necessarily have to paint them. They actually work pretty well as is. So, everything fits in there perfectly on this board. Now, what's great about this insert is it does fit all of the expansions for Wandering Towers. It It really fits all of the different potions in here. Those have a nice place of going right in here.
[snorts] It then also Let's take these cards out. And of course, the tower is going to have its own place here, the Raven Tower. And then you've got your expansion tower that can also go in here. This is again Oh, also the insert also takes everything that is for the expansion that's 3D printed, too. So, again, my expansions have an upgrade. I'll get to that in a moment as well. Actually, get to that right now. I'll actually move these out of the way. And you'll notice right here my little spider web has also been upgraded. And I will link that in the description as well. So, that's nice. So, this fits That's That's why I switched to this. Number one, it looks great. Number two, it does fit all of my upgraded components. So, I just put this in here.
And you'll notice too, if I lift these up under here, you do have the different upgrades and more potions, things like that. And again, the 3D printed upgrades that go right there. This fits right in here. Now, let me show you again more expansion components fit in here that all the players are going to get their own box, which is pretty nice. All right? So, again, you just hand these out, they put them back in, potions fit in here, everything is there. One thing I will say is later I'm going to upgrade the potions on this. And when I do, they won't fit in here, but I'll worry about that later. So, these are really nice. And again, I love anything you can hand out, just take that, that's your player color. And I like the idea of this kind of beehive that you can look through and see the colors at a glance so people can grab them that way. All right? So this goes right in here. Again, everything is pretty tight, not too bad, not as tight as some of the other ones.
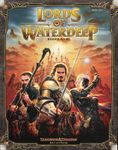
And place these right in here, just like this. Everything goes right back in, and this one is pretty self-explanatory to how it goes together. Drop the instructions right on top, and there you go. That's the expansion for Wandering Towers. Okay, next we have the in insert for Lords of Waterdeep. This right here is a game that needs more love, and it gets love by a premium premium insert. So first off, we've got this. We've got I've got different player aids in here. And put this aside, take out the board. Take a look at this. Look at that. Isn't that a thing of beauty? This is just really It's functional as well as it just looks incredible. Like this, for example, this is just a spacer, right? So that's all that is.
Goes right in there. But as a spacer, it also makes it easier to take things out like the boards, right? And that will reveal the different components in here. You'll notice a lot of this is not upgraded. I need to get some upgraded components for my Lords of Waterdeep. So if you know some great things, either buy or print or whatever, let me know because now the insert has this. I need some TLC on some of these different components on this. I mean, these are cardboard. Come on, man. All right, but anyway, everything fits in here perfectly. And then right here, I love all the building tiles go here, different pieces. Again, I like these tabs because these come right out just like that.
And all of these building tiles. What I love is it's labeled. Look at that. All of these are That is actually through the entire thing. I'll show you as well that everything there is labeled. Then this is not just a spacer. It is a spacer, but take a look. What? All the different player colors. And this one I actually went to the trouble making sure my filament matched the player colors because again, this deserves a nice look and it's got it. And then finally let me show you over here where the cards go. I will show you this. Let me take these out as well as these. Just for a couple of examples, you'll notice they are labeled in there. So you know intrigue goes there, Lord cards there, you've got quest. Everything there is labeled. So they slide right in and there's never a doubt. And these will fit sleeved cards, which I have not sleeved mine yet, but I will eventually.
And again, this is pretty easy to put in. Everything goes right where it looks like it would. Board goes on top. Then all of your instruction manuals and everything go here. And there it is. A little TLC for Lords of Waterdeep. It's pretty. Oh buddy, this is Camp Grizzly here. Oh I was excited about printing this insert. First off, this does give you a little bit of little lift, but every expansion I've got everything for Camp Grizzly and it fits in here and it looks good. So now normally you don't have to use one of these if you do kind of store them like this, horizontal. Sometimes I do store them vertical. So when I do, I use these type of bands here. So first off, let's take a look.
Here we go. [sighs] It is all tight in there. Then you have got the instruction booklet. One thing I will say in this is I have got this map that tells you where everything goes. And I love that, especially when things kind of go together like a puzzle like this. So check this out. This looks so good. So then you take out the board and everything is right below. Look at this, objective tokens. All the objective tokens are placed right in there. Look at that. Everything in there. Then you've got the keys. Here we go. You've got your trackers. The way this is designed really blows my mind. Trackers is a little bit thinner because these are just trackers. And then you've got the dice.
And look at that, a little bit deeper. You've got Otis's track right here. There we go. And then you've got the different I'm going to show you how these go in a moment, but let me show you some of these are the different expansions. This I think is the spin the bottle expansion. Yeah, it is. All right. So all the expansions kind of have their own, so you can choose to play with those and the different counselors they give you in the different expansions are going to be with those as well. And that's what is going to be here, here, and here. You can actually see on the map it shows you where everything goes, where the different expansions are. So um let me show you these right here. And you got a bit more down here. But then these right here, the standees, these are so clever the way they go in. Now I don't have these organized yet, but everything slides perfectly in there.
The way this is engineered is just great. So these go right in here. And I will show you got your horrified tokens and your locks. All right. And then right over here you've got your survival deck. You've got more underneath there. And pretty easy to hit the table again and check these out. Same thing with these different acrylics. You've got more of the expansion stuff there. And you'll notice right here all your acrylics, they slide in there perfectly. One more thing I'll show you here is underneath here are the rest of your base standees. So you notice that there's a lot more of these, and those are all stuck down here. So those are all going to be down here. This is your kind of your base counselors, your board, your setup, your finales, all of that are going to be down here. All right? So which is really nice.
Everything again goes right in just like this. Perfect. And then Otis goes right here. Place this here. Dice. All right, and it goes and drops right back on top. This goes in and I like to keep that right in here. Closes up. This one I love this insert. And I love this game. Did I mention? It's Camp Grizzly. Okay, so next these are some Camp Grizzly. I've shown the insert. These are some 3D components. All right, I got this idea from Chuck, Chuck Case, and he's and I he we played them at the I think East or something, and I loved this. So went ahead and printed them.
First off, everywhere you've got the different finales, and now you need a little bit of spice with those finales. So here we go. First off, we've got the tower. For this one, I printed a medieval Ranger tower. It's a simple print. It has no supports, looks great. I did use a brim on this because the contact points were small. I did that just to be careful. I'm not sure if you actually need those or not. If you have a very clean bed, you're very good about that, then you should be fine. But I did use a brim for this. But again, I think this looks great on the board. Kind of adds that other element. Anything that adds that 3D element I love. Then you've got the barn. The barn over here. Barn I did this guy right here. This prints in two pieces. It does have supports, but they're tree supports and very easy to remove. Um honestly they they look like weeds. And one person that commented below of this says that he just kept them because they look like weeds. But um now honestly come this, look at the roof. Can you tell where I ran out of filament? And I grabbed the other filament next to it in the AMS that I said was brown, but apparently it was gray. So you can see a little slight difference there, but honestly I think this gives it character. So I'm going to keep it. And besides, eventually these may be painted because my family does love love love Camp Grizzly. My daughter even loves Camp Camp Grizzly. She just mentioned it to me, which is insane. Then Okay, then next you've got the boat, the boat finale. Didn't forget about you, boat.
So on this one, I have printed this maritime rowboat. And again, link for this is right below. Now Chuck um didn't send me his version of the file that he took and you painted I painted it white in the slicer. You can do this for you that you know how to use bamboo slicer and other ones. You can actually paint different areas so it prints with an AMS. So this printed white. The rope printed white and the rest was printed brown. You don't have to do that. This could all be printed in one color. Paint it and then just paint the rope white. That's just as easy. But this again adds that element for the finale that is the boat. You might be wondering, but Joey, there's a there's a van there. To go in the van, whatever could you print for the van that looks good? Let me show you what I printed for the van.
Ho bam. This is it right here. I had to pick this guy because let's be honest, it's awesome. This uses a uses a touch of AMS for the size of the van that kind of go on there. They say the mystery machine, but you don't need it. That's the thing. There are other ways to print it. This you can do a layer change if you want to use that. Everything in this prints separately and they all snap and glue together. So this is kind of funny. You print everything piece by piece by piece, the axle, the the tires, everything on this printed separately and I just assembled it. Now there was an option on this to print the tires with TPU, which is kind of a a kind of like a squishy filament that the tires would have made sense for a TPU, but I printed mine entirely in PLA and it worked great for me. Also, with this, the tires do turn as you move around.
That I I you don't really need that, but it's cool that it does do it. There are other vans available if you're looking for one that you think kind of matches the motif you're going for, but I love this one. It fits the character and the theme of the game, and honestly, I have some homebrew Scooby-Doo characters that I use with Camp Grizzly, so this just worked out great. Okay, so now for that tip I was talking about. Before I mentioned different places you can find different STLs, you know, there's Facebook communities, there's also a an area on BGG. There's another site that you can use to find different board game prints, but then someone sent me this one. This is very interesting. It's called Layer Up Games. And as I went into this, there's so much to unpack. I have just scratched the surface of this, so I hopefully a lot of you have heard of this and some of you might not have. And if you have heard of it there's things I'm missing about this. I'm just discovering this website and I love it. So let me show you a bit about that cuz you may you may want to look at this, too.
Okay, this is a site I want to show you, layerup.games, right? First off, I have an account here that's free. I think there's probably a paid things. I want to show you what I know about this. This is the way you can look up any different prints that you want to have for your games. What's really cool about that, first off, you can go to games. Here we go. And you can just well up here you can search for anything you want. Let's go to I don't know. Let's go to Oh, see if there's anything anything for Dark Providence, which probably not. Here we go. Cthulhu Dark Providence, here we go, the game. And there are. Take a look. Right here, everything you can print for Dark Providence right here, which is really cool. So you look through any of these. Now, what's cool about this, too, is it pulls from several different plays, from Maker World to Thingiverse to Cults 3D to also printables. So it's going to pull from these look like that's from Thingiverse here, and this one click here.
This is from MakerWorld, all right? So what's there you can view it on MakerWorld if you want to, or you can add it to your want up next printing and printed. And you can also save it to a collection. So if I wanted to want I just click on that. All right, so that's pretty cool it shows you there. And as far as pictures wise, I think it's a newer site so you don't see a lot of that stuff here and here. But here's what's pretty neat. Um on this go to games, my games. This is what I think has this stepped apart. So this right here can resync can sync it with your BGG list. So if you have it synced, if you have all your games, you have your list of games on BGG, this will then pull those games you have in your collection, and you can look through there and see what's available for your games. All right? So right here I've got now mine's not updated by the way, so some of these I don't have any longer. So you go through, you see all these games, what you like, and then you print something for those.
Let's take a look over here. Let's go to Return to Dark Tower. All right? And again, you could take a look and everything here is available for Return to Dark Tower like that fire right there. That's going to be awesome printing that next time. Yeah, I am. All right, so then that's that part right there. Also, you can go over here and let's go to my table. I think that's where it is here. Where am I at? All right, here we go. So this right here shows the different these are the future prints. These are things that I put in here. I just started using this, so it's not full. Um these are things I think I'm featuring in this video. I've already printed so these are under my done printing. I'm not actually printing those, but I put those in there. And also future prints. These are the ones that I want to print pretty soon. So I've got all of these. So that way when you are looking to print something, you can roll right into this. Also, I noticed you've got friends. You can add friends to see what your friends are printing. I have no friends, so add me as a friend. Joey Evans right there. See I am. There I am. So anyway, this does a lot more than that.
And again, I don't know everything this does. I'm just now kind of experiencing it and looking through this. But man, this has so much. Oh, one other thing is I will show you sleeves. Let's go to um my games again. But on sleeves, you can go anywhere and it will show you the size of sleeves they need. Let's go here to Arc Nova. And you can actually click on the game. It and it shows you all the details of the game, what it needs, the expansions that are there. And you can go there and get also one of these sites somewhere here has sleeve sizes. Oh, this is interesting. These are the covers from the cover art, the colors from the cover art. So you can get matching filament if you want your which is insane, your inserts to match that. So again, there's a lot to explore on this. I'm just kind of taking a look like right there scratching the surface of this. There's so much to unpack in this. Shows some hot things right here. Magical athlete.
You got Gloomhaven Jaws of the Lion, the insert. Then people do upload their print photos on here. I think this is going to be a great community to take a look at. And there's a Discord on there as well. So definitely check that out. It's layerup.games. Okay, well that is it. And that's that's the one website you have to check out. So anyway, that is what I printed. Please again, comment below. Let me know your thoughts, what else you want to see on the channel. I've mentioned different things that we can talk about. And also send me in those prints that you have had that you've made, that you're proud of, and where you can get them. I look at free and paid STLs, whatever's out there to kind of up your game on those. It's joey@dicetower.com because again, I want to make this a community because honestly it saves me filament if you print something and say this is good or this one not so good.
It's pretty nice to know that. And if you've used layerup.games and you know of a certain part of that site that I don't again know about, I'm just scratching the surface, let me know that or comment below. So, anyway, that is it. Woo! Another one in the books. So, I'm Joey Evans, and I'll see you later on the channel.
Hey folks, thanks for joining us for that video. If you haven't yet, like the video, subscribe to the channel, and hey, make sure you check out What's Happening where I'll cover an app on an iOS or Switch device, and you can check it out along with me. Thanks very much for watching The Dice Tower.